Integrate Yeastar P-Series Software Edition with Active Directory
This topic describes how to integrate Yeastar P-Series Software Edition with Active Directory (AD) using Lightweight Directory Access Protocol (LDAP).
Requirements
- Operating System: Windows Server 2008 / 2008 R2 / 2012 / 2012 R2 / 2016 / 2019
- PBX Server:
- Firmware: Version 83.23.0.24 or later
- Plan: Ultimate Plan (UP)
Prerequisites
- Make sure the PBX server can communicate with the Active Directory via LDAP
protocol.
If your PBX and Active Directory are in the same network, the PBX can directly send LDAP(S) requests to the Active Directory through the default port 389 (LDAP) or port 636 (LDAPS) for performing LDAP queries. Otherwise, make sure the following network requirements are met:
- If your Active Directory is behind a firewall, you should forward
the following port(s) as needed on the firewall to pass LDAP(S)
requests from PBX to Active Directory.
- TCP/UDP 389 for LDAP
- TCP/UDP 636 for LDAPS (Highly recommended)
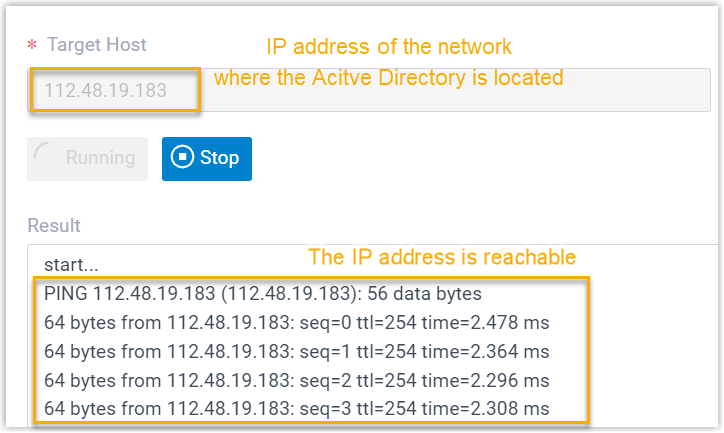
- If your PBX is behind a firewall, ensure that the PBX has access to
the Active Directory.Tip: You can test the network connectivity by pinging the IP address of the Active Directory network on in the PBX.
- If your Active Directory is behind a firewall, you should forward
the following port(s) as needed on the firewall to pass LDAP(S)
requests from PBX to Active Directory.
- Gather the following information from your Active Directory:
- The IP address of the network where the Active Directory Domain Controller resides.
- The Distinguished Name (DN) of the directory node where you want to
start querying. Tip: If you have enabled advanced features view within "Active Directory Users and Computers" on , you can right click the desired directory node, and check the DN on .
- The user name and password of an Active Directory domain account, in
which the user name should be a Distinguished Name (DN) or User
Principal Name (UPN).
The account needs full access to the desired directory, so as to read the directory information during synchronization.
Tip: If you have enabled advanced features view within "Active Directory Users and Computers" on , you can right click the desired account, and check the DN or UPN on .
Procedure
- Log in to PBX web portal, go to .
- Click Integrate beside the Active Directory (AD) service.
- In the Connect to Active Directory Domain section,
fill in the following information.
Setting Description Host IP Enter the IP address of the network where the Active Directory Domain Controller resides. Protocol Specify the communication protocol. - LDAP: Unencrypted LDAP communication.
- LDAPS: Encrypted LDAP communication with SSL/TLS.
Note:- For Windows Server 2016 and above, Active Directory Certificate Services (AD CS) is required when using LDAPS protocol.
- You can change the protocol as needed in future use.
Port Specify the port that are used to access the Active Directory. The default port number is 389 for LDAP and 636 for LDAPS. If your Active Directory uses an alternate port, specify it here.
Base DN Enter the distinguished name of the base entry to specify the starting points for searches in Active Directory. For example, if you want to start querying from the organizational unit
yeastardocsin the AD domainlocaldirectory.com, enter OU=yeastardocs,dc=localdirectory,dc=com. - In the Administrator Account Authorization section,
enter the credential of an AD domain account.
Setting Description Administrator Logon Username Enter the user name of an AD domain account. The format can be either a fully distinguished name (DN) or a User Principal Name (UPN).
Examples:- DN:
cn=Administrator,cn=Users,dc=localdirectory,dc=com - UPN:
Administrator@localdirectory.com
Administrator Password Enter the password associated with the username. - DN:
- Click Save.
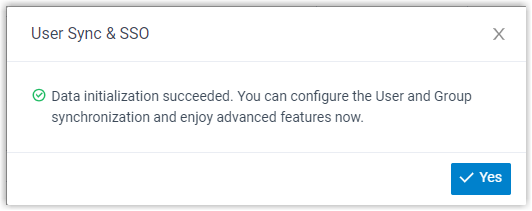
A pop-up dialog box prompts that the integration succeeds.
-
Click Yes to close the dialog box.
Result
On the integration page, the Status displays "Connected", indicating that the PBX is successfully connected to the Active Directory.

What to do next
Set up synchronization rules to synchronize the desired AD users, organizational units, and groups to PBX. For more information, see the following topics: