Set up Yeastar P-Series Cloud Edition as an LDAP Server
This topic describes how to set up Yeastar P-Series Cloud Edition as an LDAP Server. In this way, you can store the contacts information on PBX and query from IP phones directly.
Procedure
- Log in to PBX web portal, go to .
- On the top of the page, turn on LDAP Server.
- Click the LDAP Server Settings tab to check the LDAP
Server settings or change the settings according to your needs.
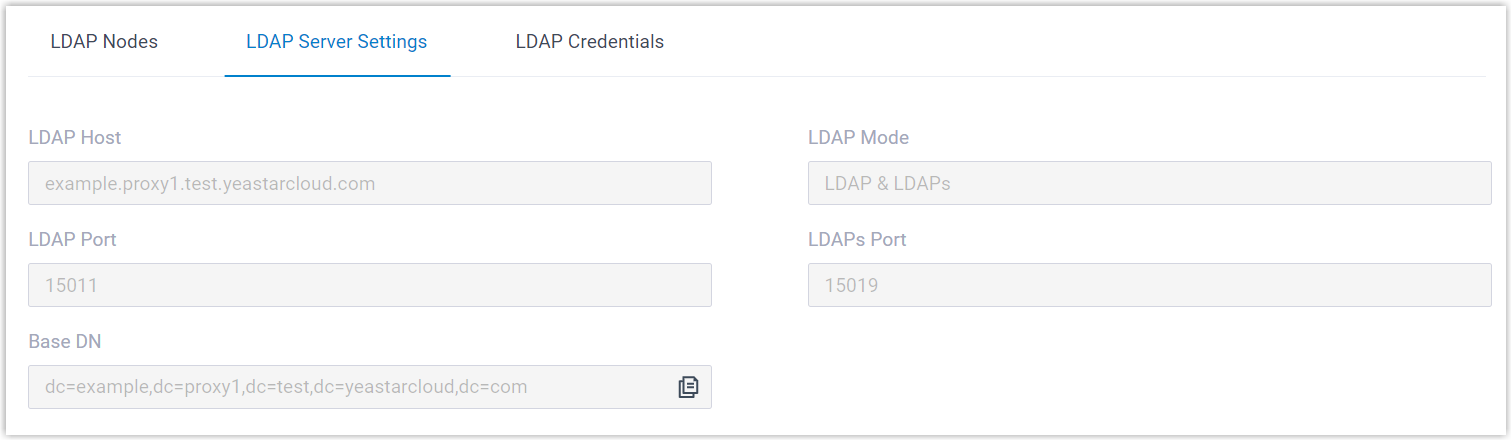
Setting Description LDAP Host The LDAP Server address of Yeastar P-Series Cloud Edition. LDAP Client connects to the LDAP Server via the address.
LDAP Mode The connection protocol used between the LDAP Server and the LDAP Clients. LDAP Port The LDAP port of the LDAP Server. LDAPs Port The LDAPs port of the LDAP Server. Base DN Set up the base entry of the directory. Format:
dc=XXX,dc=comFor example,dc=example,dc=proxy1,dc=test,dc=yeastarcloud,dc=com.Note:- Only numbers, letters, and characters
*.@-_are allowed. - Ensure the entered length is within the supported range of the phone or other connected clients.
- Only numbers, letters, and characters
- Click the LDAP Nodes tab, enable or disable the nodes
according to your needs.
If a node is disabled, you can not query the information under this node.
Result
The Yeastar P-Series Cloud Edition is now working as an LDAP Server. You can store contact information in the PBX directly. Users can connect an IP phone to PBX via LDAP, and query the contact information from IP phone directly.