Manage Custom Auto Provisioning Templates
This topic describes how to edit or delete custom Auto Provisioning templates.
Edit a custom Auto Provisioning template
- Log in to PBX web portal, go to .
- Click
 beside a desired custom template.
 - Modify the device settings.
- Click Save.The system prompts you whether to update the new configurations to devices that use this template.
- Yes: The system generates new configuration files and immediately triggers provisioning for all devices that use this template.
- No: The system saves the changes to this template, and generates new configuration files for all devices that use this template. You can trigger provisioning manually for specific devices later.
Delete custom Auto Provisioning templates
- Log in to PBX web portal, go to .
- Delete custom templates according to your needs.
- To delete a custom template, click
 beside the desired
template.
beside the desired
template. - To delete custom templates in bulk, select the checkboxes of desired templates, click Delete.
- To delete a custom template, click
- In the pop-up dialog box, click Yes.
If the template is in use, you need to release it from the devices that use the template first.
Update Auto Provisioning template(s) to all applicable devices
- Log in to PBX web portal, go to .
- Update the configurations to the devices:
- To update the configuration of a specific template, click
 beside the desired template.
 - To update the configuration of multiple templates, select the checkboxes of desired templates, click Update to Device.
- To update the configuration of a specific template, click
- Click Yes to trigger phone provisioning.
Download or upload custom Auto Provisioning templates
Yeastar P-Series PBX System support downloading and uploading of auto provisioning
custom templates, which allows template reuse across multiple PBXs without the need
to recreate templates manually.
Important: The
downloaded template files are encrypted and cannot be opened directly; they can
only be uploaded and parsed by the PBX.
- Requirements
- The firmware of Yeastar P-Series PBX System is 37.19.0.70 or later.
- Procedure
-
- Log in to PBX web portal, go to .
- To download custom auto provisioning templates, do as
follows:
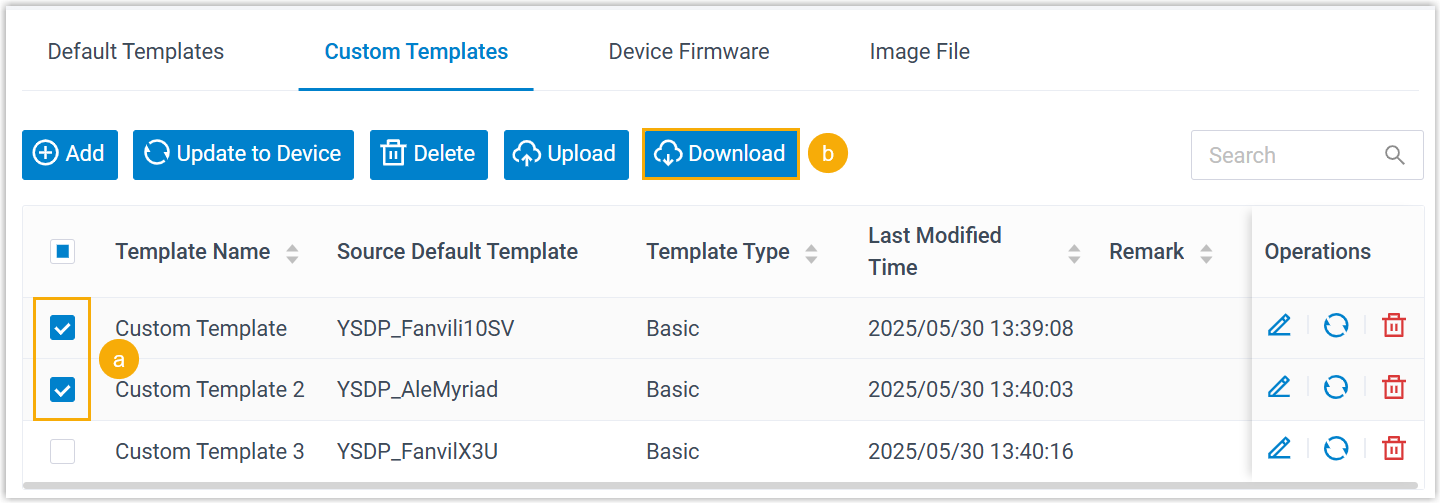
- Select one or more desired templates.
- At the top of the list, click
Download.
The template files are downloaded to your computer in
.custformat.
- To upload a custom auto provisioning template, do as
follows:
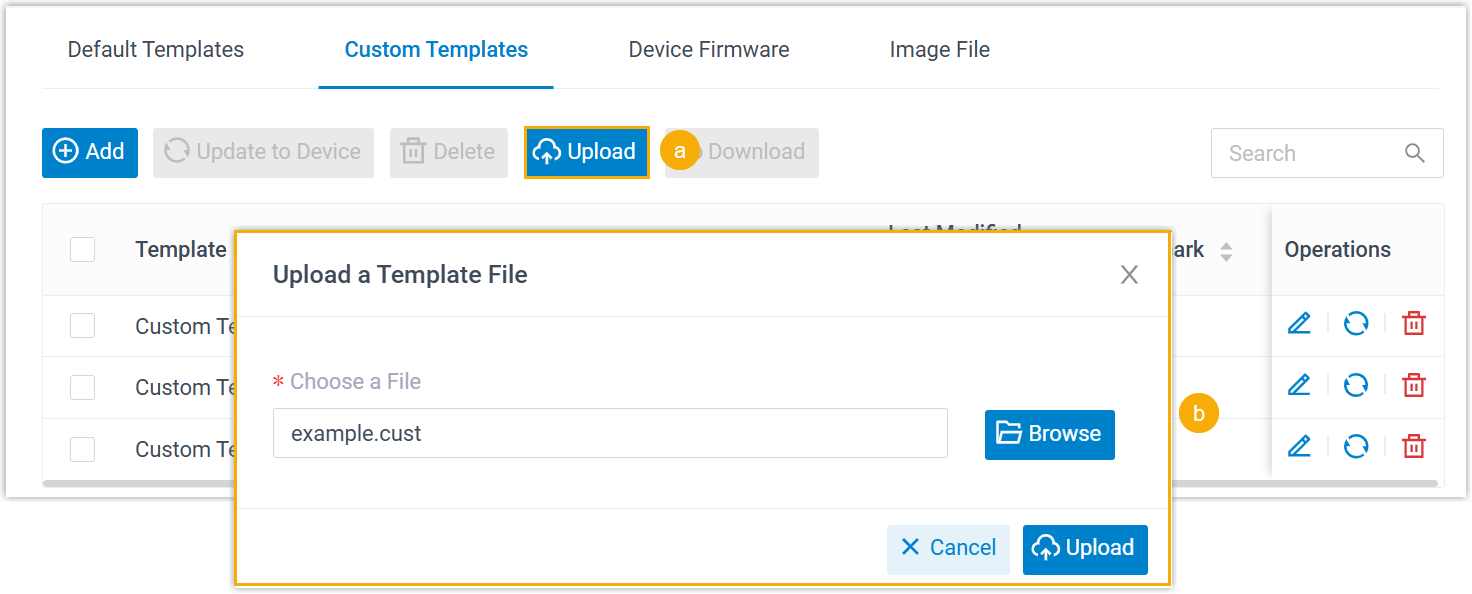
- At the top of the list, click Upload.
- In the pop-up window, click
Browse to select the
downloaded
.custtemplate file, then click Upload.The template is uploaded and displayed in the list.