Restore P-Series Cloud PBX from Another Backup
A backup file containing basic configurations allows you to quickly set up multiple P-Series Cloud PBXs within minutes. This topic describes how to restore a P-Series Cloud PBX using a backup generated from another PBX.
Background information
Yeastar Central Management supports restoring P-Series Cloud PBX from a backup created either on the same PBX or on another P-Series Cloud PBX.
- To restore P-Series Cloud PBX from a backup generated by another PBX, see this topic.
- To restore P-Series Cloud PBX from its source backup, see Restore P-Series Appliance/Software Edition from Source Backup.
Prerequisites
There is at least one backup file of P-Series Cloud PBX, either uploaded by yourself or generated from a scheduled backup task.
For more information, see Upload a Backup File of P-Series Cloud PBX, Create an On-demand Backup Task, and Schedule an Automated Backup Task.
Procedure
- Log in to Yeastar Central Management, go to .
Backup files of all the P-Series Cloud PBX are displayed in the list, either manually uploaded by yourself or automatically generated from a backup task.
- Click
 beside a desired backup file.
- In the pop-up window, do as follows:
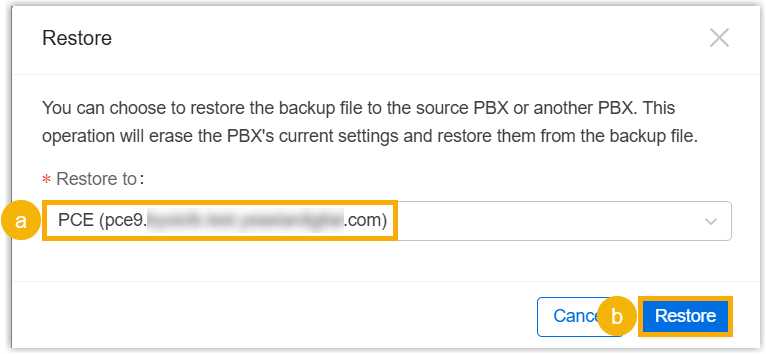
- In the drop-down list of Restore to, select a desired P-Series Cloud PBX.
- Click Restore.
Result
- PBX status is displayed as
 , and there is a pop-up window
prompting that PBX system is restoring from the backup file.Tip: You can click Collapse to collapse the window to the bottom-right corner.
, and there is a pop-up window
prompting that PBX system is restoring from the backup file.Tip: You can click Collapse to collapse the window to the bottom-right corner.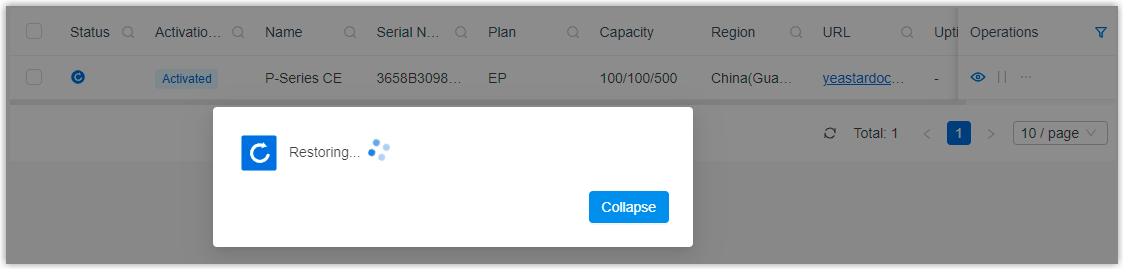
- After PBX system starts up, the current configurations are overwritten with
the backup data, and PBX status is displayed as
 .
.