Assign Trunk Access Permission to Users
On Yeastar Central Management, you can grant subordinate users the permission to assign your shared trunks and DID numbers. This allows them to provision these resources directly to their managed cloud PBXs, while you retain full control over the trunk configuration and management. This topic describes how to assign trunk access permission to subordinate users to achieve this.
Prerequisites
-
Make sure that you have the permission to assign trunk access permission to your resellers.Note: If the Trunk Access Control tab is not visible (Path: ), contact your service provider to obtain this permission.
-
Make sure that you have available shared trunks (with DID numbers), which come from either of the following sources:
- Trunks you created: You have created shared trunks and assigned DID numbers to them.
- Trunks assigned to you: Your service provider has authorized shared trunks with DID numbers to your account.
Procedure
- Log in to Yeastar Central Management, go to .
- Click Add.
-
In the pop-up window, complete the following settings.
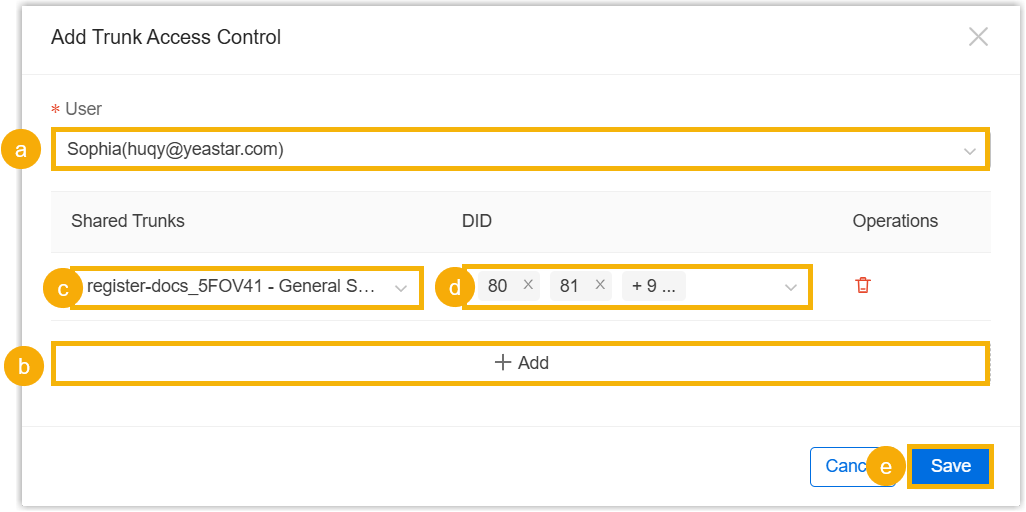
- In the User drop-down list, select the user to grant permission to.
- Click Add to add a trunk
access rule.
- Shared Trunks: Select the desired shared trunk.
- DID: Select the DID number(s) to be assigned to the user.
- Maximum Concurrent
Calls: (Optional) Set the concurrent call
limit for this user on the shared trunk. Note: If left blank, the user can utilize the trunk's maximum concurrent capacity.
- Click Save.
- Optional: Repeat step 2 and 3 to assign trunk access permissions for other users.
Result
-
The assigned trunk access permission is displayed in the Trunk Access Control list.
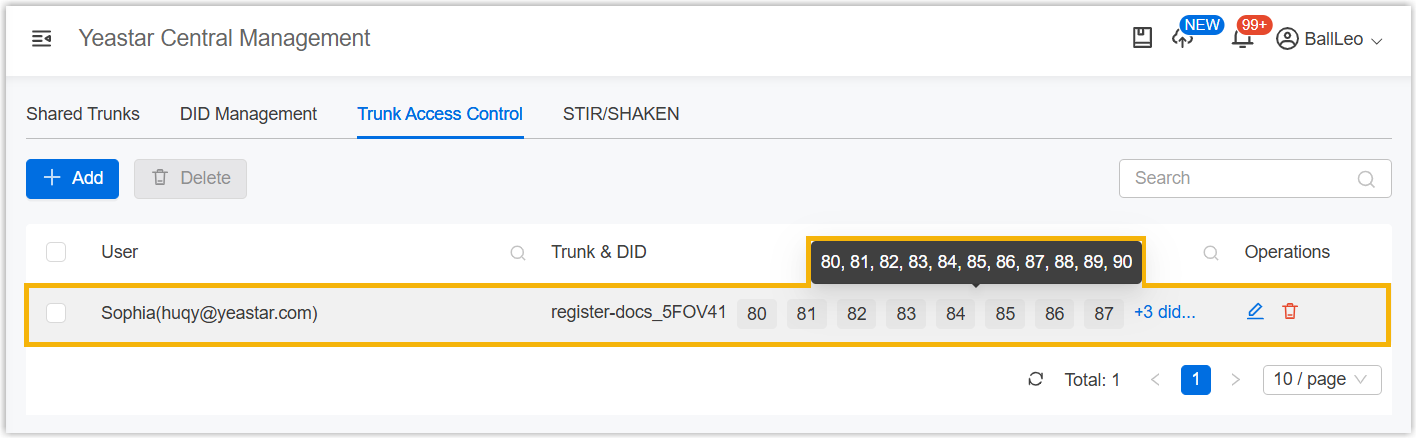
- The users with this permission can
assign the shared trunk, DID numbers, and concurrent calls to cloud PBXs
under their management. Note: However, the users cannot view or modify these trunk resources in their Shared Trunks list. The authorized trunks only appear as selectable options when they are assigning trunks.