Add a DNS Provider
Yeastar Central Management supports automatic certificate application and renewal. This topic describes how to add a DNS provider for automated certificate management.
Introduction
Yeastar Central Management supports two methods for domain certificate management:
-
DNS API Mode: The system automatically interacts with your DNS provider's native API to complete certificate issuance and renewal. It dynamically adds and removes DNS TXT records required for ACME challenge, handling issuance and renewal without manual intervention. This method requires you to provide API credentials for your DNS provider.
-
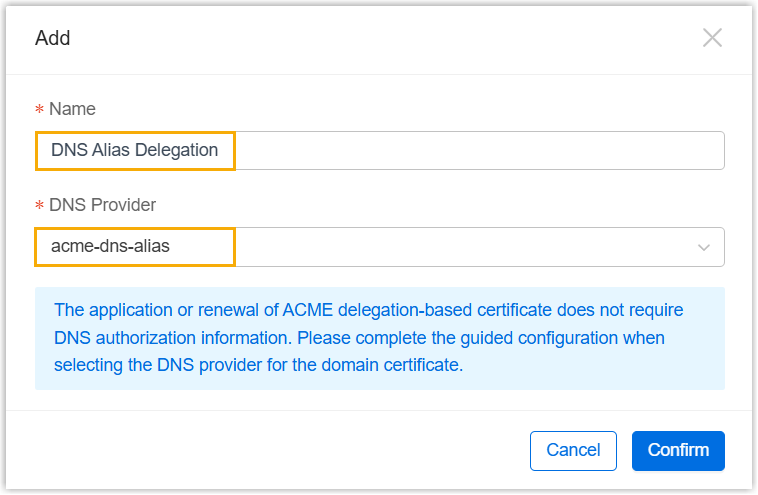
DNS Alias Mode: The system uses ACME delegation via CNAME record to complete certificate issuance and renewal without requiring any API credentials. You manually add a one-time, static DNS CNAME record during initial setup to delegate SSL verification authority. After that, the system handles certificate renewal automatically.
Regardless of which method you choose, you can add your DNS provider information in advance to simplify the domain setup process and facilitate ongoing management.
Prerequisites
- Check if your DNS provider is supported.
- Prepare the required DNS API credentials (e.g., access key, secret key, token).
Procedure
- Log in to Yeastar Central Management, go to .
- Click Add.
- In the pop-up window, add the desired DNS provider.
- For DNS API Mode
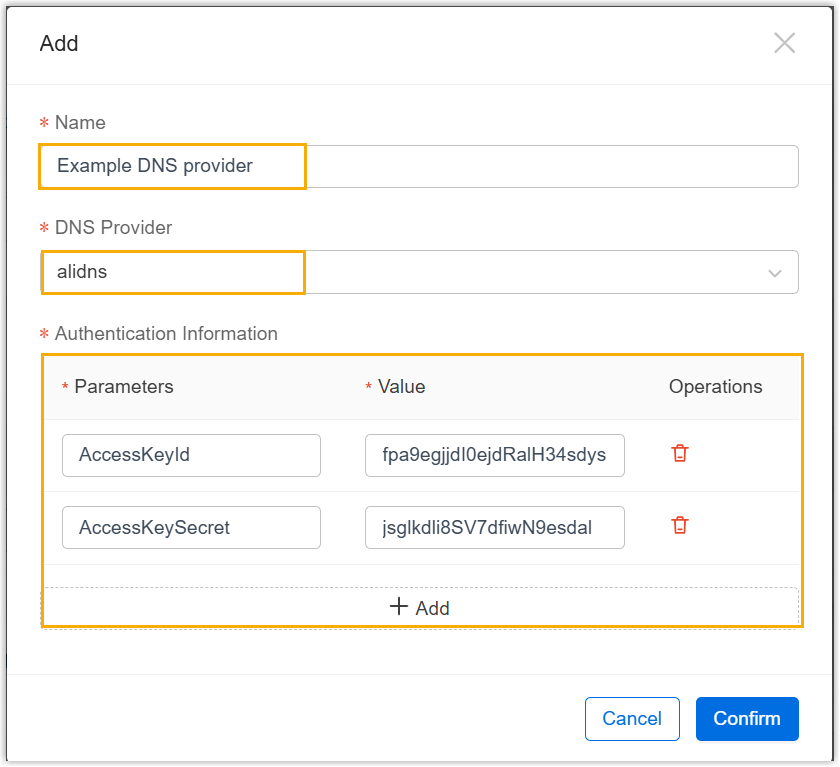
Setting Description Name Set a name to help you identify the DNS provider. DNS Provider Search for and select your desired DNS provider. Authentication Information Enter the values for required parameters. Note: The authentication information varies for different DNS providers, for more information about the parameters, see Supported DNS Providers.
- For DNS Alias Mode
- Click Confirm.
Result
The DNS provider information is added and displayed in the list.
