Assign DID Numbers to a P-Series Cloud PBX
This topic describes how to assign DID numbers to an existing P-Series Cloud PBX to associate the PBX with the corresponding shared trunk.
Prerequisites
- You have available shared
trunks (with DID numbers) in the same region as the PBX,
under one of the following conditions:
- You have created shared trunks and assigned DID numbers to them.
- Your service provider has assigned the access permissions of shared trunks with DID numbers to your account.
- The firmware version of the Cloud PBX is 84.19.0.22 or later.
Procedure
- Log in to Yeastar Central Management, go to .
- Click
 beside the desired PBX.
 - In the PBX details page, go to the Assigned DIDs tab.
- Assigned DID numbers to the PBX.
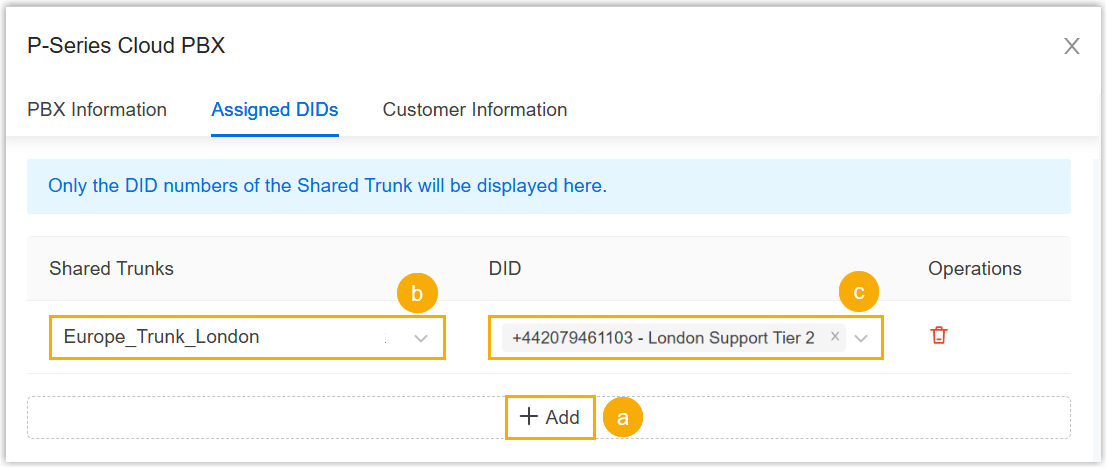
- Click Add.
- Configure the assignment settings.
- Shared Trunks: Select the desired trunk that will be shared with the PBX.
- DID: Select the trunk's associated DID numbers to be assigned to the PBX for inbound and outbound call routing.
- Maximum Concurrent
Calls: (Optional) Set the concurrent
call limit for the PBX on the shared trunk. Note:
- This setting only takes effect on P-Series Cloud PBX with firmware version 84.23.0.123 or later.
- If left blank, the PBX can utilize the trunk's maximum concurrent capacity.
- Optional: Assign custom SIP headers of the shared
trunk to the PBX, which will be included in SIP INVITE messages of the
outbound calls routed through the shared trunk.Note: This setting is available only when the following requirements are met:
- The firmware version of the Cloud PBX is 84.22.0.138 or later.
- The shared trunk has been configured with the custom SIP headers.
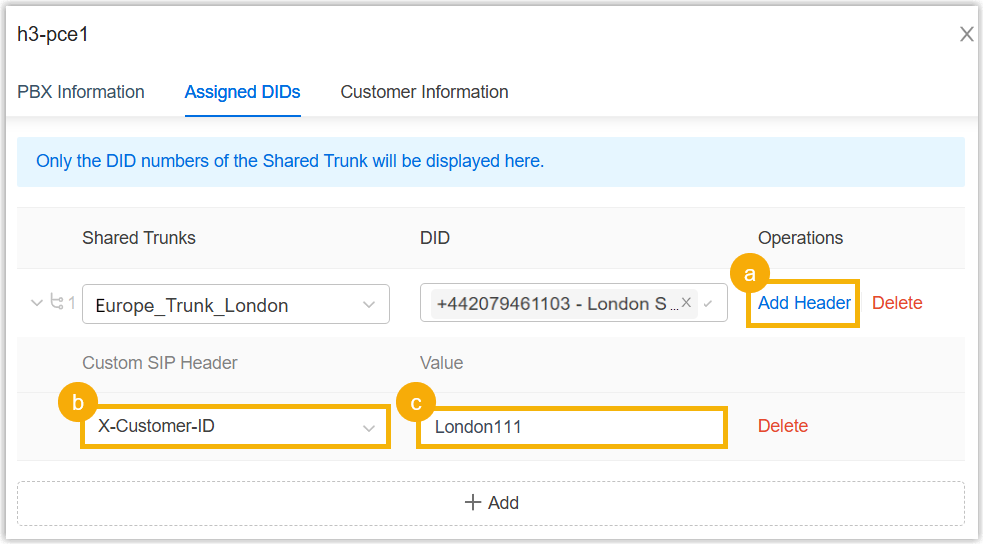
- Click Add Header in the Operations column.
- In the Custom SIP Header drop-down list, select the desired custom SIP header.
- In the Value
filed, enter a value for the SIP header.Note:
- The total length must not exceed 255 characters.
- This value MUST be unique across all Cloud PBXs for the same custom SIP header on the shared trunk.
- To assign more custom SIP headers to the Cloud PBX, repeat step a to c.
- Click Save.
Result
-
The trunk automatically appears on the Cloud PBX (Path: ), with an indicator of
 showing that it is a shared trunk.
- Any changes made in the trunk in Yeastar Central Management are
automatically synchronized to the PBX. Note:
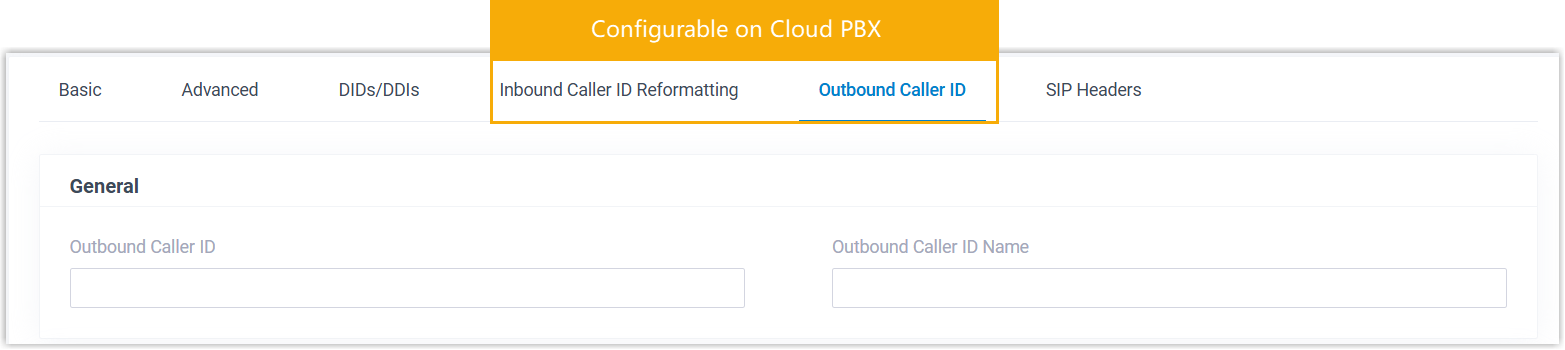
- Trunk settings managed centrally through Yeastar Central
Management can NOT be modified on PBX. However, PBX
administrators can configure the Inbound Caller ID
Reformatting and Outbound Caller ID settings for
the shared trunk.
- Shared trunks are NOT included in PBX system backups, whether the backup is performed on the PBX or via Yeastar Central Management. After restoring a PBX, you need to reassign shared trunks and the corresponding DID numbers for the PBX in Yeastar Central Management.
- Trunk settings managed centrally through Yeastar Central
Management can NOT be modified on PBX. However, PBX
administrators can configure the Inbound Caller ID
Reformatting and Outbound Caller ID settings for
the shared trunk.