Add and Mark Desks on the Map
This topic describes how to add and mark desks on the map.
Prerequisites
- The Yeastar Workplace plan is Standard Plan or Pro Plan.
- You have uploaded floor maps.
Procedure
- Log in to Yeastar Workplace admin portal, go to Location, then click the desired building.
- Select the desired floor and click Configure Map.
- Add and mark desks.
-
To add desks individually, do as follows:
-
In the top bar, click Desk and select an icon style from the first three buttons.
-
Click on desired locations on the map to add and mark desks.
-
Right-click the map and select Cancel to quit marking mode.
-
Optional: Click & drag to select the icons and adjust the size and position.
-
- To add desks in bulk, do as follows:
-
In the top bar, click Desk and decide how many desks you wish to add at once.
-
Click a desired position on the map to create and mark the desks.
-
Optional: Specify the icon style and adjust the size and orientation.
-
-
- Click an icon and edit the desk's information on the right panel
individually.
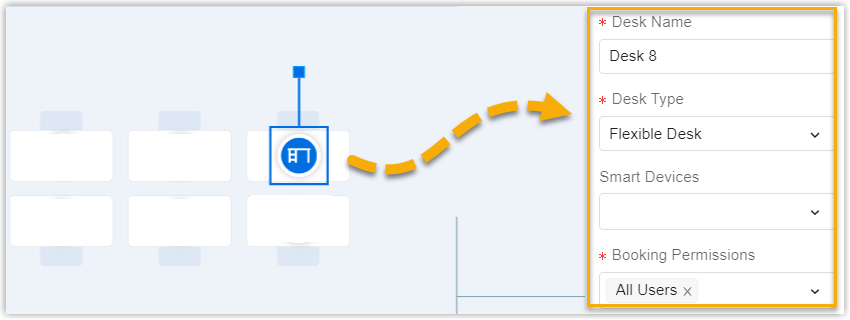
Setting Description Desk Name Specify a name to help you identify this desk. It's recommended to name a desk with its location, e.g. Desk 201. Desk Type Click the drop-down list and select the type for this desk. - Permanent Desk: A dedicated desk for a specific user, can not be booked.
- Flexible Desk: A flexible desk that supports being booked by users with permissions.
Smart Devices Click the drop-down list and select an occupancy sensor to bind with this desk. Desk User This field is only available when the desk type is selected as Permanent Desk. Click the drop-down list and select which user this desk will be assigned to. Booking Permissions This field is only available when the desk type is selected as Flexible Desk. Click the drop-down list and specify which users have permission to book this desk. - Click Save at the top-right corner.
Result
- The desk resources are added to the system and marked on the
floor map. You can view and manage the desk resources in the
following methods:
- Go to Location, access the map configuration panel of the floor where the desk is marked.
- Go to , search and find the desired desk resource.
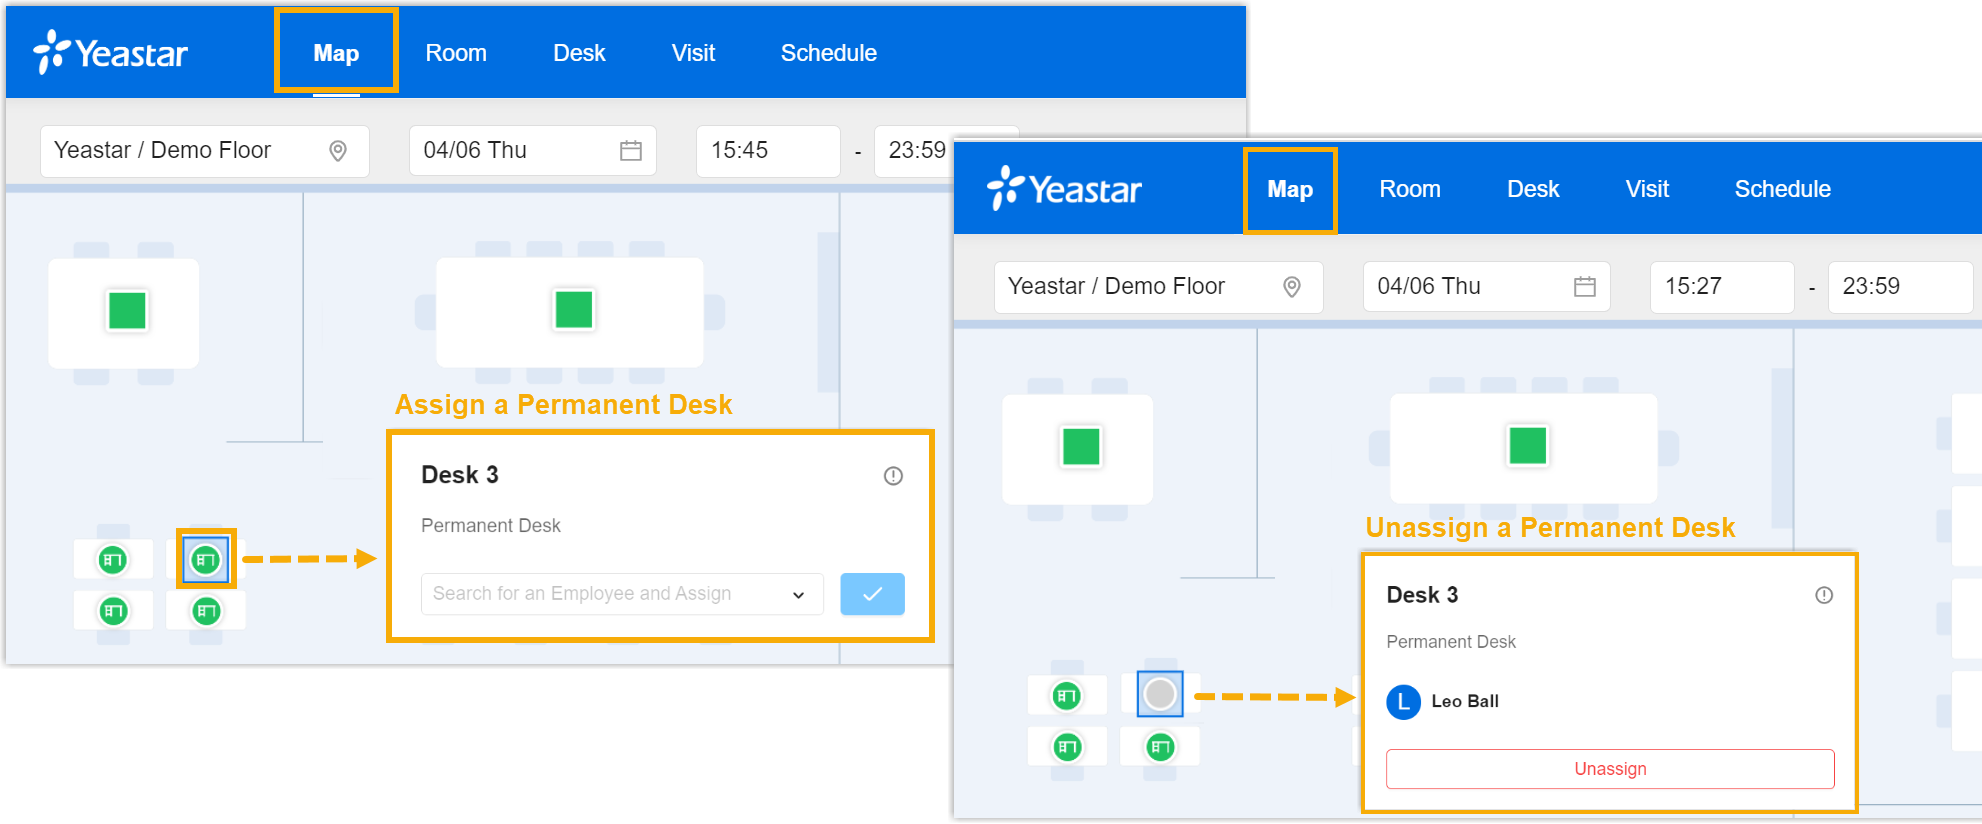
- The marked desks are displayed on the Map
tab of Yeastar Workplace user portal, and the following
functions are achieved.
- Users can view the real-time booking status of desks by
the color of the icons.
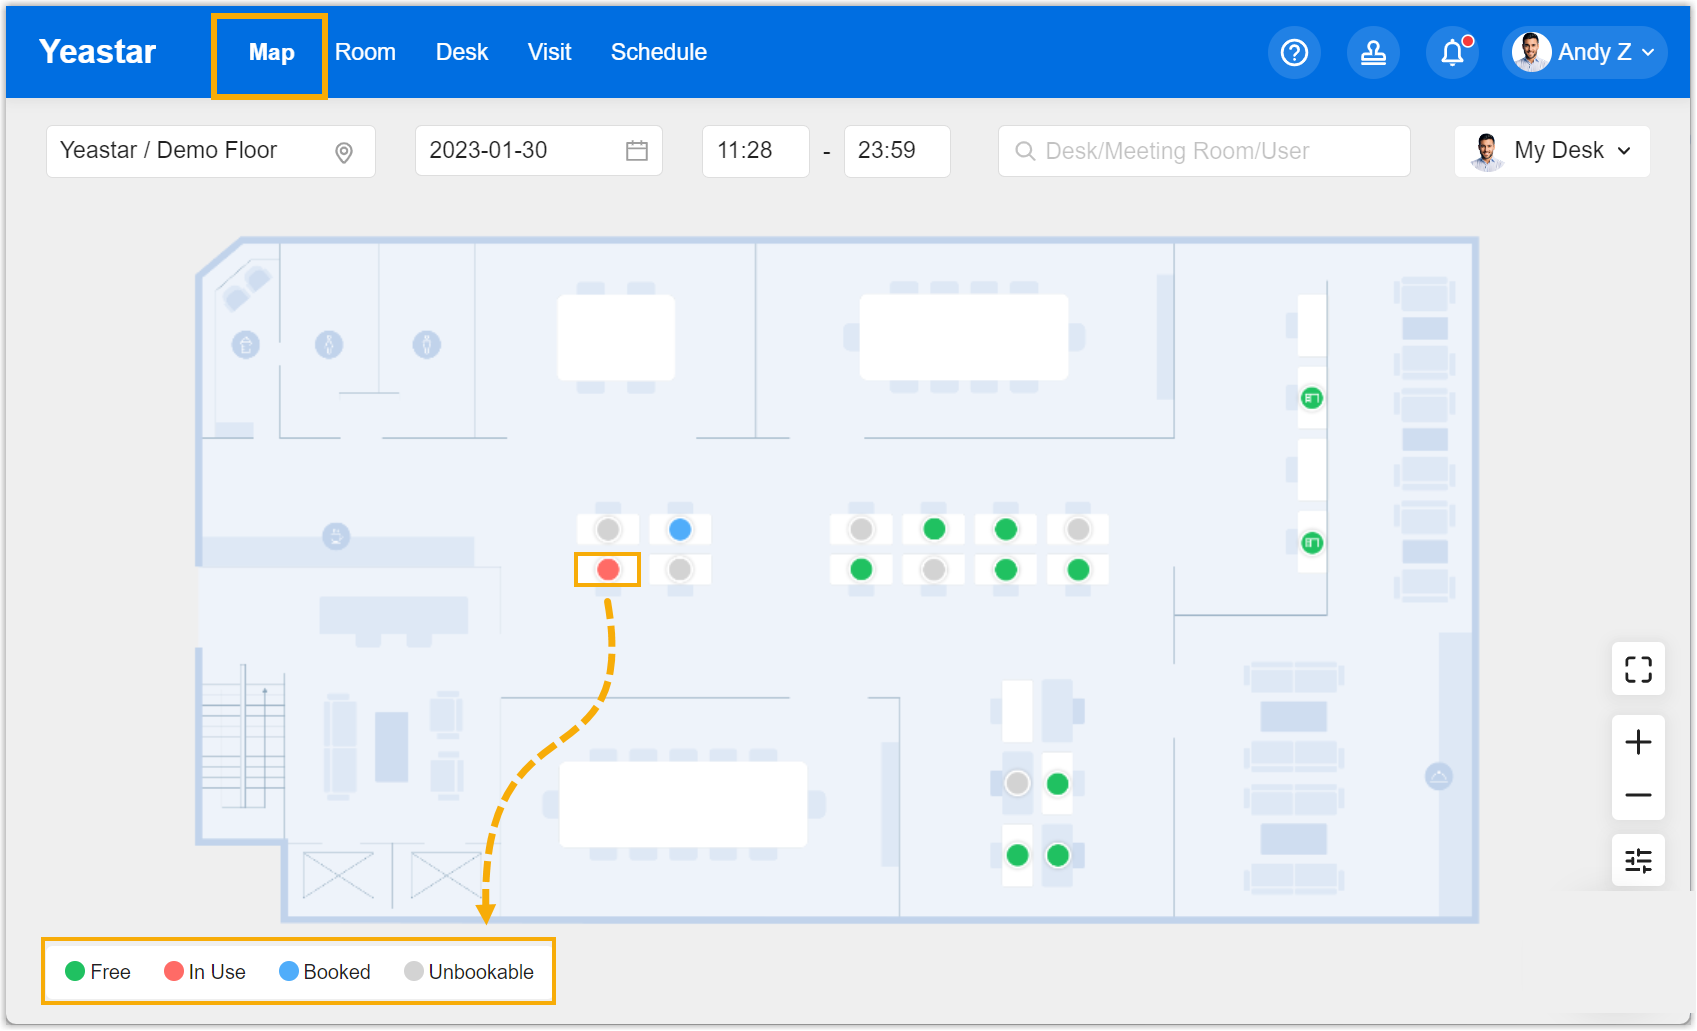
- Users can click the icon of a desk to make
reservations.
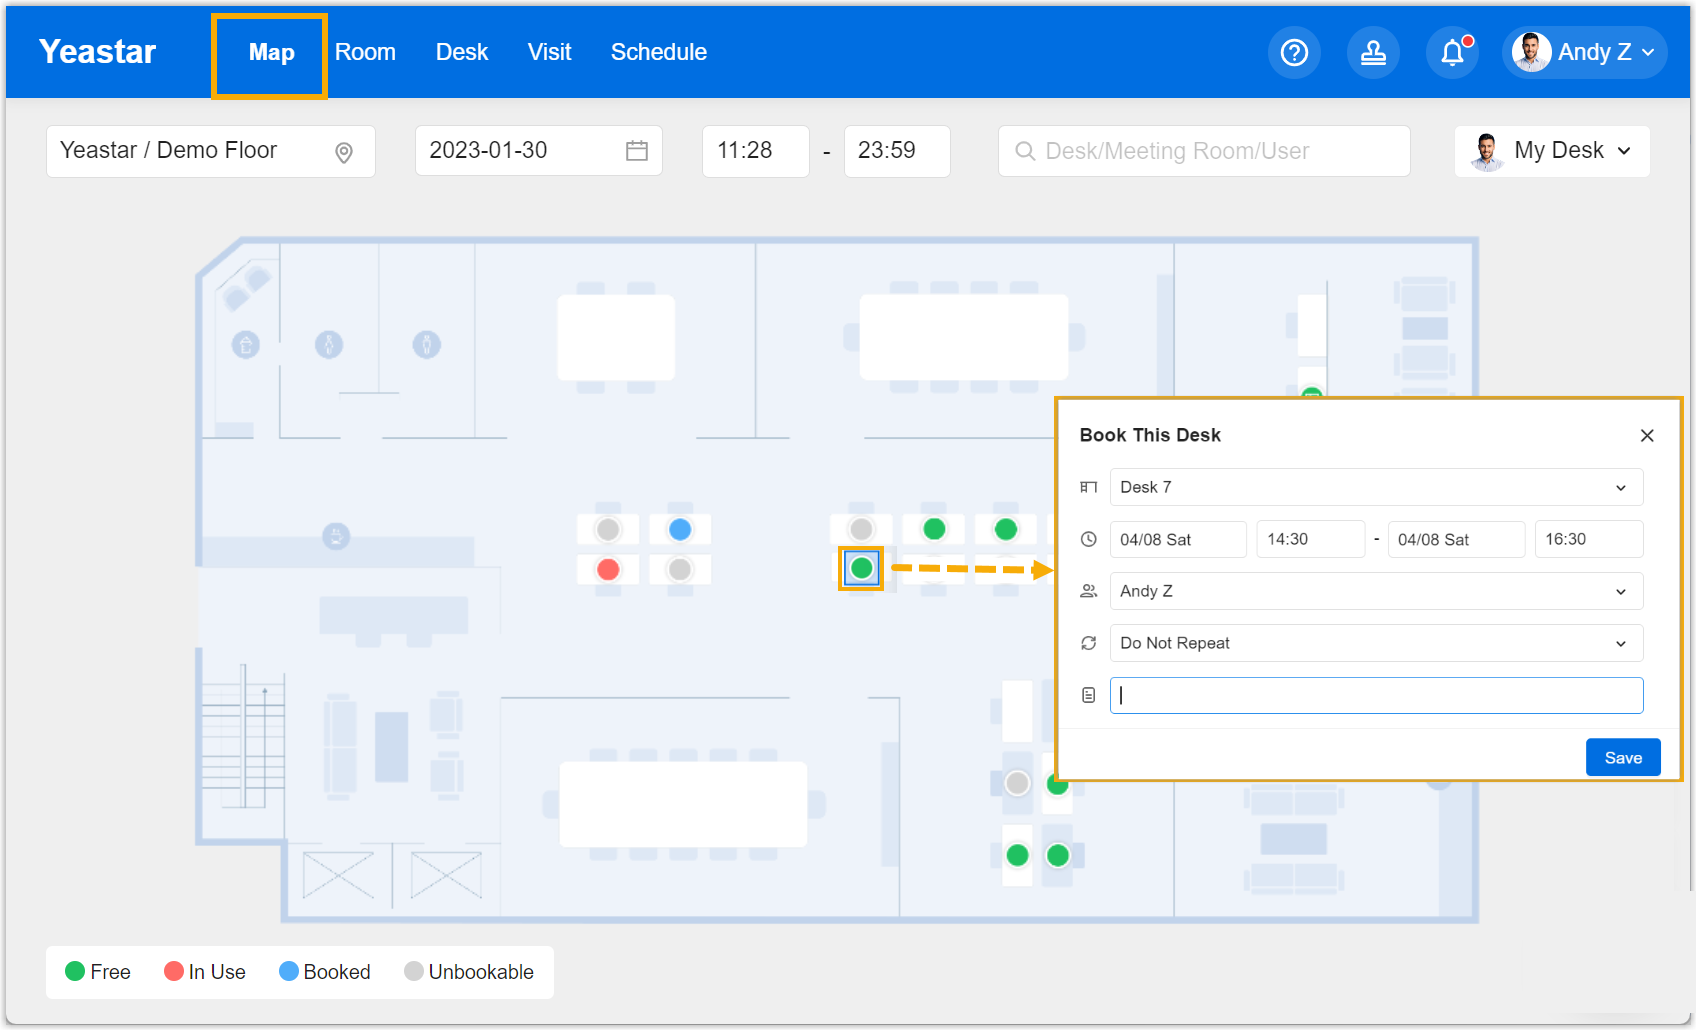
- Users can locate specific desks and users on the
map.
- Users can view the real-time booking status of desks by
the color of the icons.