Configure a Scheduled Paging or Intercom
A scheduled paging or intercom allows an extension user or Yeastar S-Series VoIP PBX to make an announcement on the specified date and time. This topic describes how to configure a scheduled paging or intercom.
Prerequisites
- The feature is only available to Yeastar S50, S100, and S300.
- At least one paging or intercom group is set up.
Procedure
- Go to , click Add.
- Configure a scheduled paging or intercom group.
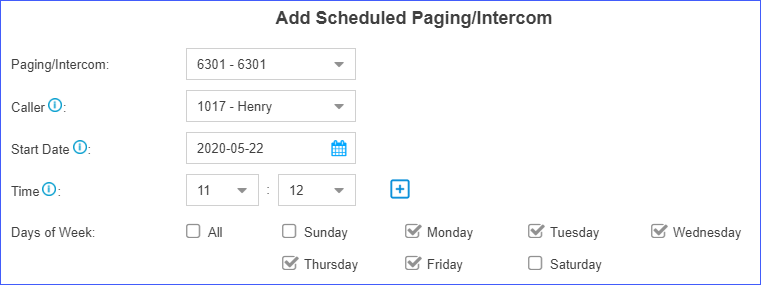
- Paging/Intercom: Select the desired paging group or intercom group.
- Caller: Select who will make the announcement.
- {extension_user}: The extension
user will make the announcement.On the specified date and time, the PBX will place a call to remind the user to make an announcement. When the user answers the call, the PBX will call group members.Note: If the user rejects the call, the announcement will be cancelled.
- None: Yeastar S-Series VoIP PBX will automatically make
the announcement. On the specified date and time, the PBX will call group members and play the specified custom prompt. After the prompt ends, the PBX hangs up the call. The option can be applied to school bells, church bells and so on.Note: The option is available only when a custom prompt is assigned to the selected paging group or intercom group.
- {extension_user}: The extension
user will make the announcement.
- Start Date: Set the start date of the scheduled paging call or intercom call.
- Time: Set the start time of the scheduled paging call or intercom call. You can set up to 8 timings simultaneously, which means that the paging call or intercom call can be placed at different time on the same day.
- Days of Week: Select the days of week. The scheduled paging call or intercom call will be weekly placed on the specified days of week.
- Click Save and Apply.