Auto Provision Avaya IP Phone with Yeastar P-Series Software Edition
This topic takes Avaya J139 (firmware: 4.1.5.0.6) as an example to describe how to auto provision Avaya IP phone with Yeastar P-Series Software Edition.
Requirements
The firmwares of Avaya IP phone and Yeastar PBX meet the following requirements.
| Model | Phone Requirement | PBX Requirement | Supported Auto Provisioning Method |
|---|---|---|---|
| J129 | 4.1.1.0.7 or later |
83.12.0.23 or later |
|
| J139 | 4.1.1.0.7 or later |
83.12.0.23 or later |
|
| J159 | 4.1.1.0.7 or later |
83.12.0.23 or later |
|
| J169 | 4.1.1.0.7 or later |
83.12.0.23 or later |
|
| J179 | 4.1.1.0.7 or later |
83.12.0.23 or later |
|
| J189 | 4.1.1.0.7 or later |
83.12.0.23 or later |
|
| 9608 | 7.1.15.2.1 or later |
83.14.0.26 or later |
|
| 9611G | 7.1.15.2.1 or later |
83.14.0.26 or later |
|
| 9641G | 7.1.15.2.1 or later |
83.14.0.26 or later |
|
Prerequisites
- Set up a DHCP server in the same subnet as the IP phone to
assign it an IP address.Note: Make sure that there is only one DHCP server running in the subnet, or the IP phone would fail to obtain an IP address.
- RESET the IP phone if it is previously used.
- Gather information of IP phone, including Vendor, Model, and MAC address.
- Make sure that you have downloaded the template for the desired phone model (Path: ).
- Make sure that you have completed the corresponding settings shown below
according to the network environment of Avaya IP phone and Yeastar
PBX.
Network Environment Setting Local Network Provision an IP phone in the same subnet Set the registration name to the same as the extension number for the extension that will be assigned to the IP phone (Path: Extension and Trunk > Extension >  > User > Extension Information).Important: Due to the IP phone's limitation, the extension's Registration Name must be the same as the Extension Number; otherwise, the registration will FAIL.
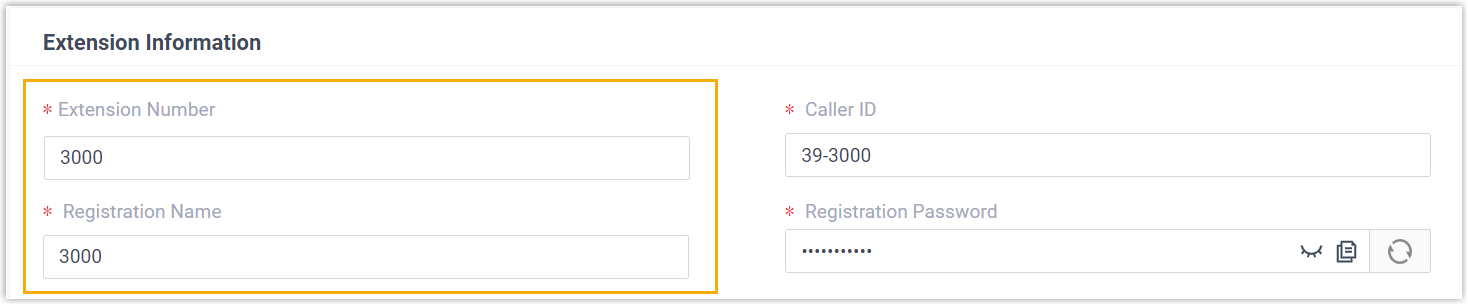
Provision an IP phone in different subnets - Make sure that the two subnets can communicates with each other.
- Complete the following settings for the
extension to be assigned to the IP phone:
- Set the registration name to the
same as the extension number for the extension
(Path: Extension and Trunk > Extension > > User > Extension Information).Important: Due to the IP phone's limitation, the extension's Registration Name must be the same as the Extension Number; otherwise, the registration will FAIL.
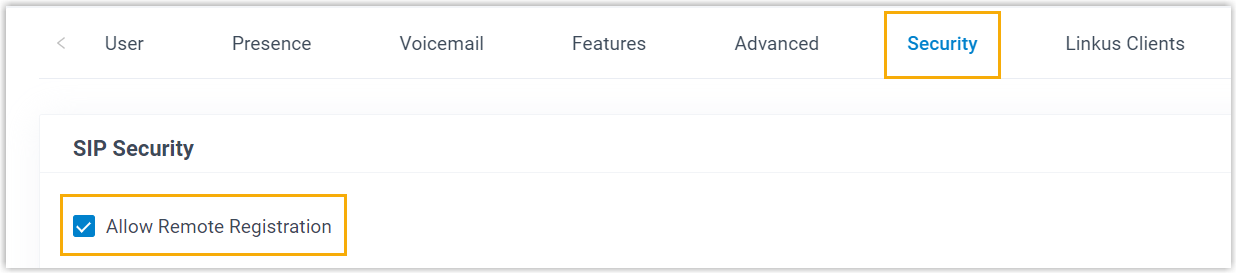
- Enable the Remote Registration
feature for the extension (Path: Extension and Trunk > Extension > > Security > SIP Security > Allow Remote Registration).
- Set the registration name to the
same as the extension number for the extension
(Path: Extension and Trunk > Extension >
Remote Network Remotely provision an IP phone using Yeastar FQDN - Complete the following settings for the
extension to be assigned to the IP phone:
- Set the registration name to the
same as the extension number for the extension
(Path: Extension and Trunk > Extension > > User > Extension Information).Important: Due to the IP phone's limitation, the extension's Registration Name must be the same as the Extension Number; otherwise, the registration will FAIL.
- Grant remote SIP access permission for the
extension (Path: ).

- Set the registration name to the
same as the extension number for the extension
(Path: Extension and Trunk > Extension >
Remotely provision an IP phone using public IP address / domain name - Configure PBX network for
remote access by a public IP address, by an external host domain name, or by a Yeastar domain name.Important: The following PBX ports MUST be forwarded for RPS provisioning.
- RTP ports
- SIP port
- Web Server port
- Complete the following settings
for the extension to be assigned to the IP
phone:
- Set the registration name to the
same as the extension number for the extension
(Path: Extension and Trunk > Extension > > User > Extension Information).Important: Due to the IP phone's limitation, the extension's Registration Name must be the same as the Extension Number; otherwise, the registration will FAIL.
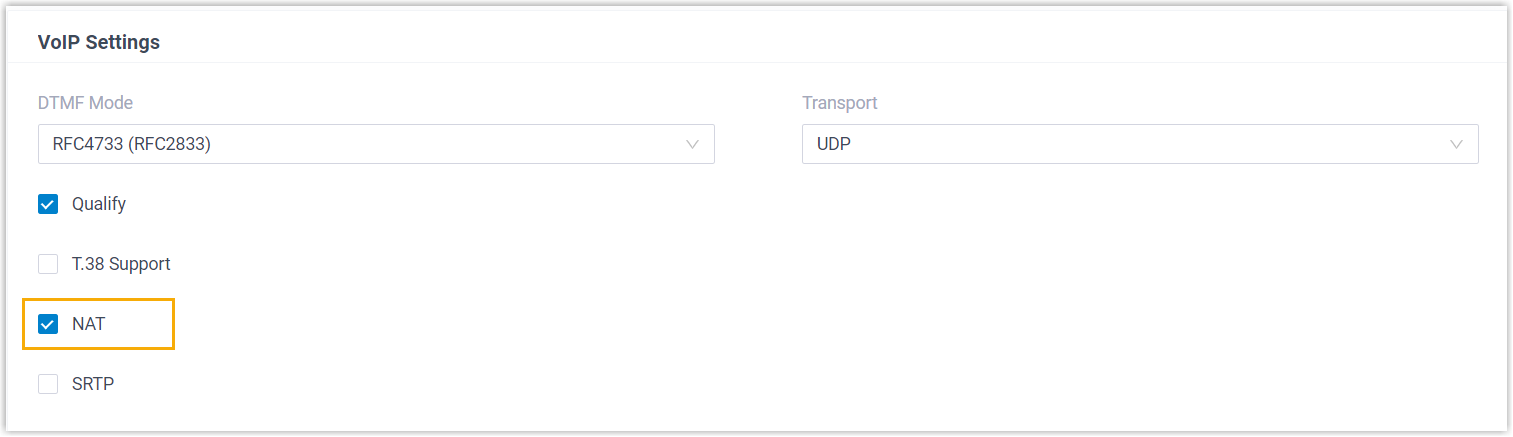
- Enable NAT for the extension (Path: Extension and Trunk > Extension > > Advanced > VoIP Settings > NAT).
- Enable the Remote Registration
feature for the extension (Path: Extension and Trunk > Extension > > Security > SIP Security > Allow Remote Registration).
- Set the registration name to the
same as the extension number for the extension
(Path: Extension and Trunk > Extension >
Procedure
Step 1. Add the Avaya IP phone on PBX
Add the IP phone on PBX. The PBX will generate a configuration file based on the phone's MAC address.
- Log in to PBX web portal, go to .
- Click .
- In the IP Phone section, enter the following phone
information.
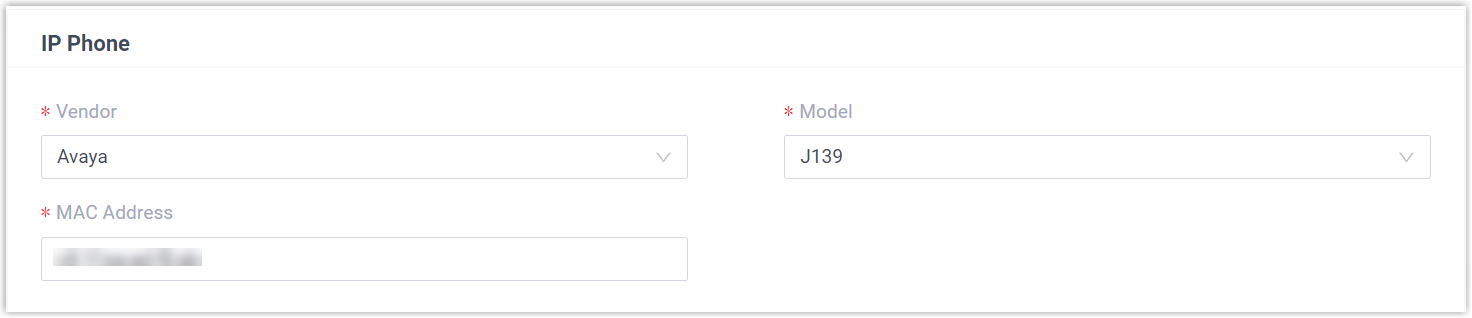
- Vendor: Select Avaya.
- Model: Select the phone model. In this example, select J139.
- MAC Address: Enter the MAC address of the IP phone.
- In the Options section, configure the following
settings.
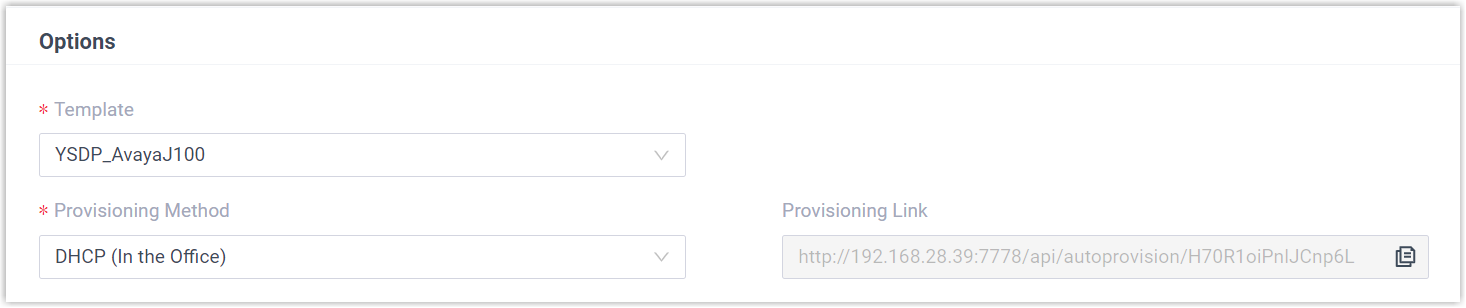
- Template: Select a desired template
from the drop-down list.Note: You can select the default template corresponding to the phone model, or customize your own template. For more information, see Create a Custom Auto Provisioning Template.
- Provisioning Method: Select the provisioning
method according to your needs.
Provisioning Method Description DHCP (In the Office) Suitable for provisioning the IP phone that is located in the local network, either in the same subnet or in different subnets. Provision Link (Remote) Suitable for provisioning the IP phone located in a remote network, and the IP phone will access the PBX using public IP address / domain name to retrieve configuration files. Provision Link - FQDN (Remote) Suitable for provisioning the IP phone located in a remote network, and the IP phone will access the PBX using Yeastar FQDN to retrieve configuration files. A provisioning link is automatically generated and displayed in the Provisioning Link field. This provisioning link points to the location where the phone's configuration file is stored.
Note: Note down the provisioning link, as you will use it later.
- Template: Select a desired template
from the drop-down list.
- In the Assign Extension
section, assign an extension to the IP phone.
 Note: If your desired extension is not listed in the drop-down list, it indicates that the extension has been associated with an IP phone or gateway.
- To release the extension from the associated IP phone or gateway, see Release an Extension from a Provisioned IP Phone/Gateway.
- To assign the extension to the phone without releasing it from the previously associated device, you can configure the concurrent registration setting for the extension, as the PBX only allows an extension to register with one SIP endpoint by default.
- Click Save.
The IP phone is added and displayed in the Auto Provisioning phone list.
- Set the phone language for the IP phone.
- In the Auto Provisioning phone list, click
 beside the Avaya IP phone.
- In the phone configuration page, scroll down to the
Preference section, and select the
desired phone language based on the phone model.
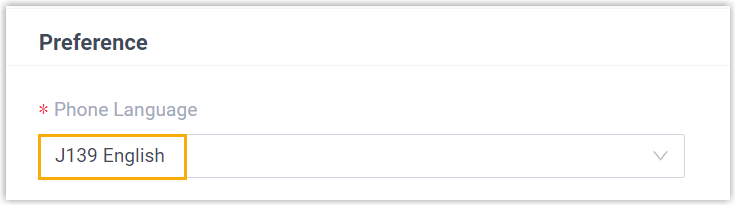
- Click Save.
- In the Auto Provisioning phone list, click
Step 2. Configure DHCP option 242 on DHCP server
Configure DHCP option 242 to point to the PBX. This allows the Avaya IP phone to automatically retrieve its configuration files from the PBX.The following instructions take Tftpd64 DHCP server as an example to show how to configure the option 242.
- On the running Tftpd64 software, go to .
- Add option 242 and define the location of the configuration files.

- In the Additional Option field, enter 242.
- In the string value field, enter the provisioning link obtained from the PBX
according to the selected provisioning method.
Provisioning Method Instruction DHCP Enter the link in the following format: HTTPSRVR=192.168.28.39,HTTPDIR=api/autoprovision/lgjnRL8CkoYFXWJd,HTTPPORT=7778,SIG=2- HTTPSRVR: The IP address of the PBX.
- HTTPDIR: The file path on the PBX (e.g.
api/autoprovision/lgjnRL8CkoYFXWJd). - HTTPPORT: The server port of the PBX.
- SIG: The software version of the Avaya IP phone. Set the value to 2.
Provision Link Enter the link in the following format: TLSSRVR=yeastardocs.ras.yeastar.com,TLSDIR=api/autoprovision/lgjnRL8CkoYFXWJd,TLSPORT=443,SIG=2- TLSSRVR: The public IP address / domain name of the PBX.
- TLSDIR: The file path on the PBX (e.g.
api/autoprovision/lgjnRL8CkoYFXWJd). - TLSPORT: The server port of the PBX.
- SIG: The software version of the Avaya IP phone. Set the value to 2.
- Click OK to save the settings.
Results
- After rebooting the IP phone, it gets an IP address from the DHCP server, downloads the configurations from the PBX via the provisioning link, and applies the settings automatically.
- The extension is successfully registered on the IP phone. You can check the
registration status on on the PBX web portal.
