Set up an Inbound Route
To receive inbound calls from external users, you need to set up at least one inbound route.
Background information
Yeastar P-Series PBX System has a default inbound route that will route all the inbound calls to an IVR. You can delete the default inbound route, and add a new one to configure settings according to your needs.
Prerequisites
Ensure that you have set up at least one trunk for external users to call in.
Procedure
- Log in to PBX web portal, go to , click Add.
- In the Name field, enter a name to help you identify it.
- Optional: Set an "alert info text" to add to Alert-info header in
INVITE request for inbound calls.
When receiving an inbound call, the phone will inspect "Alert-Info" header to determine which ring tone it should use for ringing.
- In the Trunk section, select the desired trunks from
Available box to Selected
box.
The PBX will route inbound calls through this inbound route when external users call the selected trunk number.
- Optional: If you want to route inbound calls based on DID numbers,
configure DID Pattern.
The PBX will route inbound calls only when the callers dial the matched DID numbers.
Note: Leave this field blank to match calls with any or no DID information.For more information, see Route Inbound Calls based on DID Numbers. - Optional: If you want to route inbound calls based on Caller IDs,
configure Caller ID Pattern.
The PBX will route inbound calls only when the Caller IDs match the Caller ID pattern.
Note: Leave this field blank to match calls with any or no Caller ID info.For more information, see Route Inbound Calls based on Caller ID.
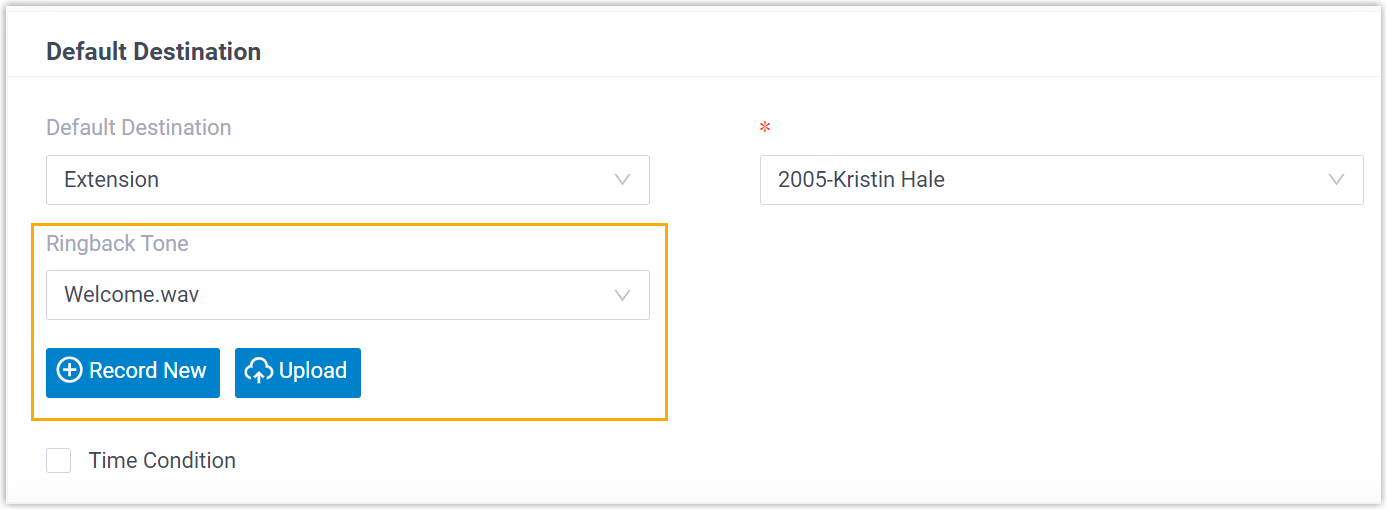
- Configure the inbound route destination.Note: When the destination is set to an extension, you can select or upload a music in the follow-up Ringback Tone field, which will be played to the caller before the extension user answers the call.
- If you want to route inbound calls to one destination whenever
the calls reach the system, perform the following operations:
- Keep the Time Condition unselected.
- Configure the Default Destination.
- If you want to route inbound calls to different destinations
based on the time, perform the following operations:
- Select the checkbox of Time Condition.
- Select an option from the drop-down list of Time-based Routing Mode.
- Configure the destinations based on the time.
If an inbound call reaches the PBX during the time period, PBX will route the call to the selected destination.
- Optional: If you want to route inbound calls
based on the business hours and non-working hours
during holidays, select the checkbox of
Ignore the Holiday
Destination.
Inbound calls during holiday will be distributed to other destinations according to your office hour setting.
- Optional: To play a prompt to callers before
routing the inbound calls to the holiday
destination, select the checkbox of Play
Holiday Prompt During Holidays.Note: Make sure that you have set a prompt for the holiday (Path: ). Otherwise, the inbound calls will be directly routed to the holiday destination without playing a prompt.
For more information of inbound call routing based on time, see the following topics:
- If you want to route inbound calls to one destination whenever
the calls reach the system, perform the following operations:
- Optional: To receive faxes through this inbound route, enable
Fax Detection and configure the fax destination.
- Extension: The faxes will be sent to the
selected extension.
- For an FXS extension, you need to connect a fax machine to the relevant FXS port to receive faxes.
- For a SIP extension, you need to register the extension on a SIP compatible fax machine.
Note: If the selected extension is deleted, the fax destination will automatically jump to Hang up, and faxes cannot be received through this inbound route. - Fax to Email: The faxes will be converted
to email attachments and be sent to an extension's email address.Note: Make sure the system email is configured correctly, or Fax to Email will fail to work.
For more information of fax setting, see Fax Overview.
- Extension: The faxes will be sent to the
selected extension.
- Click Save and Apply.