Purchase NovoOne (Self-hosted)
NovoOne (Self-hosted) service allows you to deploy a communications platform in your own data center, giving you full data sovereignty and control. This topic describes how to purchase the service through Yeastar Partner Portal.
Offering types
Yeastar provides two offerings for NovoOne (self-hosted) service - Trial and Commercial. Refer to the following table for the differences.
| Item | Trial | Commercial |
|---|---|---|
| Concurrent Call | 20 concurrent calls | Starting from 50 concurrent calls |
| White Label | 1 template | Starting from 1 template |
| Transcription | 1 user | Starting from 1 user |
| AI Receptionist | 60 minutes for each tenant (one-time) |
|
| Validity Period | 30 days | Annual Subscription |
| Price | Free | Paid |
Step 1. Go to product purchase page
- Log in to Yeastar Partner Portal, go to Products & Purchase.
- On the product list, click Purchase on
NovoOne (Self-hosted).
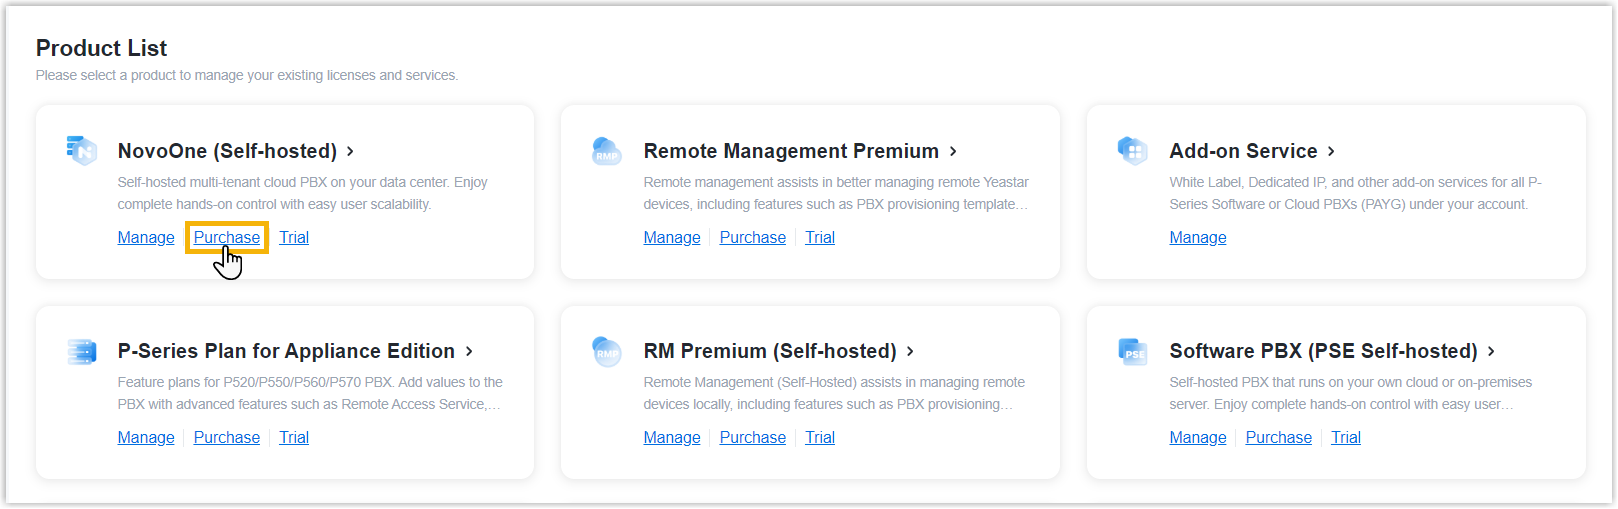
A side panel slides in from the right of the page.
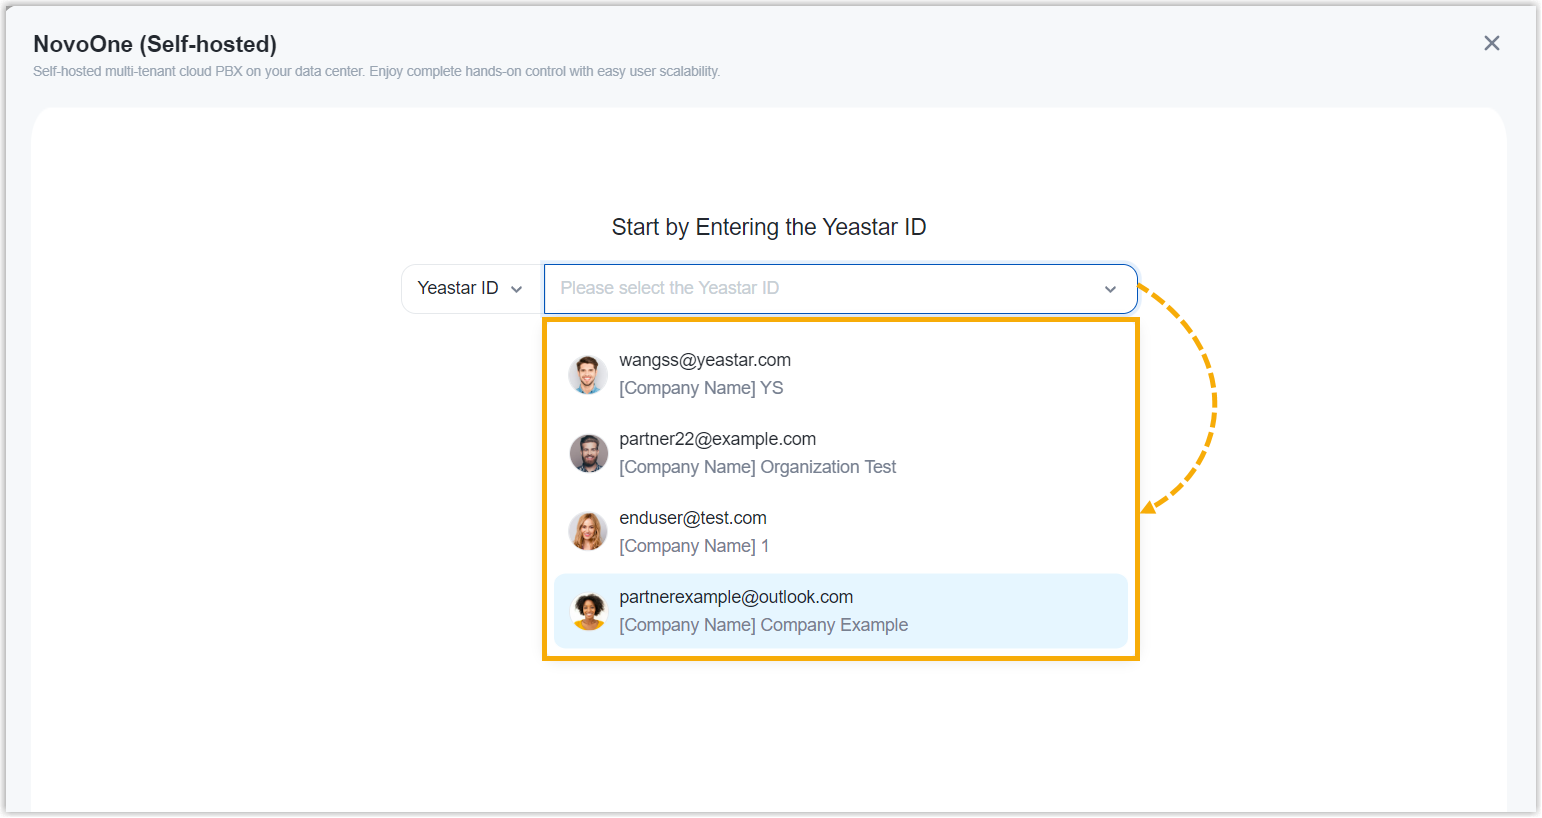
- Specify a user for who you want to purchase the NovoOne (Self-hosted)
service.The selected user will have full access to view and manage the resources included in the service through his or her NovoOne account, while other users will not have access.Note: If you want to manage the service yourself, make sure to select your own Yeastar ID.
Step 2. Select plan and service
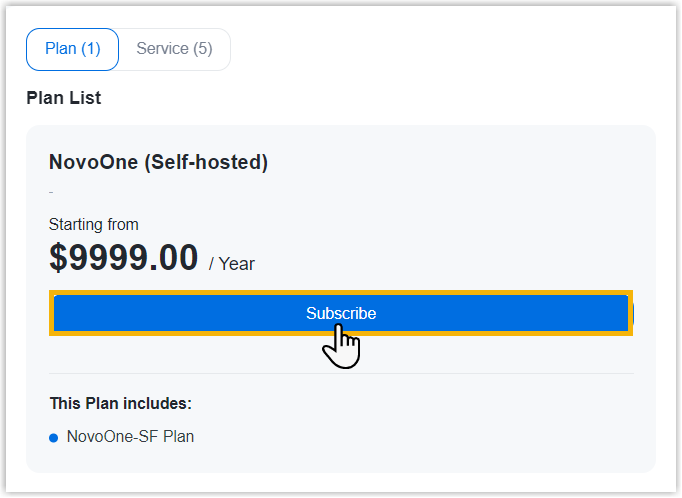
- Under Plan tab, click
Subscribe of NovoOne
(Self-hosted).
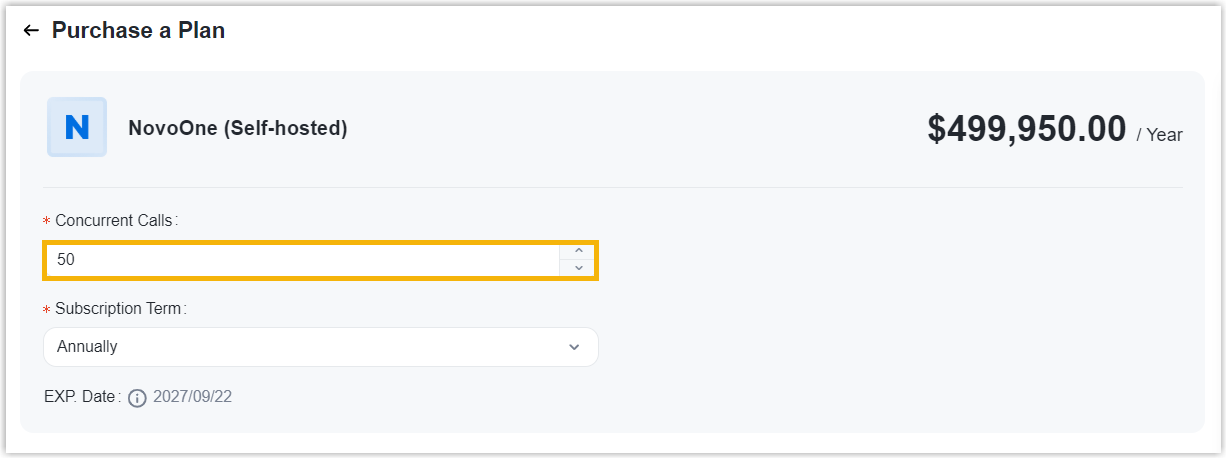
- On the left plan details section, set the desired number of concurrent
calls.
- Optional: In the Service section, subscribe to additional services as needed.
(Optional) Step 3. Assign the product to another Yeastar ID
- This does NOT grant administration permission for the service within the corresponding NovoOne platform.
- If you prefer to retain access only for yourself, please skip this step.
- Select an existing user from the drop-down list.

-
If desired user doesn't exist, you can click Add Partner to create a new Partner Portal account for the user.Important: Clicking Add Partner will create a new Partner Portal account, and an activation email will be sent to the assigned email address. If you DO NOT want your customer to receive this email, do NOT click Add Partner here.
- On the right Order Summary section, click Checkout.
Step 4. Review the order and check out
- On the left Plan Information section and Service Information section, review the information.
- On the left Billing Information section, review and edit
the billing information as needed.Note:
- The billing information will be displayed on an invoice, which will be generated and sent to the selected billing contact's email address after you complete payment.
- By default, your information is automatically filled in. You can
change to another billing contact, either by selecting an existing
one from the drop-down list, or by clicking Add
New to add a contact. The billing contacts are
synchronized with the ones that you have set on Billing
Receiver.

- On the right Checkout
section, choose either of the following ways to check out.
- Pay by PayPal
-
- In the Payment Method section, click PayPal.
- Click PayPal and log in to your PayPal account to complete payment.
- Pay by debit card or credit card
-
- In the Payment Method section, click Debit or Credit Card.
- Click Debit or Credit Card and enter the information required to complete payment.
- Pay offline
-
- In the Payment Method section, click Offline.
- Optional: In the PI Number field, enter the PI number that is provided by Yeastar Sales.
- Click Place Order.
After you submit the order, your account manager or local distributor will contact you actively for the payment.
Result
After you complete payment, the billing contact will receive an email, which contains the order summary and an invoice. He or she can click on the attached link to view or download the invoice.
- The attached link is valid in 24 hours and can be used ONCE only.
- You can also view the invoice on Yeastar Partner Portal: Orders and Billing > Orders >
 .
.
What to do next
Access NovoOne Platform portal to create resources by following the instructions in the NovoOne Document Center.