Purchase RM Premium (Self-hosted) Service
RM Premium (Self-hosted) service allows you to connect Yeastar P-Series on-premises PBXs to your Yeastar Central Management or self-hosted platform for remote monitoring, management, and provisioning.
Step 1. Go to product purchase page
- Log in to Yeastar Partner Portal, go to Products & Purchase.
- On the product list, click Purchase
on RM Premium (Self-hosted).
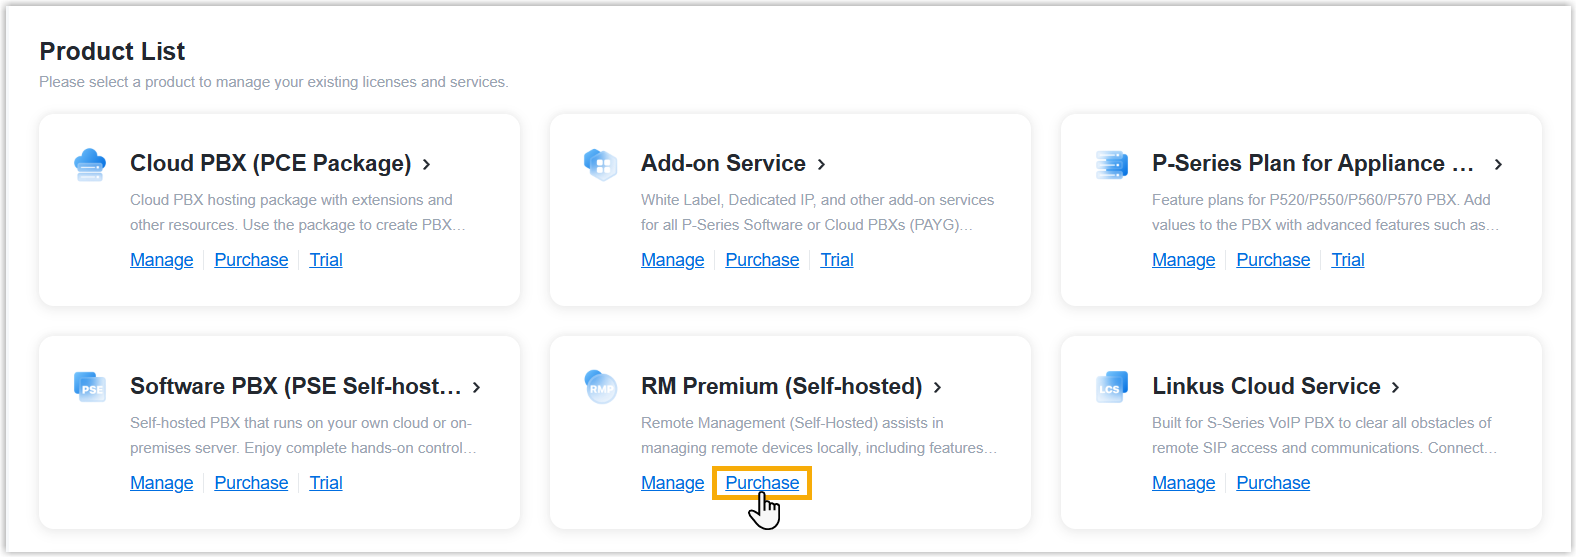
A side panel slides in from the right of the page.
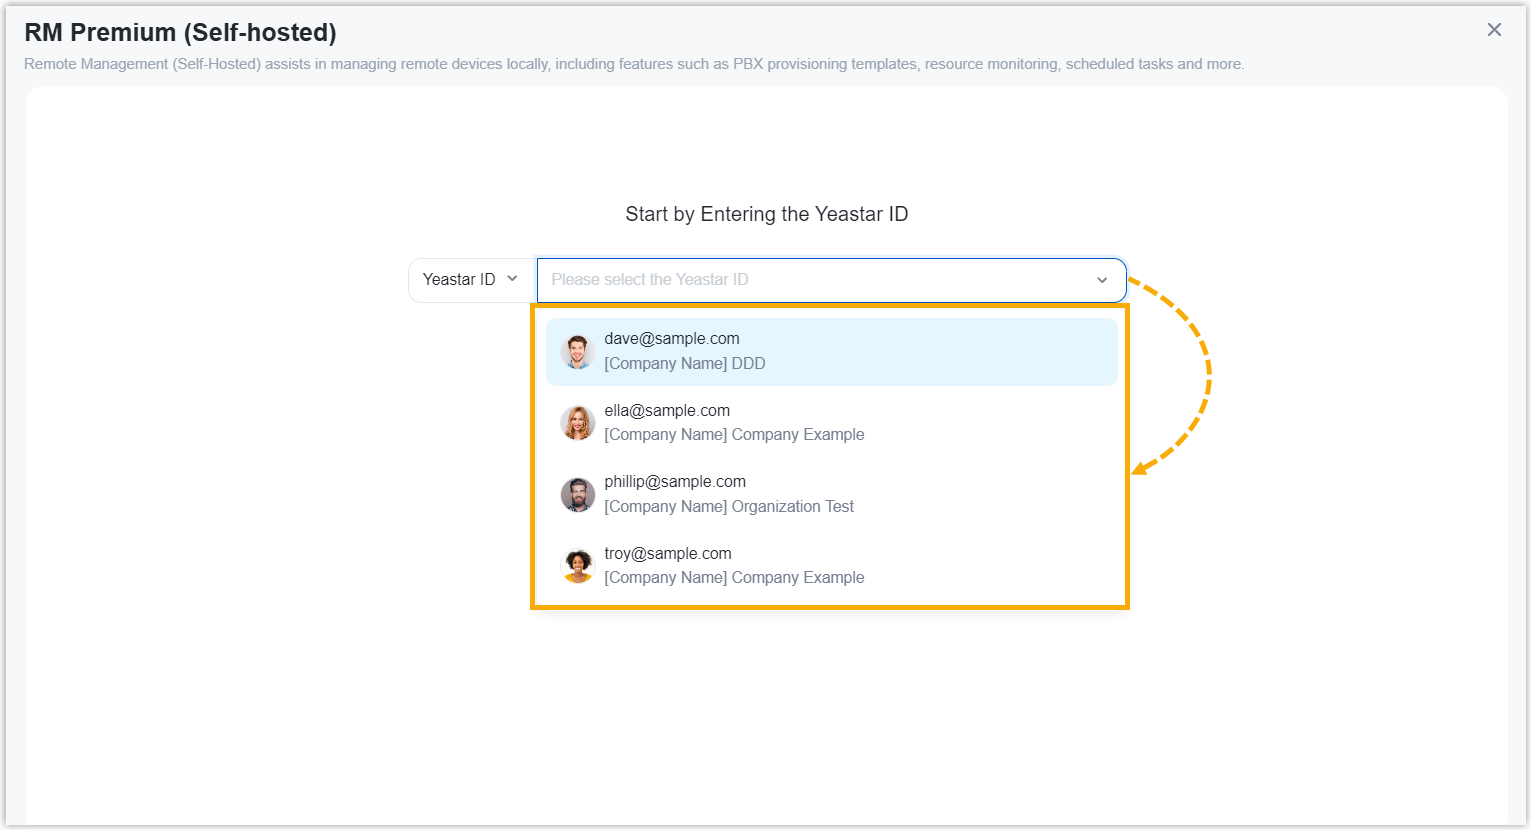
- Search and select the user for whom you want to purchase RM Premium
(Self-hosted) service from the drop-down list by filter (Yeastar
ID or Company Name).
Step 2. Select service and connections
- Under the Service List tab, click
Subscribe of the Remote Management
Connectionsservice.
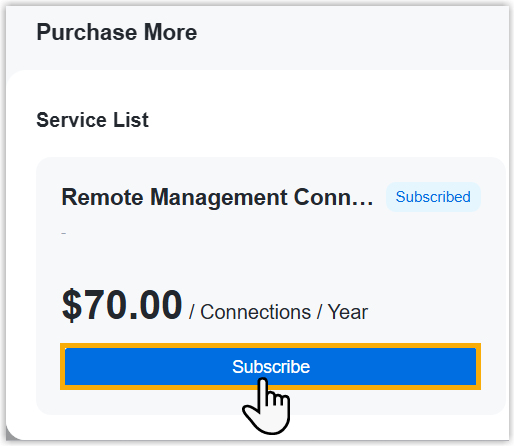
- In the Connections field, set the number of
connections that you want to purchase.
(Optional) Step 3. Assign the product to another Yeastar ID
Product assignment allows you to grant another user access to view the subscription details within the Partner Portal (Path: ).
- Select an existing user from the drop-down list.

-
If desired user doesn't exist, you can click Add Partner to create a new Partner Portal account for the user.
- On the right Order Summary section, click Checkout.
Step 4. Review the order and check out
- On the left Plan Information section, review the plan information.
- On the left Billing Information section, review and
edit the billing information as needed.Note:
- The billing information will be displayed on an invoice, which will be generated and sent to the selected billing contact's email address after you complete payment.
- By default, your information is automatically filled in. You
can change to another billing contact, either by selecting
an existing one from the drop-down list, or by clicking
Add New to add a contact. The
billing contacts are synchronized with the ones that you
have set on Billing Receiver.

- On the right Checkout section, choose either of the following ways to check out.
Result
After you complete payment, the followings are achieved:
- The service and connections purchased for the specified user take effect immediately.
- The billing contact will receive an email, containing the order summary and
an invoice. He or she can click on the attached link to view or download the invoice.Note:
- The attached link is valid in 24 hours and can be used ONCE only.
- You can also view the invoice on Yeastar Partner Portal: Orders and Billing > Orders >
 .
.