Integrate Yeastar P-Series Software Edition and Microsoft Teams
After the preparation, log in to the configuration portal by your Microsoft 365 admin account to integrate Yeastar P-Series Software Edition and Microsoft Teams.
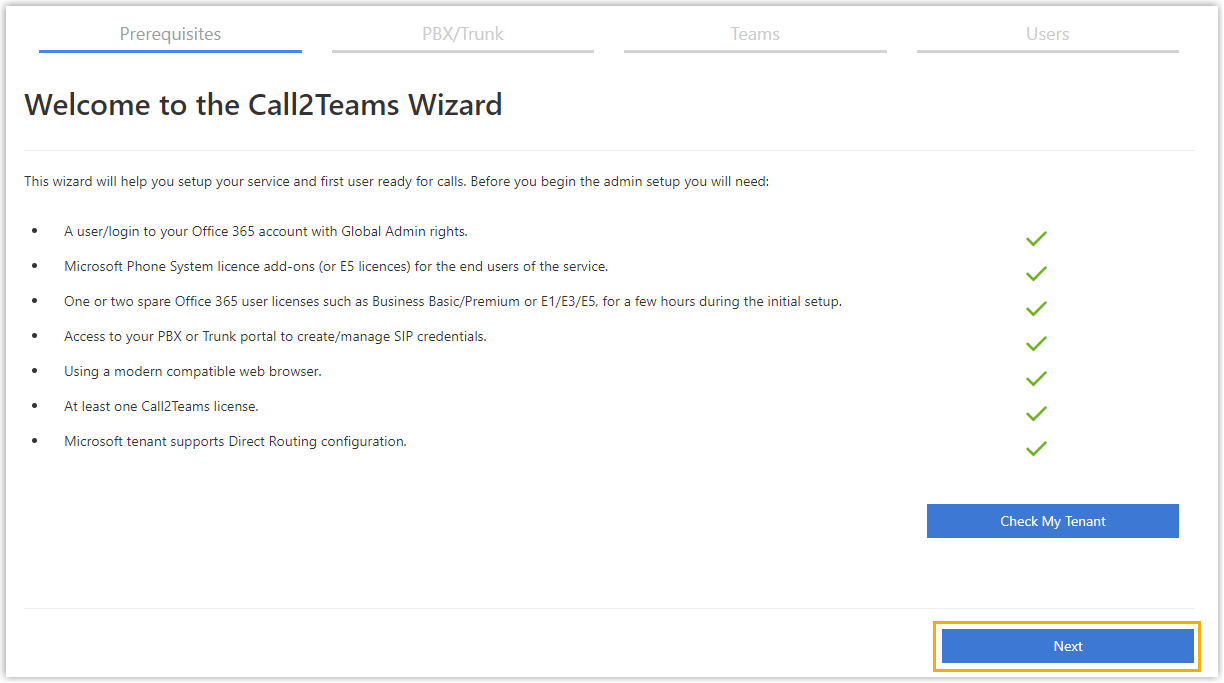
Step1. Check your tenant
Check if your Microsoft 365 tenant is ready for the integration.
- On the top navigation bar, click Getting Started tab.
- On the Prerequisites page, click Check My
Tenant.
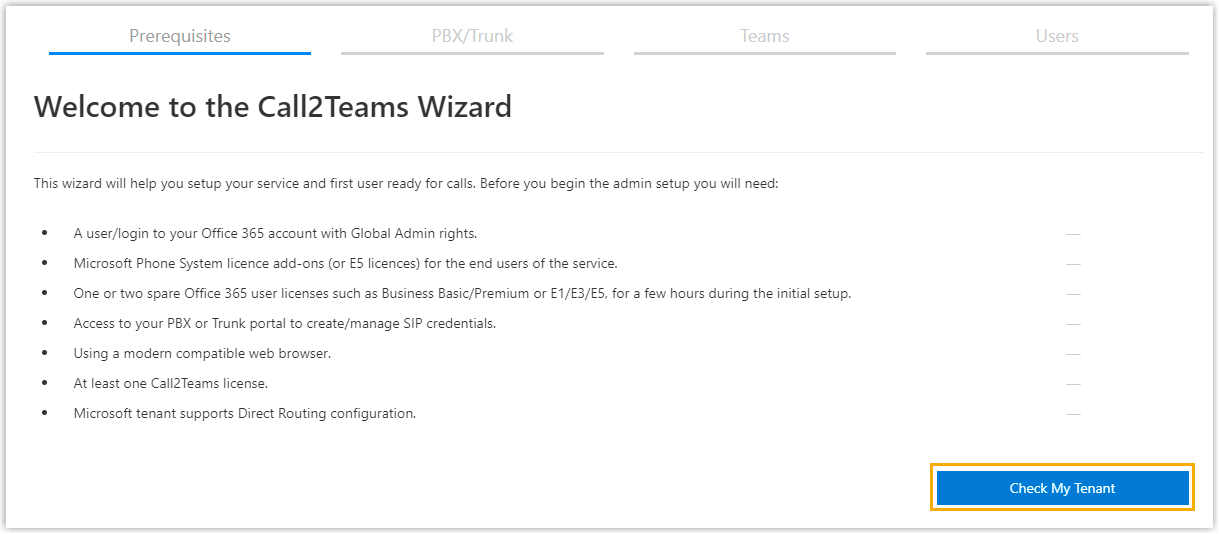
- In the pop-up window, select your Microsoft 365 admin account.
The configuration portal starts checking your Microsoft 365 tenant.
- If your tenant is ready, click Next to set up PBX
service.
Step2. Set up PBX service
- On the PBX/Trunk page, click PBX tab.
- Set up PBX service.
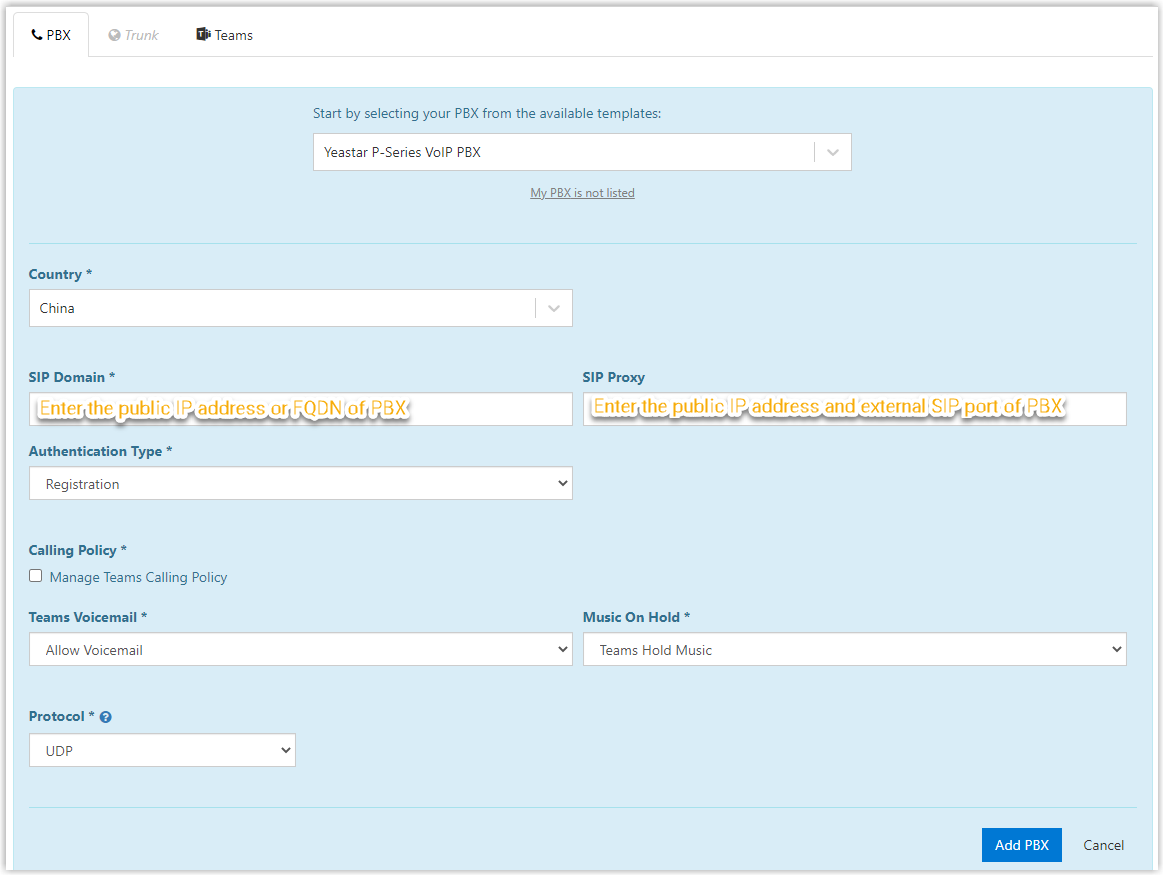
- Start by selecting your PBX from the available templates: Select Yeastar P-Series VoIP PBX.
- Country: Select your country.
- SIP Domain: Enter the remote access
information of your PBX.
- If you integrate PBX with
Microsoft Teams via FQDN, enter the Yeastar FQDN.
In this example, enter
yeastardocs.ras.yeastar.com. - If you integrate PBX with
Microsoft Teams via NAT-mapped public IP address /
custom domain, enter the public IP address / custom
domain according to the NAT type you have configured on
the PBX.
In this example, enter public IP address or custom domain as shown in the table below:
NAT Type Public IP Address / Custom Domain Public IP Address 110.80.36.162 External host example.domain.comYeastar Domain docs.cloudpbx.yeastar.com
- If you integrate PBX with
Microsoft Teams via FQDN, enter the Yeastar FQDN.
- SIP Proxy:
Enter the public IP address / custom domain and external SIP
port of your PBX according to the NAT type you have
configured.Note: This option is required only when you integrate PBX with Microsoft Teams via public IP address / custom domain.
- Authentication Type: Select Registration.
- Protocol:
Select the protocol of external SIP port.Note:
- If you integrate PBX with Microsoft Teams via public IP address / custom domain, the protocol is the one for the SIP port that you have forwarded. In this scenario, select UDP.
- If you integrate PBX with Microsoft Teams via FQDN, the protocol is the one for remote SIP registration port. In this scenario, select UDP.
- Click Add PBX.
A green checkmark prompting "Service successfully enabled" appears. It automatically enters into Teams page to synchronize Yeastar P-Series Software Edition with Microsoft 365.
Step3. Synchronize Yeastar P-Series Software Edition with Microsoft 365
- Click Sync Now - Changes Queued to synchronize Yeastar P-Series Software Edition with Microsoft 365.
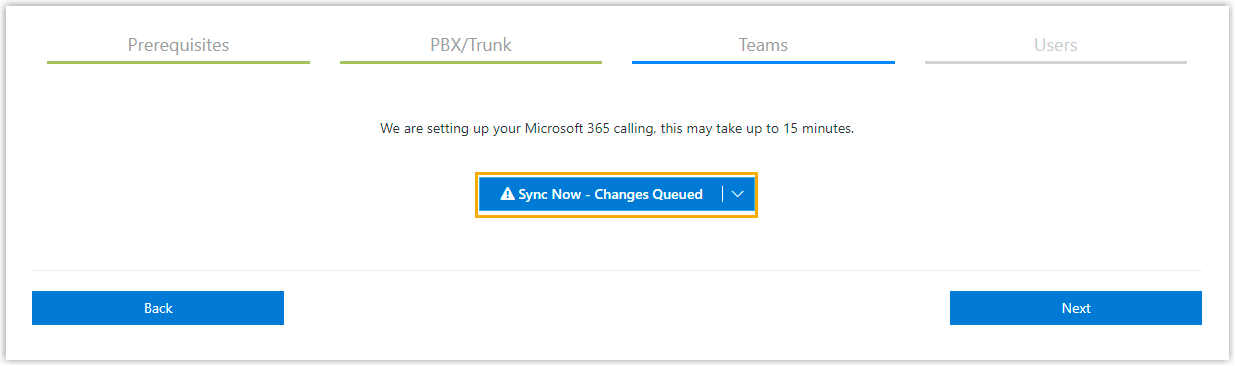
It takes several minutes to proceed with the synchronization.
- After the synchronization completes, click Next to associate Teams users with SIP extensions.
Step4. Associate a Microsoft Teams user with a SIP extension
- On the Users page, complete the followings:
- Select a User: Select a Teams user from
the drop-down list.Note: Make sure the selected user has the required licenses of both Microsoft and Yeastar for Microsoft Teams, or the user can NOT make or receive calls.
- Phone Number: Set the user's phone number.
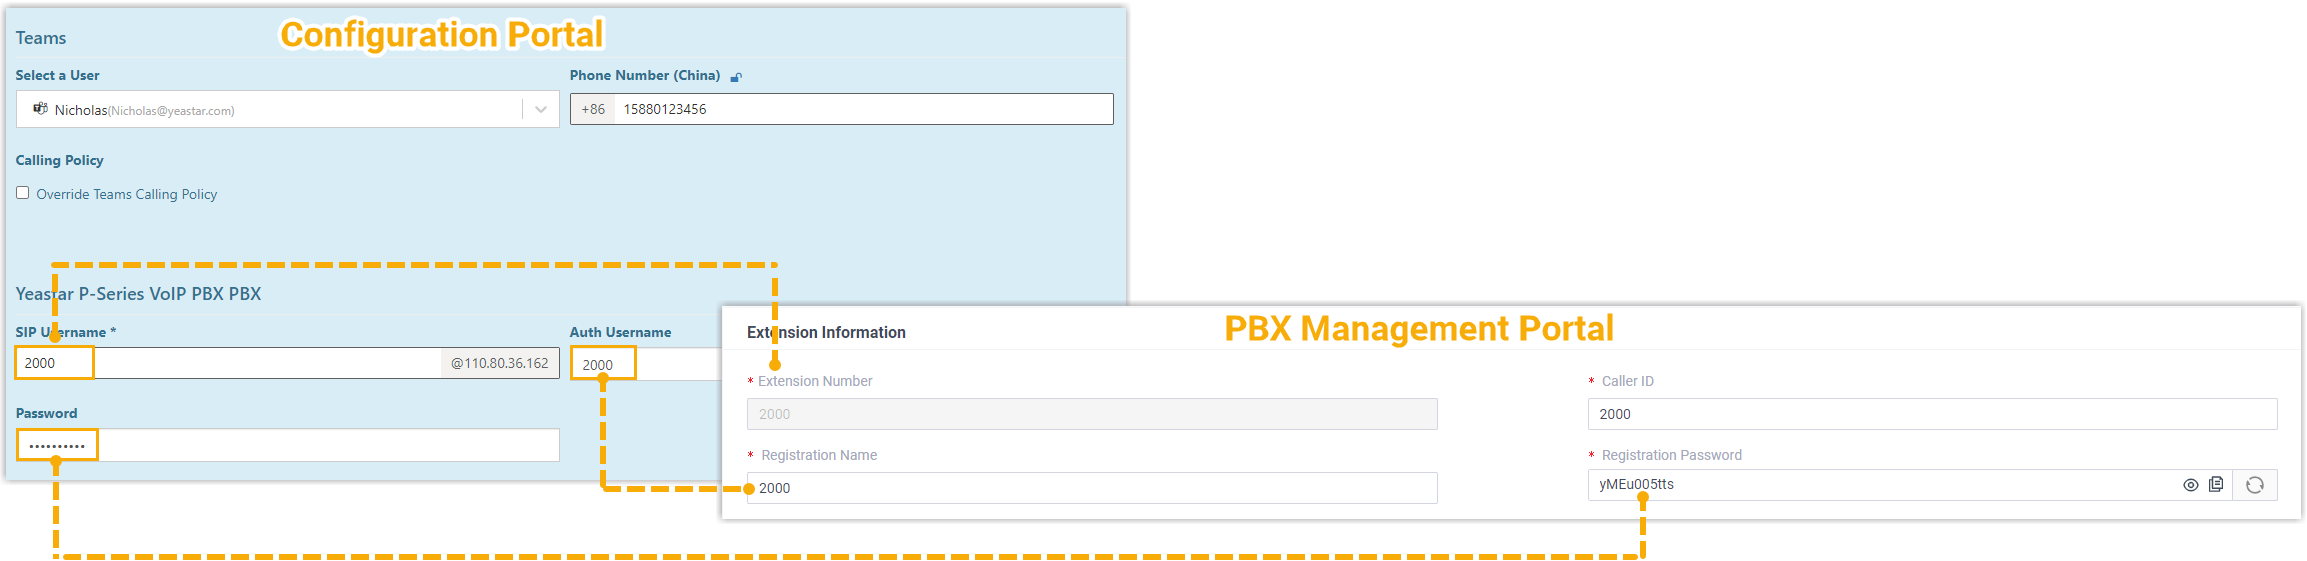
- SIP Username: Enter the extension's Extension Number.
- Auth Username: Enter the extension's Registration Name.
- Password: Enter the extension's Registration password.
- Select a User: Select a Teams user from
the drop-down list.
- Click Add User and Sync.
A green checkmark prompting "Service user successfully added" appears.
If the user is successfully associated with the PBX, the Registration status shows
 .
.
Result
After integrating Yeastar P-Series Software Edition with Microsoft Teams, Teams users can make and receive internal calls from the PBX extensions.
What to do next
- To allow Teams users to make outbound calls through PBX's trunk, you need to configure dial plans in Microsoft Teams.
- To allow Teams users to receive inbound calls through PBX's trunk, you need to make sure at least an inbound route is configured to reach the extensions that are associated with the Teams users.