Create a CRM application using HubSpot CLI
This topic describes how to create a new application using the HubSpot CLI. You can define the application's configurations in local files, which are bundled into a project and can be uploaded to your developer account for later integration.
Prerequisites
- To create an application, you need a developer account.
- You have subscribed to Enterprise Plan (EP) or Ultimate Plan (UP).
- Make sure that the PBX can be remotely accessed via domain name.For more information about the configuration, see the following topics:
Procedure
Obtain required authentication information
- Get a personal access key from HubSpot.
- Log in to your HubSpot developer account.
- At the left navigation bar, go to , and click Generate personal access
key.
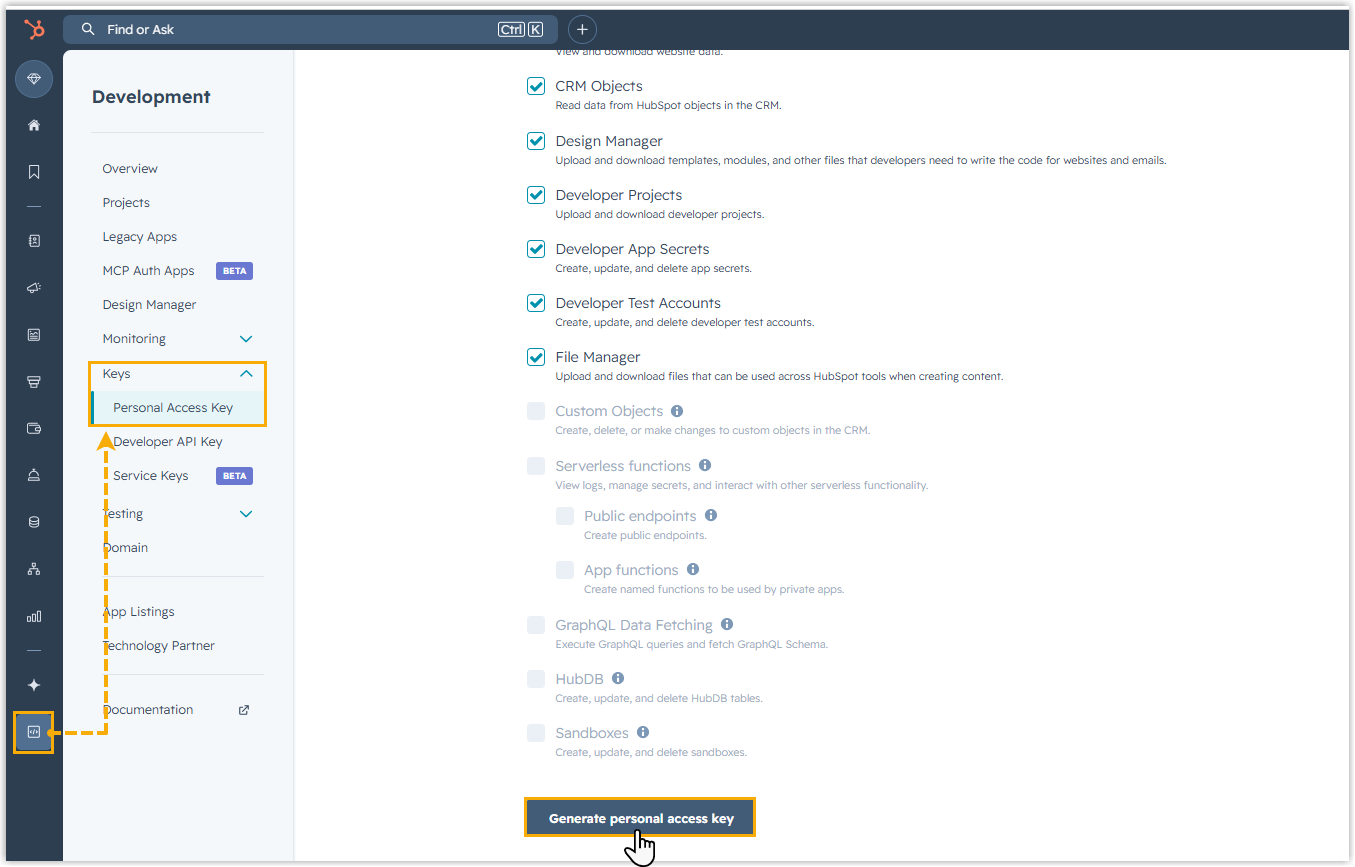
- In the Personal Access Key section, copy the
generated key and store it securely for later use.

- Get the redirect URL from Yeastar PBX.
- Log in to PBX web portal, go to .
- Click HubSpot.
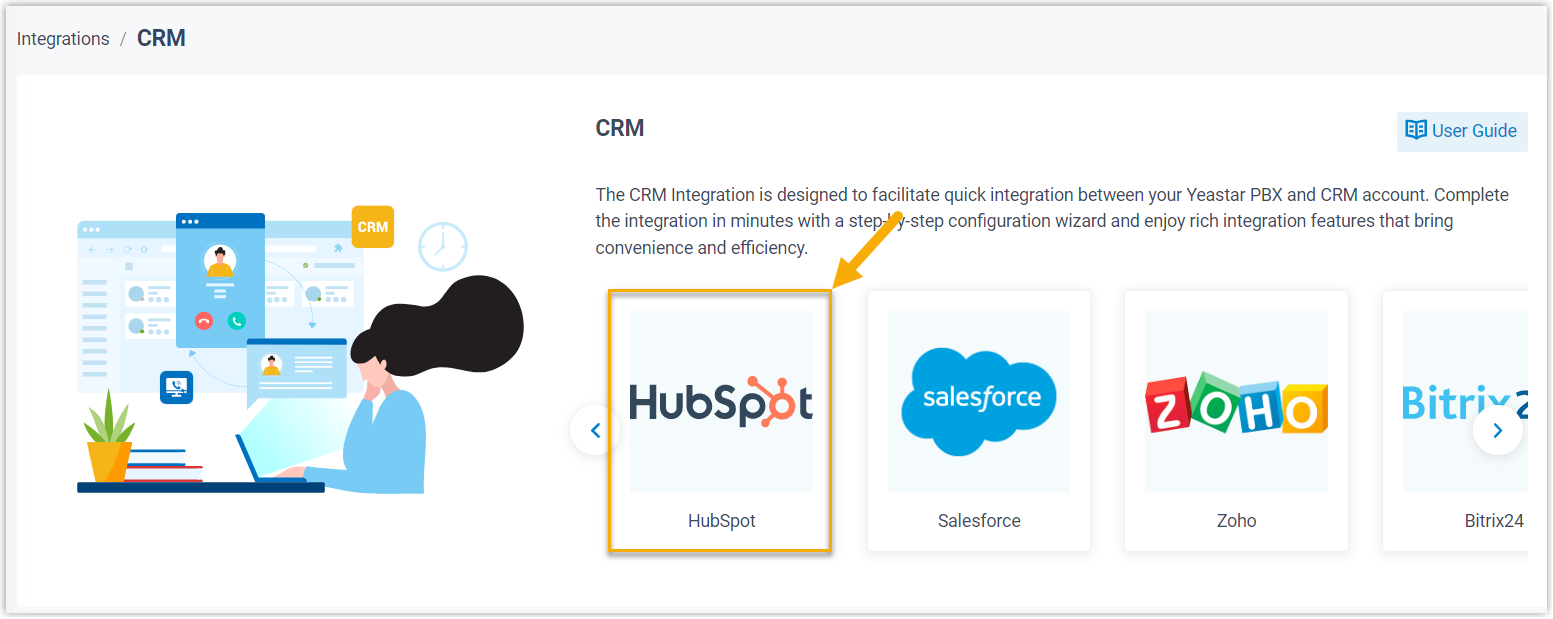
- In the Network section, select and
note down the Redirect URL for later use.

Set up the local environment
Prepare your local development environment by installing the required dependencies and authenticating with HubSpot.
- Install Node.js (Version 20 or later).
- Go to nodejs.org, download the latest TLS version, and install it on your computer.
- Launch a terminal, and run the following command to verify the installation:
node --version
# Example output: v24.15.0
- Install the HubSpot CLI.
- In the terminal, run the following command to install the HubSpot
CLI
globally:
npm install -g @hubspot/cliWhen you see output similar to
changed 704 packages in
                                        2m
, the installation has succeeded.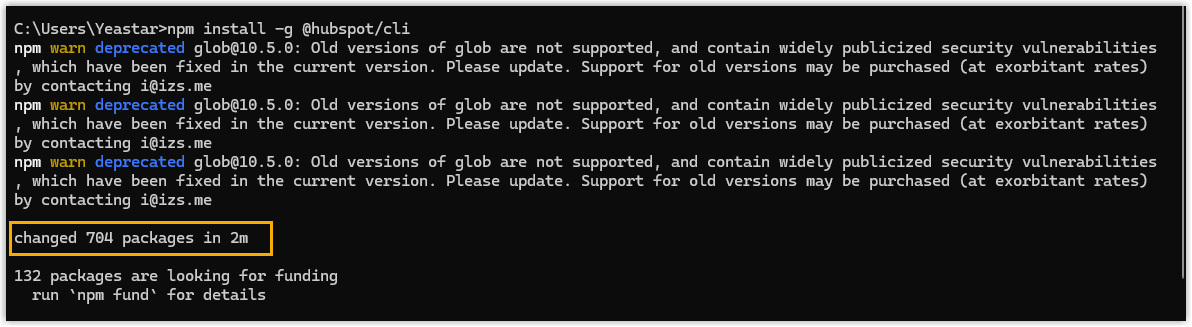
- Optional: Run the following command to verify the installation:
hs --version
# Example output: 8.9.0
- In the terminal, run the following command to install the HubSpot
CLI
globally:
- Connect your local environment to HubSpot.
- In the terminal, run the following
command:
The terminal will prompt you to enter a Personal Access Key.hs account auth - Directly press any key to proceed, and paste the personal access key when prompted.
- Set a unique name to reference this account in the CLI.
When the terminal displays success confirmation messages, it indicates that the account is connected and set as default.

- In the terminal, run the following
command:
Create and configure an application
Define your application's settings locally, including permissions and redirect URIs, then upload the project to HubSpot.
- Create a local folder for your project and open it in the terminal.
# Example # Create a folder named "HubSpot CLI" on the D drive mkdir D:\HubSpot CLI # Navigate into the folder cd D:\HubSpot CLI - Create a project.
- Run the following
command.
hs project create - Set up the project.
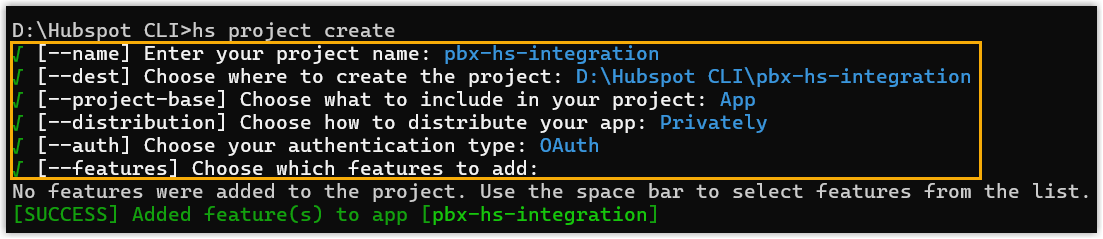
- name: Enter a name for your project.
- dest: Specify where to create the
project.Note: To use the current folder, press Enter directly.
- project-base: Select App.
- distribution: Select Privately.
- auth: Select OAuth.
- features: Press Enter directly to skip and proceed.
Wait until a
SUCCESSmessage is displayed. Anapp-hsmeta.jsonfile will be added to the project.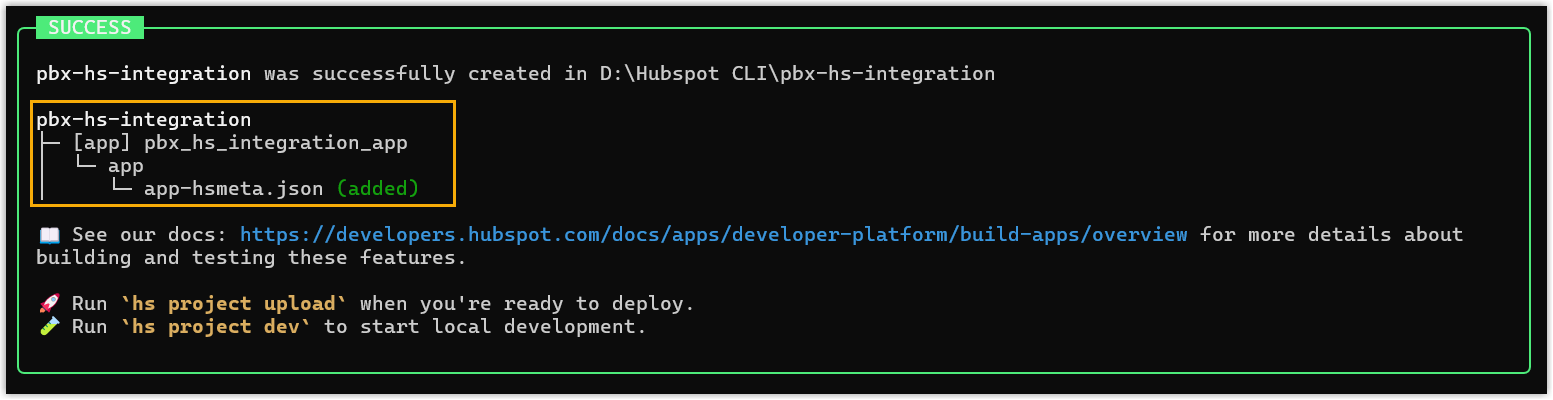
- Run the following
command.
- Modify application configuration.
- In the file explorer, navigate to the following path to locate the
app-hsmeta.jsonfile.<your_project_folder>/src/app/app-hsmeta.json - Open the file using a code editor.
- Modify the following settings:

redirectUrls: Paste the Redirect URL obtained from the PBX.requiredScopes: Paste the following scopes:"requiredScopes": [ "oauth", "crm.objects.contacts.read", "settings.users.write", "crm.objects.contacts.write", "crm.objects.companies.write", "settings.users.read", "crm.schemas.contacts.read", "crm.objects.companies.read", "crm.objects.deals.read", "crm.objects.deals.write", "crm.schemas.companies.read", "crm.schemas.companies.write", "crm.schemas.contacts.write", "crm.schemas.deals.read", "crm.schemas.deals.write", "crm.objects.owners.read", "settings.users.teams.write", "settings.users.teams.read" ]
- Save the changes.
- In the file explorer, navigate to the following path to locate the
- Upload the project to HubSpot.
- In the terminal, navigate to the root directly of the project.
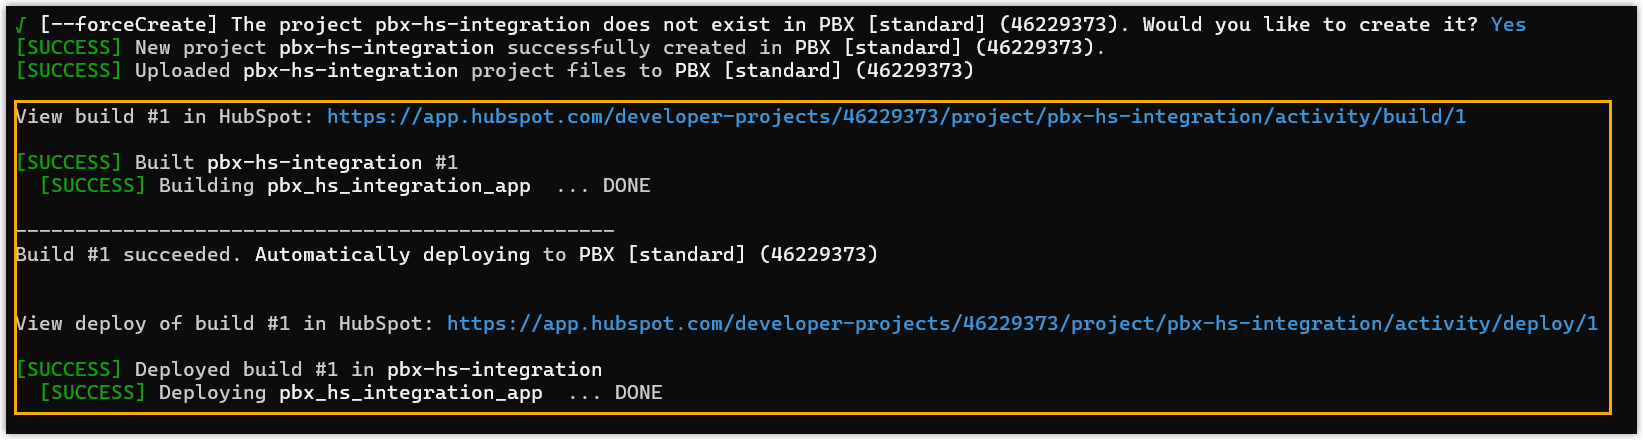
# Example cd D:\HubSpot CLI\pbx-hs-integration - Run the following command:The terminal will prompt that the project does not exist and ask for confirmation to create it.
hs project upload - Enter
Yto confirm.HubSpot will create the application and trigger a new build.
- In the terminal, navigate to the root directly of the project.
Result
hs project upload to update on HubSpot.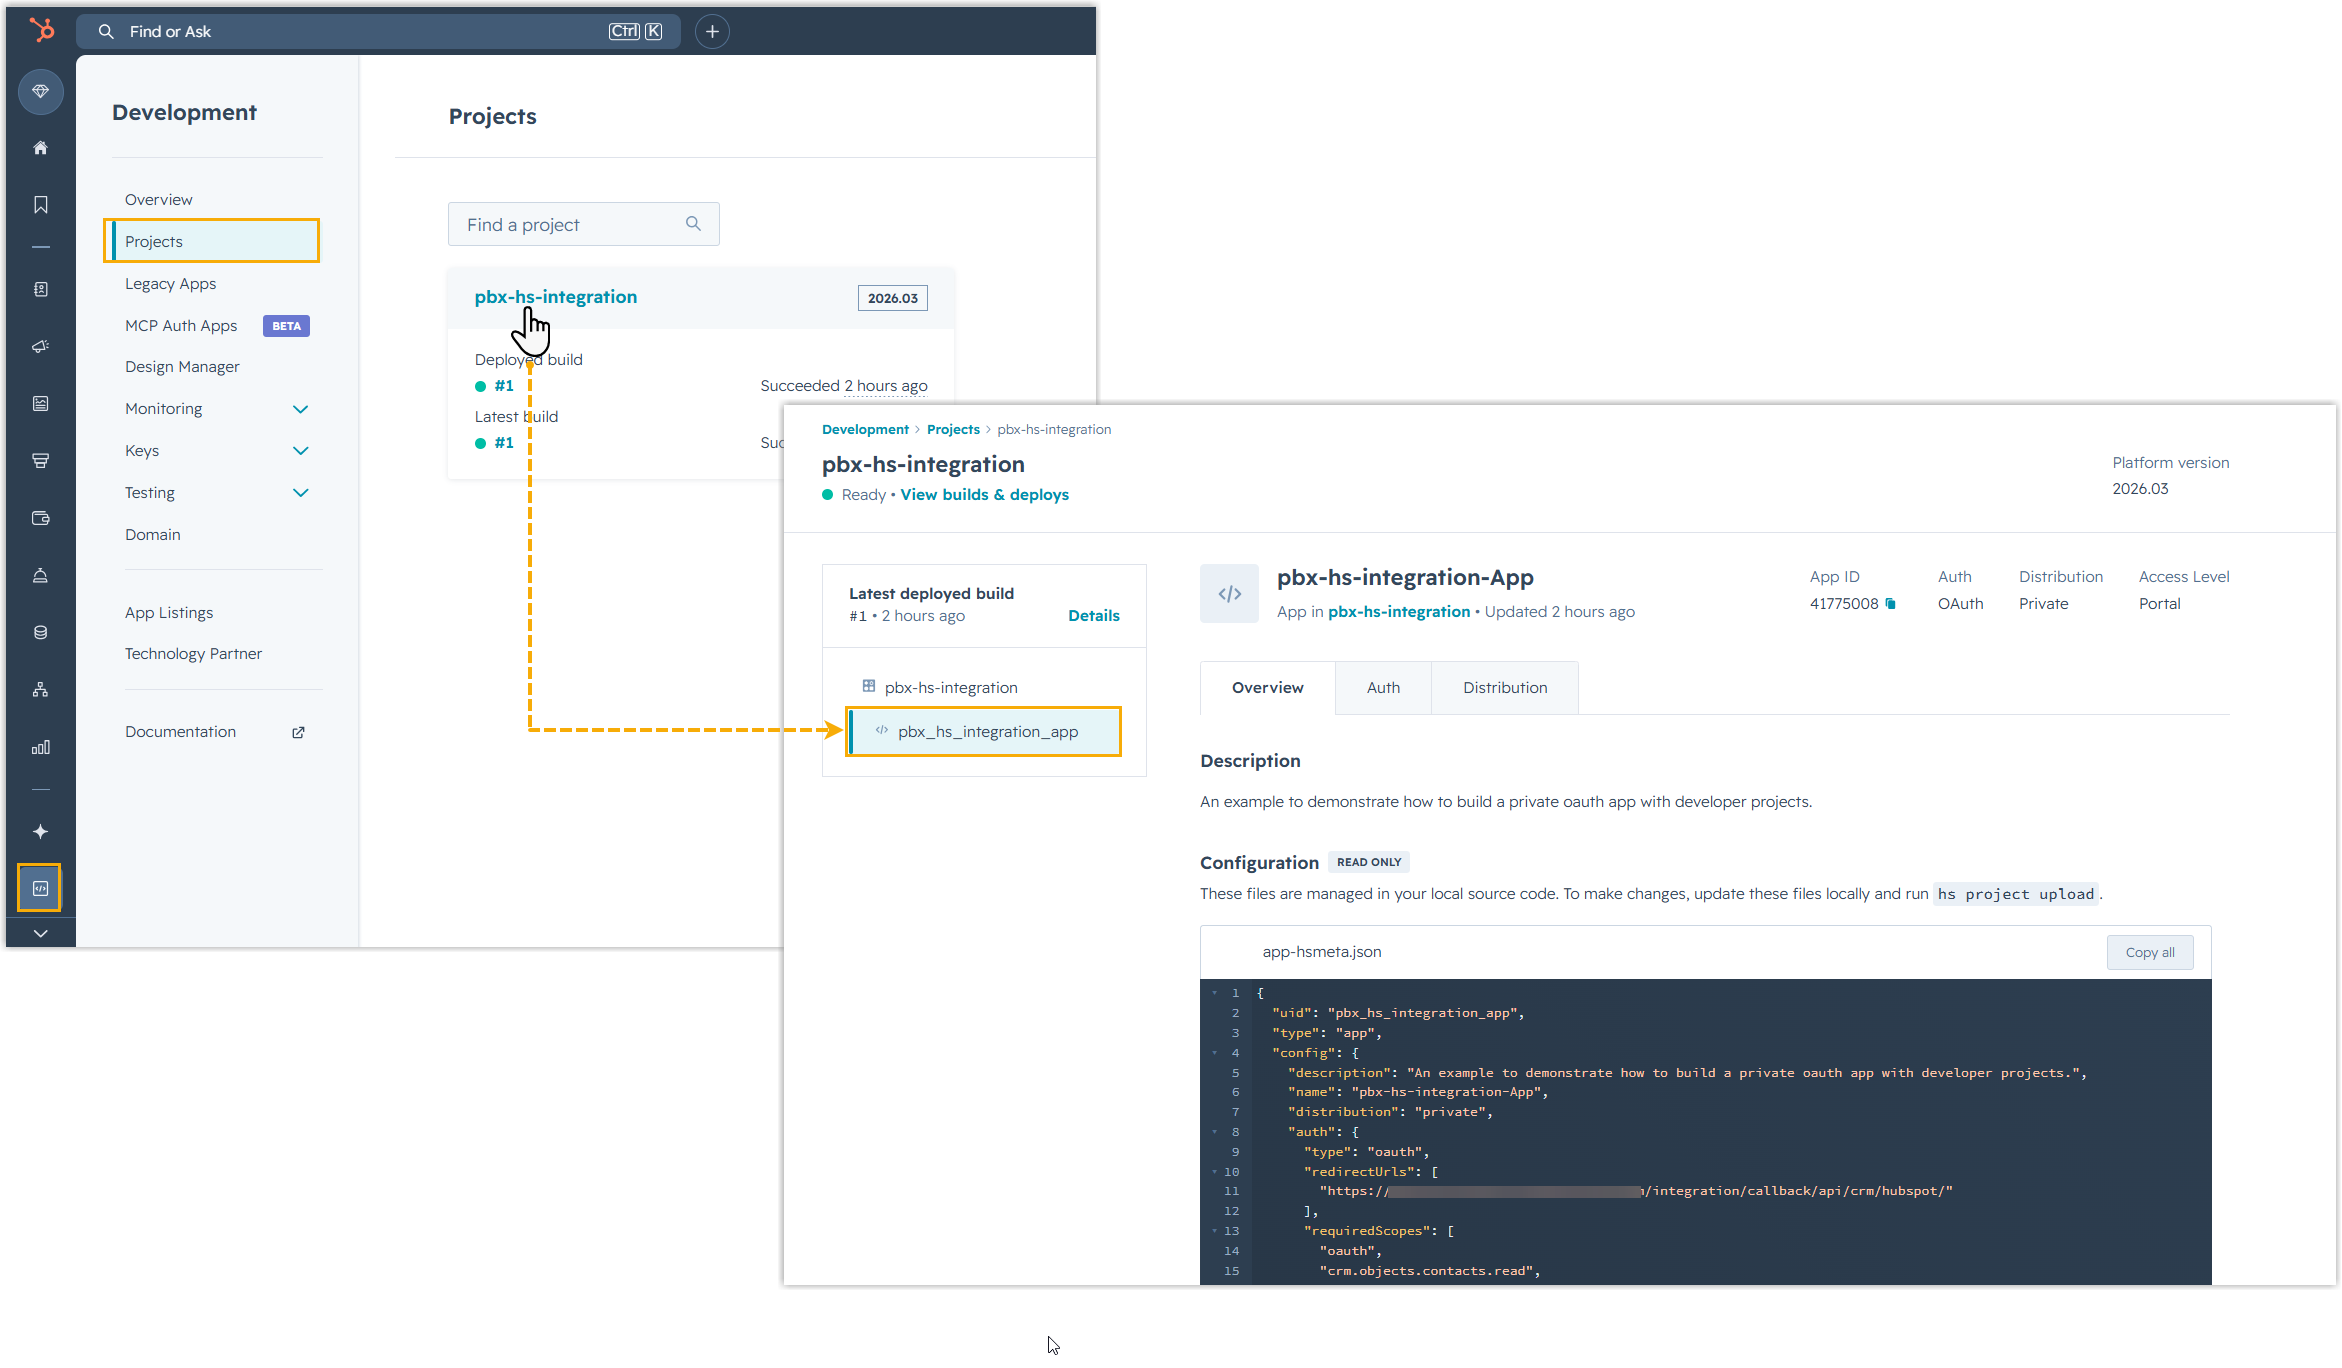
What to do next
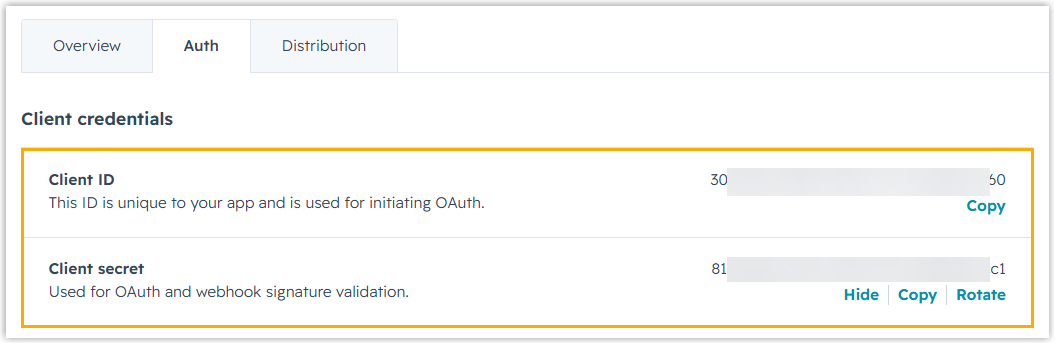
- Go to the Auth tab of the application to obtain the
Client ID and Client secret
for integration.
- Integrate Yeastar P-Series PBX System with HubSpot CRM.