Set up Outlook as an Email Server
This topic describes how to set up Microsoft Outlook as the email server for Yeastar Central Management using modern authentication. This allows the system to send emails through your Microsoft account.
Requirements
- The Microsoft account should meet the following requirements:
- Assigned with the Global Administrator role.
- Assigned with Microsoft 365 Business Standard license.
- The modern authentication is enabled in Microsoft 365 admin center.
Procedure
Step 1. Obtain redirect URI from Yeastar Central Management
Obtain the redirect URI from Yeastar Central Management, which will be required when registering a Microsoft Entra application later.
- Log in to Yeastar Central Management, go to .
- Turn on the switch of Custom SMTP.
- In the Select Email Server Provider drop-down list, select Microsoft.
- In the Redirect URI field, click
 to
copy the URI.
Step 2. Register an application on Microsoft Entra ID
Register an application on Microsoft Entra ID with the redirected URI provided by Yeastar Central Management, then obtain the application authentication information for SMTP settings on Yeastar Central Management.
- Log in to Microsoft Azure Portal with the Microsoft Administrator account.
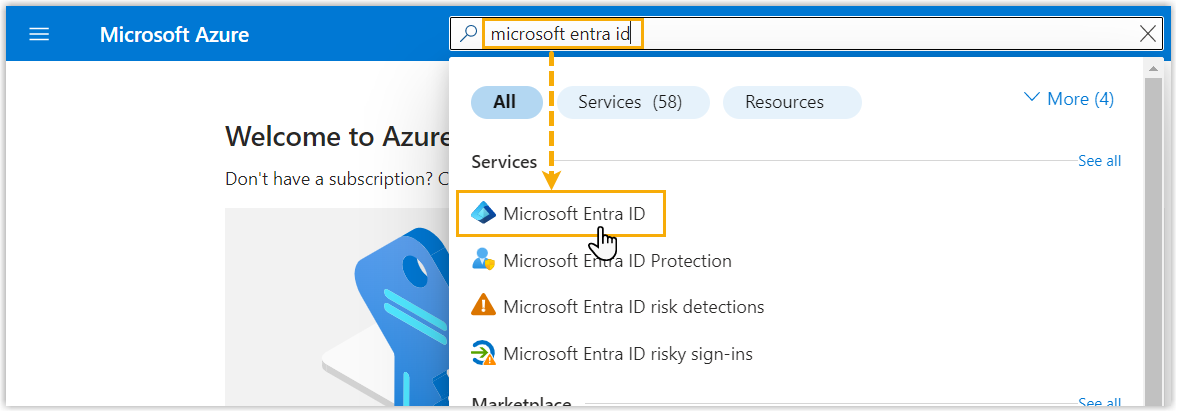
- In the search bar, search and select Microsoft Entra ID
service to enter your organization's directory.
-
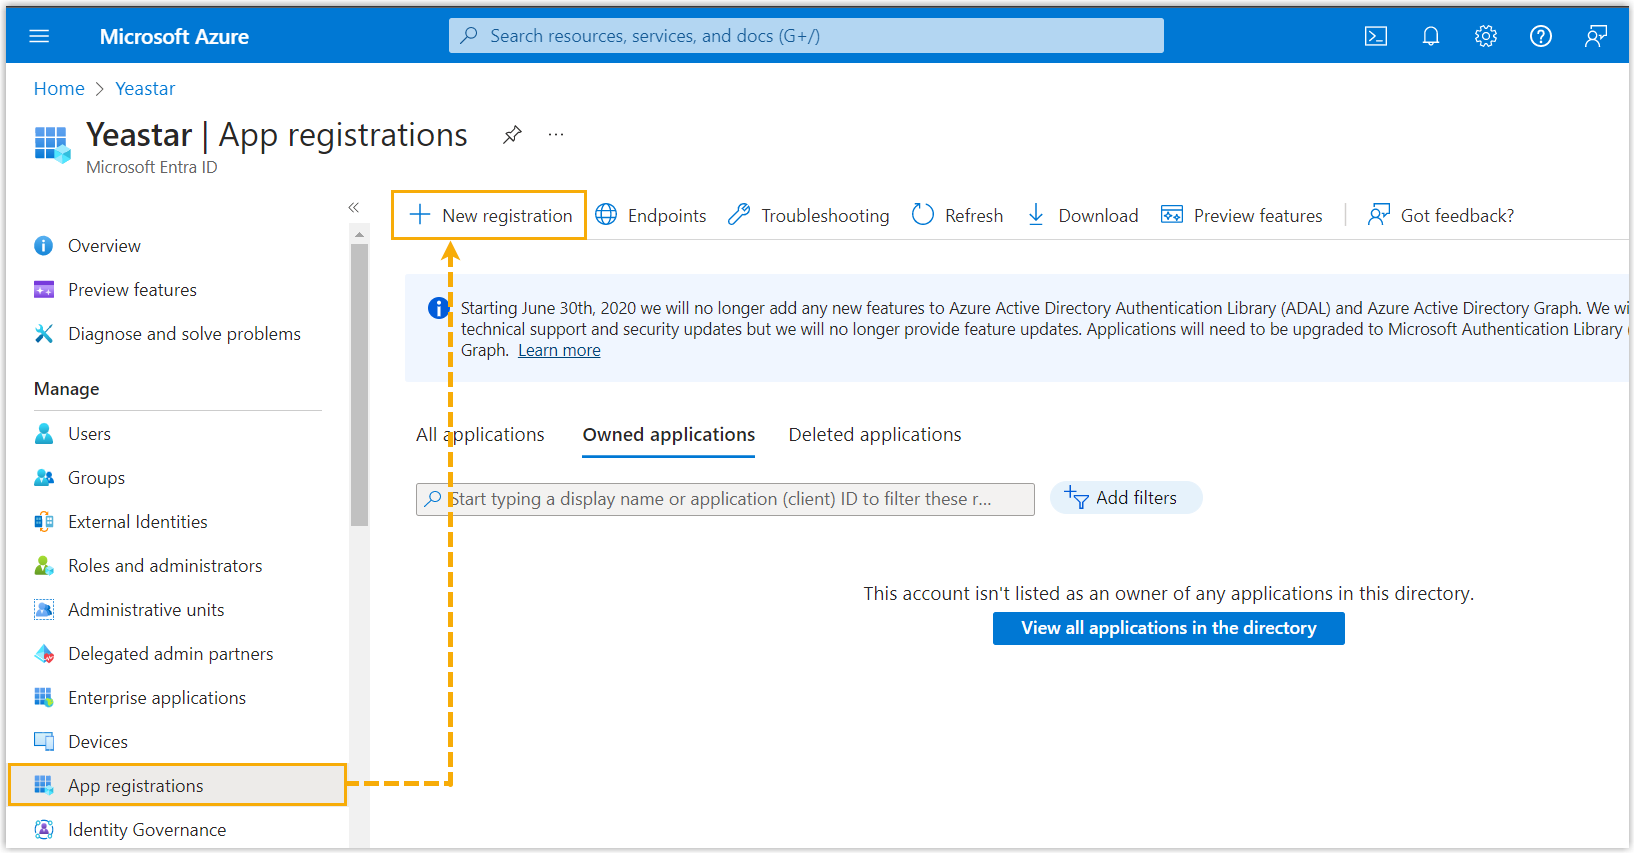
On the left navigation bar of organization's directory, go to App registrations, then click New registration.
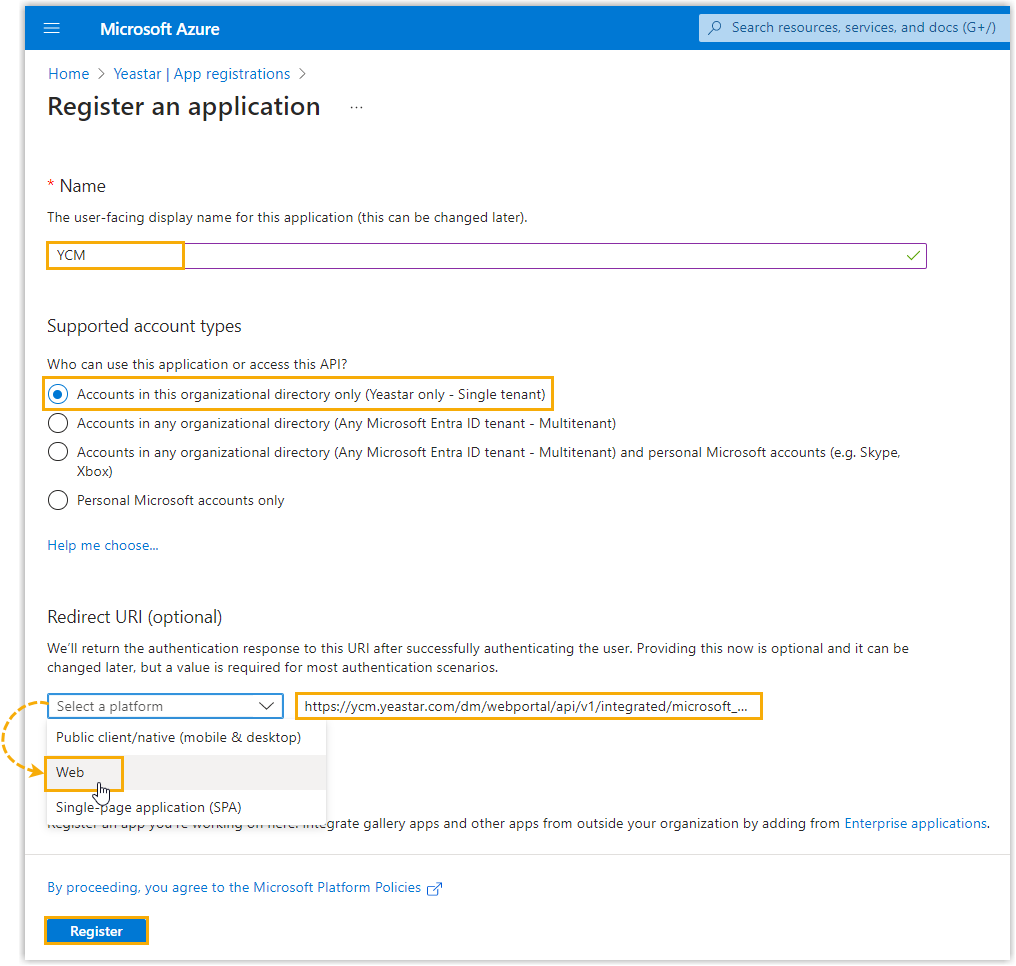
- In the Register an application page, configure the
registration information for the application, and click
Register.
 An application is registered successfully, you are redirected to the Overview page of the application.
- Name: Specify a name to help you identify the application.
- Supported account types: Select Accounts in this organizational directory only.
- Redirect URI: In the Select a platform drop-down list, select Web, then paste the Redirect URI obtained from Yeastar Central Management.
-
Note down the Application (client) ID and Directory (tenant) ID of the application, as you will need to fill them into Yeastar Central Management later.

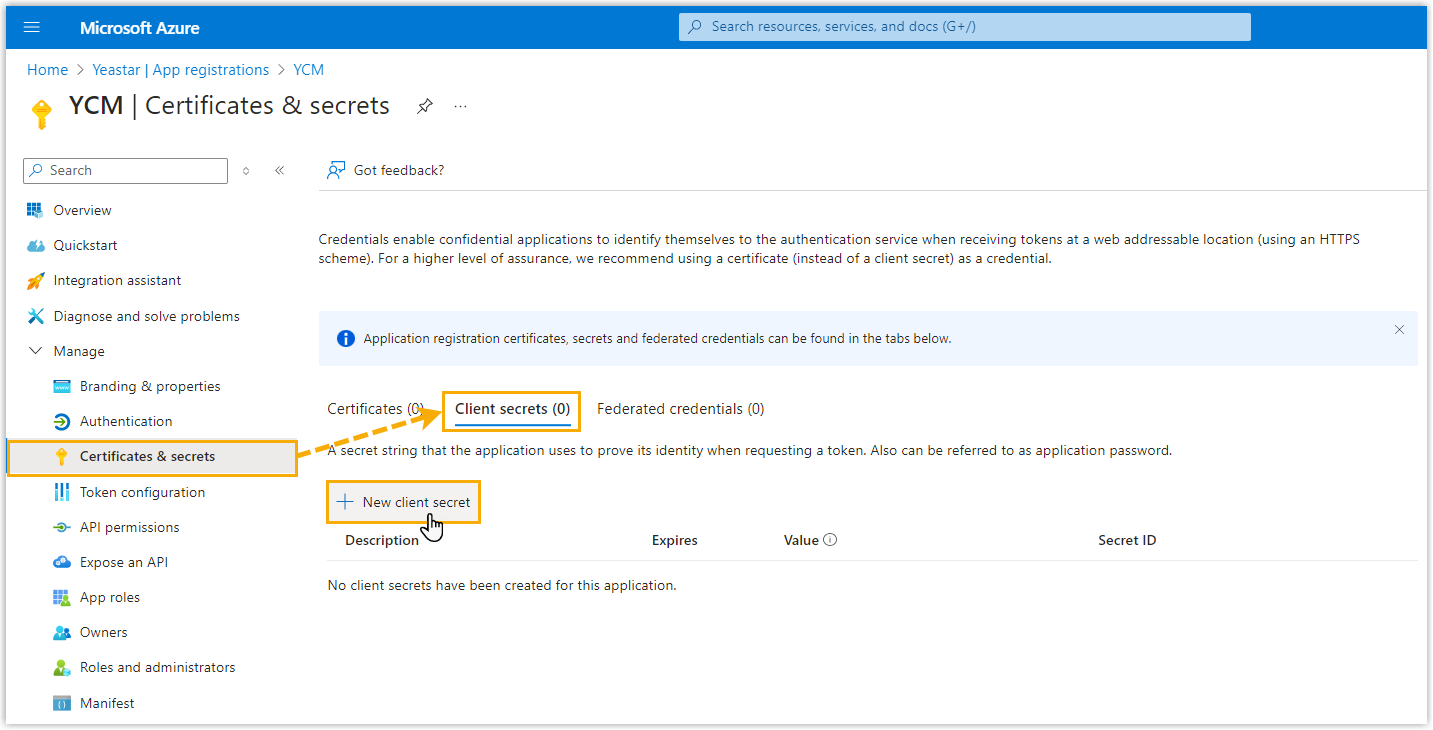
- Generate a client secret for the application.
- On the left navigation bar of the application, go to , then click New client
secret.
- In the Add a client secret page, add a
description and set an expiration date for the client secret, then
click Add.

A client secret is created and displayed in the Client secrets list.
- Note down the client secret's
Value, as you will need to fill it into
the Yeastar Central Management later.Important: Record the client secret's value before leaving the page, as the key is only shown once. Otherwise, you will have to create a new client secret.

- On the left navigation bar of the application, go to , then click New client
secret.
Step 3. Configure SMTP settings on Yeastar Central Management
Configure the SMTP settings of Yeastar Central Management with the authentication information obtained from the Microsoft Entra application, so as to set Microsoft Outlook as the system's email server.
- Log in to Yeastar Central Management, go to .
- Turn on the switch of Custom SMTP.
- Enter the following authentication information.

- Tenant ID: Paste the Tenant ID of the Microsoft Entra application.
- Application (Client) ID: Paste the Application ID of the Microsoft Entra application.
- Client Secret: Paste the client secret of the Microsoft Entra application.
- Click Save.
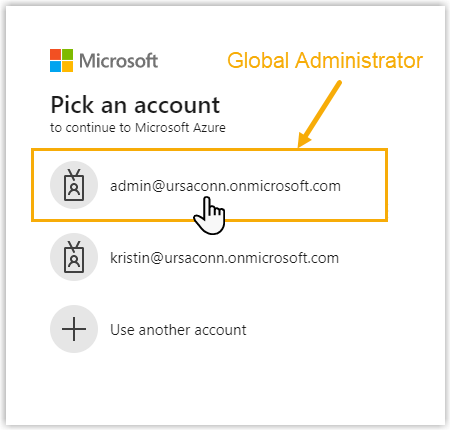
You are redirect to the Microsoft Sign-in page.
- Sign in with the Microsoft account that has Global
Administrator privilege.
-
In the pop-up window, do as follows to confirm:
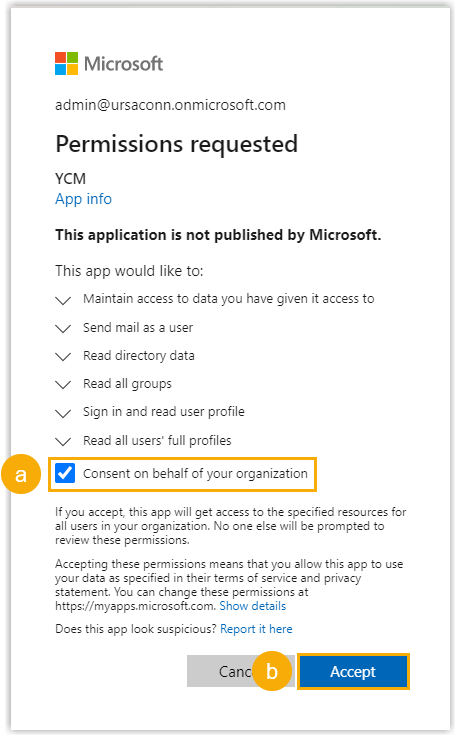
- Select the checkbox of Consent on behalf of your organization.
- Click Accept.

- Test
if the mail server can successfully send emails.
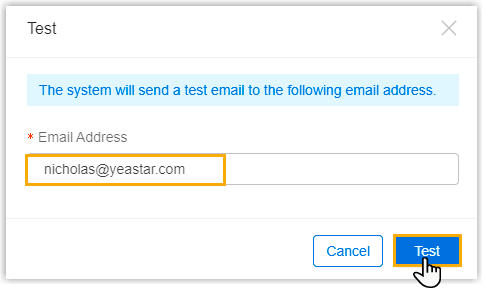
- Click Test.
- In the pop-up window, enter a recipient's email address in the
Email Address field, then click
Test.
Result
admin<admin@ursaconn.onmicrosoft.com>.- If you want to change the sender name of the emails sent by the SMTP
server, change the display name of the Microsoft account, as shown
below:

- If the test email is failed to be sent, the page prompts you an error message.