Set up SNMP on Yeastar Central Management
This topic describes how to enable SNMP and configure the related settings on Yeastar Central Management.
Requirements
- Yeastar Central Management:Version 87.14.0.31 or later.
- P-Series Cloud PBX: Version 84.15.0.22 or later.
Procedure
- Log in to Yeastar Central Management, go to .
- In the Basic section, set up SNMP related settings
that are required when adding the monitored device to the NMS.
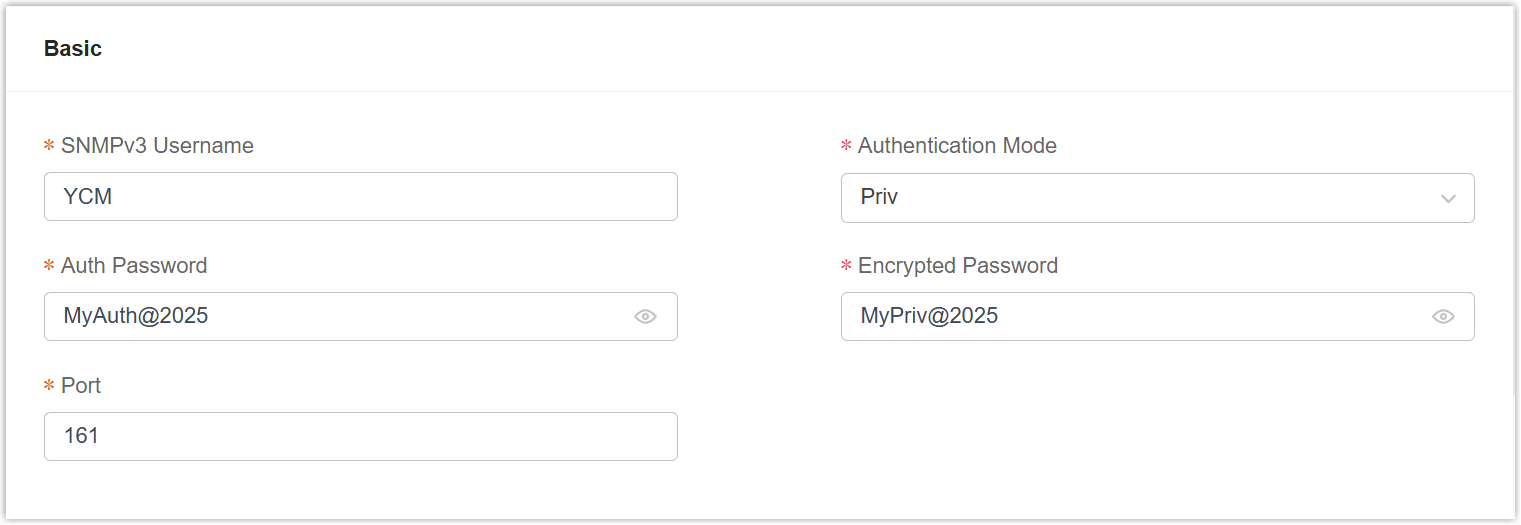
Setting Description SNMPv3 Username Enter a user name for authentication on NMS. Authentication Mode Select an authentication method. - NoAuth: Provide access control based on the user name.
- Auth: Provide access control based on the HMAC-MD5 authentication.
- Priv: Provide access control based on the HMAC-MD5 authentication and data encryption by CBC-DES.
Auth Password Enter a desired password. Note: This option is available only when Authentication Mode is set to Auth or Priv.Encrypted Password Enter a desired password. Note: This option is available only when Authentication Mode is set to Priv.Port Enter the default SNMP port 161, or specify a desired port number. - Optional: To enable Yeastar Central Management to send SNMP trap
messages to NMS when a pre-defined event occurs and triggers the trap, set
up SNMP trap.

- Turn on SNMP Trap.
- Enter the IP address of the SNMP trap receiver (i.e, NMS) and
the port to which the SNMP traps will be sent.Note: If you use FRP tunneling to forward traps, set the SNMP Trap Receiver IP address to
127.0.0.1(localhost). This ensures that trap notifications are correctly forwarded to the NMS through the FRP tunnel.
- Click Save.
Result
The SNMP feature on Yeastar Central Management is set up.
What to do next
Connect Yeastar Central Management with Network Management System (NMS) via
SNMP.
Note: We provide an example on how to connect Yeastar
Central Management with MIB Browser.
For more information, see Monitor Yeastar Central Management through SNMP using MIB Browser.