Create a Message Queue
Yeastar P-Series Software Edition allows to route messages from different message channels to message queues, so as to share workload between agents and reduce customer service response time. This topic describes how to create a message queue.
Limitation
| Maximum Number of Extensions (N) | N ≤500 | N > 500 |
|---|---|---|
| Message Queue | 32 | 128 |
| Agents per Message Queue | 60 | 120 |
Requirements
- Firmware: 83.20.0.21 or later
Procedure
- Log in to PBX web portal, go to .
- Click Add.
- In the Name field, specify a name to help you identify it.
- In the Chat Assignment Mode section, configure the
assignment mode according to your needs.
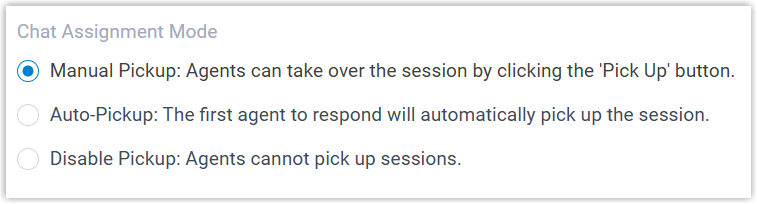
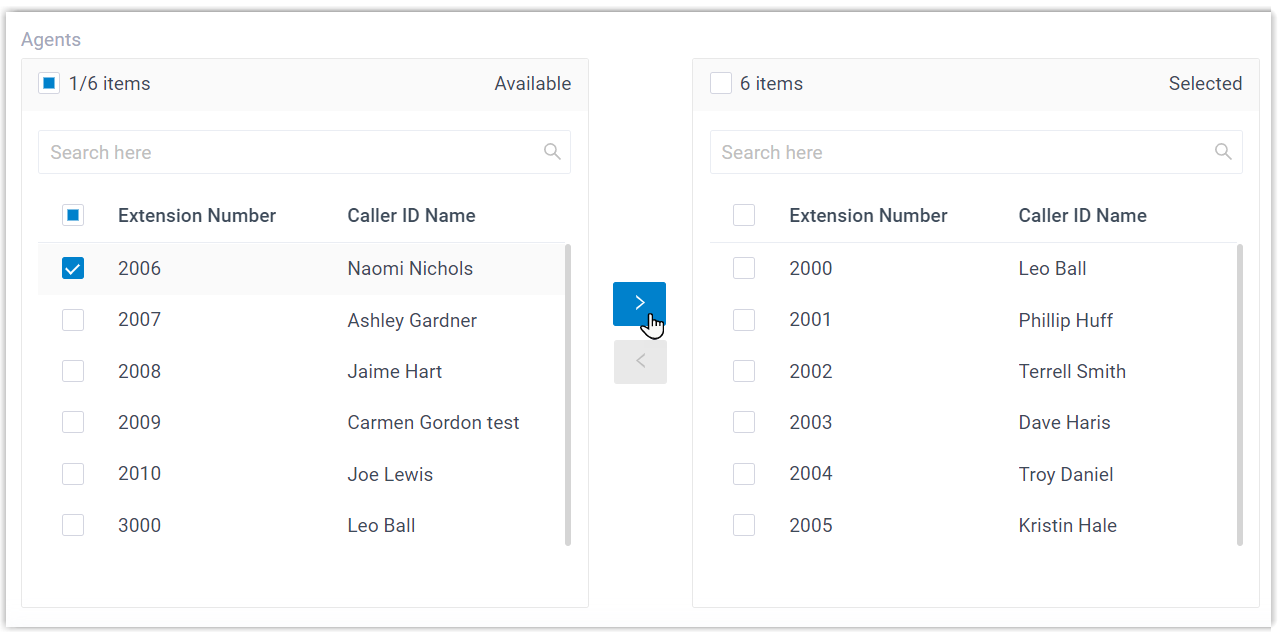
Mode Description Manual Pickup All agents can view and reply to messages until an agent manually click the Pick Up button to pick up the session. Auto-Pickup All agents can view the messages, and the first agent to reply automatically picks up the session. Tip: If you select this mode, make sure to inform all agents in the queue in advance to avoid incorrect operations.Disable Pickup All agents can view and reply to messages, and sessions cannot be picked up. - In the Agents section, select the desired extension
users from the Available box to the
Selected box.
- Click Save.
Result
All the selected extension users are assigned as agents of the message queue.
What to do next
Set the message queue as the inbound message destination of a channel number (Path: Messaging > Message Channel > ![]() > Messaging Settings).
> Messaging Settings).
