Manage Customer Queries from External Messaging Channels on Web Client / Desktop Client
This topic describes how to manage the messaging sessions of customer queries on Linkus Web Client and Desktop Client.
Requirements
- PBX Server
- Contact system administrator to make sure that PBX server meets the
following requirements:
- PBX Version: 83.20.0.128 or later.
- Messaging: At least one messaging channel is set up on PBX.
- Linkus Desktop Client
- Make sure that the version of your Linkus Desktop Client meets the following
requirement:
- Windows Desktop: 1.2.14 or later
- macOS Desktop: 1.2.14 or later
Pick up a messaging session
- If the mode set to Manual Pickup, you need to manually pick up the session.
- If the mode is set to Auto-Pickup, the session will be automatically assigned to you if you are the first agent to reply. You can also manually pick up the session in this mode if needed.

- On Linkus Web Client or Desktop Client, click Chat, then click the External Chat tab.
- To manually pick up a session, click Pick Up at the
top of the messaging session.
There is a prompt indicating that you have picked up the session from the message queue; Only you can see the session and respond to messages in the session.
Transfer a messaging session
![]()
- On Linkus Web Client or Desktop Client, click Chat, then click the External Chat tab.
- At the top-right corner of the messaging session, click
 .
. - In the pop-up window, select the desired destination and click
OK.
The messaging session is removed from your external chat list, and transferred to the colleague / message queue / Third-party message analytics platform with whole chat history.
Initiate a voice call from a messaging session
You can initiate a voice call right from the messaging session to resolve a customer's issue if necessary.
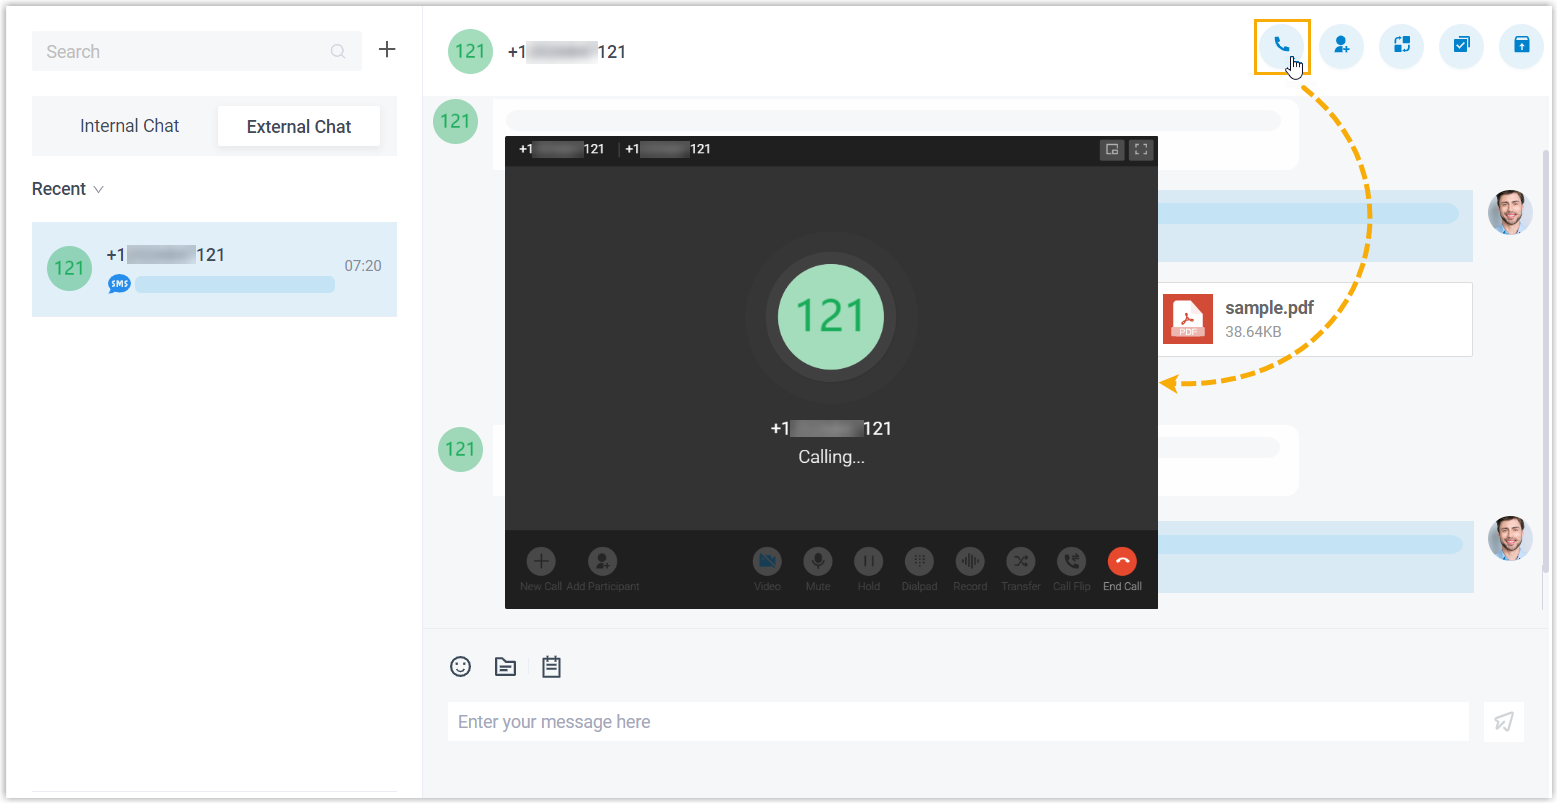
- On Linkus Web Client or Desktop Client, click Chat, then click the External Chat tab.
- At the top-right corner of the messaging session, click
 .
.Linkus Web Client quickly dials out the customer's number, and the call is sent through the PBX.
Add a customer to Contacts
You can add a customer to Contacts right from the messaging session.
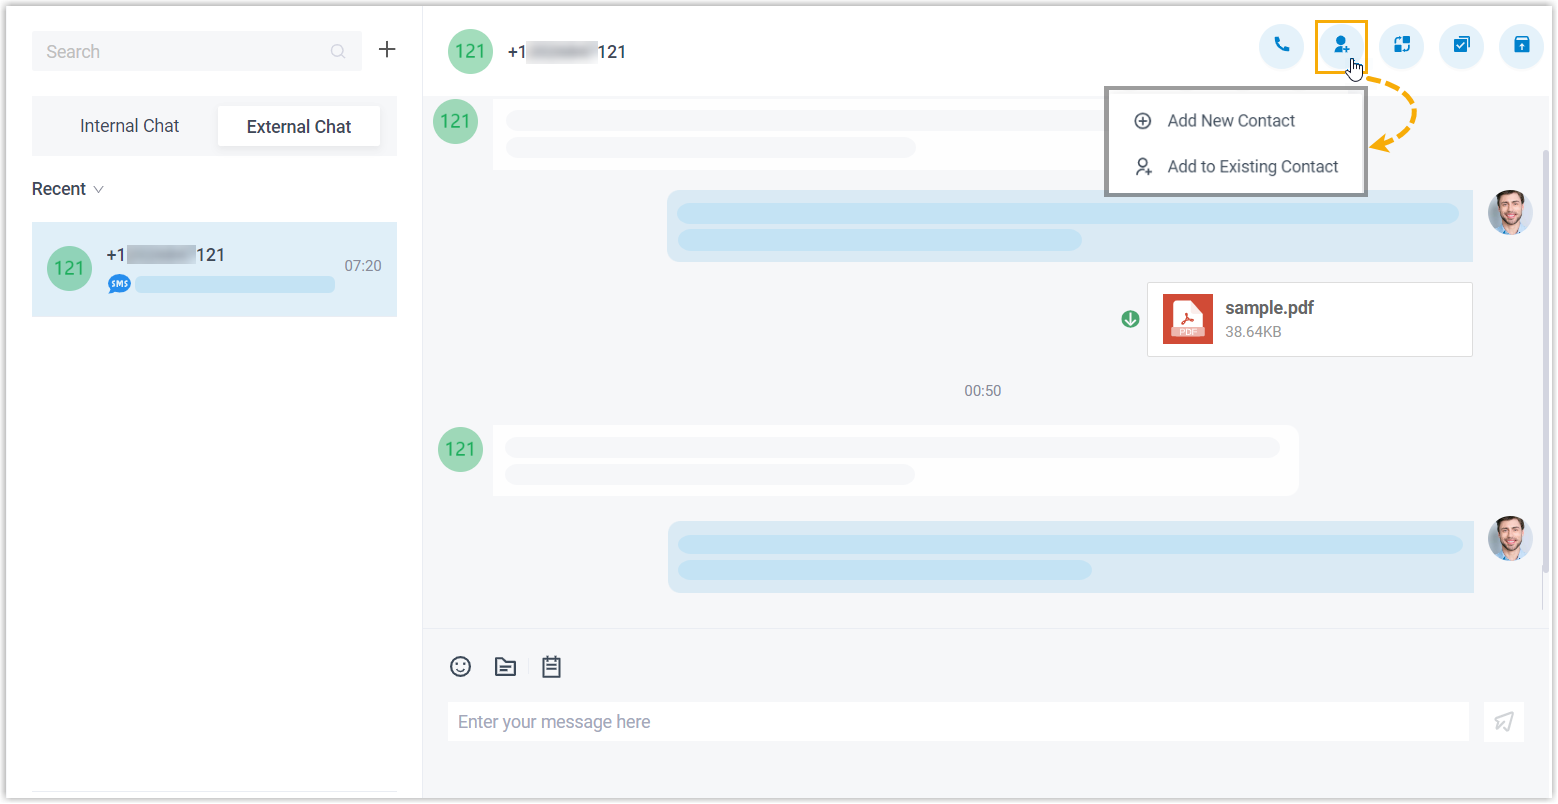
- On Linkus Web Client or Desktop Client, click Chat, then click the External Chat tab.
- At the top-right corner of the messaging session, click
 .
. - Add the customer to Contacts according to your needs.
- To add the customer as a new contact, click Add New Contact and enter the customer's information.
- To add the customer to an existing contact, click Add to Existing Contact and edit the contact's information as needed.
View messaging session details
You can check the detailed information of a messaging session, including the message source channel, channel number, etc.
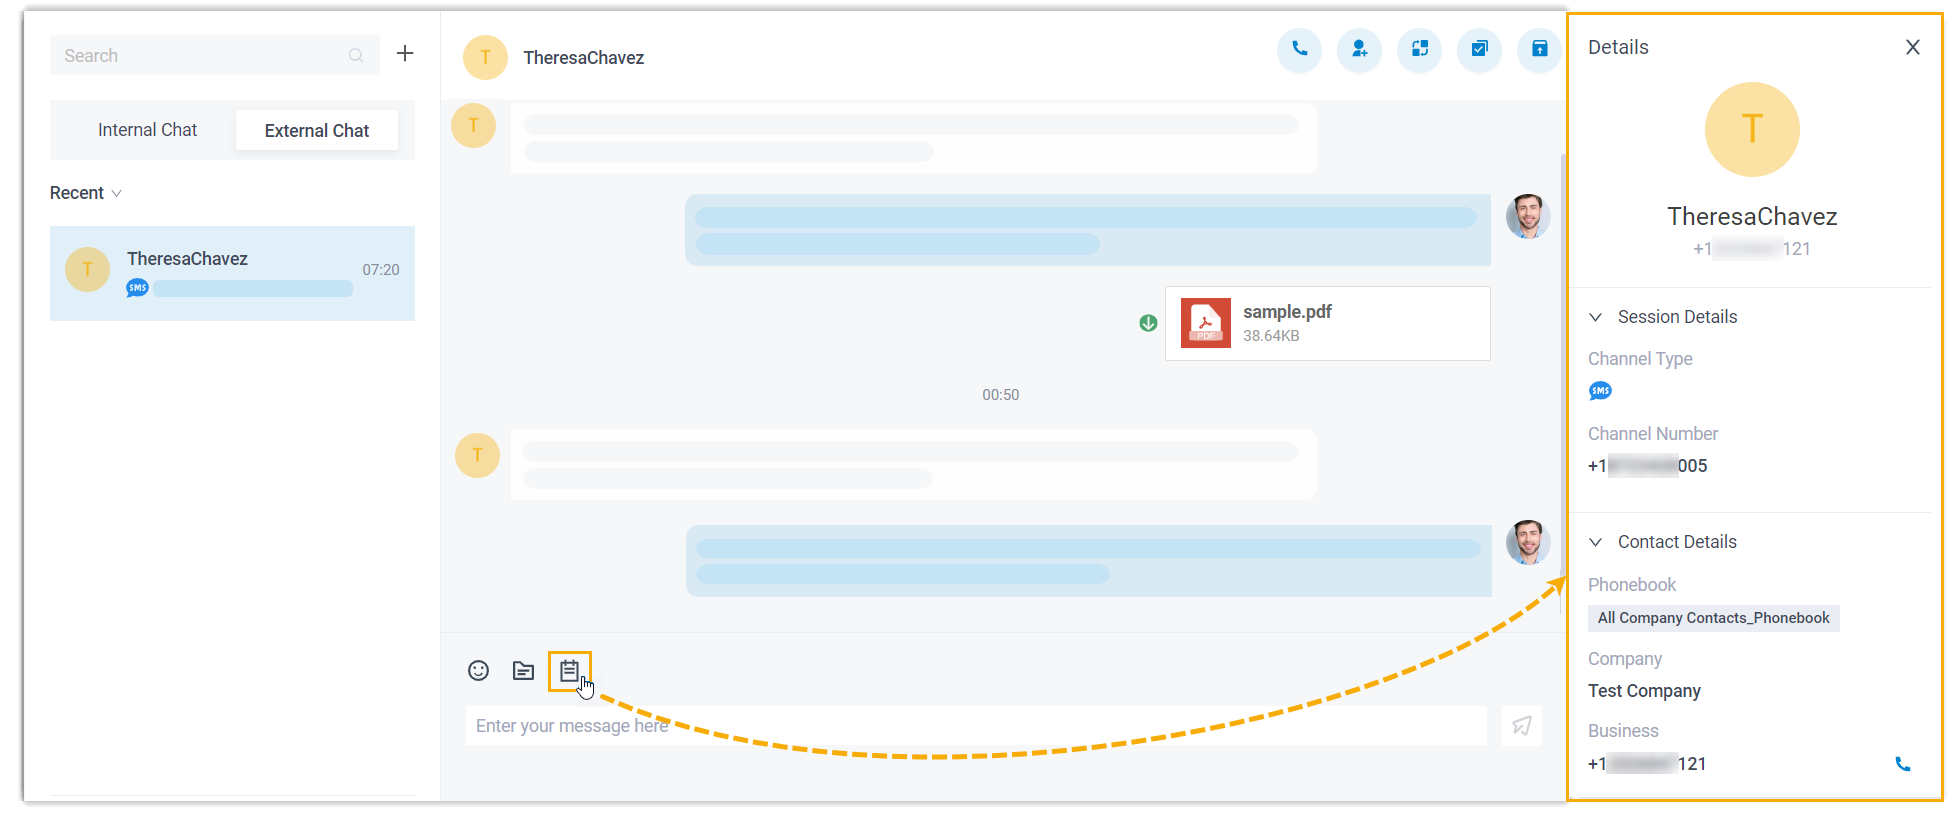
- On Linkus Web Client or Desktop Client, click Chat, then click the External Chat tab.
- At the bottom of the messaging session, click
 .
.The details of the messaging session is display at the right panel.
Archive a messaging session
You can archive a messaging session if there is no response from the customer or you wish to refer back to the session later.

- On Linkus Web Client or Desktop Client, click Chat, then click the External Chat tab.
- At the top-right corner of the messaging session, click
 .The messaging session is moved from Recent list to the Archived list.Note: To start the conversation again, you can directly send a message in the archived messaging session, or click
 at the top-right corner to unarchive the messaging session. The
unarchived session will be moved back to the
Recent list.
at the top-right corner to unarchive the messaging session. The
unarchived session will be moved back to the
Recent list.
End a messaging session
When you’re done helping a customer, you can end the messaging session.
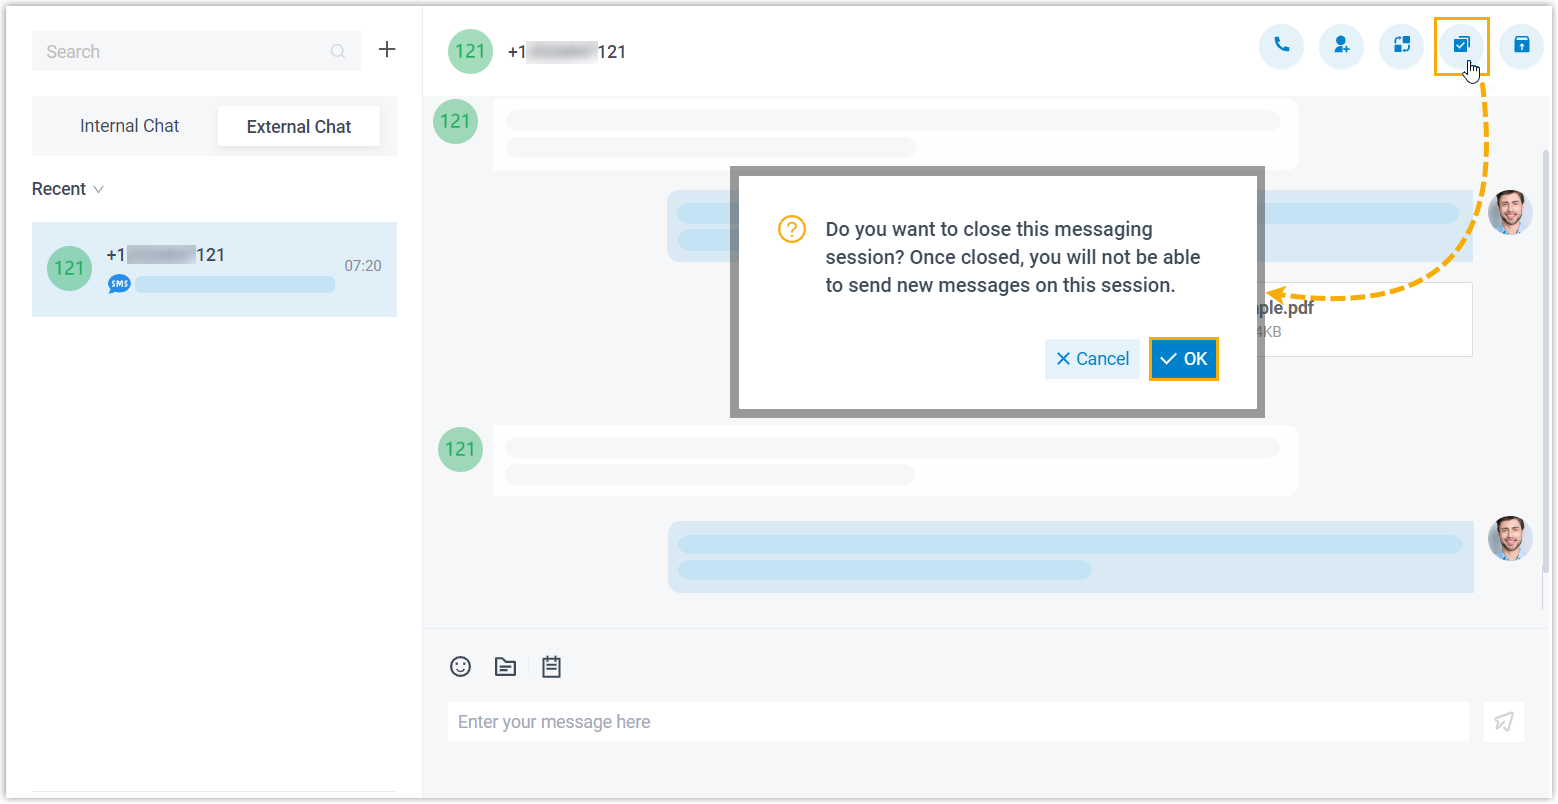
- On Linkus Web Client or Desktop Client, click Chat, then click the External Chat tab.
- At the top-right corner of a messaging session, click
 .
. - In the pop-up window, click OK.
The messaging session is closed and moved to the Archived list; You can NOT send messages on this session any more. Next time the customer sends messages, a new messaging session will be created.
Remove a messaging session
To remove a messaging session, do as follows:
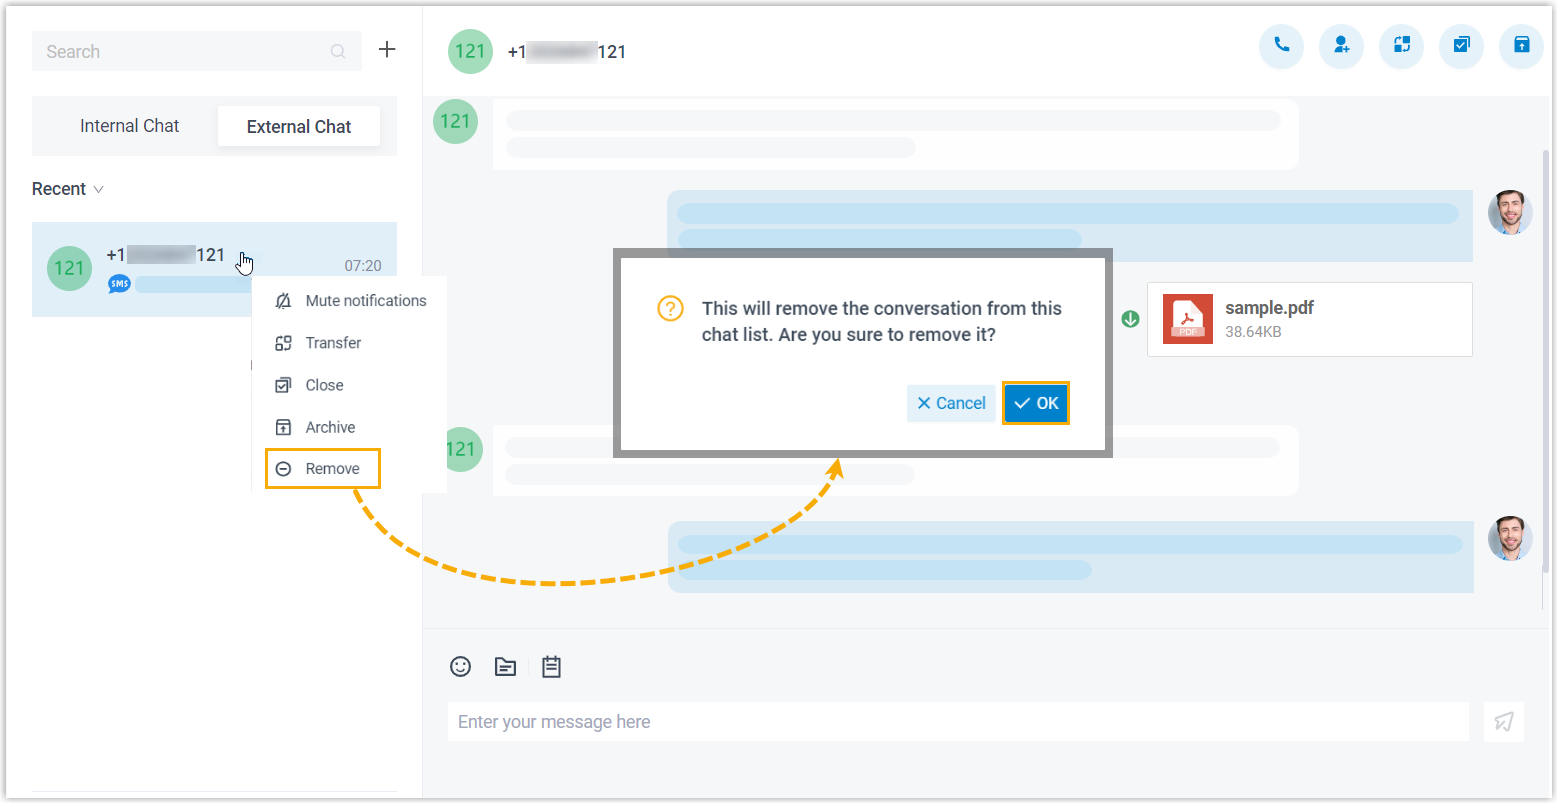
- On Linkus Web Client or Desktop Client, click Chat, then click the External Chat tab.
- In the external chat list, right click the messaging session that you want to remove.
- Click Remove.
- In the pop-up window, click OK.
The messaging session is removed from all your Linkus clients.
Handle campaign sessions
If system administrator sets message campaigns to send messages in bulk, and assigns the campaign sessions to your extension or the message queue you belong to, you can view and manage these campaign sessions.
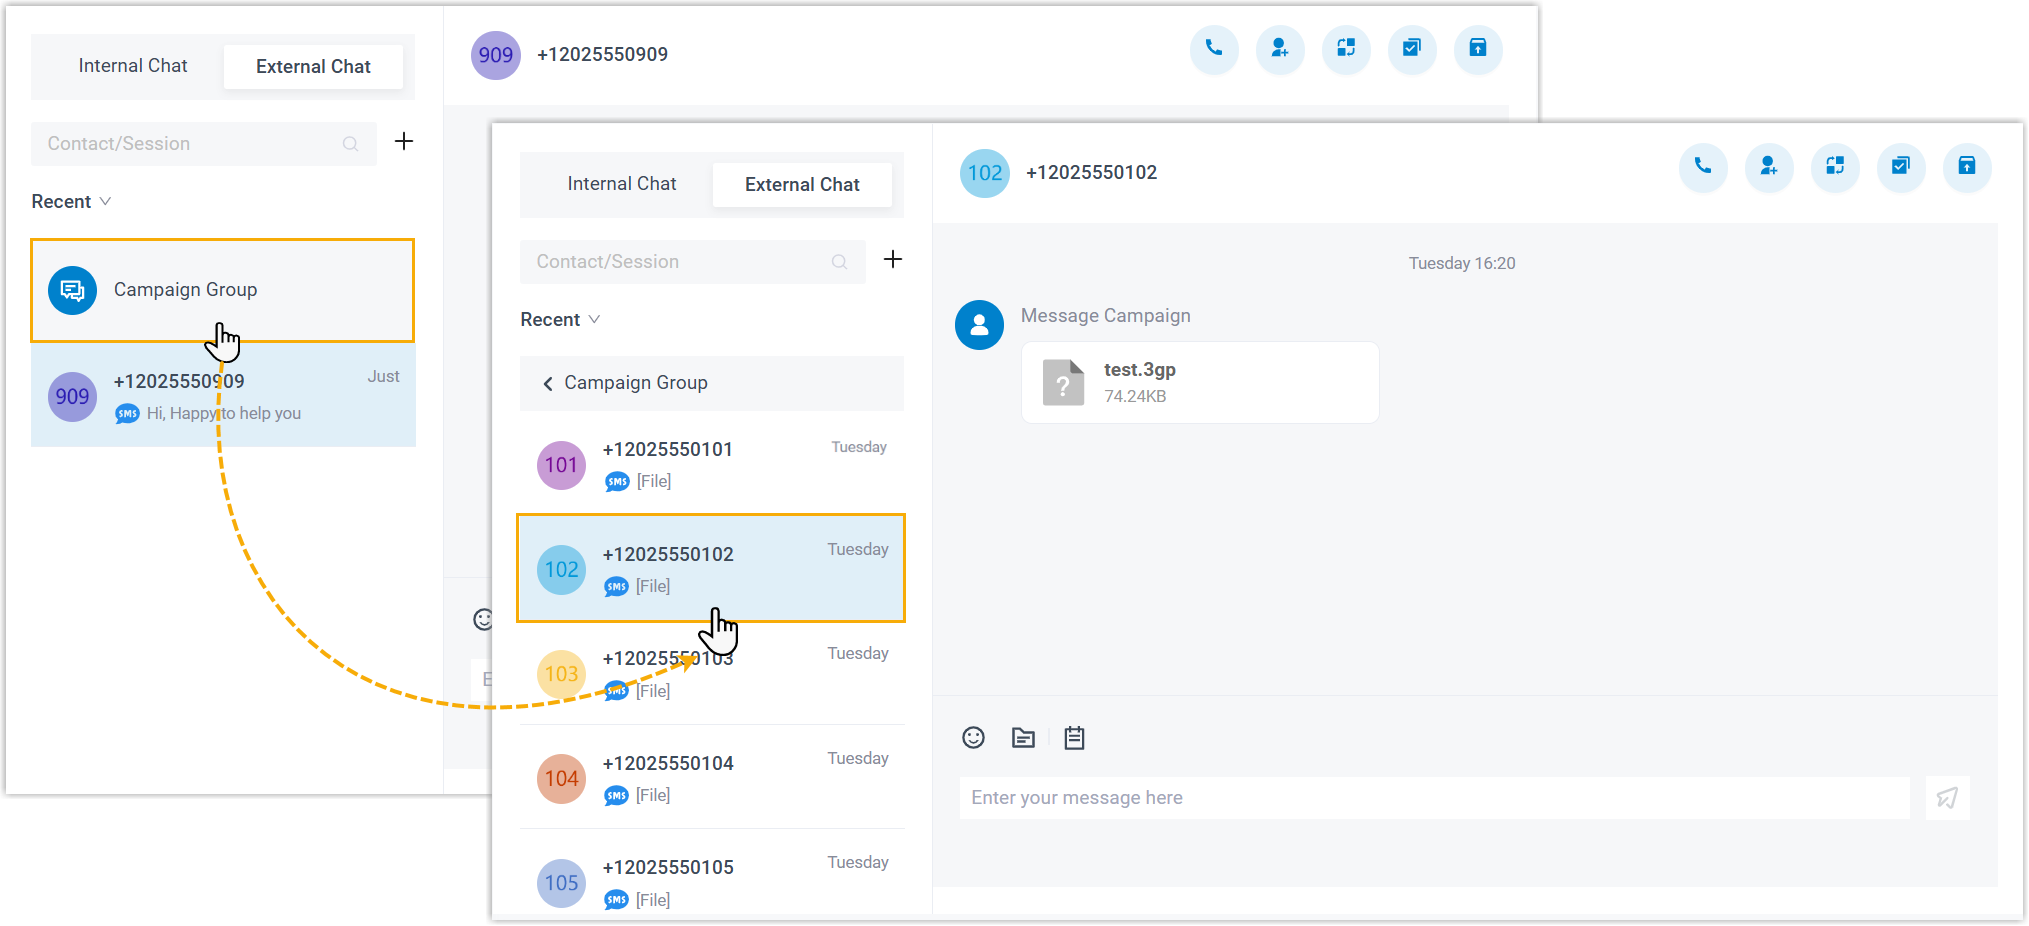
- On Linkus Web Client or Desktop Client, click Chat, then click the External Chat tab.
- In the external chat list, click Campaign
Group.
All sessions created by message campaigns will be listed.
- Click a session to view and respond to customer replies as needed.