Start a Messaging Session with a Customer on Web Client / Desktop Client
If you need to send customers messages for notifications, marketing campaigns or other purposes, you can proactively start a messaging session.
Note: You can proactively start a messaging session via SMS or
WhatsApp messaging channel.
Requirements
- PBX Server
-
Contact system administrator to make sure that PBX server meets the following requirements:
- PBX Version: 83.23.0.24 or later.
- Messaging:
- At least one SMS or WhatsApp messaging channel is set up on PBX.
- You have been granted with the permission to create message sessions in the channel.
- To initiate a session via the WhatsApp channel, only WhatsApp-approved message templates can be used. Ensure that the desired templates have been synchronized to the PBX.
- Linkus Desktop Client
- Make sure that the version of your Linkus Desktop Client meets the
following requirement:
- Windows Desktop: 1.7.3 or later
- macOS Desktop: 1.7.3 or later
Supported methods
Start a session via an SMS channel
- Procedure
-
- On Linkus Web Client or Desktop Client, go to .
- Click
 to add a session.
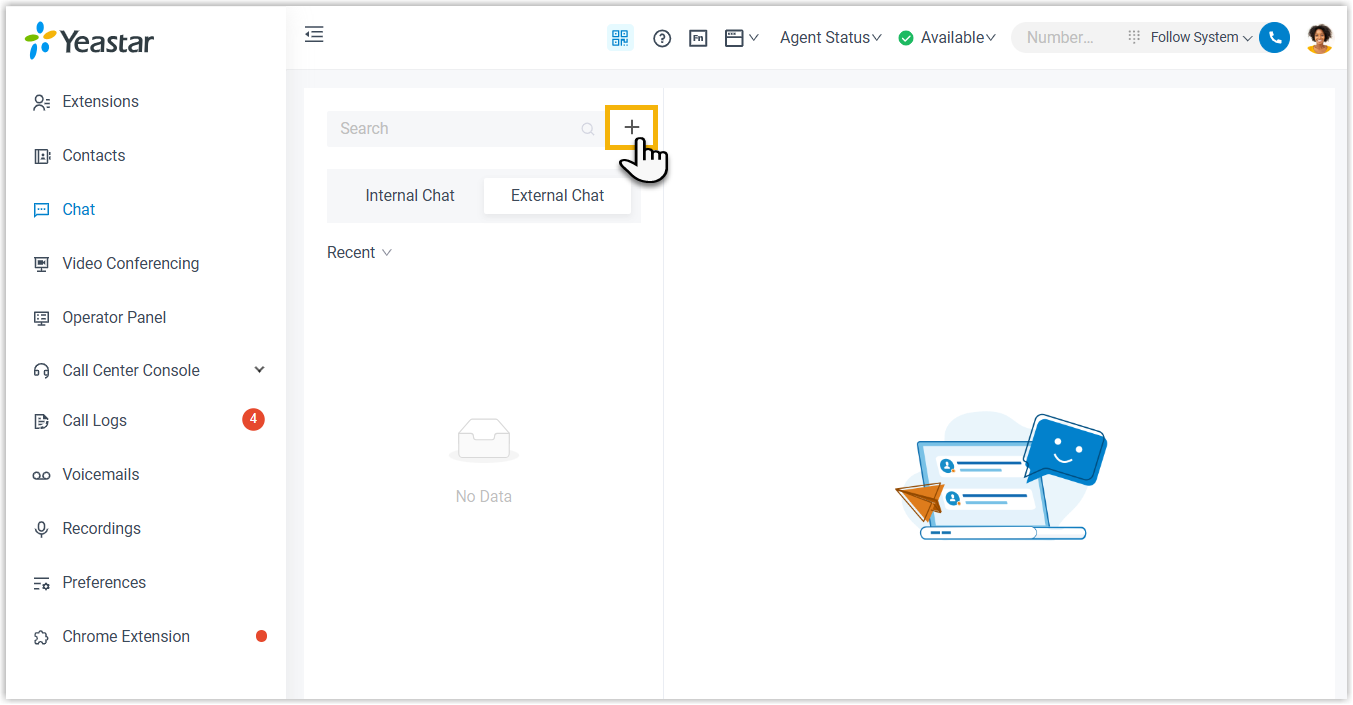
- In the pop-up window, complete the following settings.
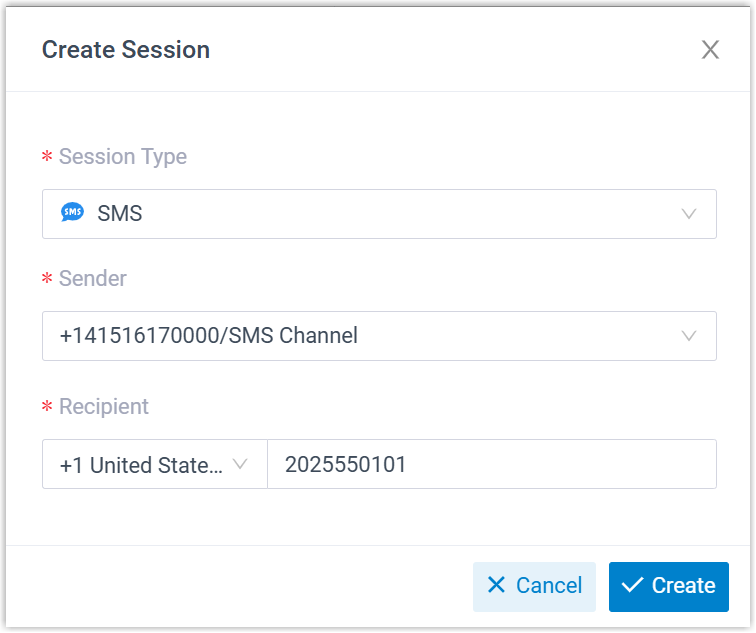
- Enter the session information.
- Session Type: Select SMS.
- Sender: Select the desired channel number for sending messages.
- Recipient: Select a country/region code, then enter the recipient number.
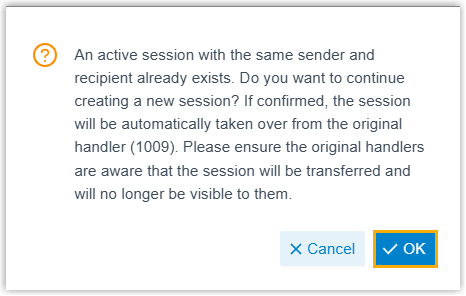
- Click Create.Note: If an active session with the same sender and recipient already exists and the channel is configured to allow duplicate session creation, the following confirmation dialog will appear. Click OK to proceed. In this case, you will directly take over the existing session and can view the complete chat history.
- Enter the session information.
- Result
-
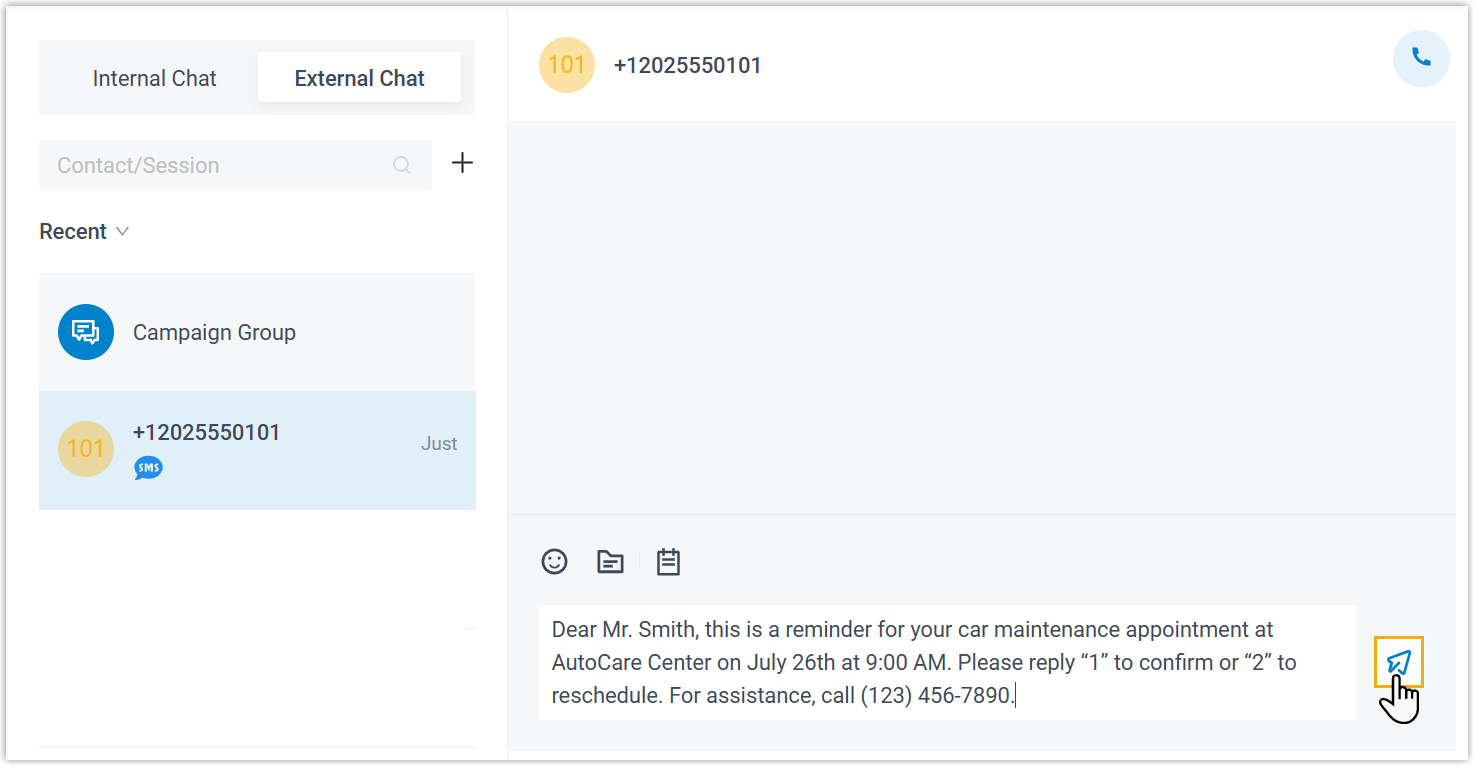
The SMS messaging session is created, you can send massages and chat with your customer.
Start a session via a WhatsApp channel
- On Linkus Web Client or Desktop Client, go to .
- Click to add a session.
- In the pop-up window, do as follows:
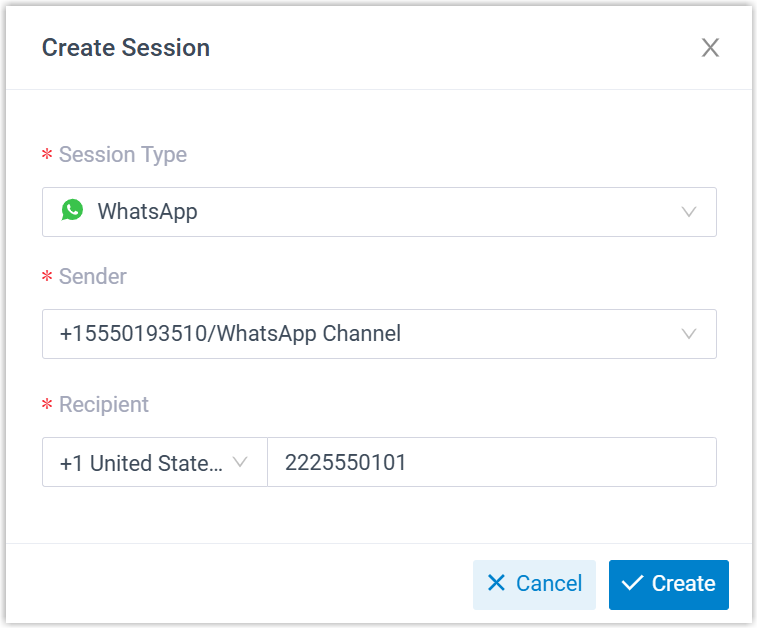
- Enter the session information.
- Session Type: Select WhatsApp.
- Sender: Select the associated phone number for sending messages.
- Recipient: Select a country/region code, then enter the recipient number.
- Click Create.Note: If an active session with the same sender and recipient already exists and the channel is configured to allow duplicate session creation, the following confirmation dialog will appear. Click OK to proceed. In this case, you will directly take over the existing session and can view the complete chat history.The WhatsApp messaging session is created.
- If you take over an existing session that is still within the 24-hour service window, you can start sending messages directly.
- If you create a new session, or the 24-hour window of the taken-over session has expired, follow Step 4 to send a message template first.
- Enter the session information.
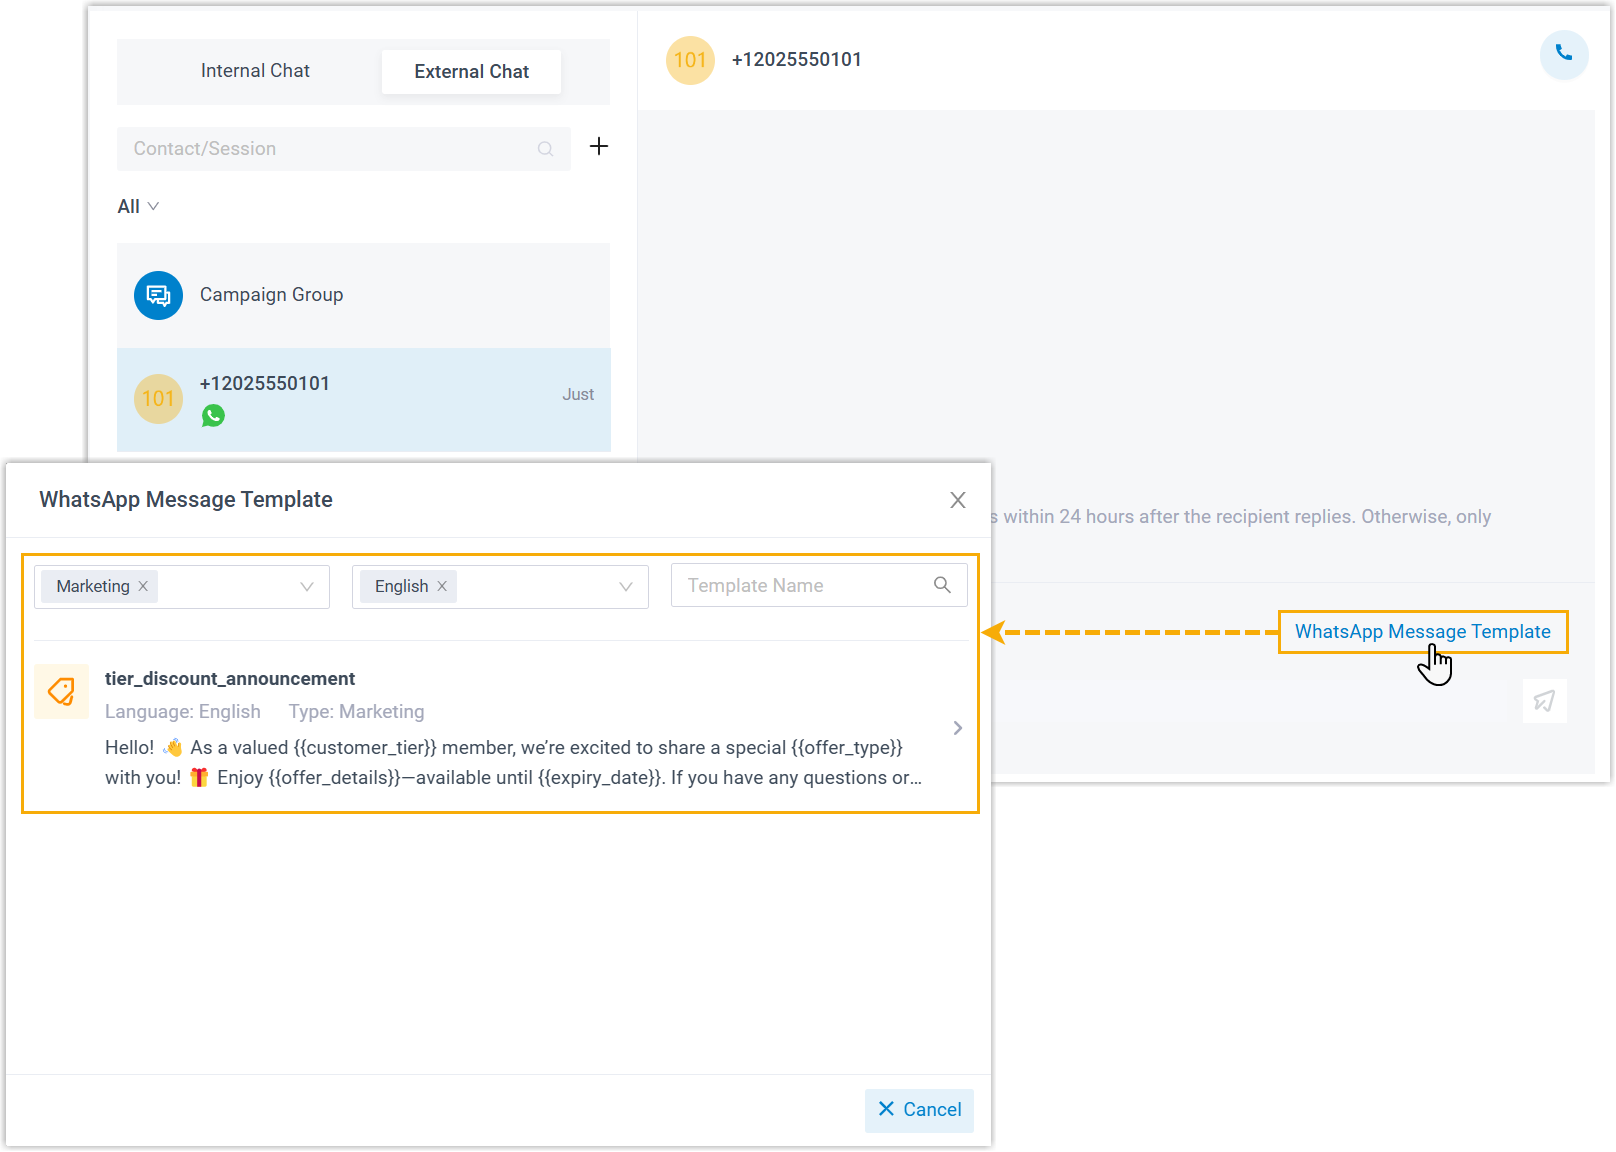
- In the session, send the desired message template to your customer.
- Click WhatsApp Message Template, then search
and select the desired template.
- If the template includes media or variable placeholders, upload the
required media files and fill in specific values for all
variables.
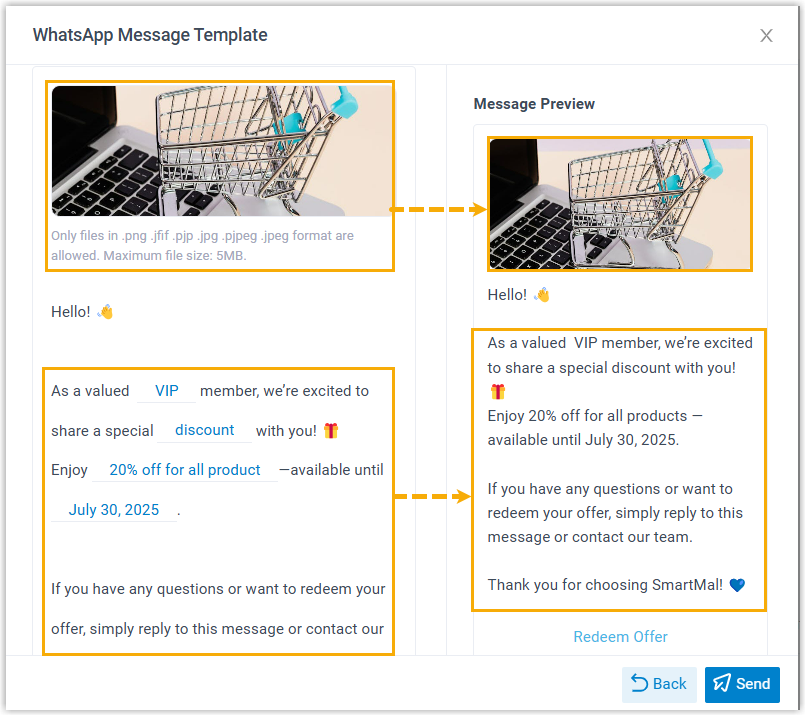 Note:
Note:- You can preview the final message contents on the right panel.
- For location information, you can simply paste the
Google Maps
URL, the system will auto-fill the name and
coordinates based on the URL. However, you need to
manually enter the detailed address for the
{{Address}}variable.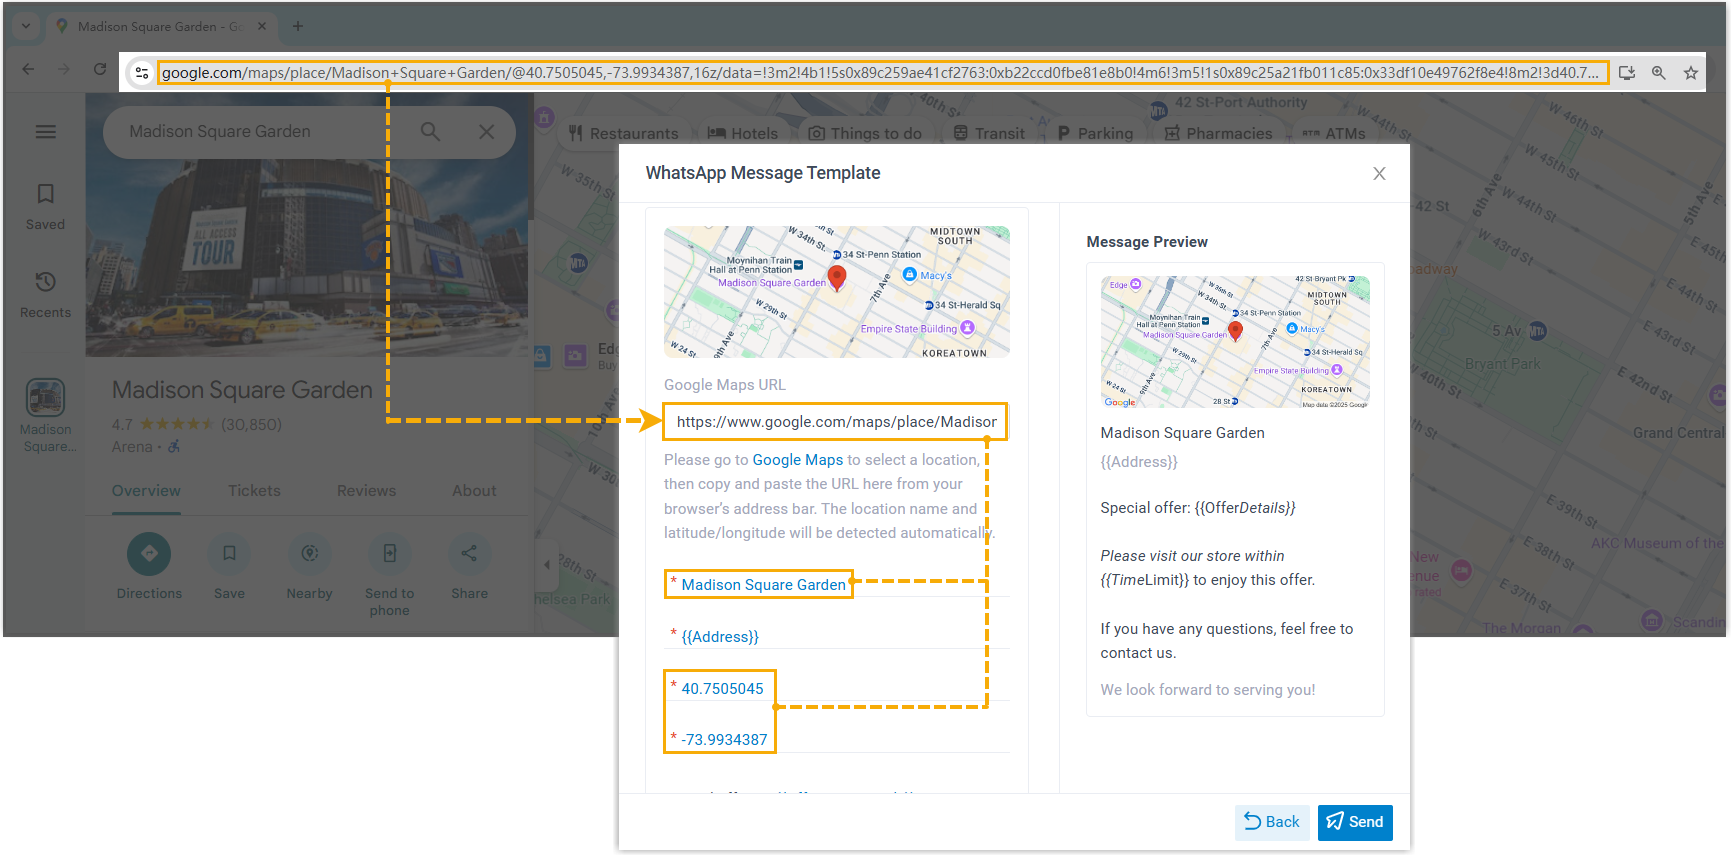
- Click Send.
- Click WhatsApp Message Template, then search
and select the desired template.