Synchronize Microsoft Outlook Contacts to Yeastar P-Series Cloud Edition
Microsoft Entra ID (Azure Active Directory) integration provides one-way synchronization of Outlook contacts (personal Outlook contacts and contacts from Outlook shared mailboxes) to PBX and Linkus UC Clients. After synchronization, the users synced from Microsoft Entra ID to Yeastar PBX can access and make calls to their Outlook contacts through Linkus UC Clients.
Prerequisites
- You have integrated Yeastar PBX with Microsoft Entra ID. The
method is determined by the PBX's firmware version:
- Version 84.22.0.138 or later: integrate Yeastar P-Series Cloud Edition with Microsoft Entra ID.
- Version earlier than 84.22.0.138: Integrate Yeastar P-Series Cloud Edition with Microsoft Entra ID (Legacy)
- You have synchronized users from Microsoft Entra ID to Yeastar PBX.
Synchronize personal Outlook contacts to Linkus Contacts directory
- Step 1. Select user range for syncing personal contacts on PBX
-
- Log in to PBX web portal, go to .
- Scroll down to the Microsoft Outlook Contacts
Synchronization section, and turn on the
switch.

- Select the checkbox of Contacts Synchronization.
- In the User Range for Contacts
Synchronization drop-down list, select the
range.Important: Ensure that the user range you select here is covered by the user range you selected when syncing users from Microsoft Entra ID to PBX, as this feature is only available for synced users.
Option Description All Users Synchronize all the users' personal contacts to their Linkus Contacts directory. 
Users in Specific Group Synchronize personal contacts of users within the specified group(s) to their Linkus Contacts directory. You need to select the desired groups in the Group drop-down list.

Specific Users Synchronize personal contacts of the selected users to their Linkus Contacts directory. You need to select the desired users as shown below:
Note: Click Select All Synced Users to quickly select all Microsoft Entra ID users that have already been synced to the PBX.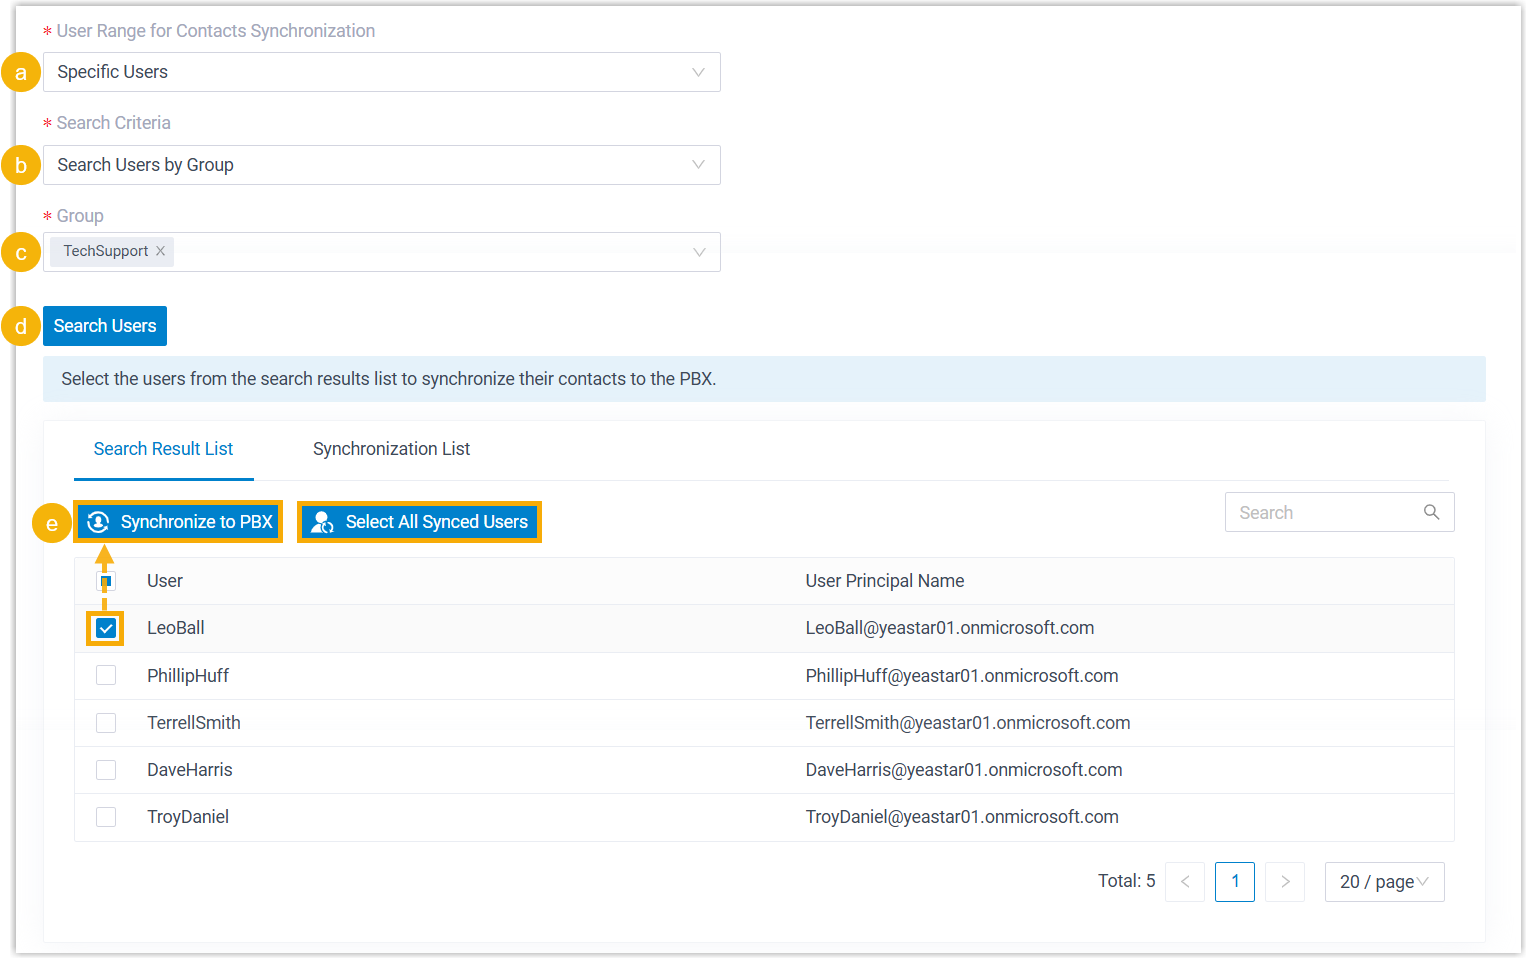
-
Click Save.
- Step 2. Share personal Outlook contacts folder on Outlook Desktop Client
-
Note: This step is required when the integration is implemented via the legacy method.
We provide an example on how an individual user in Microsoft Entra ID can share his or her personal Outlook contacts folder on Outlook Desktop Client.
- Log in to Outlook Desktop Client, go to
 (People).
 - In My Contacts section, right click the personal contacts folder, then select Properties....
- In the pop-up window, search for and add the authorization
account (the account that is used to authorize the Microsoft
Entra ID integration with PBX).
Screenshot Instruction 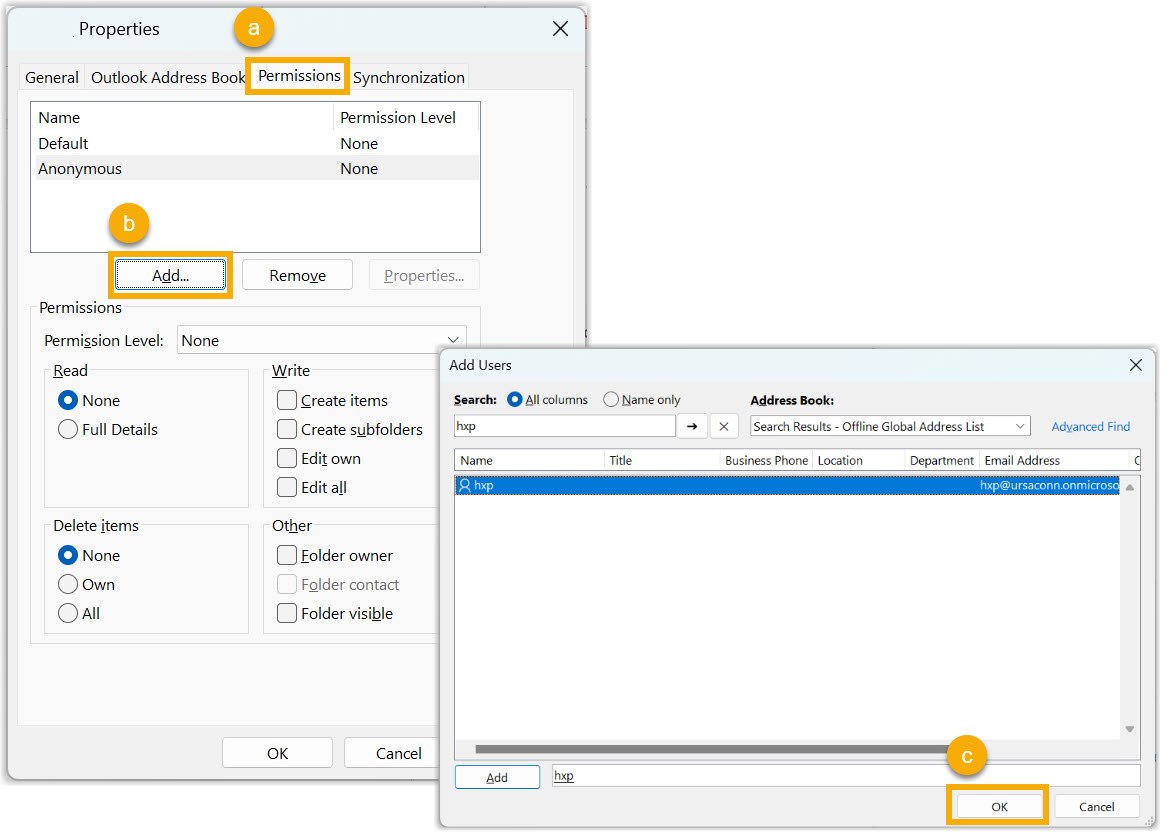
- Click the Permissions tab.
- Click Add and search for the authorization account.
- Double click the authorization account, then click OK.
- Grant the authorization account access to contacts in the folder.
Screenshot Instruction 
- In the upper user section, select the authorization account.
- In the Read section, select Full Details.
- In the Other section, select Folder contact.
- Click OK.
Note: The system will perform the synchronization at the preset time for automatic directory synchronization, you can also manually perform a directory synchronization to sync Outlook contacts.
- Log in to Outlook Desktop Client, go to
- Result
- After the synchronization, the specified users' personal Outlook
contacts are synced to their Linkus Contacts directory with a label
 . And the synced contacts can NOT
be edited or deleted on Linkus UC Clients.
. And the synced contacts can NOT
be edited or deleted on Linkus UC Clients. 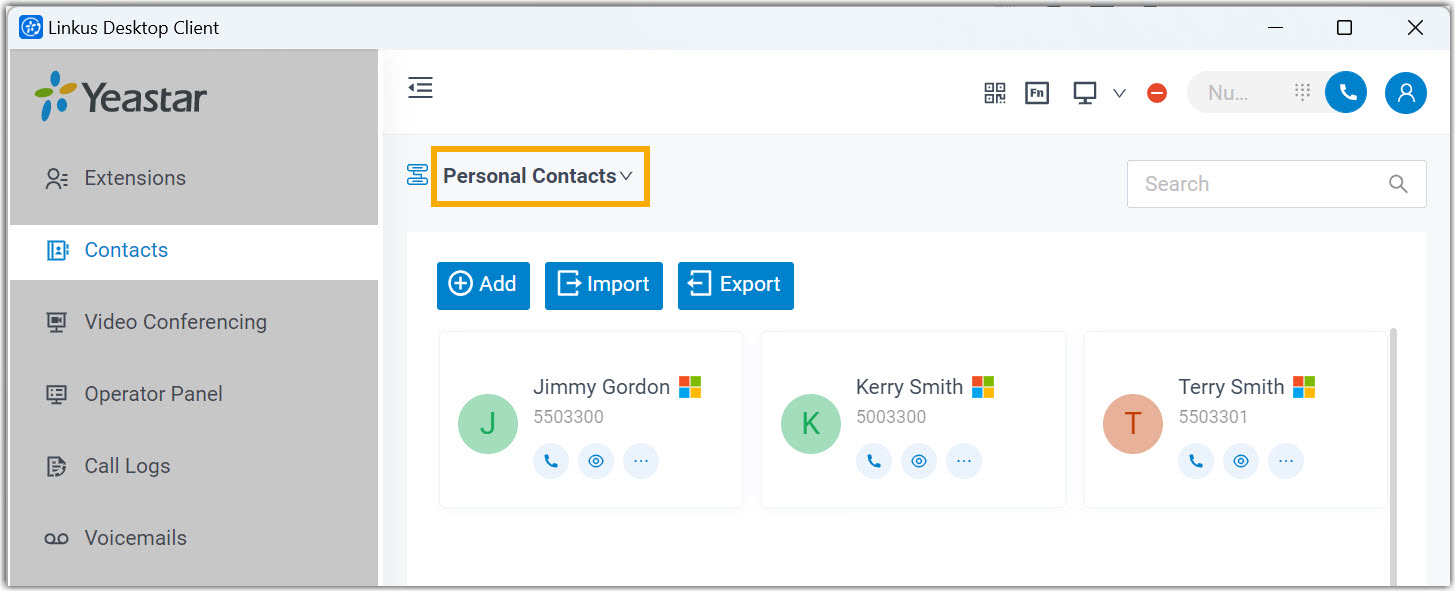
Synchronize contacts from Outlook shared mailboxes to PBX phonebooks
To synchronize contacts from shared mailboxes, you need to set up shared contacts synchronization on PBX, and add the authorization account (the account that is used to authorize the Microsoft Entra ID integration with the PBX) as a member of the desired shared mailboxes on Microsoft 365 admin center, so that PBX can access the contacts within the shared mailboxes.
- Step 1. Set up shared contacts synchronization on PBX
-
- Log in to PBX web portal, go to .
- Scroll down to Microsoft Outlook Contacts
Synchronization section, turn on the
switch.
- Select the checkbox of Shared Mailbox Contacts Synchronization.
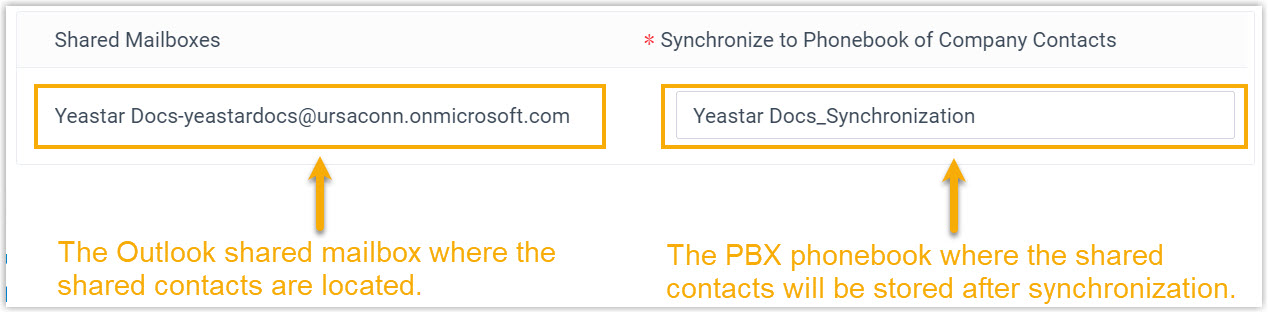
- In the Shared Mailbox Contacts
Synchronization drop-down list, select the range.
Option Description Contacts in All Shared Mailboxes Synchronize contacts from all the Outlook shared mailboxes to PBX phonebooks. Contacts in Specific Shared Mailboxes Synchronize contacts from specific Outlook shared mailbox(es) to PBX phonebooks. You can select the desired shared mailbox(es) in the Shared Mailboxes drop-down list.
- Define the phonebook name for the shared contacts to be
synced.
- Click Save.
- Step 2. Add the authorization account to the shared mailboxes on Microsoft 365 admin center
-
Note: This step is required when the integration is implemented via the legacy method.
- Result
-
After the synchronization, the followings can be implemented:
-
The shared mailboxes and their contacts are synchronized to PBX phonebook, which comes with a label
and can NOT be
edited or deleted on PBX.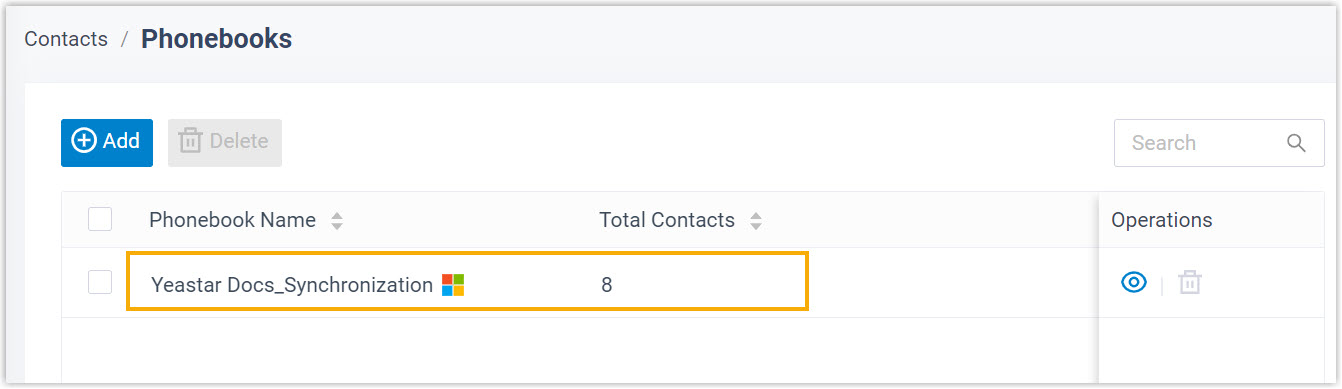 Troubleshooting: Unable to synchronize specific Outlook contacts?Incomplete information of Outlook contacts can lead to synchronization failure. Make sure the following fields are filled in for Outlook contacts, then perform the directory synchronization again:
- First name or Last name: At least one field is required.
- Mobile phone number, Home phone, or Business phone: At least one field is required.
- By default, the synced phonebook is NOT visible to users. To
allow users to view the phonebook and its contacts, go to .Note: Users with permission can log in to Linkus clients, go to Contacts and select the phonebook to view its contacts.
-