Synchronize Users from Microsoft Entra ID to Yeastar P-Series Cloud Edition
This topic describes how to customize synchronization rule based on users, so as to synchronize users from Microsoft Entra ID to Yeastar PBX system. PBX will create extensions for the specified users to be synced accordingly, and keep the extensions up-to-date with changes from the synced users.
Limitation
The number of users that can be synced from Microsoft Entra ID to PBX depends on the number of extensions that PBX system can create.
Prerequisites
- Version 84.22.0.138 or later: integrate Yeastar P-Series Cloud Edition with Microsoft Entra ID.
- Version earlier than 84.22.0.138: Integrate Yeastar P-Series Cloud Edition with Microsoft Entra ID (Legacy)
Procedure
You can either bulk synchronize Microsoft Entra ID users within a specified range and automatically assign PBX extensions, or synchronize specific users and assign PBX extensions for them individually.
- Synchronize Microsoft Entra ID users within a specified range
-
- Log in to PBX web portal, go to .
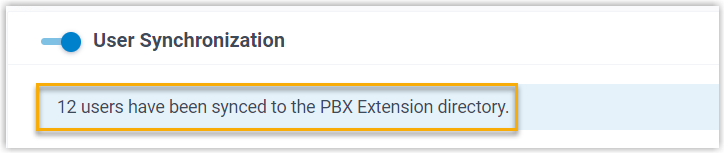
- In the User
Synchronization section, turn on the
switch.

- In the User Range for Extension Auto
Creation drop-down list, specify the users that
you want to synchronize to PBX and create extensions for
them.
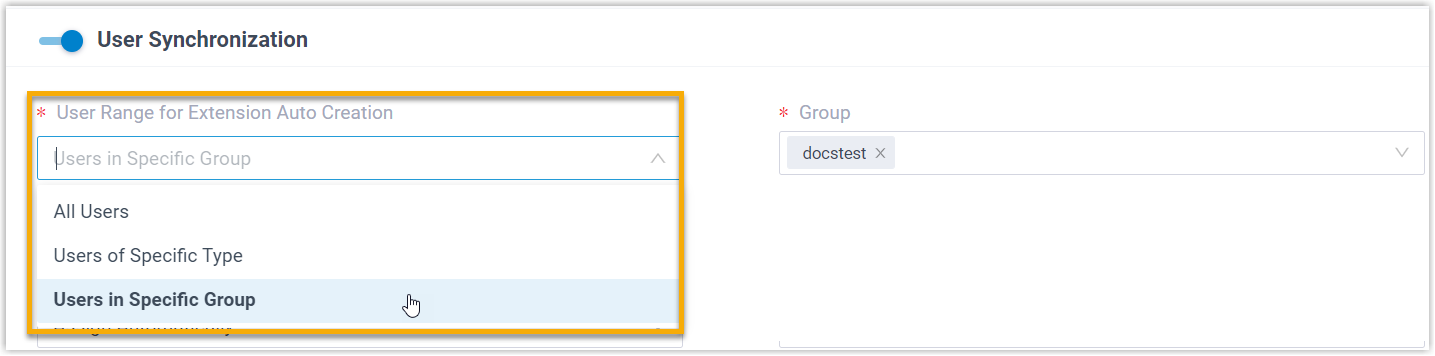
Option Description All Users Synchronize all users from Microsoft Entra ID to PBX and create extensions for them. Users of Specific Type Synchronize the specified type(s) of users from Microsoft Entra ID to PBX and create extensions for them. You need to select the desired user type(s) in the User Type drop-down list.
- Member: All member users in your organization's directory.
- Guest: All guest users in your organization's directory.
Users in Specific Group Synchronize the users within the specified group(s) from Microsoft Entra ID to PBX and create extensions for them. You need to select the desired group(s) in the Group drop-down list.
Note: In future use, if you change the range of users to be synced, you can decide how to deal with the extensions that are no longer synced from the users in Microsoft Entra ID via the Auto delete the Extensions no longer in sync option.
- If selected, the extensions will be deleted during the next synchronization.
- If unselected, the extensions will be retained and fully managed by the PBX.
- In the User's Extension Number drop-down
list, configure the extension number assignment rule.

Option Description Assign Automatically Assign extension numbers from a specific starting number.
You need to specify the starting number in the Start Extension Number from field.Read Specific Property Value Assign extension numbers based on users' property value. This can be used in the scenario that the users already have phone extensions assigned in Microsoft Entra ID, and you want to keep their extension numbers instead of assigning new ones.
You need to specify the property where the users' extension numbers are stored (e.g.
businessPhones) in the Property Name field.Tip: Refer to Microsoft User Properties for the property name. - In the Delete the Extension when its
associated user account is drop-down list,
select the account status(es) at which PBX will stop syncing
from the users, and delete the associated extensions.
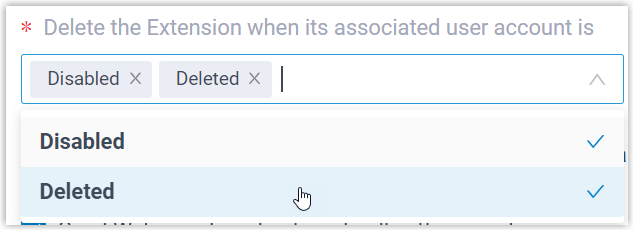
Option Description Disabled If an user account is disabled in Microsoft Entra ID, PBX will stop syncing from the user and delete the associated extension. Deleted If a user account is deleted in Microsoft Entra ID, PBX will stop syncing from the user and delete the associated extension. - Set the following synchronization options according to your
needs.
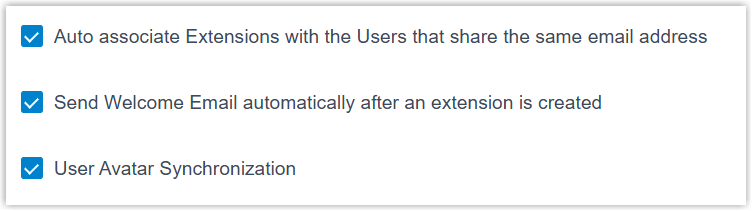
Option Description Auto associate Extensions with the Users that share the same email address Decide whether to sync users from Microsoft Entra ID to PBX when the users have the same email addresses with existing extensions. - If selected, users whose User principal name in Microsoft 365 matches the Email Address of extensions in Yeastar PBX will be synced to PBX and associated with the extensions.
- If unselected, users whose User principal name in Microsoft 365 matches the Email Address of extensions in Yeastar PBX will not be synced to PBX as the PBX system does not allow duplicated email addresses.
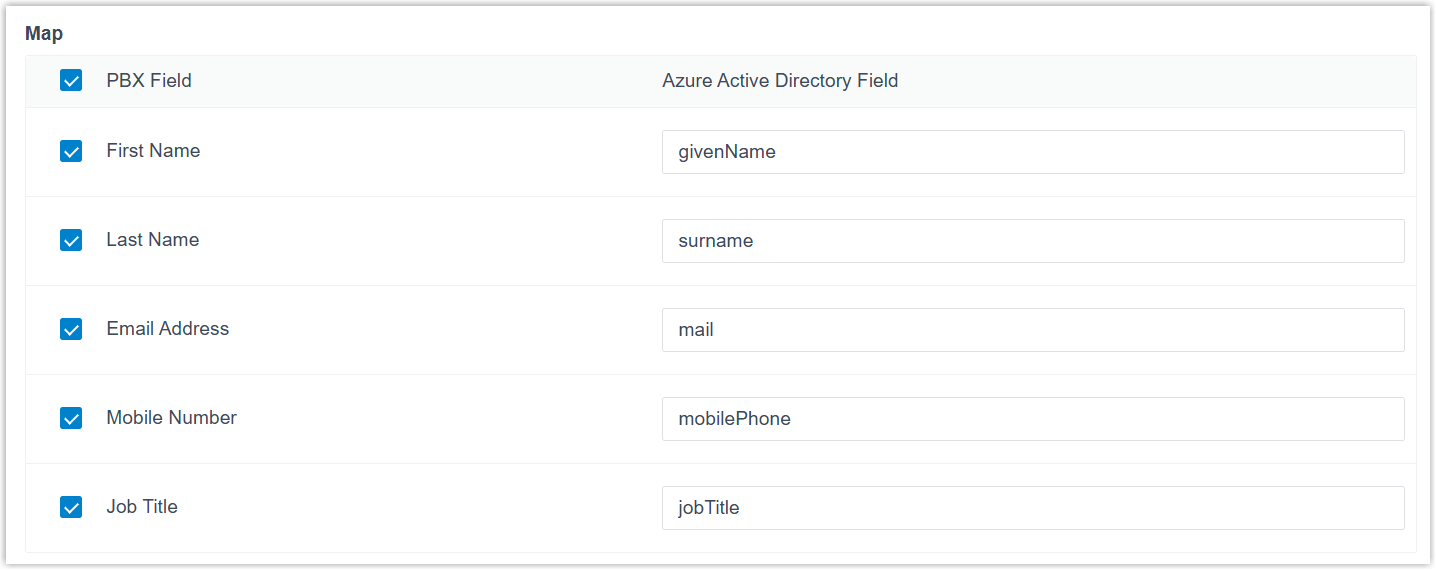
Send Welcome Email automatically after an extension is created Decide whether to send Linkus Welcome Email to the synced users. User Avatar Synchronization Decide whether to synchronize Entra ID users' avatars to the PBX extensions. Note: This feature performs a one-way synchronization of user avatars from Microsoft Entra ID to the PBX. After synchronization, the extension's avatar becomes read-only and cannot be modified by users via their Linkus clients. - In the Map section, select and
map the fields for the user information you want to synchronize.Note:
- Refer to Microsoft User Properties to fill in the Azure Active Directory fields.
- If the mapping is disabled (either for a specific field or all PBX fields), the corresponding information will not be synchronized, and you can edit these extension's information directly on the PBX.
-
Click Save.
Note:- If it is the FIRST time you save the synchronization-related settings, PBX will perform the initial synchronization immediately.
- Otherwise, you can manually perform a directory synchronization or wait for the automatic directory synchronization.
- Synchronize specific Microsoft Entra ID users
- Specify the group(s) where the PBX can search for Microsoft Entra ID users, then manually select the desired Microsoft Entra ID users to be synchronized to PBX, and individually associate PBX extensions for these users.
-
- Log in to PBX web portal, go to .
- In the User
Synchronization section, turn on the
switch.
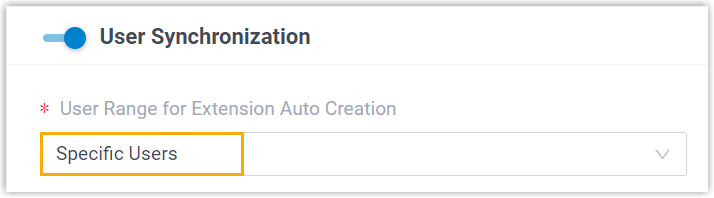
- In the User Range for Extension Auto
Creation drop-down list, select
Specific Users.
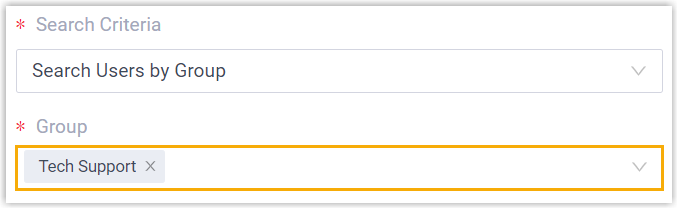
- In the Search Criteria and
Group drop-down lists, specify the
search scope in which PBX can search the Microsoft Entra ID
users.
- Click Search Users.
PBX searches Microsoft Entra ID users within the specified scope, and displays users in the Search Result List.
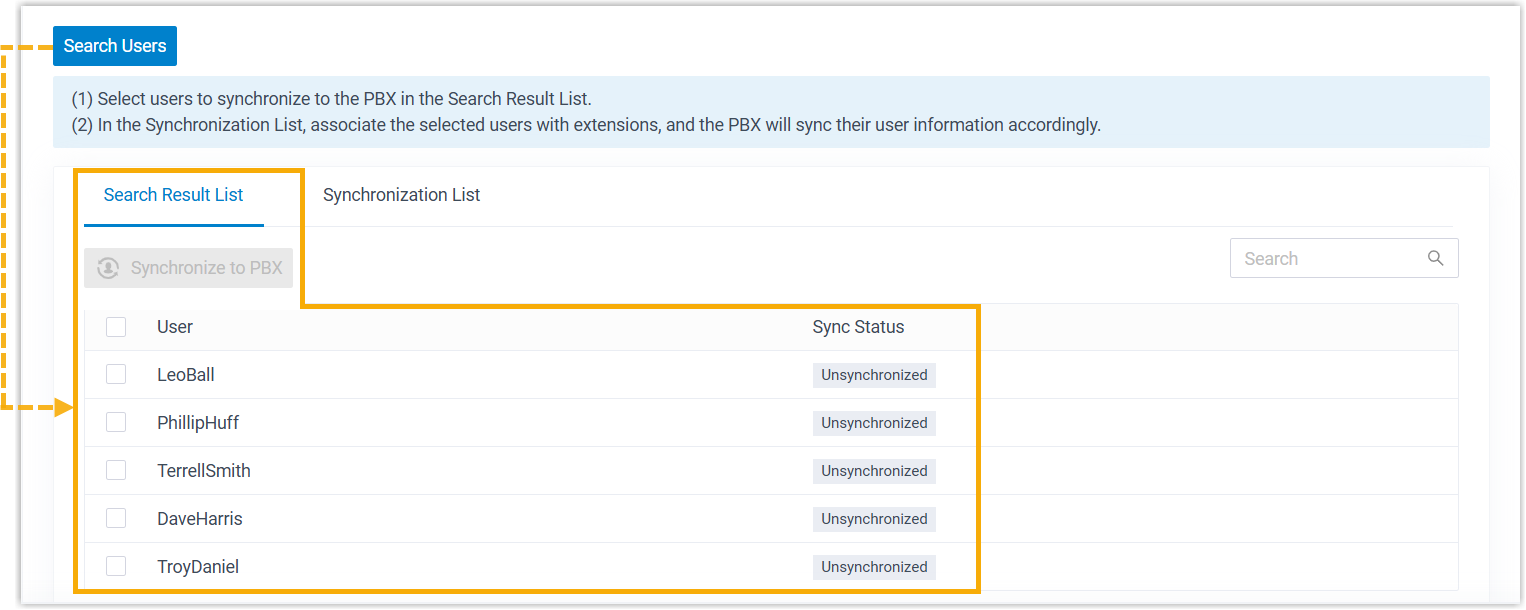 Tip: You can quickly locate the desired Microsoft Entra ID users by entering their username on the Search field at the top-right corner.
 - Select the desired Microsoft Entra ID user(s) for
synchronization, then click Synchronize to
PBX.
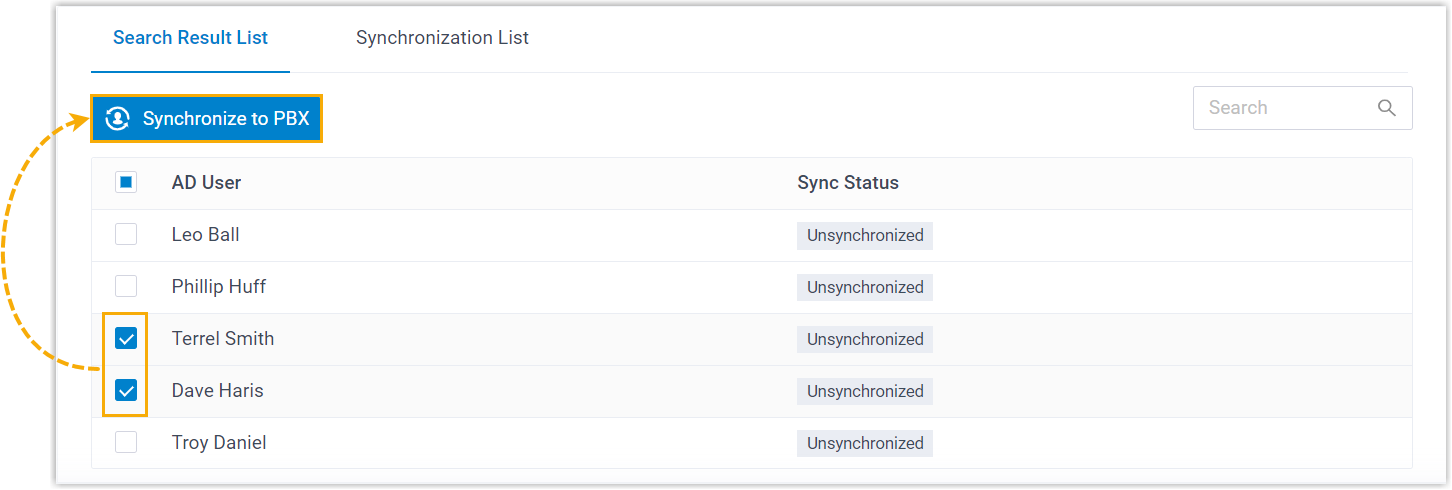
The selected Microsoft Entra ID users are added to the Synchronization List.
- In the Associate with Extension drop-down
list beside the Microsoft Entra ID user, select an extension to
assign to the Microsoft Entra ID user.
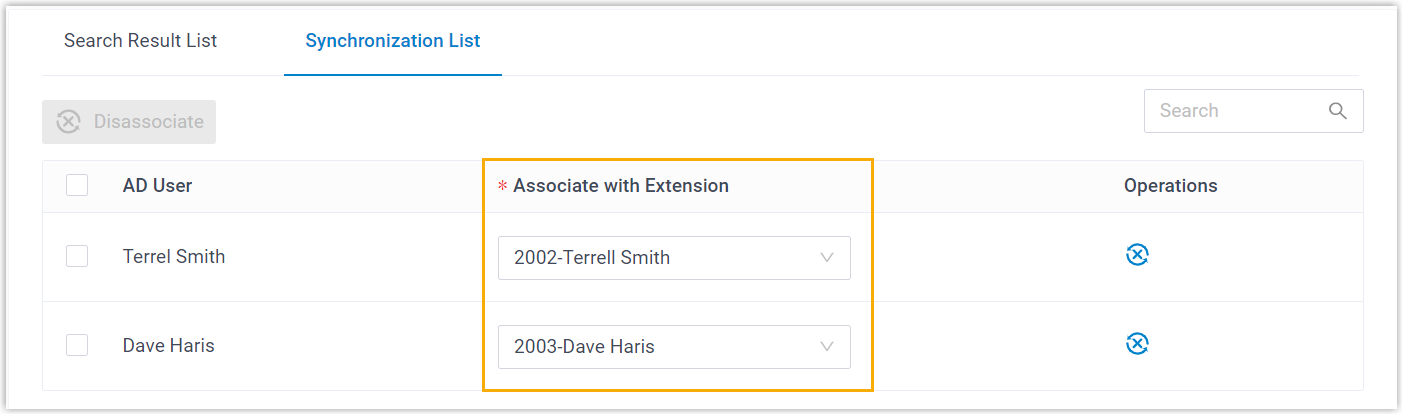 Tip: To disassociate a synced Microsoft Entra ID user with the PBX extension, select the desired Microsoft Entra ID user and click Disassociate button on the top of the list. After you save the setting, the Microsoft Entra ID user will be successfully disassociated with the extension.
 - In the Delete the Extension when its
associated user account is drop-down list,
select the account status(es) at which PBX will stop syncing
from the users, and delete the associated extensions.
Option Description Disabled If an user account is disabled in Microsoft Entra ID, PBX will stop syncing from the user and delete the associated extension. Deleted If a user account is deleted in Microsoft Entra ID, PBX will stop syncing from the user and delete the associated extension. - Set the following synchronization options according to your
needs.

Option Description Send Welcome Email automatically after an extension is created Decide whether to send Linkus Welcome Email to the synced users. User Avatar Synchronization Decide whether to synchronize Entra ID users' avatars to the PBX extensions. Note: This feature performs a one-way synchronization of user avatars from Microsoft Entra ID to the PBX. After synchronization, the extension's avatar becomes read-only and cannot be modified by users via their Linkus clients. - In the Map section, select and
map the fields for the user information you want to synchronize.Note:
- Refer to Microsoft User Properties to fill in the Azure Active Directory fields.
- If the mapping is disabled (either for a specific field or all PBX fields), the corresponding information will not be synchronized, and you can edit these extension's information directly on the PBX.
-
Click Save.
Note:- If it is the FIRST time you save the synchronization-related settings, PBX will perform the initial synchronization immediately.
- Otherwise, you can manually perform a directory synchronization or wait for the automatic directory synchronization.
Result
You have created your custom synchronization rule for synchronizing users from Microsoft Entra ID to the PBX.
During a synchronization process, PBX system performs queries within the Microsoft Entra ID based on the rule, and synchronizes the desired users as well as the updated information to PBX. After the synchronization, the followings can be implemented:
- You can check the synchronization result in the User
Synchronization section.
- The PBX extensions that are associated with users in Microsoft Entra ID come
with a label
 , and can not be
manually
deleted on PBX.
, and can not be
manually
deleted on PBX. - If the mapping feature is enabled, you can NOT manually update the
following information of the PBX extensions that are associated with users
in Microsoft Entra ID on PBX.Note: In such case, the information can only be modified within the Microsoft Entra ID and updated to the PBX during a synchronization.
- Last name
- First name
- Email Address
- Mobile Number
- Job Title
What to do next
If you want to allow the synced users to log in to Linkus UC Clients using their Microsoft accounts, you need to configure the Single Sign-on (SSO) feature.
For more information, see Allow Users to Log in to Linkus UC Clients with SSO.