Enable Yeastar Live Chat on WordPress Website
After you obtain the code snippet for Yeastar Live Chat, you can paste the code into the footer of your WordPress website. When done, a live chat widget appears at the bottom-right corner of the website, enabling website visitors to have a real-time conversation with your agents.
Prerequisites
Enable Yeastar Live Chat on WordPress website using theme editor
- Log in to your WordPress admin panel.
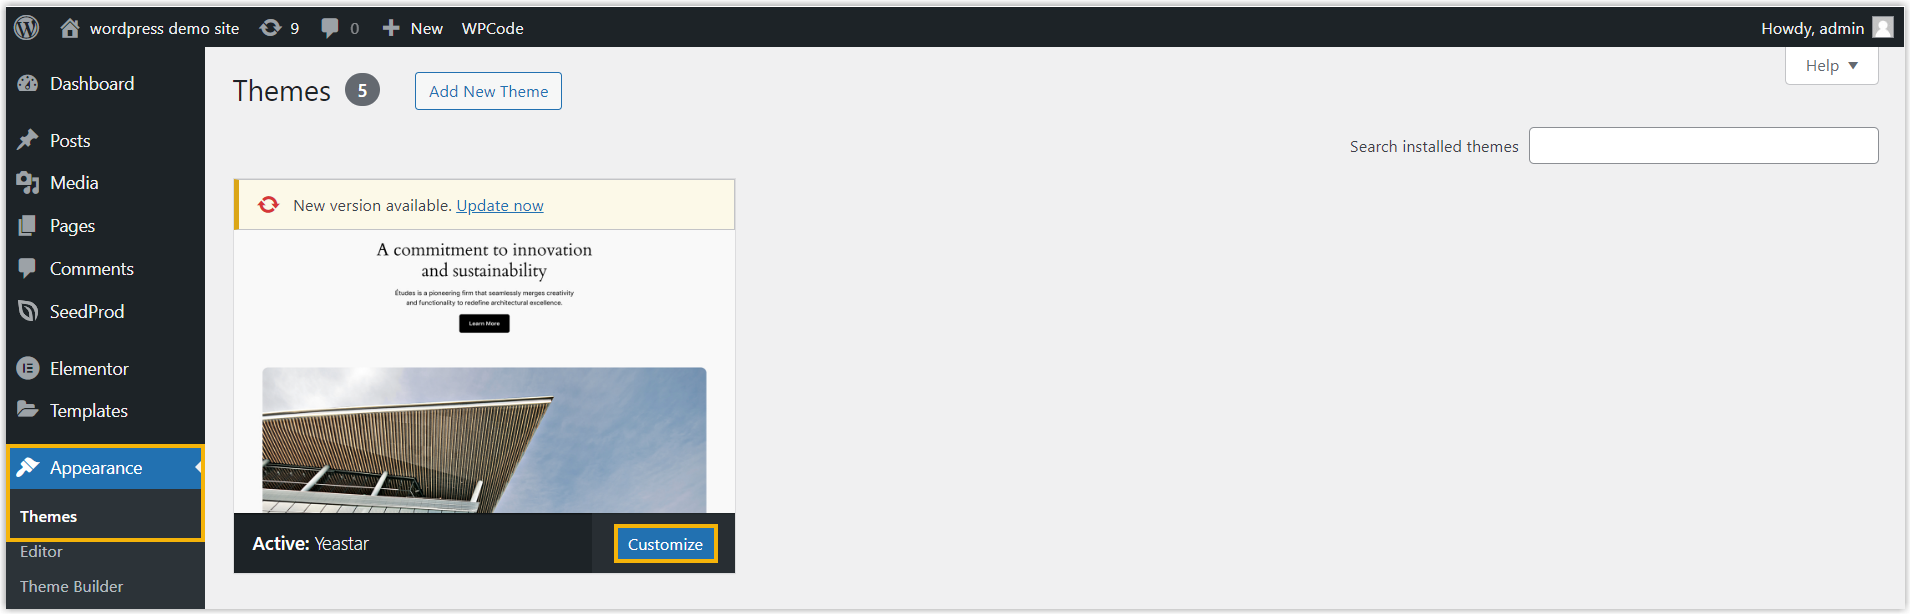
- On the left navigation bar, go to , then click Customize on the desired
theme.
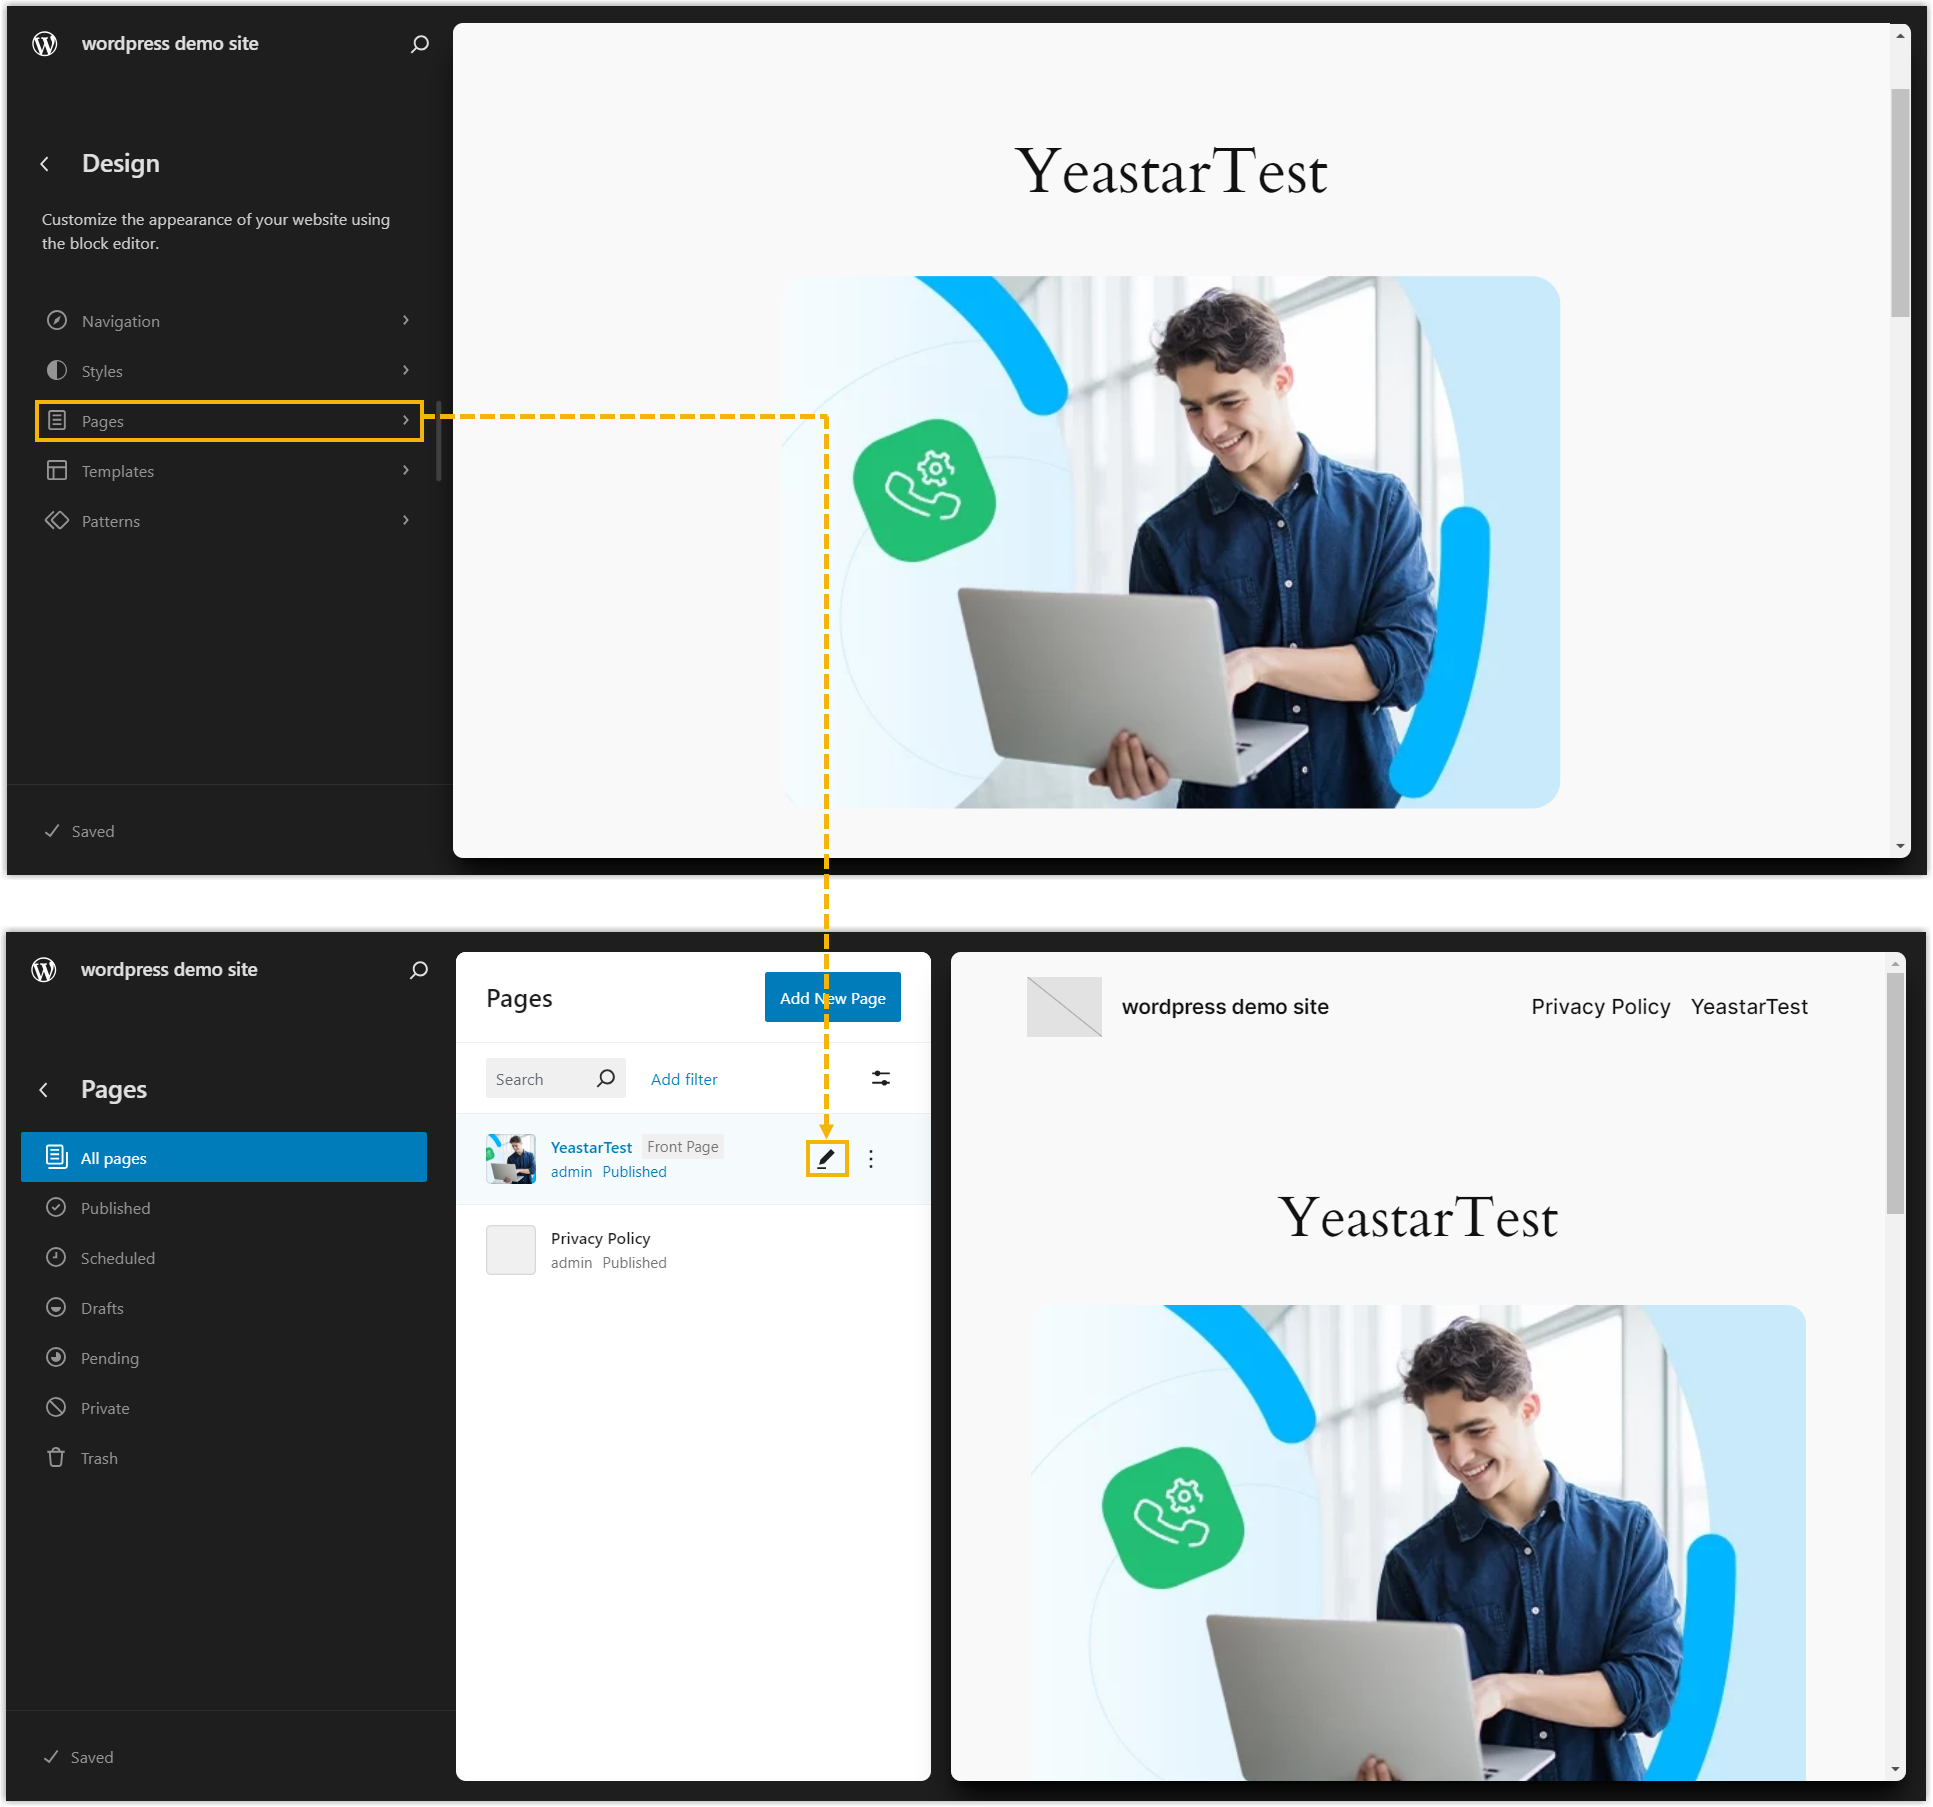
- On the left navigation bar, click Pages, then edit
your desired page.
- At the top-right corner, click
 , then click Code
editor.
, then click Code
editor.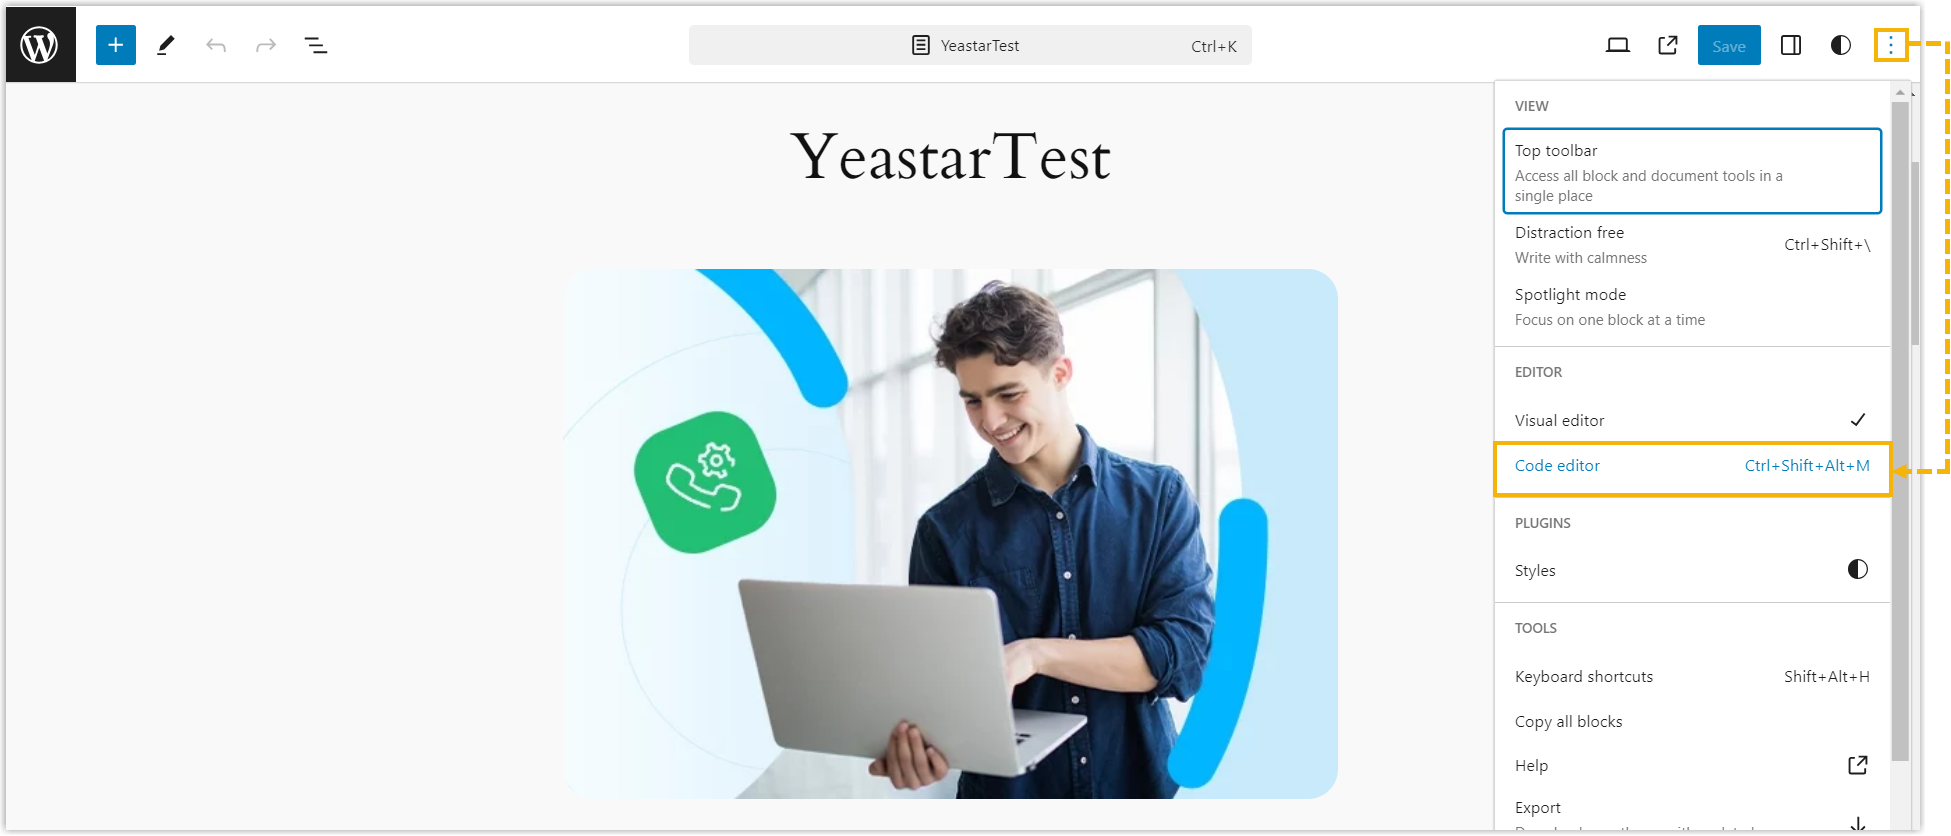
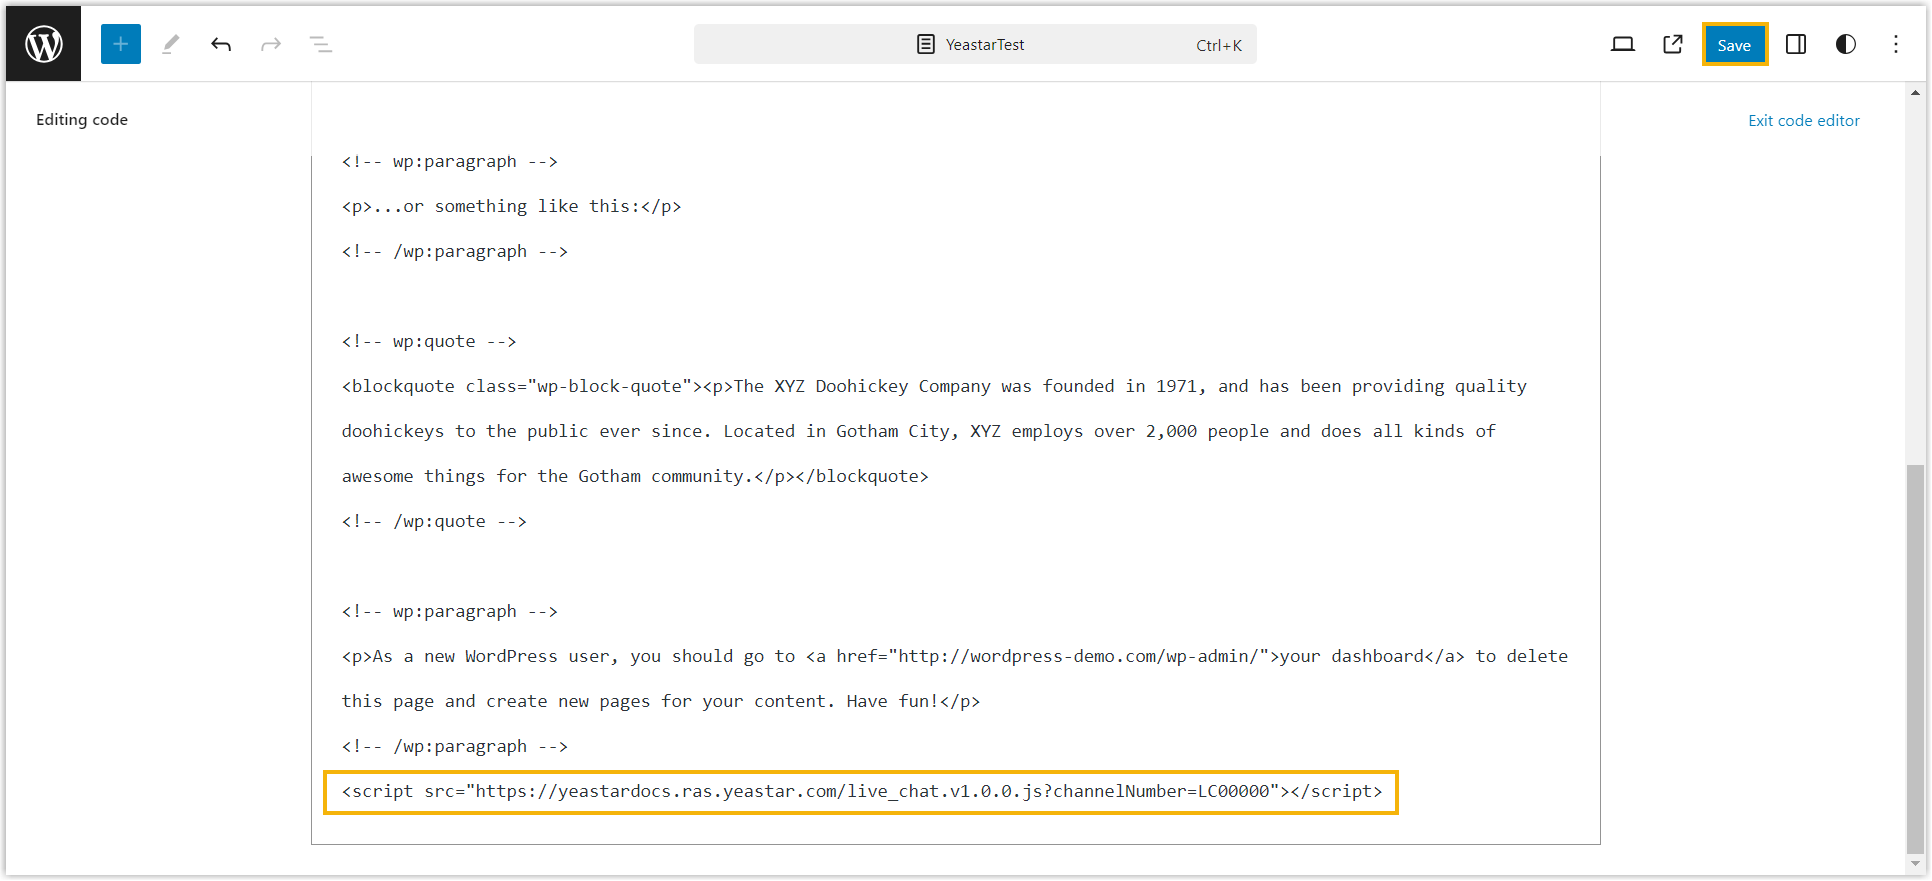
- Scroll down to the bottom, paste the code snippet, then click
Save.
Access the page, then you will find the Live Chat widget is added to your website.

Enable Yeastar Live Chat on WordPress website using WPCode plugin
- Log in to your WordPress admin panel.
- On the left navigation bar, go to .
- Add and activate WPCode plugin.
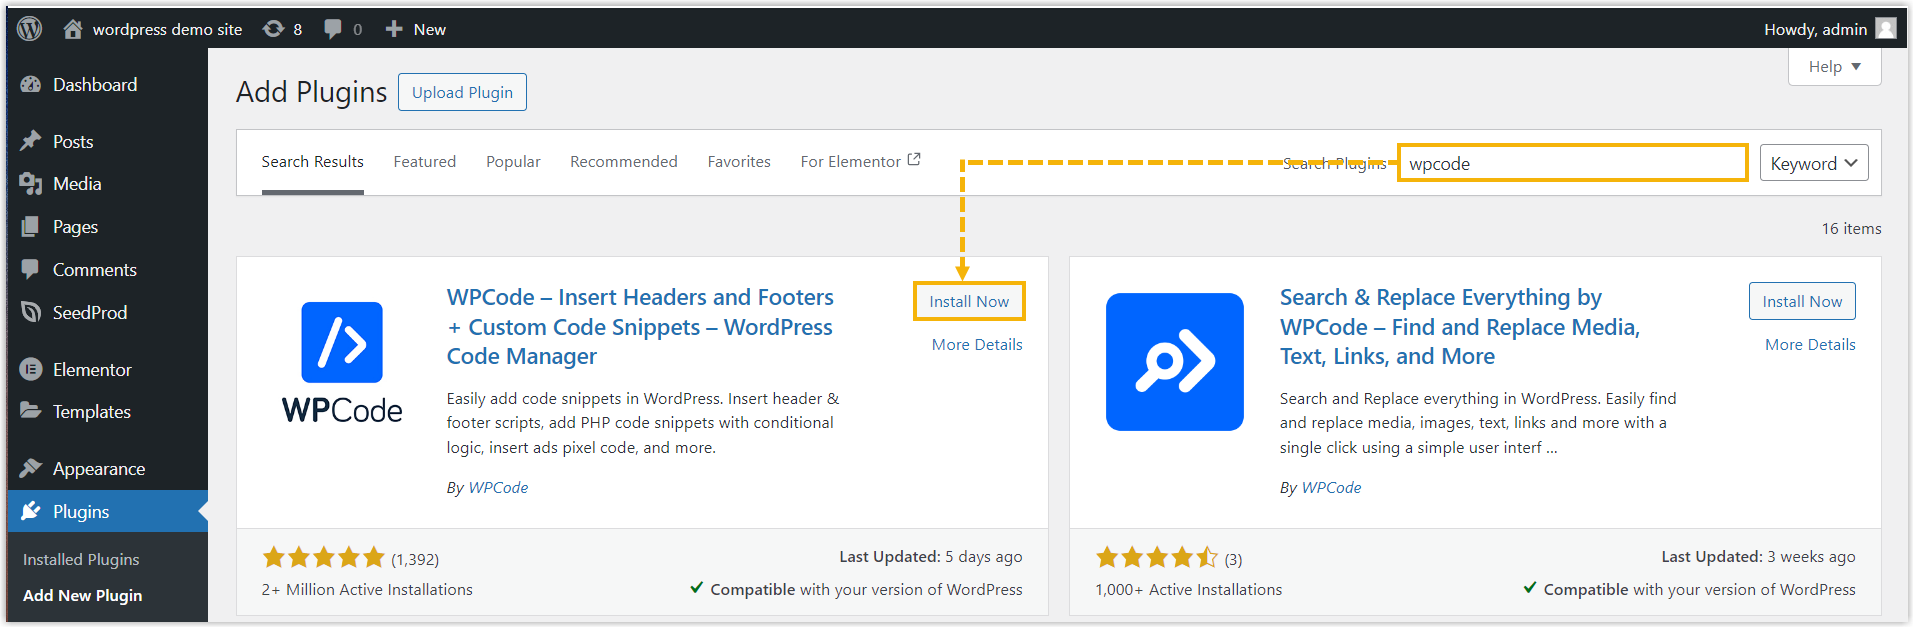
- At the top-right corner, search for WPCode plugin, then click
Install Now to install the
plugin.
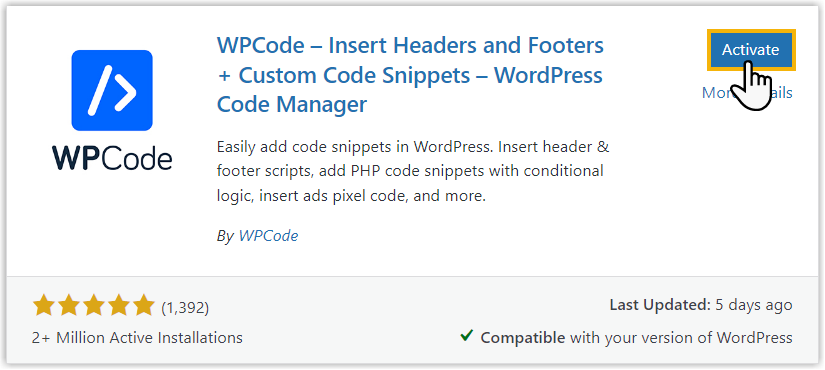
- Click Activate to activate the
plugin.
- At the top-right corner, search for WPCode plugin, then click
Install Now to install the
plugin.
- Add the code snippet to the footer.
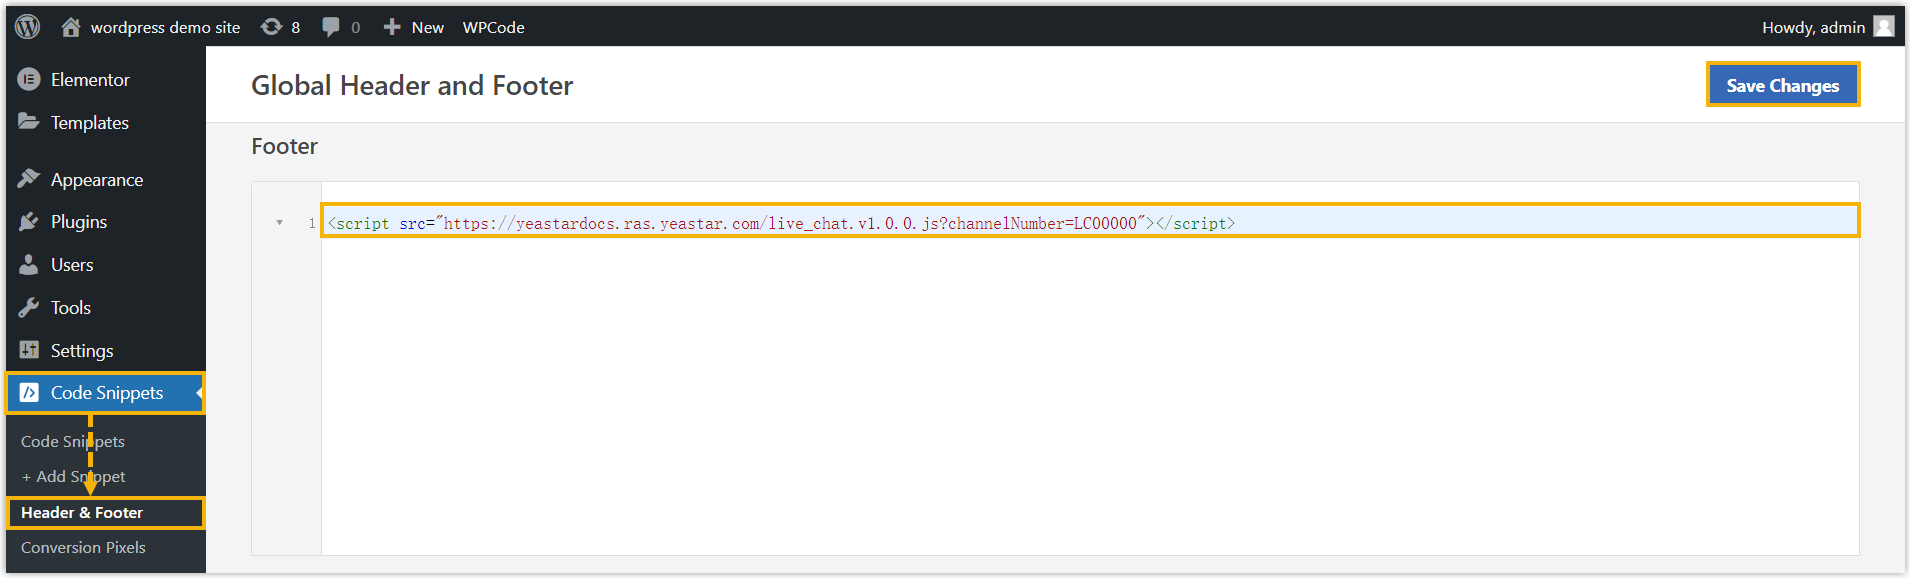
- On the left navigation bar, go to .
- In the Footer section, paste the code snippet.
- At the top-right corner, click Save Changes.
Access the page, then you will find the Live Chat widget is added to your website.