Set up a Live Chat Channel
This topic describes how to create and configure a live chat channel on Yeastar P-Series PBX System first.
Before you begin
If you want to allow users to call agents directly through the Live Chat widget on your website, we recommend that you create a WebRTC trunk and set up a corresponding inbound route in advance, as they are required in the follow-up process.
For more information, see Set up WebRTC Click-to-Call.
Procedure
- Log in to PBX web portal, go to .
- Click Add, and select Live Chat.
- In the General tab, configure general settings for
the channel.
- In the Basic section, enter the following
basic information.

- Name: Enter a name to help you identify the channel.
- Website Domain: Enter the domain name
of the website where you want to add the live chat
widget.Note: For security reasons, the live chat widget only loads on the configured website domain.
- In the Interaction Mode section, set how
users can interact with agents and where to route the
users.
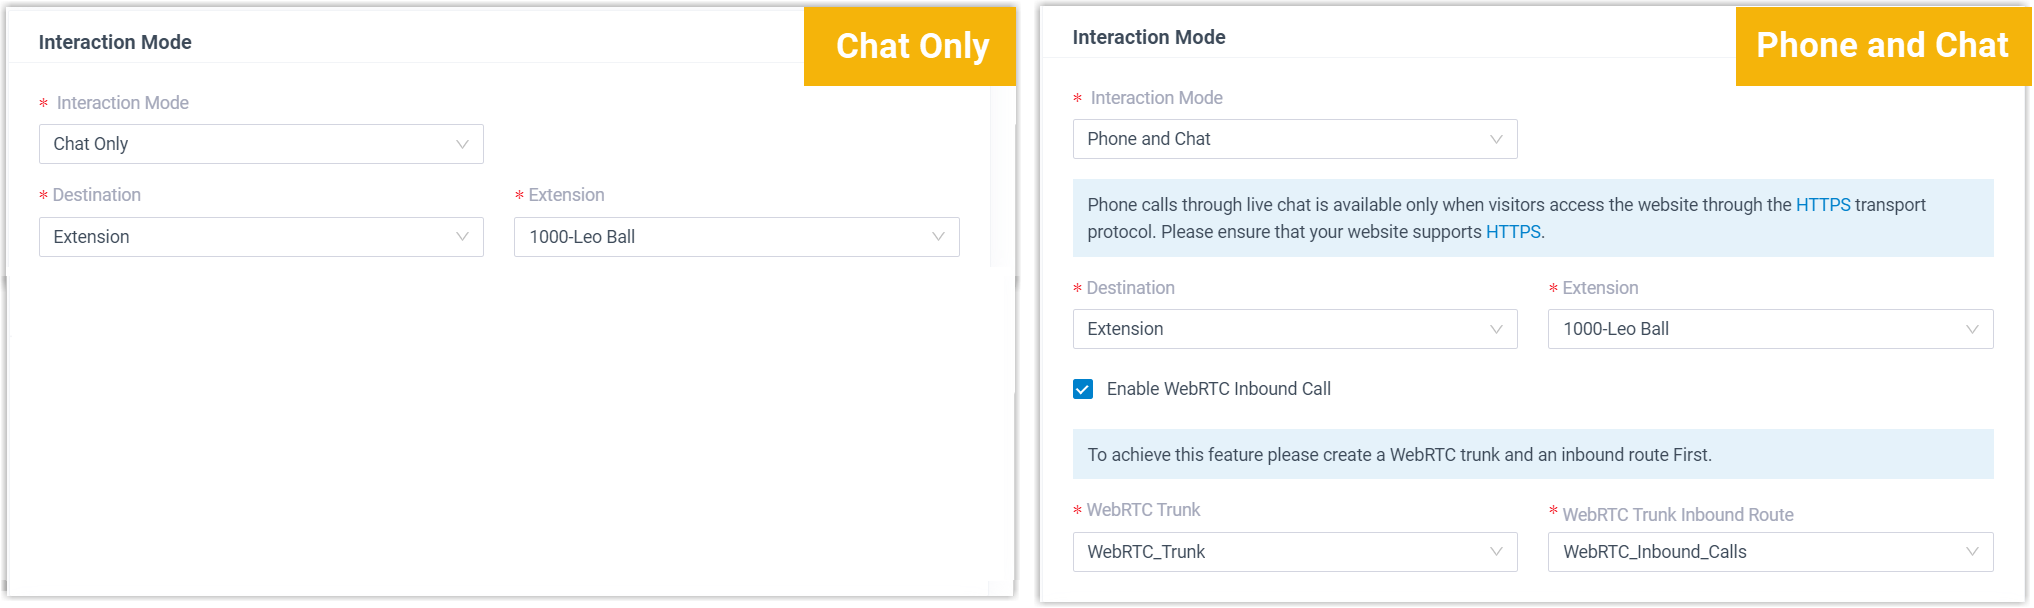
- Interaction Mode: Specify the
interaction mode supported by the live chat widget.
Option Description Chat Only If selected, users can send chat messages to agents. Phone and Chat If selected, users can send chat messages or make phone calls to agents. Note: Phone calls through live chat are available only when users access the website over HTTPS. Make sure that your website supports HTTPS. - Destination: Specify the destination
for inbound messages from live chat.
Option Description Extension If selected, choose an extension from the Extension drop-down list. Only the extension user can receive inbound messages from live chat.
Message Queue If selected, choose a queue from the Message Queue drop-down list. All the agents in the selected message queue can receive inbound message(s) of new sessions in the queue. However, only the user who picks up a session will be able to receive and respond to the follow-up inbound messages in the session.
Third-Party Message Analytics Platform (Transmitted via API) If selected, inbound messages will be automatically forwarded to a third-party message analytics platform via API for advanced processing. Note: To enable automatic forwarding of inbound messages to a third-party message analytics platform, ensure that your PBX server has been integrated with the third-party message analytics platform via API. Once this option is selected, the PBX system will automatically transmit inbound messages to the designated platform. You can get notified by monitoring the API event (30031) New Message Notification. Additionally, the PBX provides a comprehensive Message API suite for advanced message interaction with the integrated third-party message analytics platforms.Message Flow If selected, choose a message flow from the Message Flow drop-down list.
All inbound messages will be routed to the selected message flow.Note: Make sure that you have set up a message flow applicable to Live Chat session type. - Enable WebRTC Inbound Call: If you want to allow users to make phone calls through live chat, enable this option and select a WebRTC trunk and the corresponding inbound route.
- Interaction Mode: Specify the
interaction mode supported by the live chat widget.
- In the Advanced section, complete the
following settings.
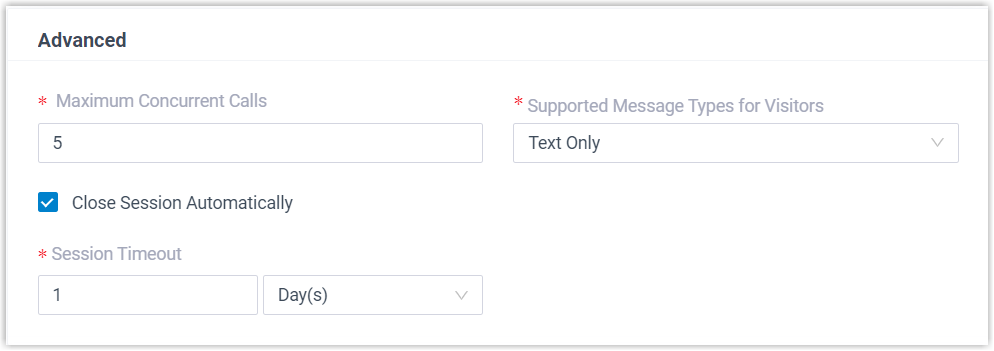
- Maximum Concurrent Calls: Set the
maximum number of concurrent calls supported by live
chat.
When the limit is reached, no more calls can be made through live chat.
Note:- Phone calls made through live chat (whether by agents or users) occupy the concurrent calls.
- The default number of concurrent calls is 5, and the maximum value is 10.
- Supported Message Types for
Visitors: Specify the message type that
users can send.
Option Description Text Only Users can send text and emojis. Text and Image Users can send text, emojis, and images. Note: The maximum size for a single image uploaded in the chat widget is 10 MB. - Close Session Automatically: If you want the system to automatically close the sessions that have been inactive for a specific period of time, select the checkbox of Close Session Automatically, then set the timeout in the Session Timeout field.
- Maximum Concurrent Calls: Set the
maximum number of concurrent calls supported by live
chat.
- In the Basic section, enter the following
basic information.
- In the Display & Appearance tab, customize the
appearance and displayed information of the live chat widget.Note: When customizing the widget, you can preview the changes in the right panel.
- In the Appearance section, customize the
appearance of the live chat widget.
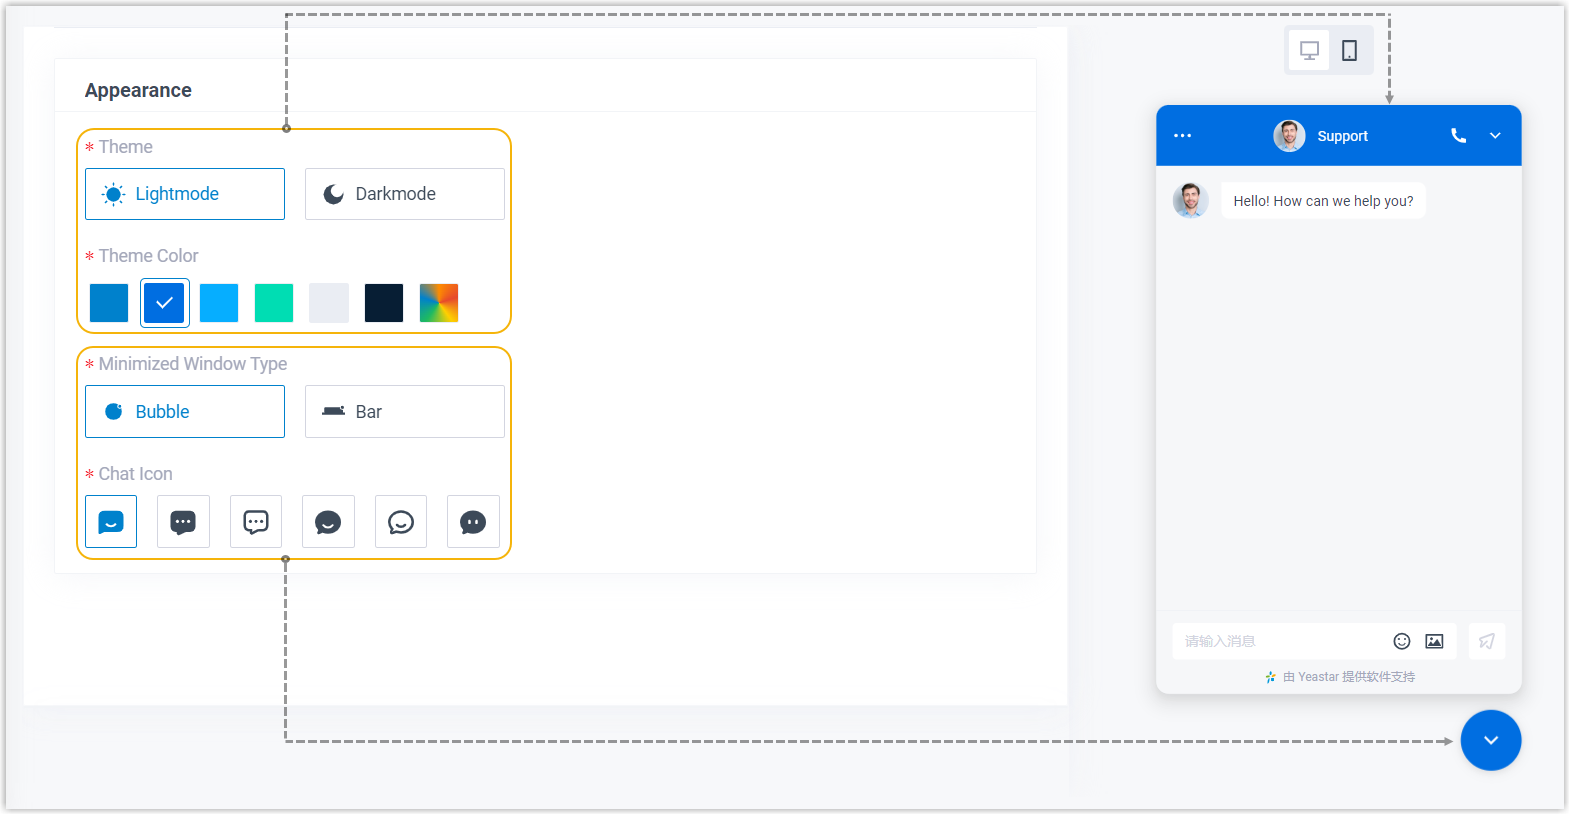
- In the Display section, customize the
information that will be displayed when
customers
initiate a chat or a
call.
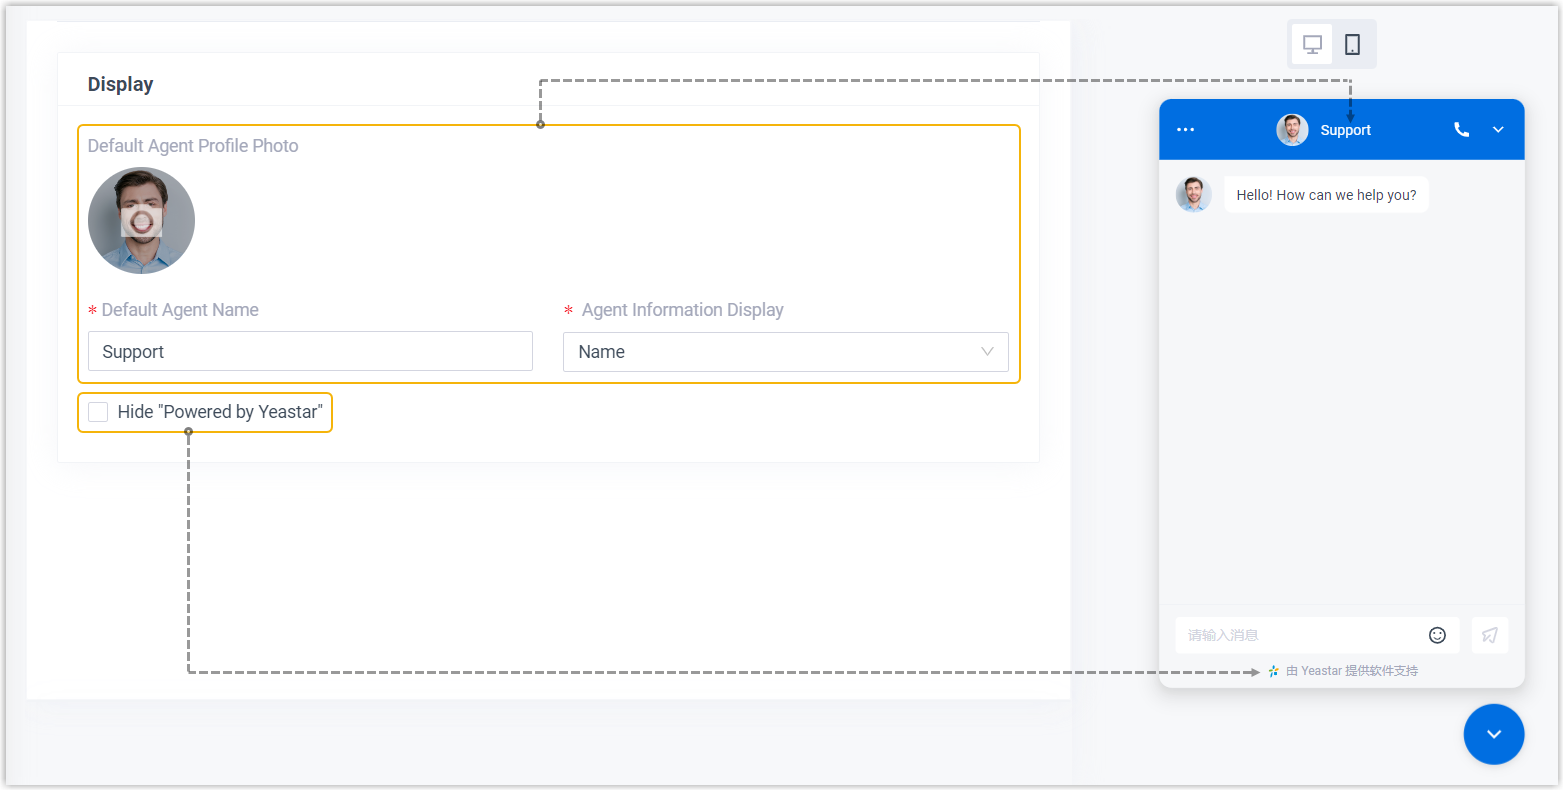 Note: If Agent Information Display is set to None, the default agent name and agent profile photo will be displayed when customers initiate a chat or a call.
If Agent Information Display is set to Name or Name and Profile Photo, the agent's real name and profile photo are displayed for calls and chats handled by the agent. For chats routed to message flow, the default agent name and profile photo will be still displayed.
- In the Appearance section, customize the
appearance of the live chat widget.
- In the Message section, configure language preference
and message settings for the chat widget.
- In the Language section, select an option
from the drop-down list.
This determines the display language of the chat widget.
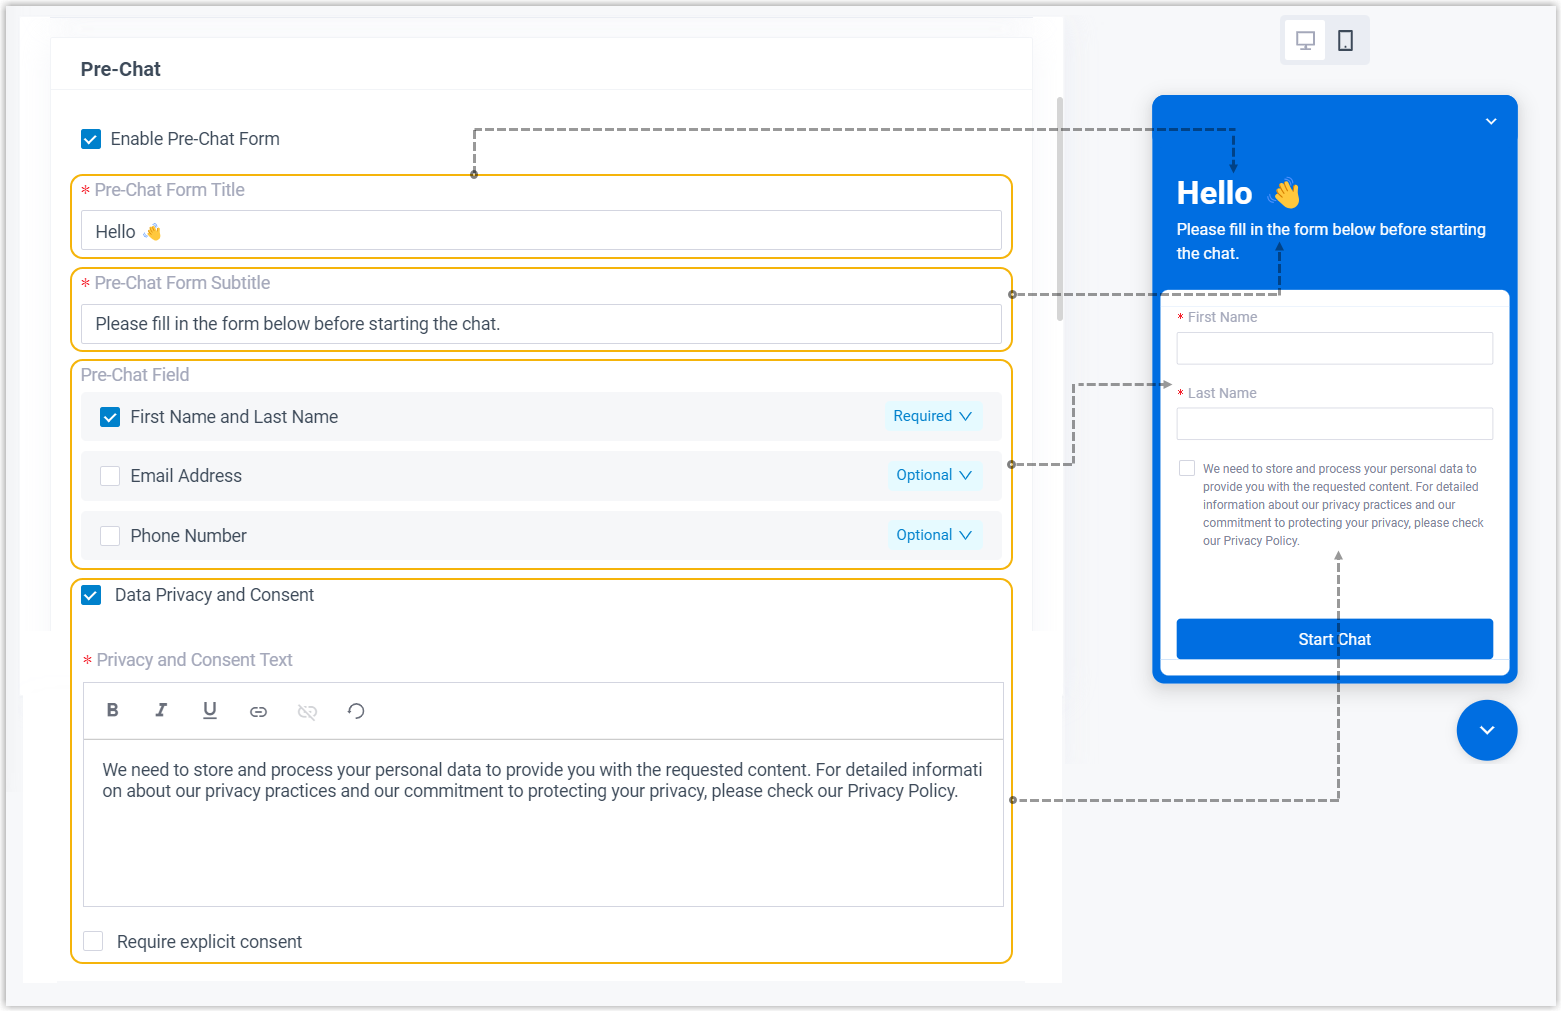
- If you want to use a pre-chat form to collect user information
before a chat starts, complete the following settings in the
Pre-Chat section.
- Optional: In the Message section, edit
the following auto-reply text messages as needed, which will be sent
to users based on specific scenarios.
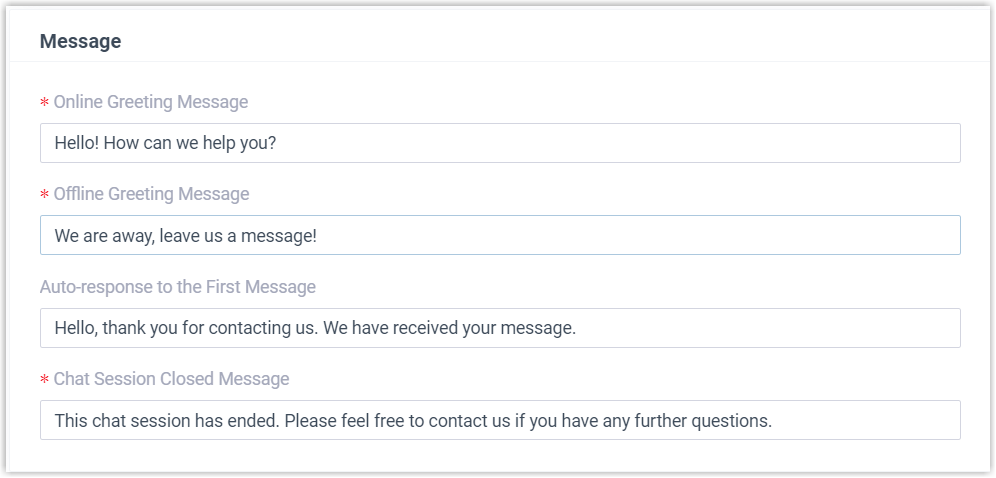 Note: The Online and Offline Greeting Messages are triggered based on office hours. Make sure that office hours in the PBX are properly configured. For more information, see Overview of Business Hours and Holidays.
- Online Greeting Message:
Automatically send the text message to users when they
open the chat interface in the following situations:
- PBX is within Business Hours, and the live chat destination is a message queue.
- PBX is within Business Hours, and the live chat destination is an extension that is logged in to Linkus UC Clients with presence status set to Available.
- Offline Greeting Message:
Automatically send the text message to users when they
open the chat interface in the following situations:
- PBX is within Outside Business Hours or Holidays.
- PBX is within Business Hours, and the live chat destination is an extension that is logged out of Linkus UC Clients or logged in with presence status set to Away / Business Trip / Do Not Disturb / Lunch Break / Off Work.
- Auto-response to the First Message: Automatically reply the text message to users when they send their first chat message.
- Chat Session Closed Message: Automatically send the text message to users when the chat session ends, either manually closed by an agent / user or automatically closed when session timeout is reached.
- Online Greeting Message:
Automatically send the text message to users when they
open the chat interface in the following situations:
- In the Language section, select an option
from the drop-down list.
- Click Save.
Result
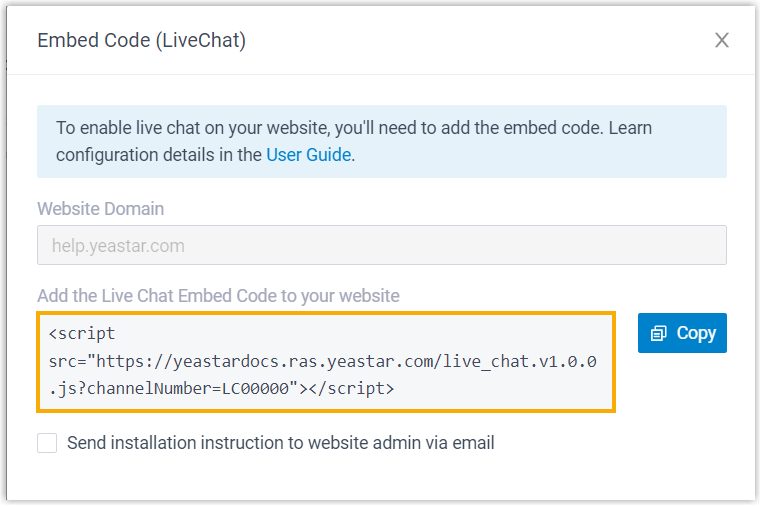
A code snippet and URL for live chat are generated and displayed in the pop-up window.
What to do next
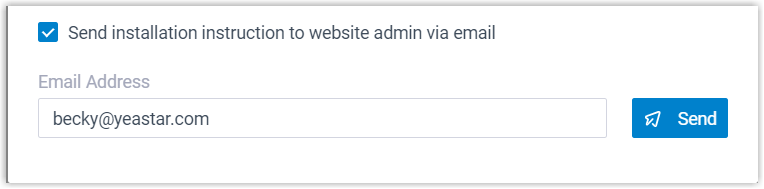
- Copy the code snippet or URL.Note: For code snippet, you can also email it and the website domain to a specified person (for example, a website admin) to assist with the setup. The system will use the default email template (Path: ) to send installation instructions to the specified email address.
-
Enable Live Chat using one of the following methods:
- Embed the code snippet into your website.
- Add the Live Chat URL to emails.
- Provide the URL for direct access.