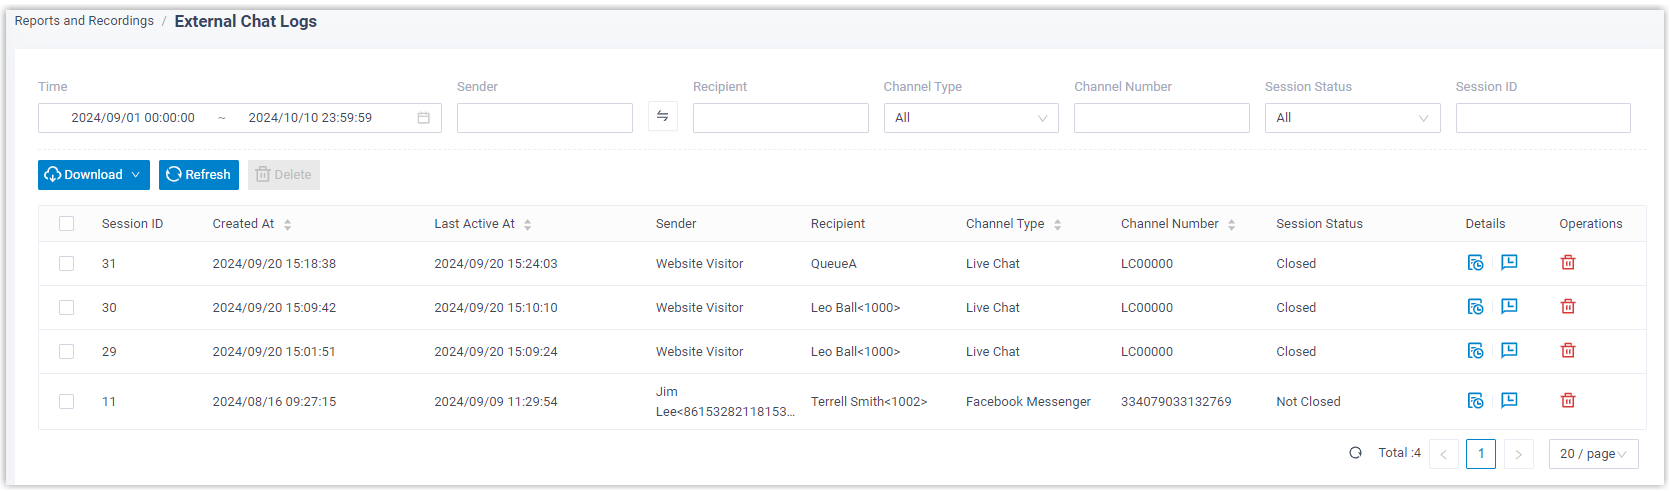
Check and Manage External Chat Logs
External chat logs are comprehensive records of sessions and messages coming from various messaging channels. This topic describes how to check the external chat logs (including session information, session operation records, and detailed chat histories) and how to manage the session or chat histories on Yeastar P-Series PBX System.
Requirements
The firmware version of Yeastar P-Series PBX System is 37.23.0.24 or later.
Procedure
- Log in to PBX web portal, go to .
- Optional: Set criteria (time, channel type, or other
objects) to filter the desired records.The relevant records of external chat sessions are displayed on the page.Tip:
- To quickly filter chat sessions that belonged to a deleted
extension or queue, click
 .
.
- To update the latest chat session list, click the Refresh.
- To quickly filter chat sessions that belonged to a deleted
extension or queue, click
- Check and manage the records according to your need.
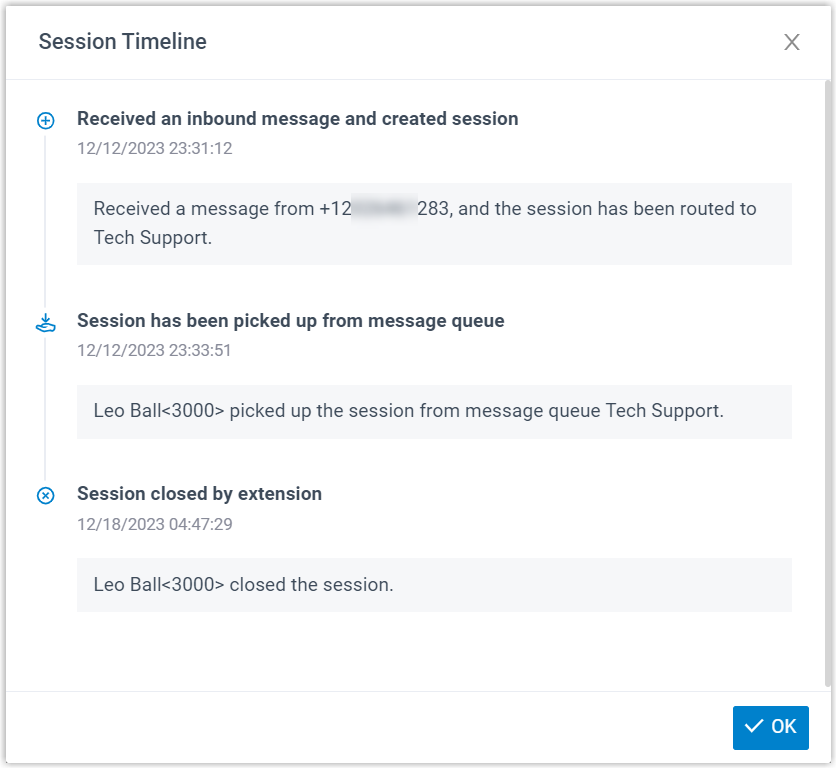
Operation Instruction External Chat Session Check operation records of an external chat session Click  beside the
desired session.
beside the
desired session.
A window pops up, displaying the operation records of the session in a timeline view.
Transfer an external chat session You can transfer one or multiple chat sessions to a specified destination as needed, for example, to reassign sessions after an extension is deleted. Supported destinations include an extension, a message queue, or a third-party message analytics platform (transmitted via API).Note:- The transfer option of Third-Party Message Analytics Platform is available only when the Omnichannel Messaging feature is available and the API feature is enabled on the PBX.
- Transferring a session does not change the session status.
- To transfer a session, do as follows:
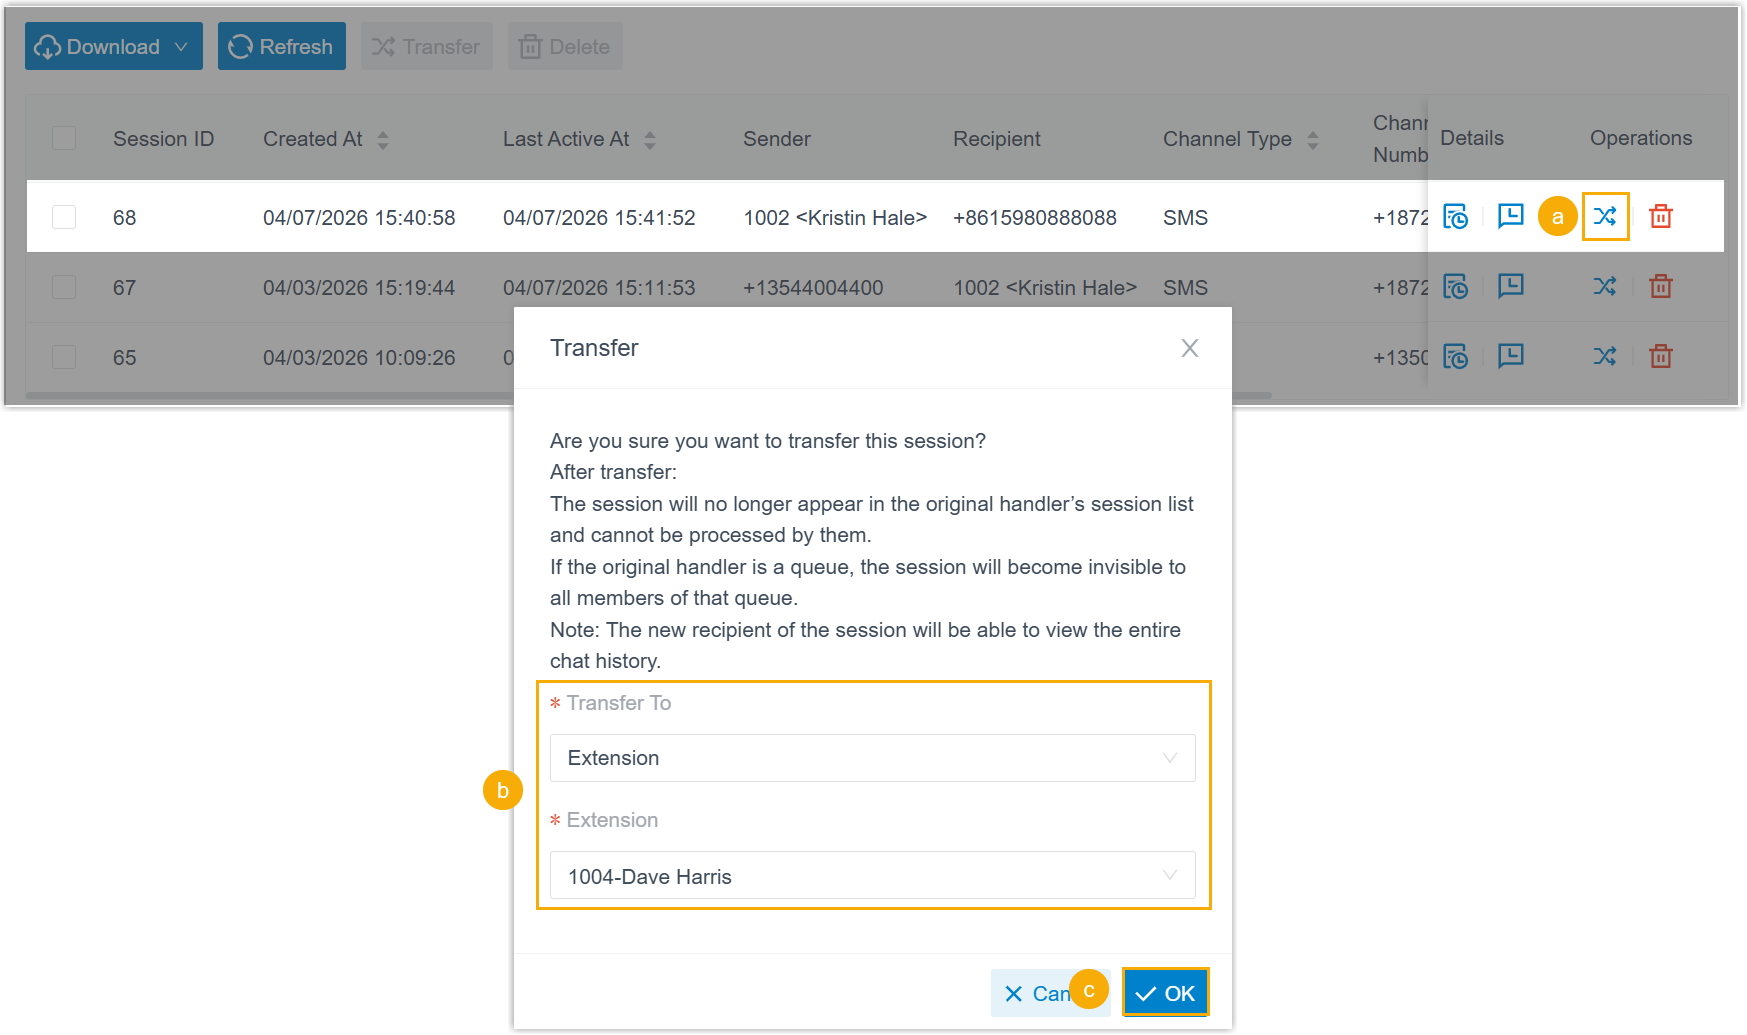
- Click
 beside the
session that you want to transfer.
beside the
session that you want to transfer. - In the pop-up window, select the desired destination type, then select the specific destination.
- Click OK.
The messaging session is removed from the original handler's session list, and transferred to the extension / message queue / third-party message analytics platform with complete chat history.
- Click
- To transfer multiple sessions, do as follows:
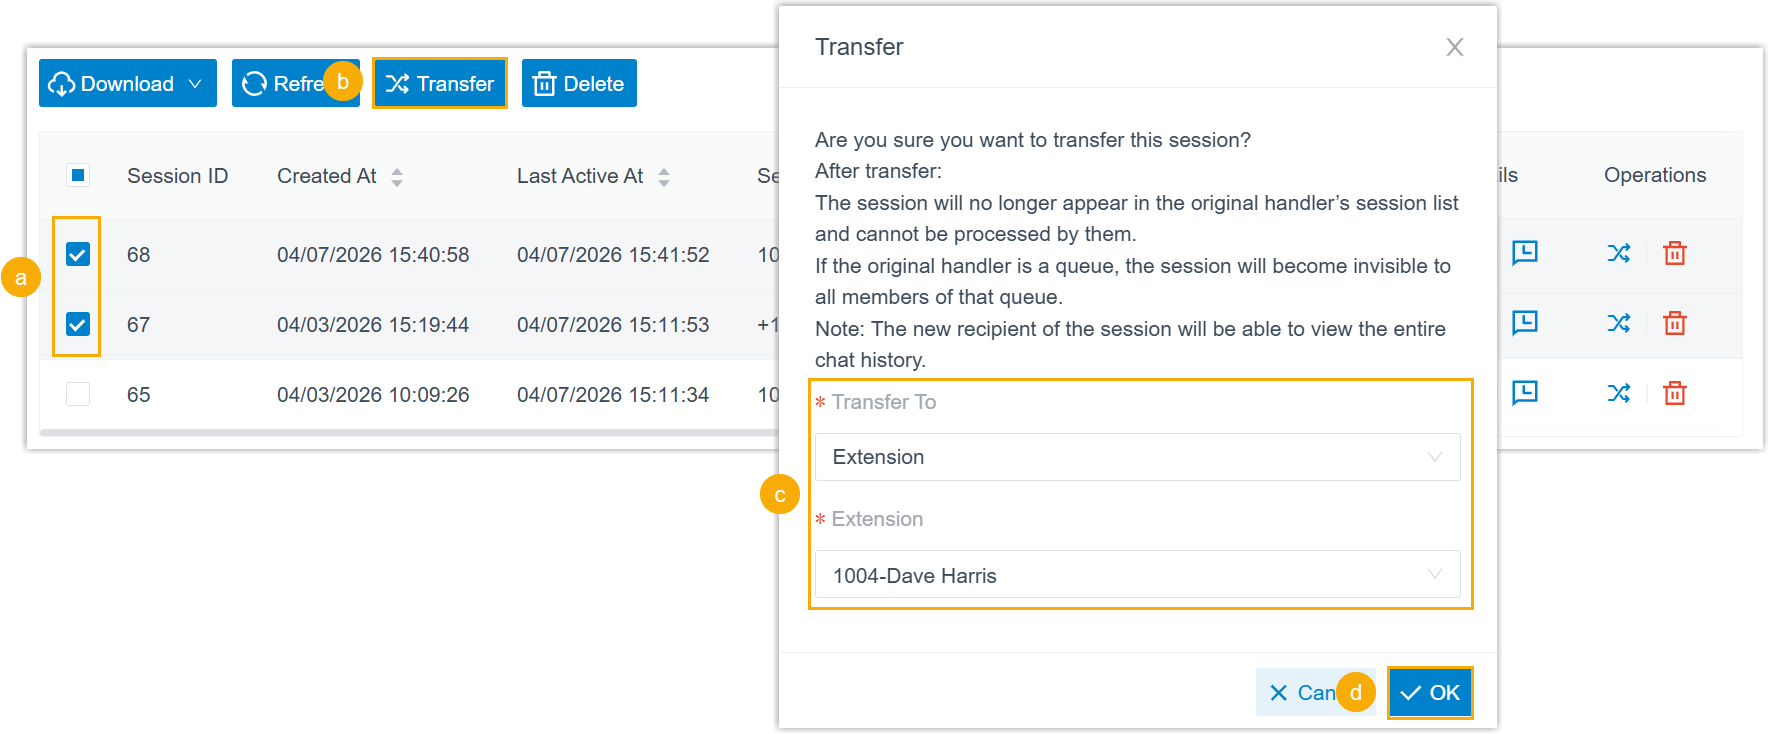
- Select the desired sessions.
- At the top of the list, click Transfer.
- In the pop-up window, select the desired destination type, then select the specific destination.
- Click OK.
The messaging session are removed from the original handler's session list, and transferred to the extension / message queue / third-party message analytics platform with complete chat history.
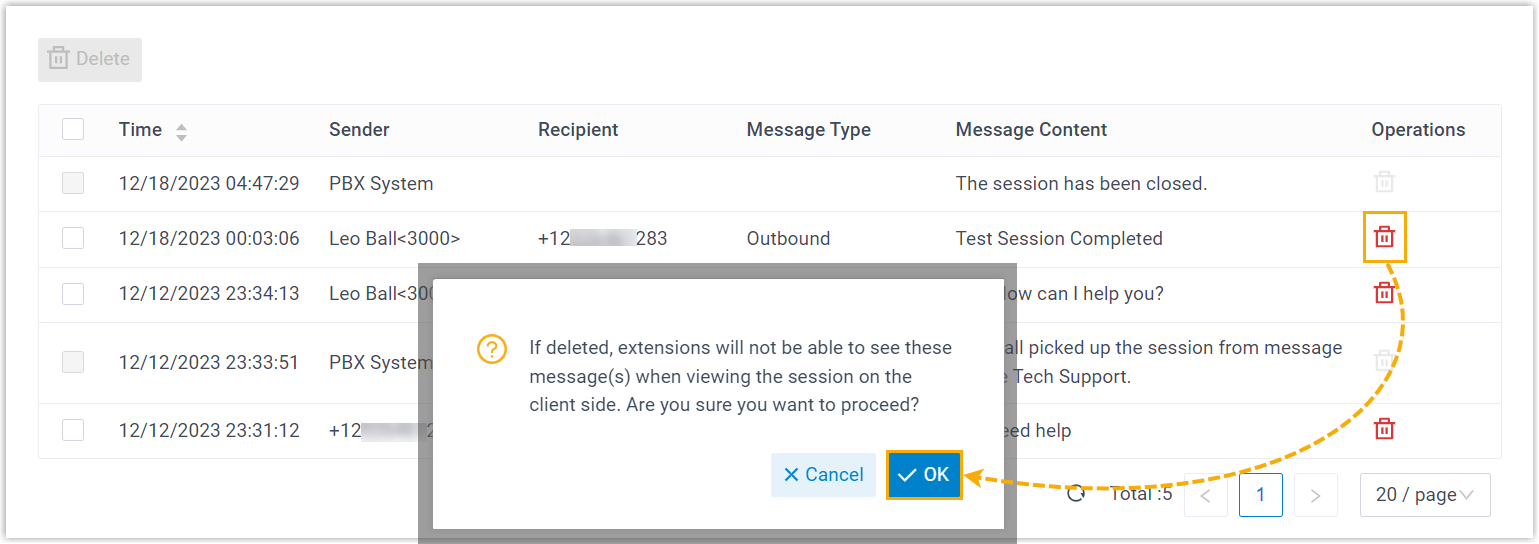
Delete external chat session(s) - To delete a session, do as follows:
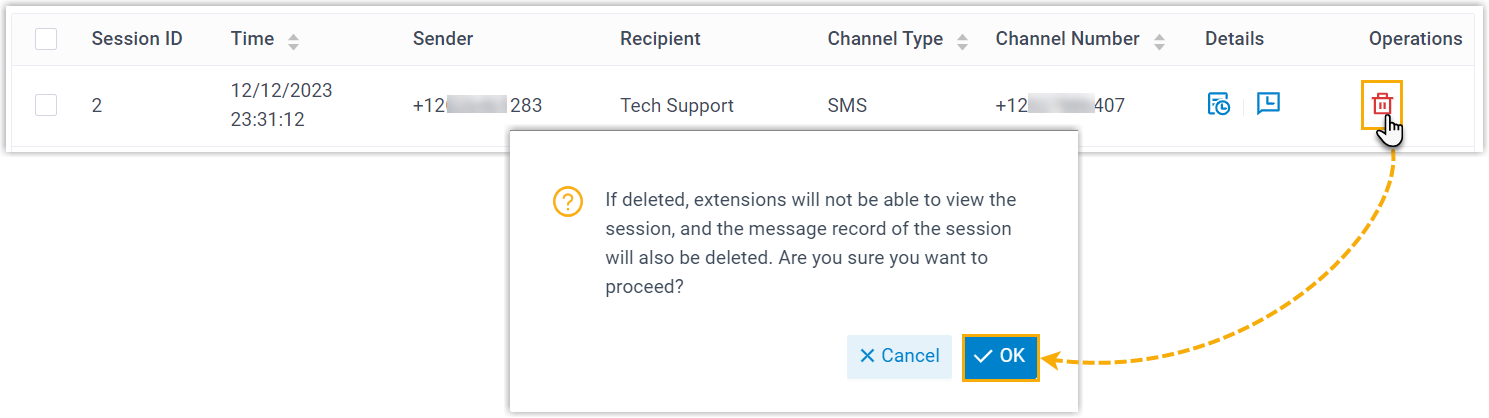
- Click
 beside the
session that you want to delete.
beside the
session that you want to delete. - In the pop-up window, click OK.
- Click
- To delete multiple sessions, do as
follows:
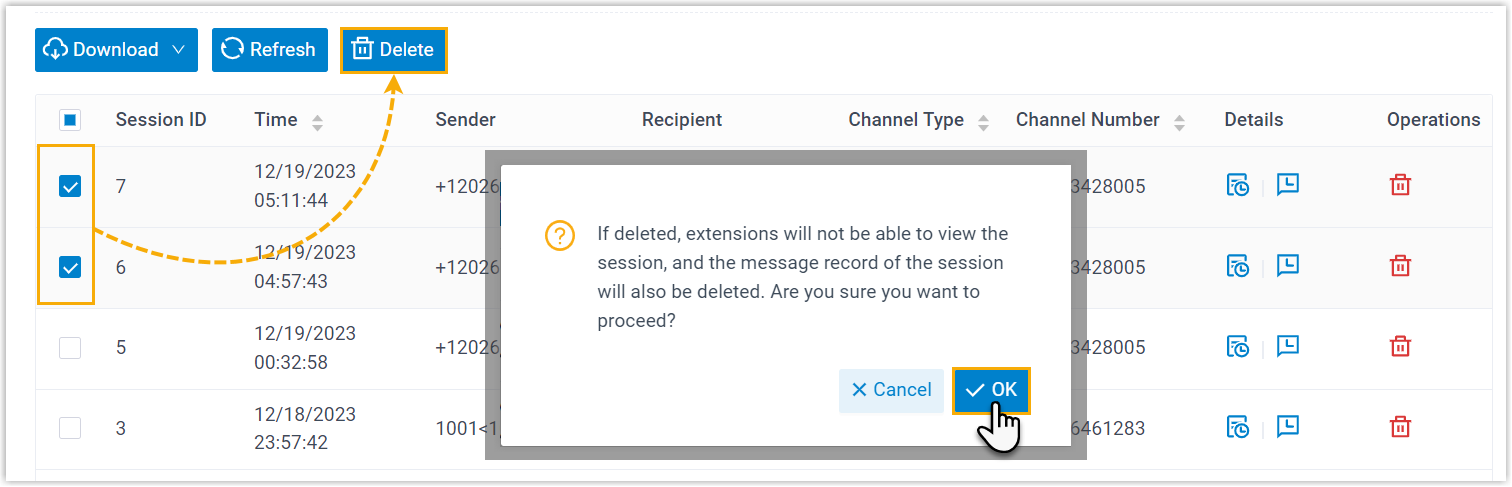
- Select the desired sessions, then click Delete.
- In the pop-up window, click OK.
External Chat History Check the detailed chat histories of a session - Click
 beside the desired
session.
beside the desired
session.
The detailed messages in the session are displayed.
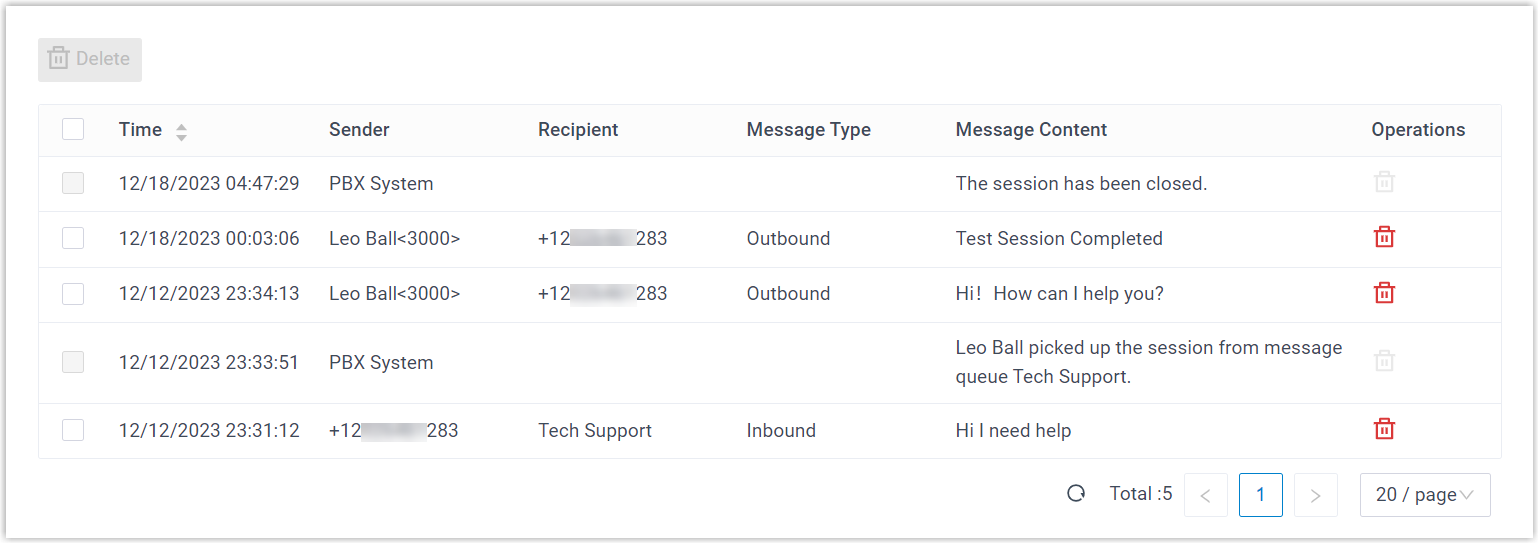
Delete chat histories of a session Note: Messages sent by the PBX system can NOT be deleted.- Click beside the
desired session.
The detailed messages in the session are displayed.
- To delete a single message, do as
follows:
- Click beside the
desired message.
- In the pop-up window, click OK.
- Click
- To delete multiple messages, do as
follows:
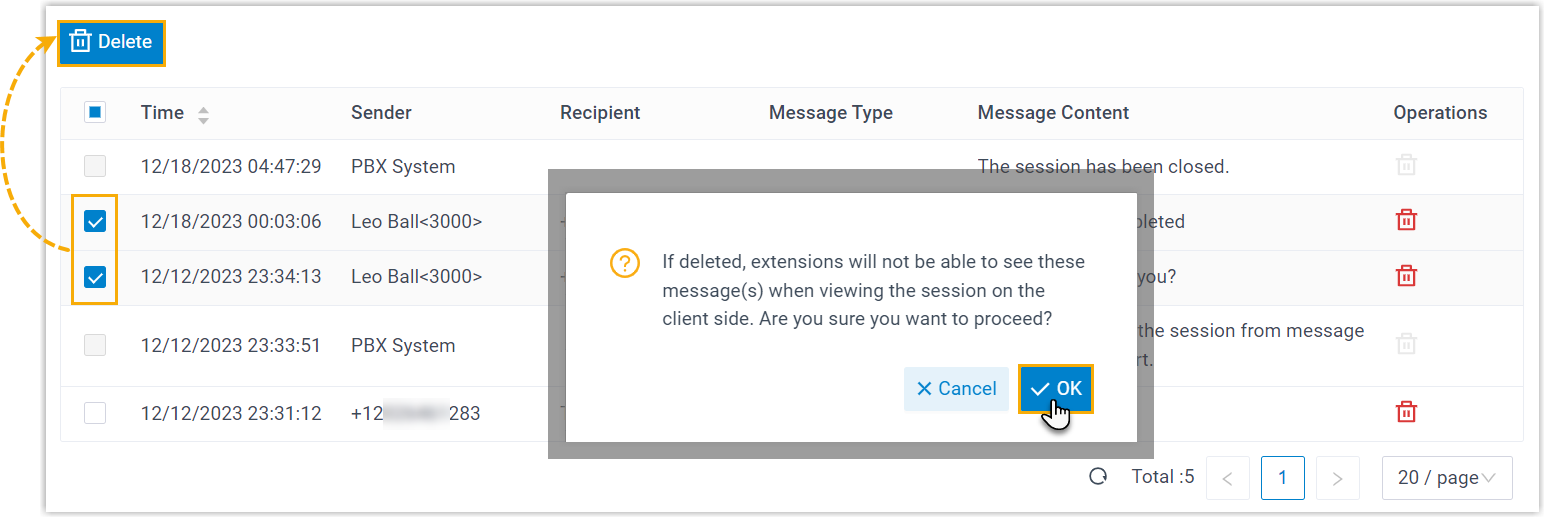
- Select the desired messages, then click Delete.
- In the pop-up window, click OK.