Set up an SMS Channel for Apidaze
This topic describes how to set up an Apidaze SMS channel on Yeastar P-Series PBX System, so that agents in your business can receive and reply to SMS messages from customers on their Linkus UC Clients.
Requirements
- Firmware: Version 37.23.0.24 or later.
- Plan: Enterprise Plan (EP) or Ultimate Plan (UP)
- Domain Name: PBX
can be remotely accessed via a domain name. Note:For more information about the domain configuration, see the following topics:
- Due to the limitation of the third-party platform, the domain name must NOT contain underscore character(s), otherwise the messaging channel will encounter authentication failure, or will fail to receive messages.
- If you use a self-managed domain name, make sure you have installed a valid domain certificate for the domain name, otherwise the messaging channel will encounter authentication failure, or will fail to receive messages.
Supported message types and limits
- Supported message types
- The Apidaze SMS channel supports text messages and multimedia messages (MMS), where the supported MMS file types are determined by Apidaze.
- Limits
-
- File size: Max. 100 MB
- File retention period: 72 hours
Prerequisites
- API key
- Secret
- Phone number used for message sending and receivingNote: If business needs to communicate with US-based customers, make sure that the phone number has been completed with 10DLC registration to avoid disruption in message delivery.
Procedure
Step 1. Create and configure an SMS channel on PBX
- Log in to PBX web portal, go to .
- Click Add, and select SMS.
- In the Authentication tab, enter the authentication
information of Apidaze.
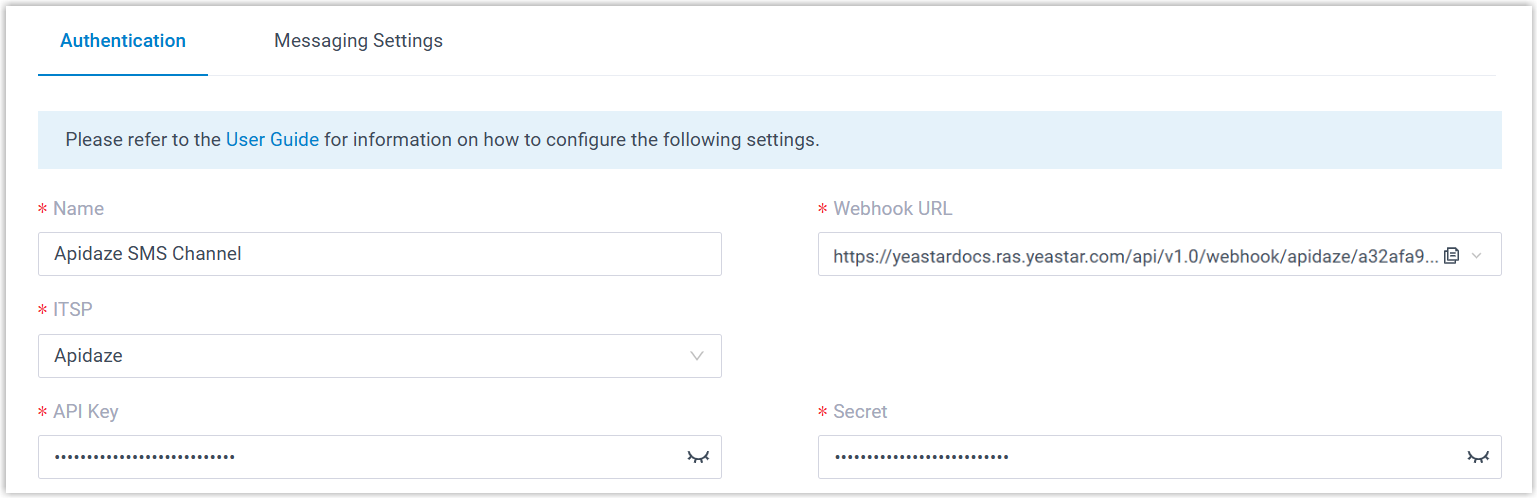
- Name: Enter a name to help you identify the channel.
- ITSP: Select Apidaze.
- API Key: Enter the API key obtained from Apidaze.
- Secret: Enter the Secret obtained from Apidaze.
- In the Messaging Setting tab, configure the
channel.
- In the Message Sending Rate field,
specify the number of messages that PBX can send per
second.Note:
- If the number of messages to send exceeds the set value, PBX will arrange the messages in queue and send them at the sending rate.
- If the sending rate set in PBX exceeds the limit set by the SMS service provider, it may result in message delivery failures. Contact your SMS service provider to confirm the sending rate limit of your account and increase the limit as needed.
- Configure the following session settings as needed.
Setting Description Close Session Automatically If you want the system to automatically close the sessions that have been inactive for a specific period of time, select the checkbox, then set the timeout in the Session Timeout (Days) field. 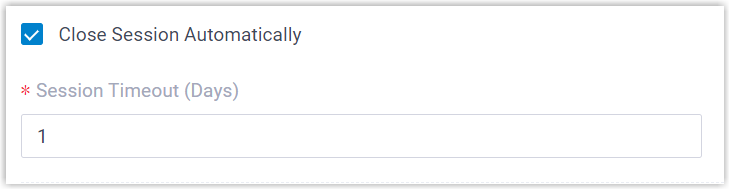
Allow the Creation of Duplicate Active Sessions To allow creating a new session when an active session with the same sender and receiver already exists, select the checkbox. When enabled, if an extension user creates a session on Linkus client and an active session with the same sender and receiver already exists on the channel, a pop-up prompt will appear. If the user chooses to continue creating the session, the original session will be removed from the previous handler's session list, and taken over by the creator, along with the complete chat history.
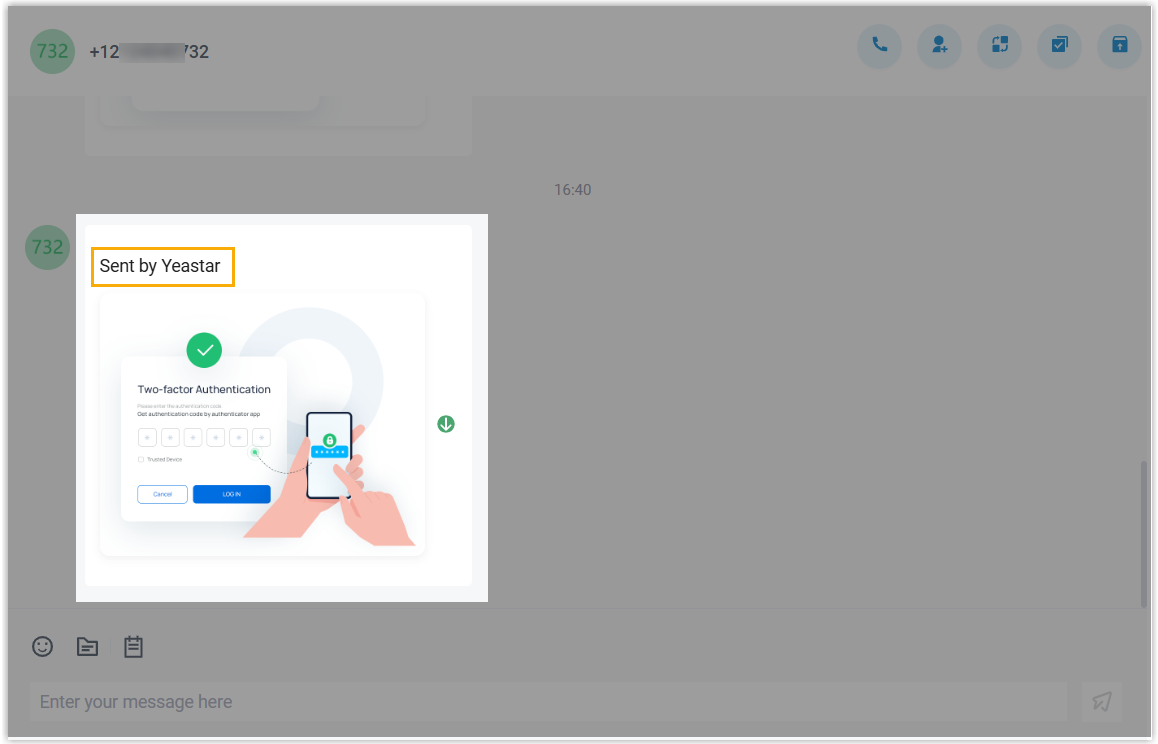
- In the Accompanying Text for Chat File field,
specify the default text that will be sent along with chat files.
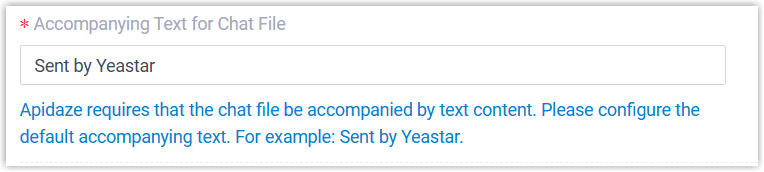
The message recipient will see the text displayed alongside the chat files.
- In the Number section, click
Add to add a message routing
rule.
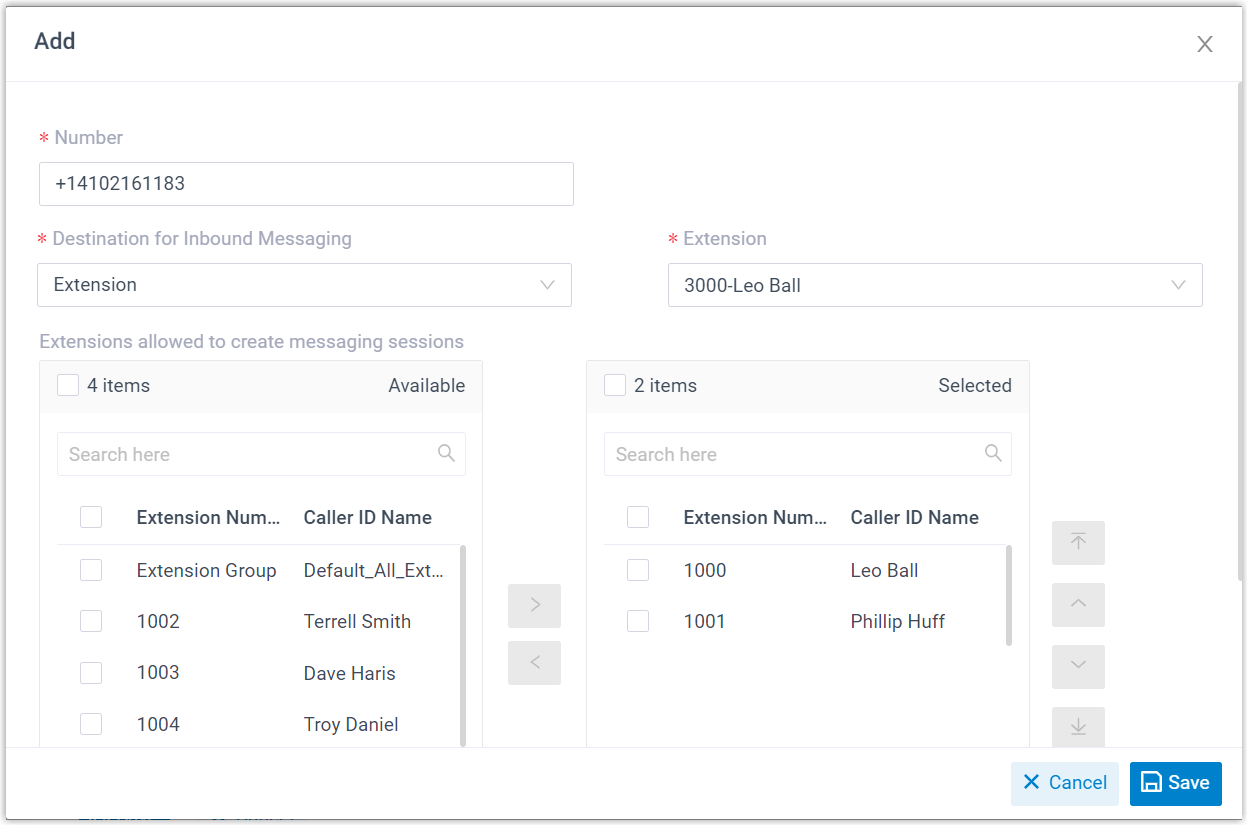
- Number: Enter the purchased
number or specify an Alphanumeric Sender ID.Note: The phone number should be in E.164 format (
[+][country code][phone
                                                  number]
). For example,+14102161183. - Destination for Inbound
Messaging: Specify the destination of
inbound messages from the number.
Option Description Extension If selected, choose an extension from the Extension drop-down list. Only the extension user can receive inbound messages from the number.
Message Queue If selected, choose a queue from the Message Queue drop-down list. All the agents in the selected message queue can receive inbound message(s) of new sessions in the queue. However, only the user who picks up a session will be able to receive and respond to the follow-up inbound messages in the session.
Third-Party Message Analytics Platform (Transmitted via API) If selected, inbound messages will be automatically forwarded to a third-party message analytics platform via API for advanced processing. Note: To enable automatic forwarding of inbound messages to a third-party message analytics platform, ensure that your PBX server has been integrated with the third-party message analytics platform via API. Once this option is selected, the PBX system will automatically transmit inbound messages to the designated platform. You can get notified by monitoring the API event (30031) New Message Notification. Additionally, the PBX provides a comprehensive Message API suite for advanced message interaction with the integrated third-party message analytics platforms. - Extensions allowed to create messaging sessions: Select the extensions that are allowed to initiate a messaging session with customers.
- Number: Enter the purchased
number or specify an Alphanumeric Sender ID.
- Click Save.
- In the Message Sending Rate field,
specify the number of messages that PBX can send per
second.
- Click Save.
Step 2. Configure webhook in Apidaze
- On PBX web portal, go to .
- Click the SMS channel you created.
- In the Authentication tab, select a desired URL from the
Webhook URL drop-down list, then copy the
URL.
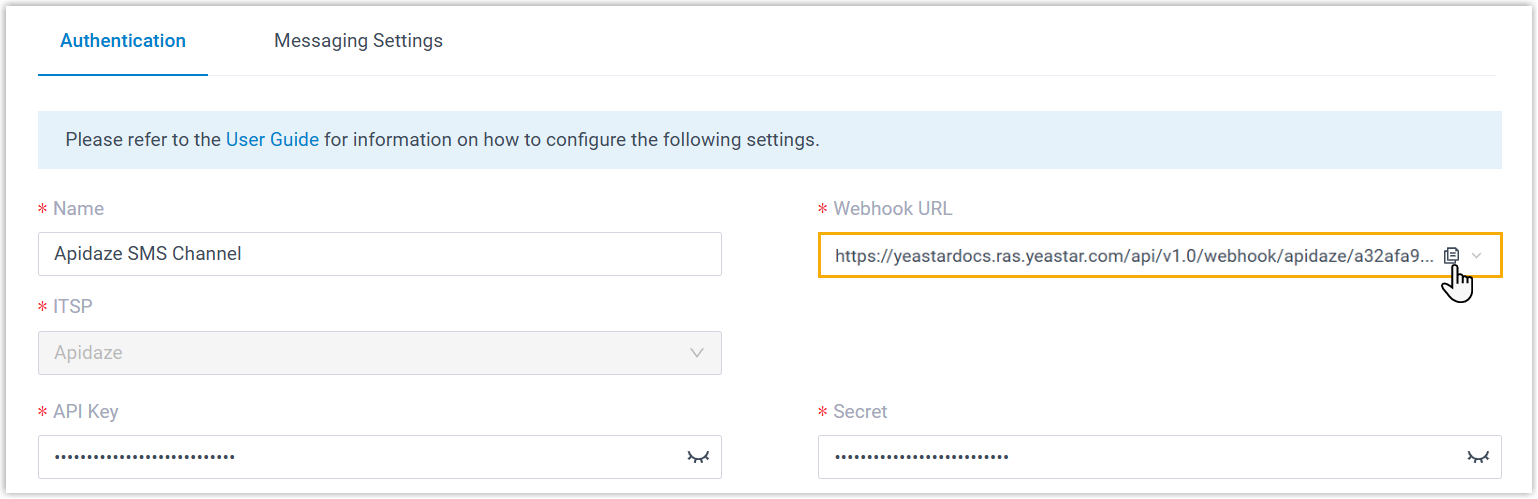
- In Apidaze, configure messaging webhook for the phone number using the PBX's webhook URL to receive inbound messages.
Result
- A messaging channel is created successfully. You can see the channel
displayed in the Messaging Channel list with Status
showing
 .
.
- PBX automatically tracks and records the number of messages sent
and received on the channel, where the Total column
indicates the total number of sent messages, including both successfully
sent messages and failed ones.Note:
- For sent messages, PBX only tracks the number of the messages sent from agents' Linkus UC Clients. If you want to calculate the actual cost of sent messages, consult with the SMS service provider for the precise number of messages transmitted, as long text messages (longer than 160 characters) are automatically split into segments and then re-assembled when they are received, increasing the number of sent messages.
- You can filter the statistics by a time period using the time filter.

What to do next
Send text messages to the phone number and see if the specified agent can receive messages on his or her Linkus UC Client.