Set up WebRTC Click-to-Call
To implement WebRTC click-to-call, you need to create a WebRTC trunk on PBX to obtain a WebRTC call link, then embed the call link into your web page. In this way, your website visitors can make calls to your company's phone system with a click.
Prerequisites
- Make sure that the PBX can be remotely accessed
via a domain name. For more information about the domain configuration, see the following topics:
- If you need video calls, Ultimate Plan is required.
- Make sure the version of Yeastar P-Series PBX System is 37.19.0.70 or later.
Procedure
Video Tutorial
Create a WebRTC trunk
Create a WebRTC trunk to obtain a WebRTC call link.
- Log in to PBX web portal, go to , then click Add.
- In the Basic section, complete the following
settings.

- Name: Enter a name to help you identify it.
- Trunk Status: Select Enabled.
- Select ITSP Template: Select General.
- In the Detailed Configuration section, complete the
following settings.
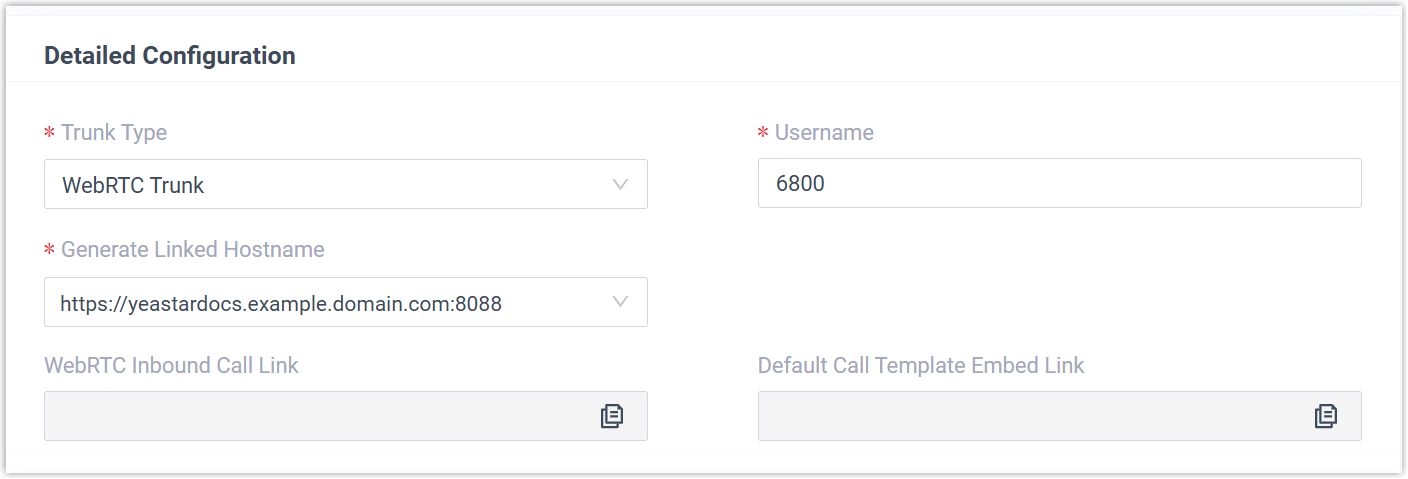
- Trunk Type: Select WebRTC Trunk.
- Username: Enter a username for the trunk.
- Generate Linked Hostname: Select the hostname for generating the WebRTC Inbound Call Link and the Default Call Template Embed Link.
- Optional: Click the Advanced tab to configure
advanced WebRTC trunk settings.
- In the Codec Settings section, configure your preferred codecs.
- In the Call Restriction section, set the
maximum number of concurrent calls for the trunk.Note: The default number is 5, you can set up to 10 concurrent calls.
- Click Save and Apply.
A WebRTC trunk is displayed in the trunk list with the trunk status showing
 ; A WebRTC call link is generated and
displayed in the WebRTC Inbound Call Link field
of the trunk.
; A WebRTC call link is generated and
displayed in the WebRTC Inbound Call Link field
of the trunk. 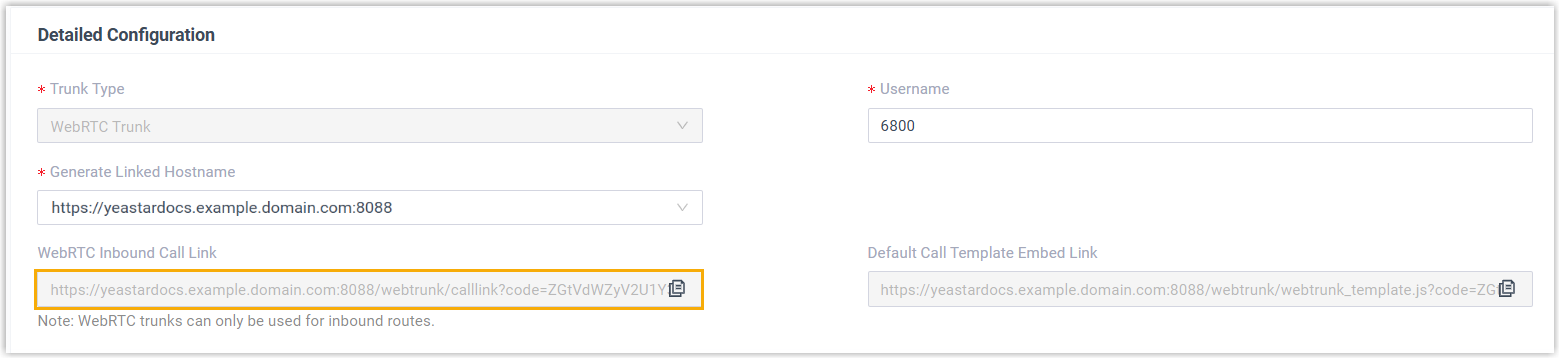
Set WebRTC inbound call destination
- Go to , then click Add to add an inbound route.
- In the General section, set a name for the inbound
route.

- In the Trunk section, select the WebRTC trunk from
Available box to Selected
box.Note: You can NOT select both WebRTC trunk and other types of trunk for an inbound route at the same time.
- In the Default Destination section, set
destination(s) for the WebRTC inbound calls.
- If you want the inbound calls to always be routed to a destination,
set the desired destination in the Default
Destination drop-down list.

- If you want the inbound calls to be routed to different destinations
based on time, do as follows:
- Select the checkbox of Time Condition.
- In the Time-based Routing Mode drop-down list, select a time-based mode.
- Configure the corresponding destinations based on time.
- If you want the inbound calls to always be routed to a destination,
set the desired destination in the Default
Destination drop-down list.
- Click Save and Apply.
Test WebRTC Click-to-Call
Test if the WebRTC inbound call can be routed to the given destination.
- Go to , click
 beside the WebRTC trunk.
 - In the Detailed Configuration section, copy the
WebRTC Inbound Call Link.
- Open a browser tab, paste the inbound call link in the address bar, then
press Enter.A dialpad is displayed on the web page, and a call is placed to the pre-set call destination.Tip: During the call, you can switch to a video call by clicking
 at the bottom-left corner on the web
page.
at the bottom-left corner on the web
page.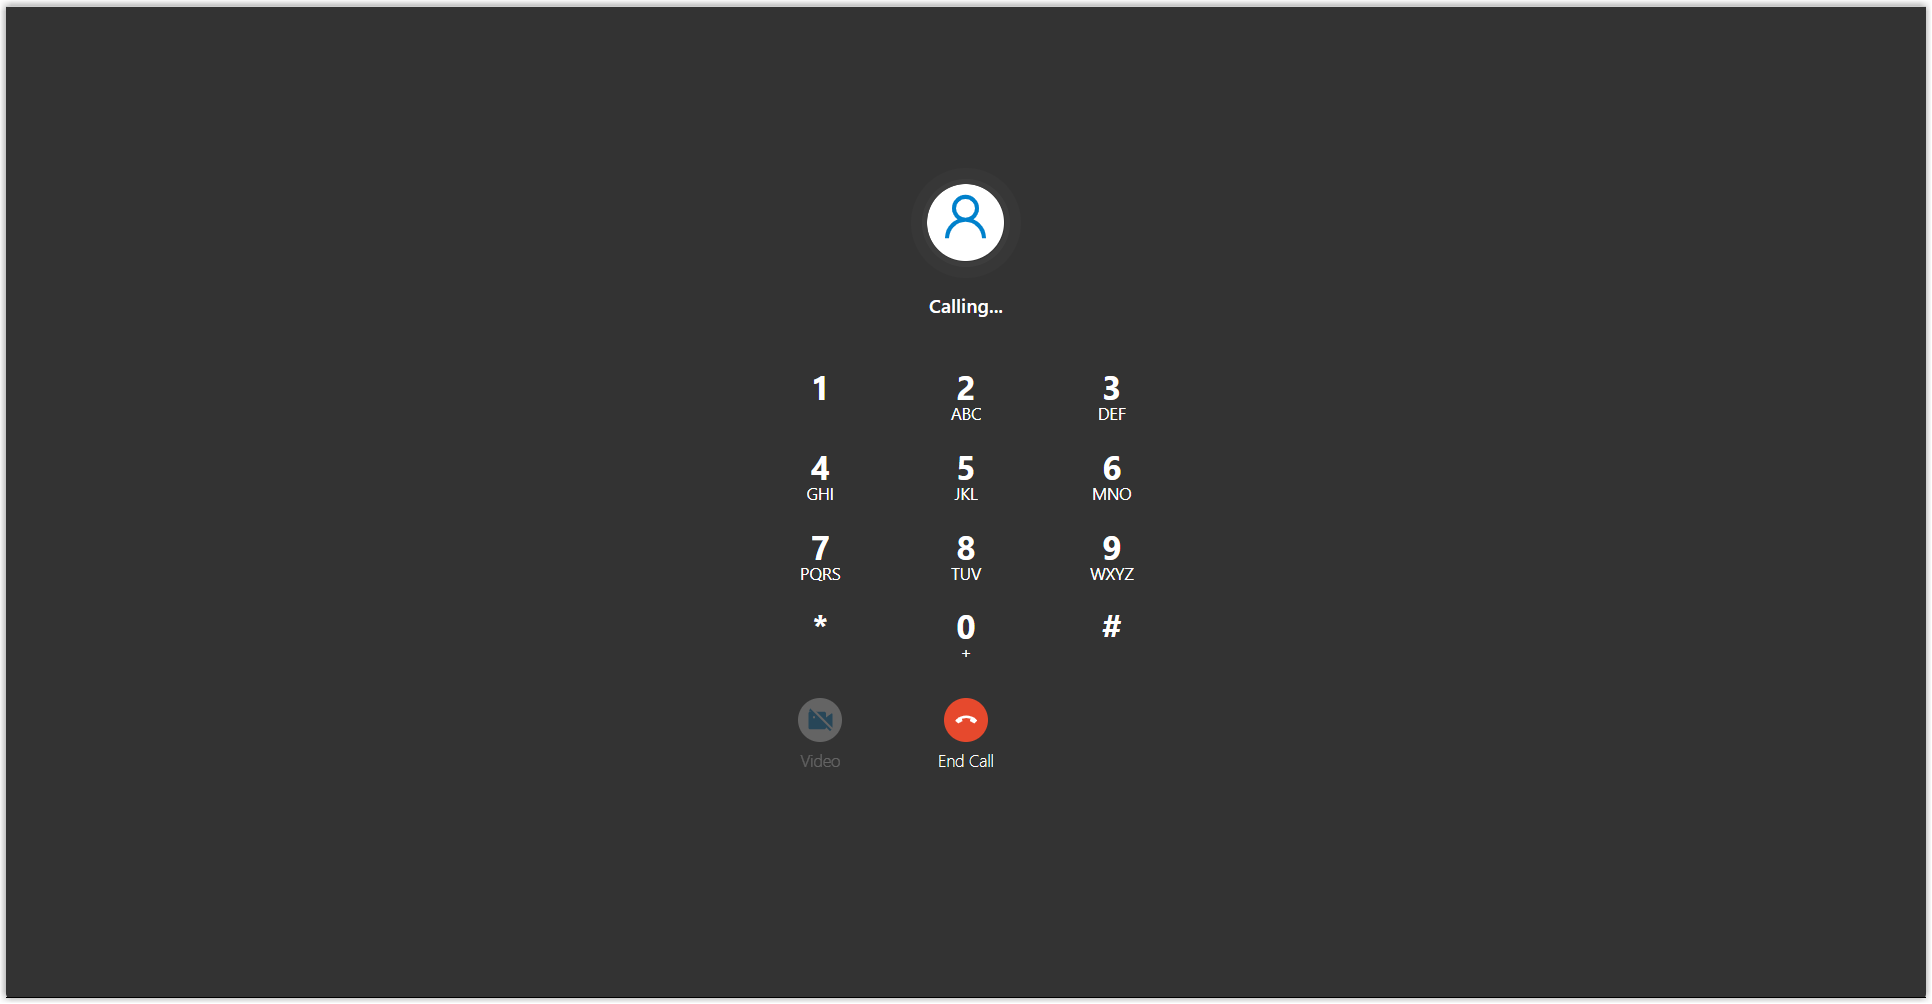
What to do next
- Customize a call button on your website, and set the button link to the
WebRTC call link.
- Utilize the default call button template provided in the WebRTC trunk by
referencing the embed link in your website using the following script:
<script src="{Default Call Template Embed Link}"></script>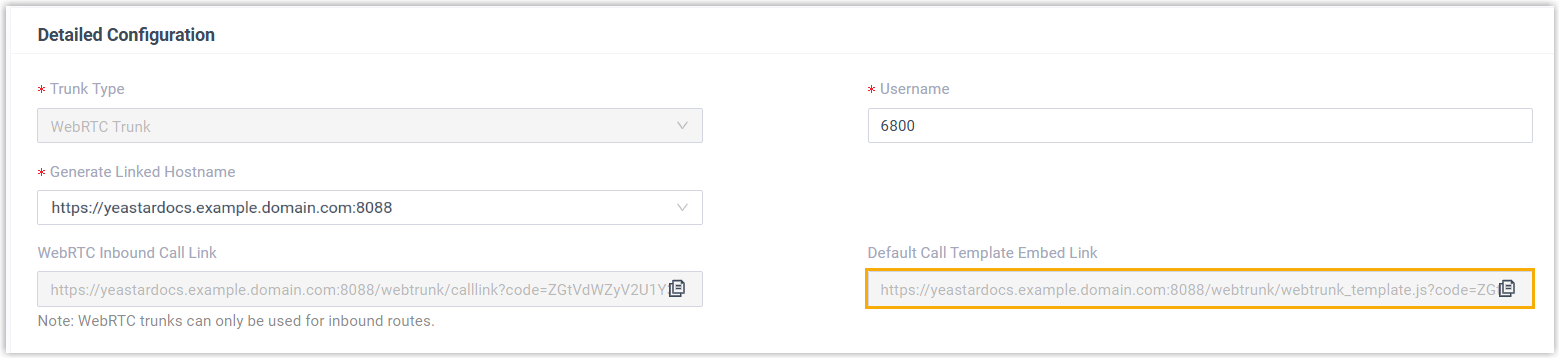
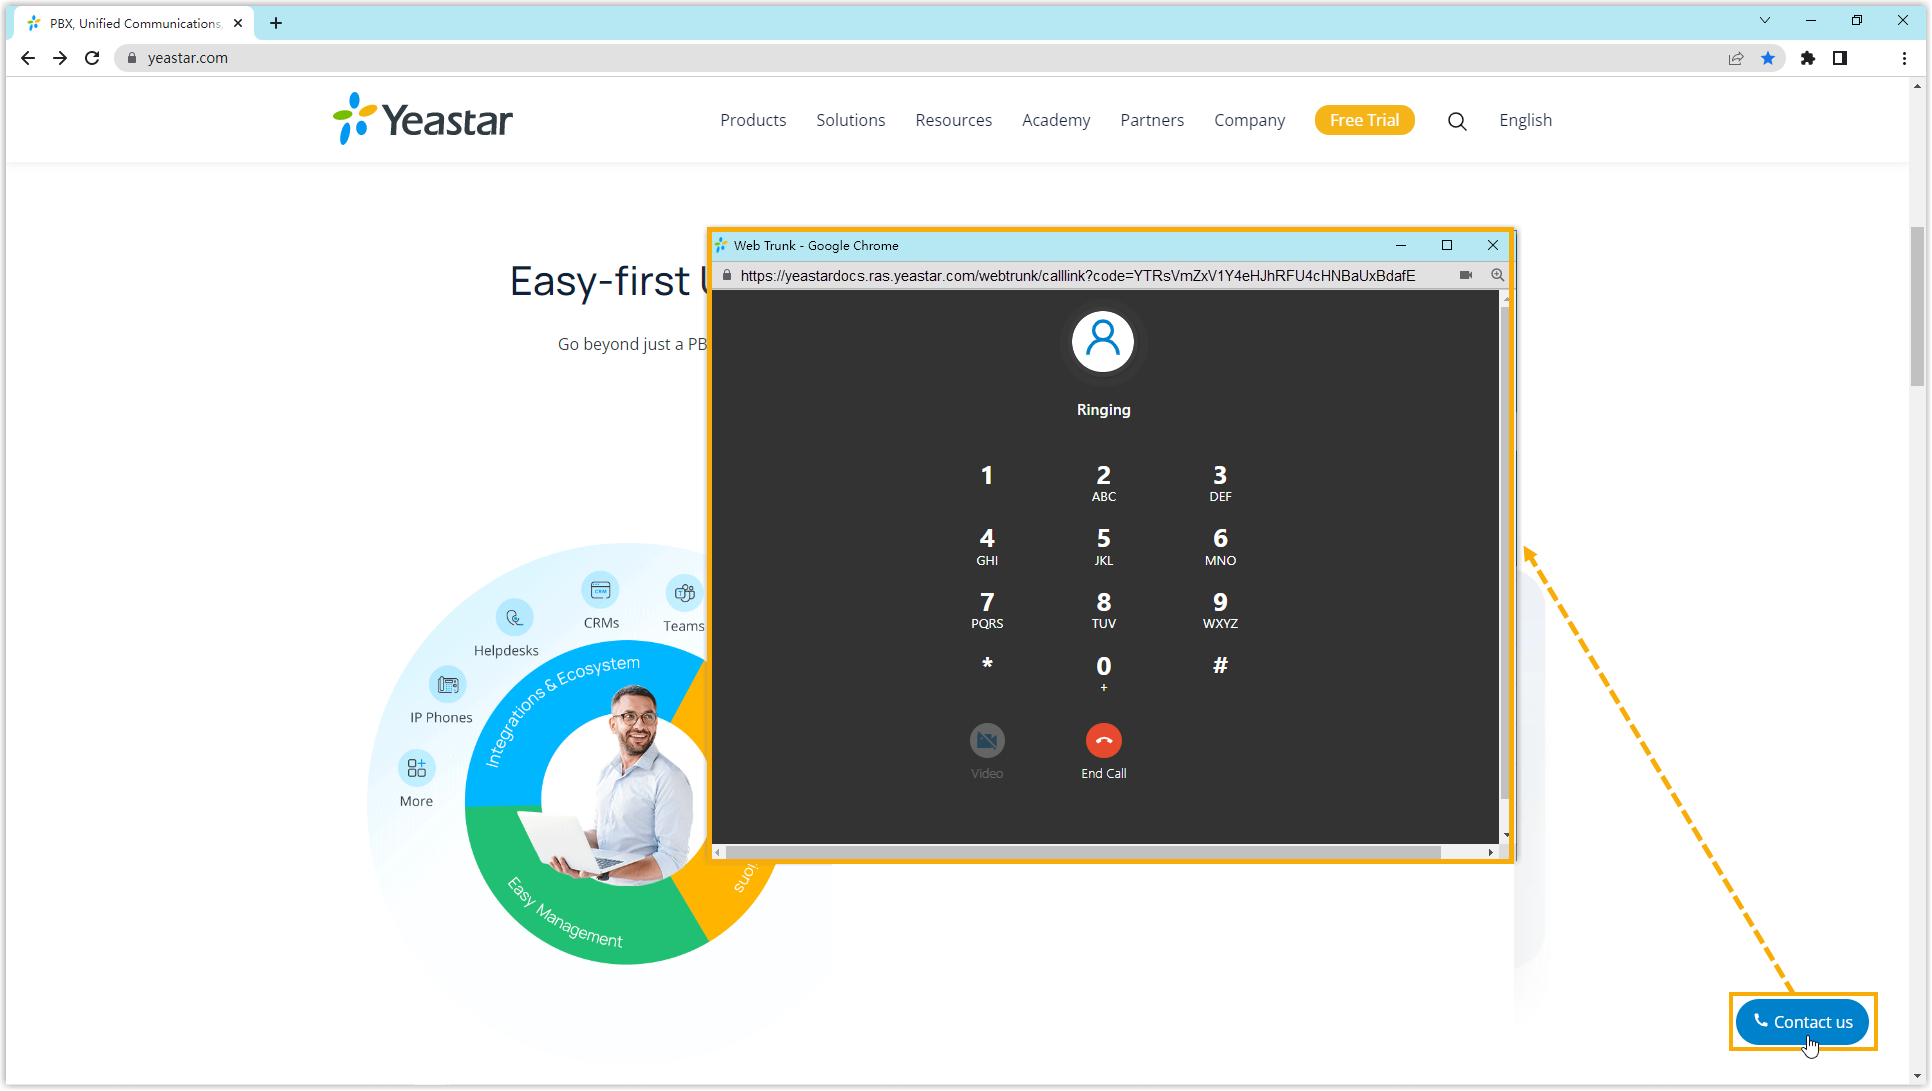
The figure below shows the generated call button and the click-to-call effect: