Set up an Outbound Route
This topic describes how to add and configure an outbound route.
Prerequisites
Your service provider has assigned at least one trunk to your tenant.
Procedure
- Log in to NovoOne Tenant portal, go to .
- Click Add.
- Configure the outbound route.
- In the General section, configure the basic
information.

Setting Description Name Enter a name to help identify the outbound route. Outbound Caller ID Set the Outbound Caller ID displayed on the called party's device when users make outbound calls through this route.
You can select an available Outbound Caller ID, or enter a custom value using one of the supported formats below.
- Fixed Outbound Caller ID: Enter a fixed
number, which will be displayed as the Outbound
Caller ID for all users when making outbound calls
through this route.
For example, enter 5503301.
- Dynamic Outbound Caller ID: Enter a
number with the
{{.Ext}}placeholder. The placeholder will be replaced with the caller's extension number in the Outbound Caller ID.For example, enter 550
{{.Ext}}. When users make outbound calls through this route from extension 3301 and 3302, 5503301 and 5503302 are used as their Outbound Caller ID respectively. - Anonymous Outbound Caller ID: Enter anonymous to hide Caller ID for outbound calls.
- Fixed Outbound Caller ID: Enter a fixed
number, which will be displayed as the Outbound
Caller ID for all users when making outbound calls
through this route.
- In the Dial Pattern section, click
Add to add dial patterns.

Setting Description Pattern Enter a pattern to match dialed numbers. The outbound route is used only when the dialed number matches the pattern.
Note: For more information about the supported characters in dial patterns, see Supported Pattern Syntax.Strip Enter the number of digits to remove from the beginning of the dialed number.
Prepend Enter digits to add to the beginning of the dialed number.
Note: The system matches the dialed number against the configured pattern. If the number matches, the system removes the specified digits from the beginning of the number, and then adds the configured prefix before sending the call out. - In the Trunk section, configure trunk-related
settings.
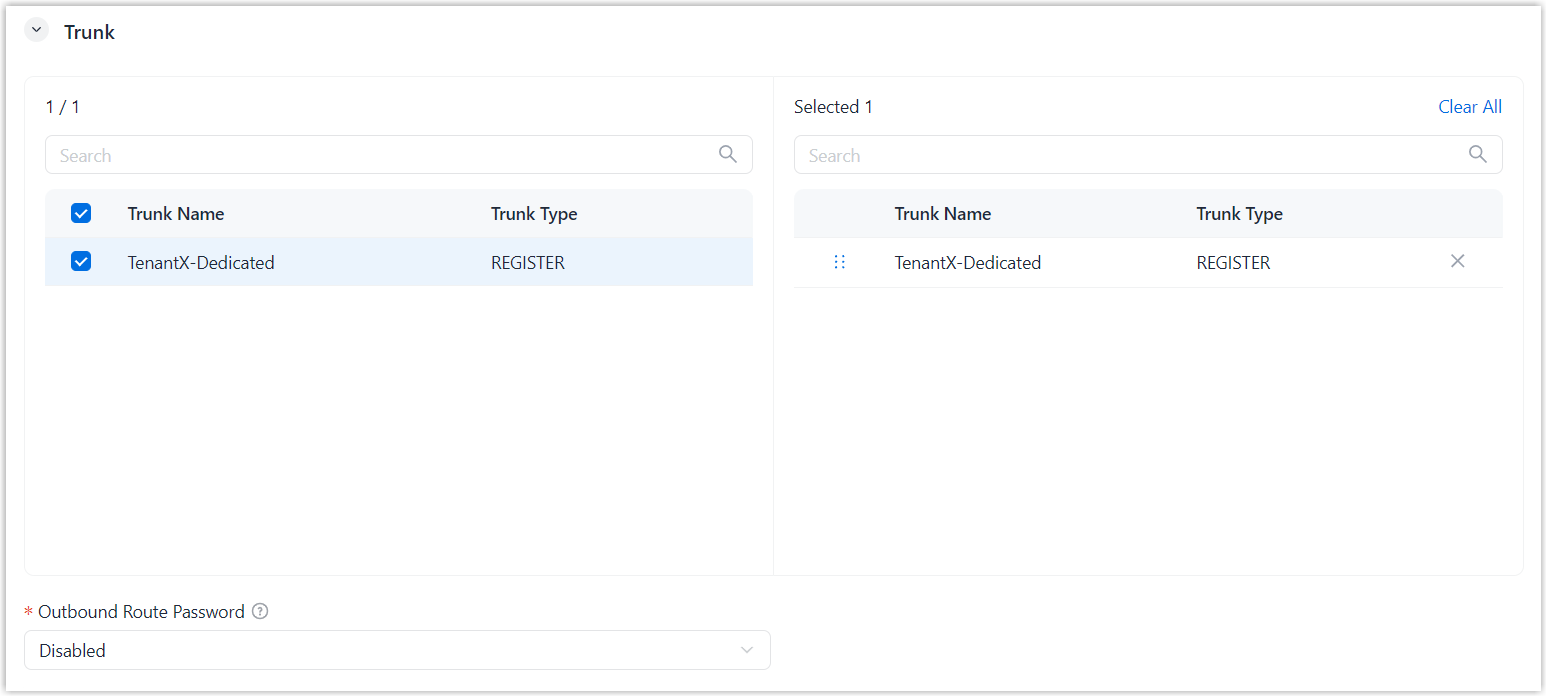
Setting Description Trunk Select one or more trunks. Note: When the dialed number matches the configured dial pattern, the system attempts to use the first idle trunk in the list. If the trunk fails, the system tries the next idle trunk.Outbound Route Password To require users to enter a PIN before using this outbound route, configure the following settings.-
Single PIN: All users must enter the same PIN to make outbound calls through this route.
If you choose this option, enter a PIN in the Single PIN field.
-
PIN List: Users must enter a PIN configured in the selected PIN list to make outbound calls through this route.
If you choose this option, select a PIN list from the PIN List field.
Note:- This option is typically used when each user has a dedicated PIN.
- Available PIN lists are synchronized from . For more information about adding a PIN list, see Add a PIN List.
When users make outbound calls through this route, the system plays the prompt "Please enter your password followed by the pound key.". Users must enter the password to call out.
-
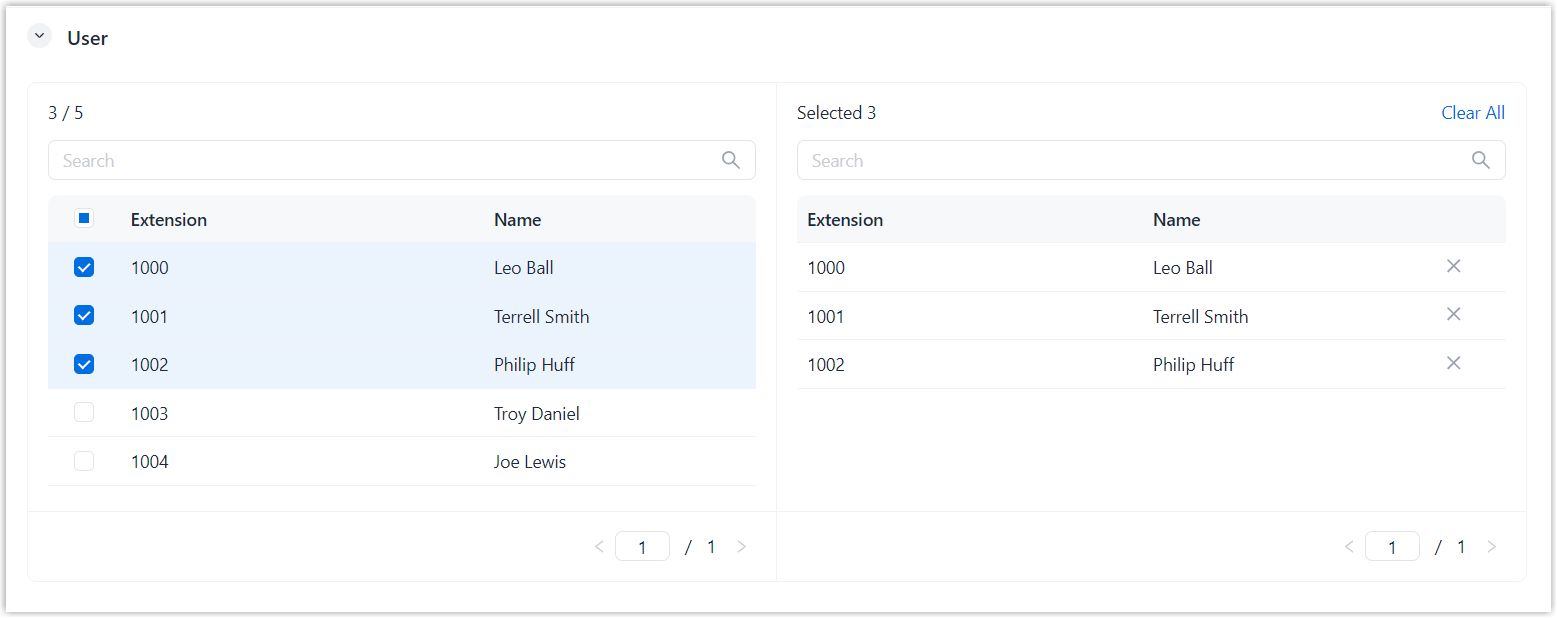
- In the User section, select the users who can use
this outbound route and move them to the Selected
box.
- Optional: To restrict the use of the outbound route by time, turn
on the switch of Time-Based Availability and
configure the following settings.
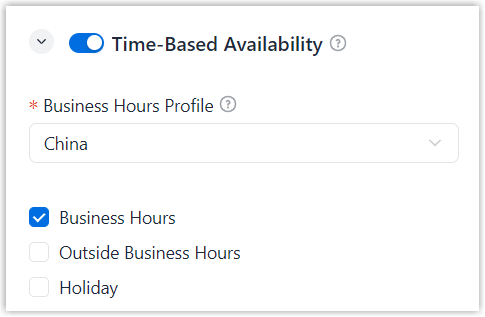
Setting Description Business Hours Profile Select a business hours profile that defines the business hours. Business Hours Select the time periods during which users can use the outbound route. Outside Business Hours Holiday Handling
- In the General section, configure the basic
information.
- Click Save.
Result
The outbound route is created and displayed in the list.