Manage Outbound Routes
This topic describes how to manage outbound routes, including setting the default Outbound Caller ID, adjusting route priority, and deleting routes.
Set default Outbound Caller ID of outbound routes
You can configure a default Outbound Caller ID for the trunks assigned to outbound routes. The default Outbound Caller ID will be used for outbound calls when no specific Outbound Caller ID is configured for the route.
- Log in to NovoOne Tenant portal, go to .
- At the top of the list, click Manage.
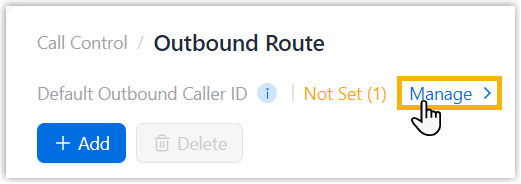
- In the right pane, configure the following settings.
- In the Default Outbound Caller ID column,
select a number from the drop-down list.
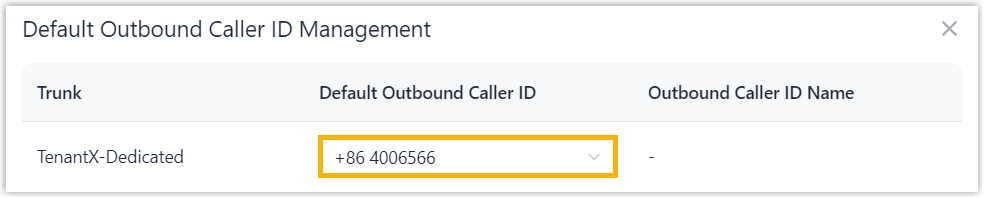
- Click Confirm.
- In the Default Outbound Caller ID column,
select a number from the drop-down list.
Adjust the priority of outbound routes
By default, outbound routes are prioritized based on their order in the list, with the route at the top having the highest priority. When an outbound call matches multiple outbound routes, the system uses the route with the highest priority. You can adjust the priority of outbound routes as needed.
- Log in to NovoOne Tenant portal, go to .
- In the Move column, click the icons beside the
desired outbound route to adjust the priority.
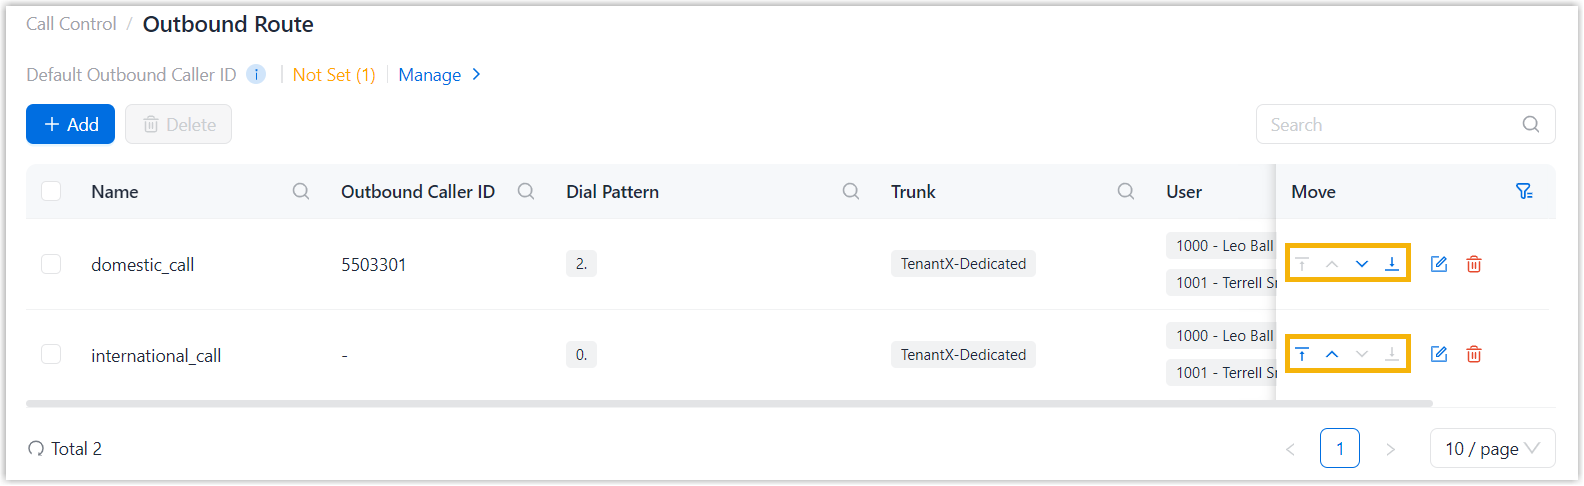
 : Move to top.
 : Move up.
 : Move down.
 : Move to bottom.
Delete outbound routes
You can delete outbound routes that are no longer needed.
- Log in to NovoOne Tenant portal, go to .
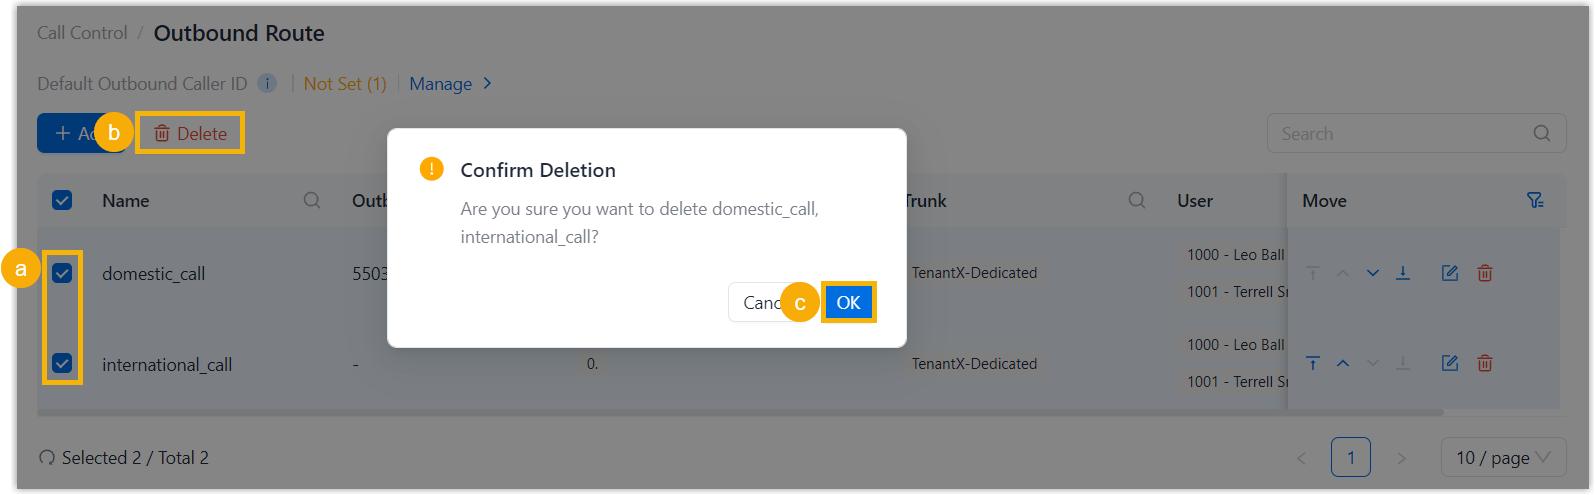
- Select the checkboxes of the desired outbound routes, click
Delete and confirm the operation.