Archive Files to Google Cloud Storage
Yeastar Central Management supports archiving the backup files of P-Series Cloud PBXs generated by backup tasks on the platform to Google Cloud Storage, either on a regular interval or at any time you want. This topic describes how to add Google Cloud Storage bucket as an archive server and schedule tasks to archive the desired files.
Requirements and restrictions
- Requirements
-
- The firmware version of Yeastar Central Management is 87.14.0.31 or later.
- Only backup files generated by backup tasks on Yeastar Central
Management and are accessible in can be archived.Note: The following backup files will NOT be archived:
- Backup files created on the PBX systems
- Backup files that are manually uploaded to Yeastar Central Management
- Restrictions
-
- Archive server: 10
- Archive task: 100
Introduction
To archive the backup files of P-Series Cloud PBXs to a specific bucket in Google Cloud Storage, you need to complete the followings:
- Prepare an eligible account and bucket on Google Cloud.
- A service account that meets the
requirements listed below:
- Full access to Google Cloud Storage resources to archive backup files
- An access key to authenticate file archiving requests from Yeastar Central Management
- A bucket to store archived files
- A service account that meets the
requirements listed below:
- Set up archive server and task on Yeastar Central Management.
When it is time to execute the archive task, Yeastar Central Management will use the access key of the service account to send file archiving requests to Google Cloud Storage. If the requests are considered authentic, the specified files will be archived to the designated bucket in Google Cloud Storage.
Step 1. Create a service account on Google Cloud
- Log in to Google Cloud Console.
- On the project selector page, select or create a Google Cloud
project.

In this example, we create a new project "Yeastar".
- Create a service account.
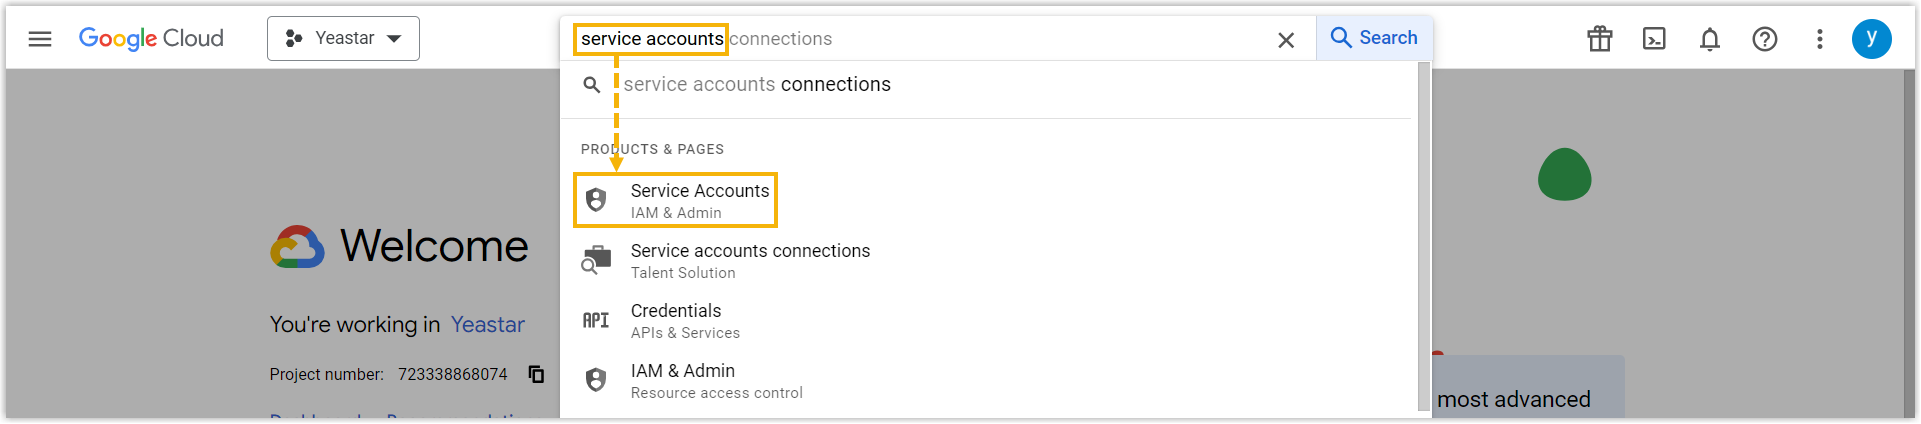
- In the top search bar, search for and select Service
Accounts.
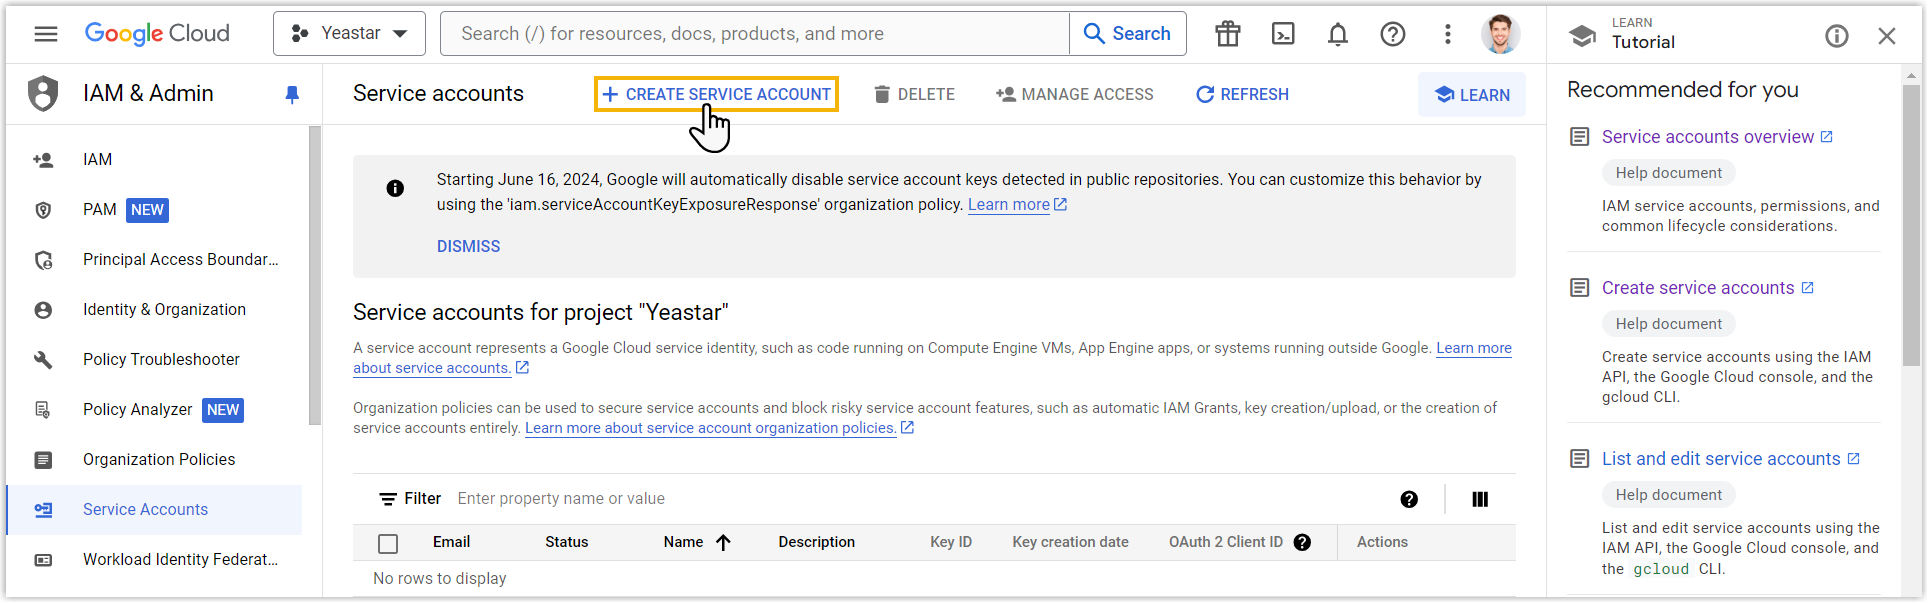
- In the top pane, click CREATE SERVICE
ACCOUNT.
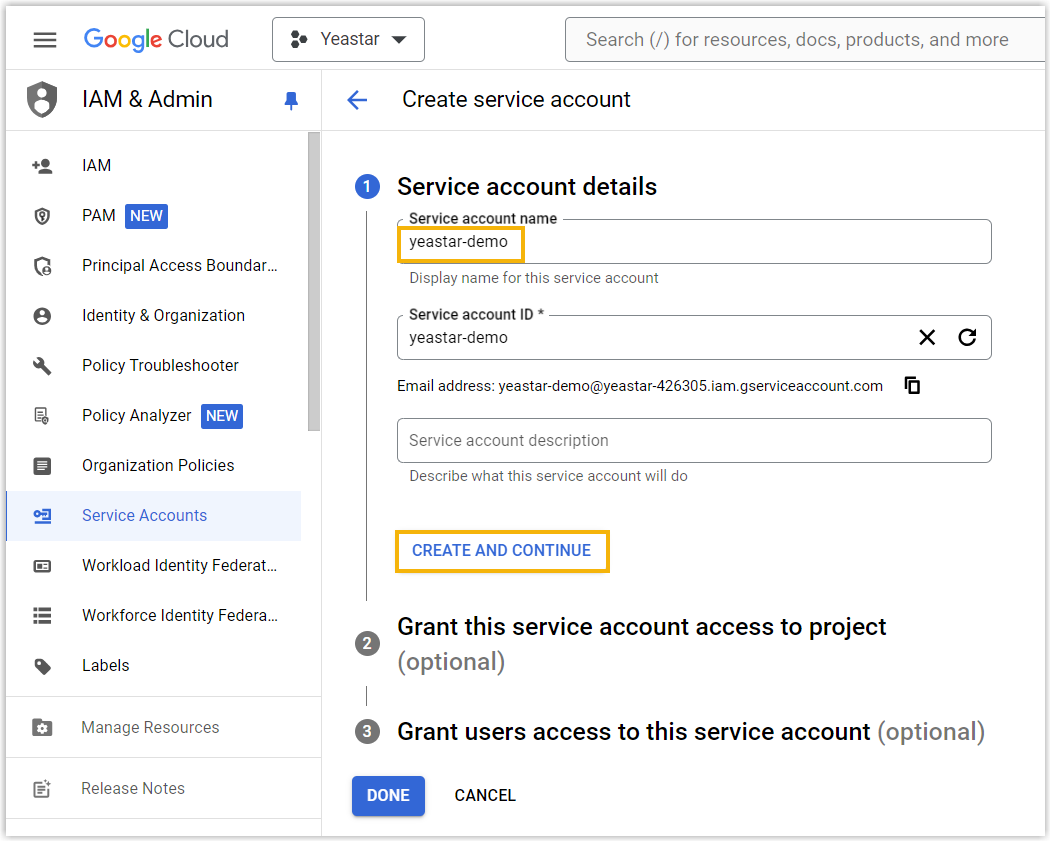
- In the Service account details section, enter
a name in the Service account name field to
help you identify the account, then click CREATE AND
CONTINUE.
- In the Grant this service account access to project
(optional) section, search and select
Storage Admin from the
Role drop-down list, then click
DONE.
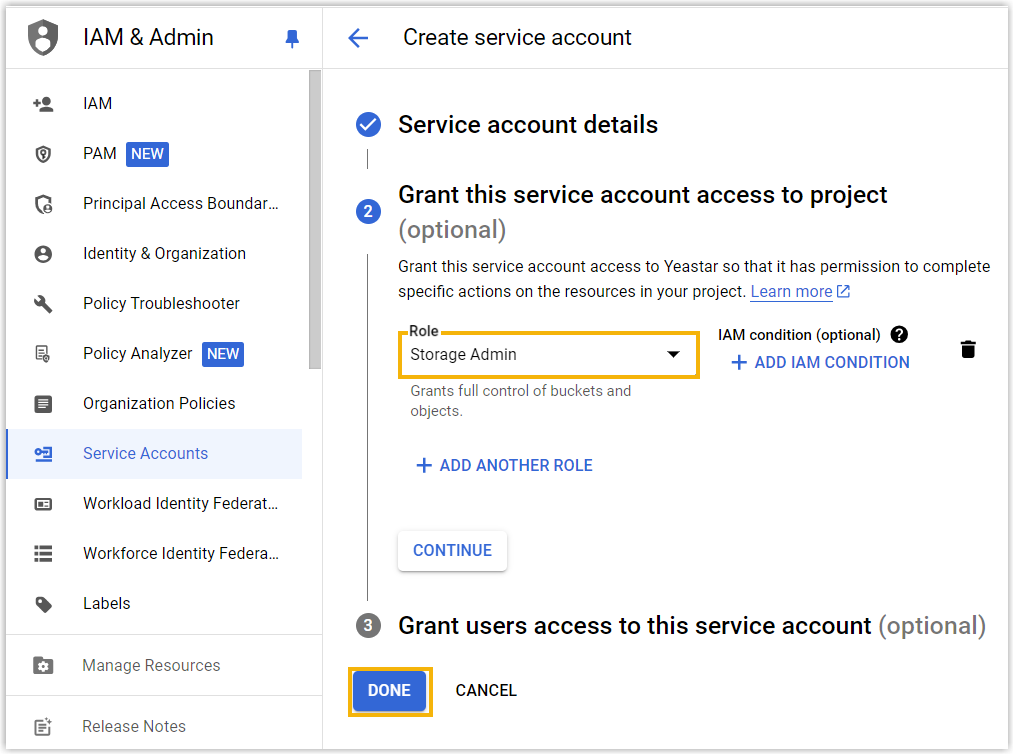
The service account is created and displayed on the service accounts list.
- In the top search bar, search for and select Service
Accounts.
- Create an access key for the service account.
- On the service accounts list, click
 beside the service account that you have created,
then select Manage keys.
beside the service account that you have created,
then select Manage keys.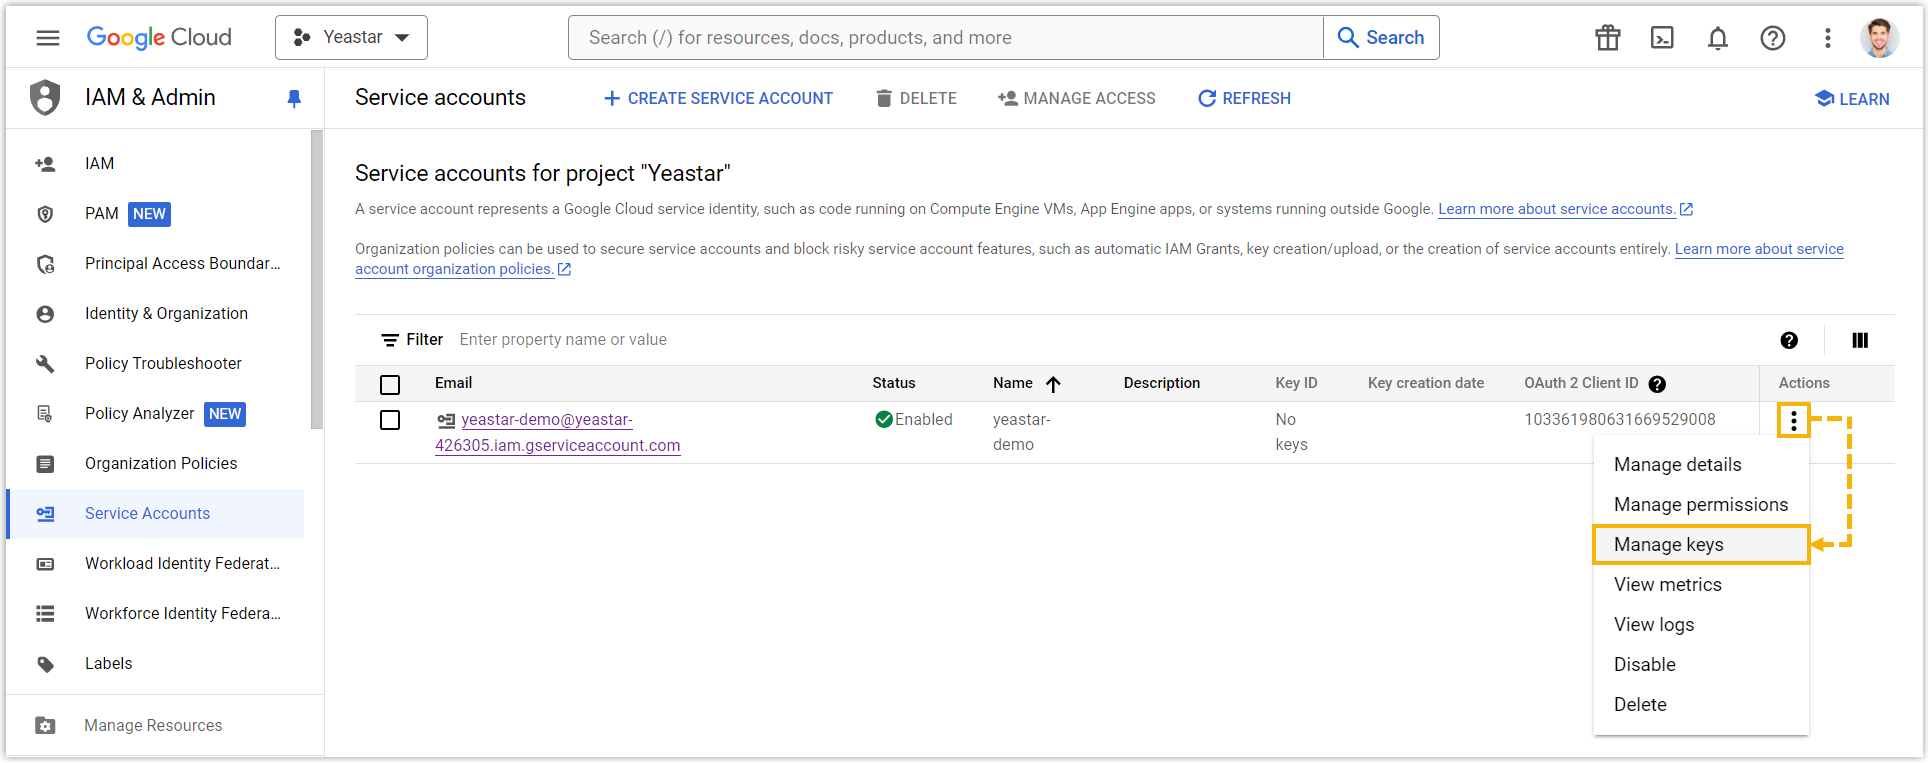
You are redirected to the key configuration page.
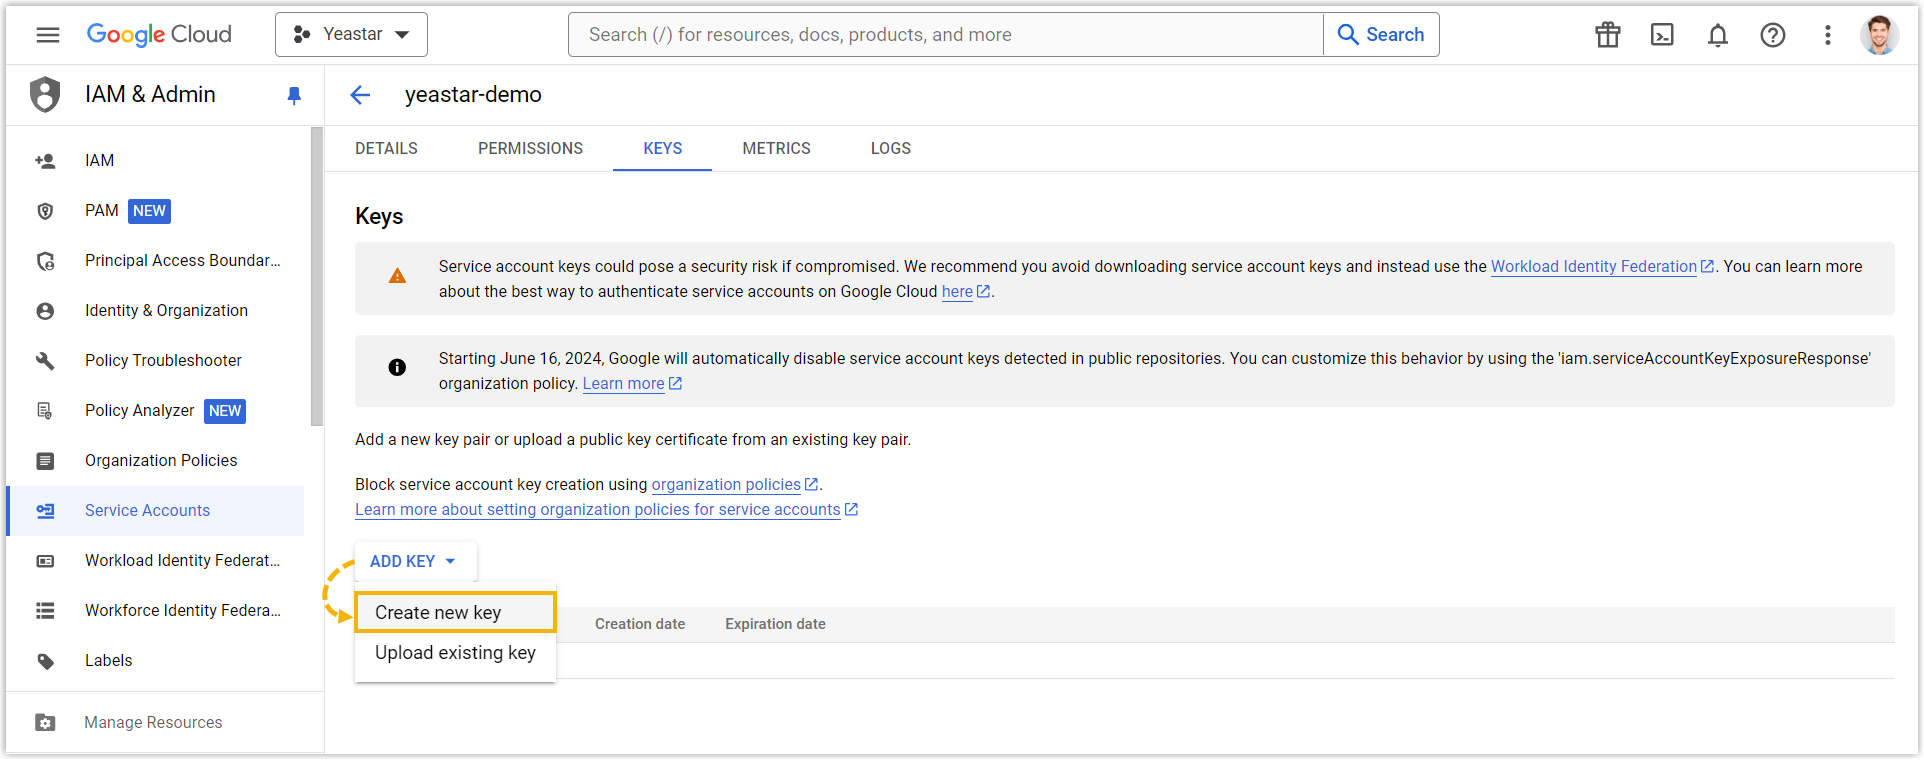
- Click ADD KEY, then select Create
new key from the drop-down list.
- Set Key type to
JSON, then click
CREATE.
The access key is created and automatically downloaded to your computer as a JSON file.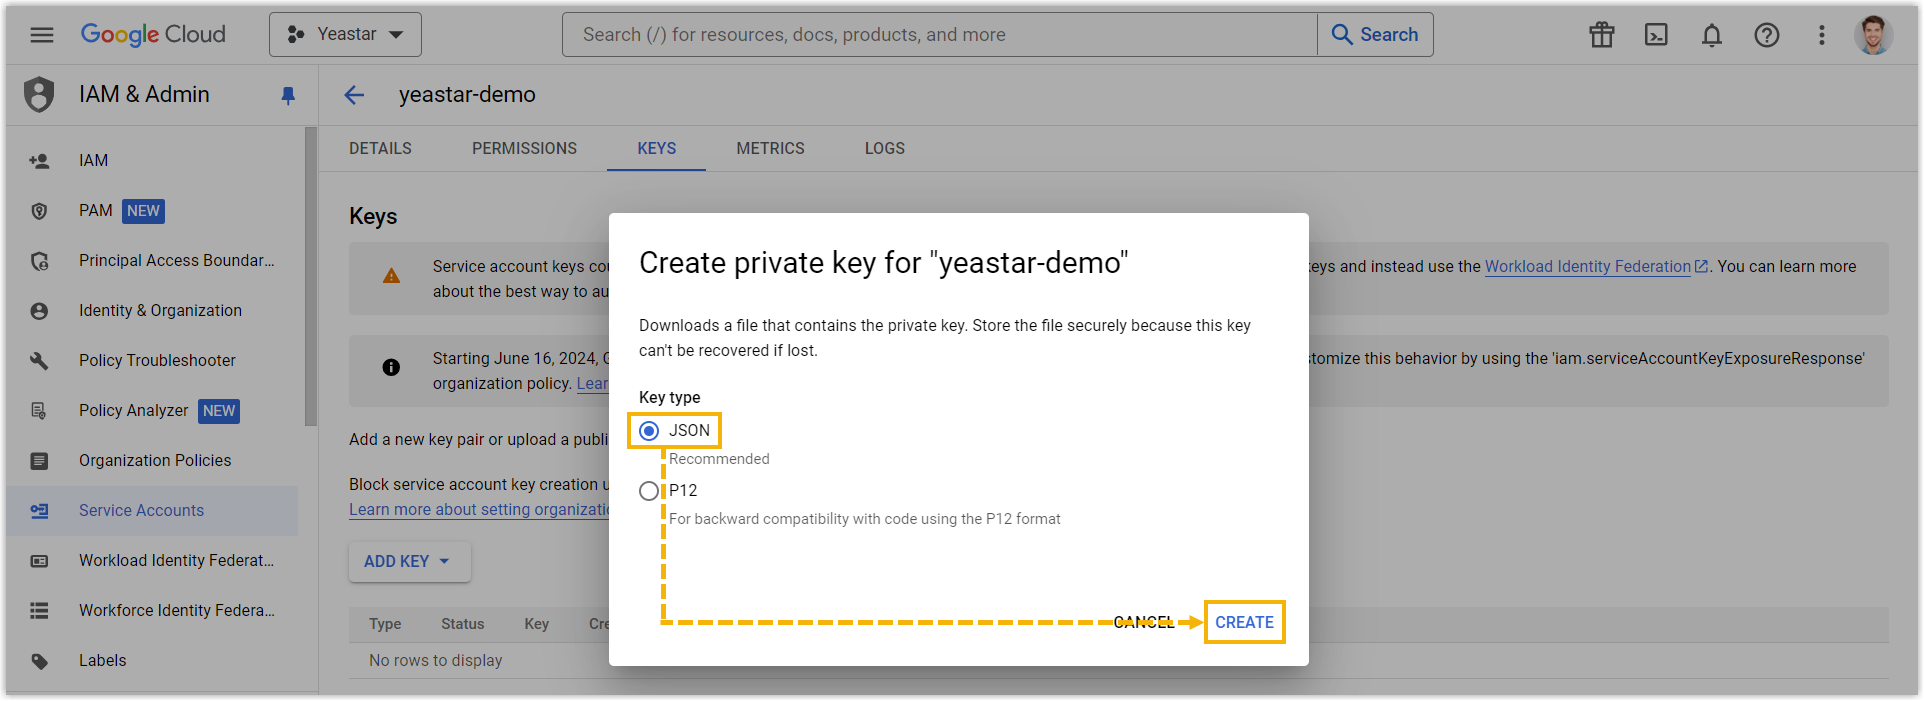 Note: Save the JSON file in a secure location, as you will need the file when setting up Google Cloud Storage bucket as archive server on Yeastar Central Management.
 - Click CLOSE to close the pop-up window.
- On the service accounts list, click
Step 2. Create a bucket on Google Cloud Storage
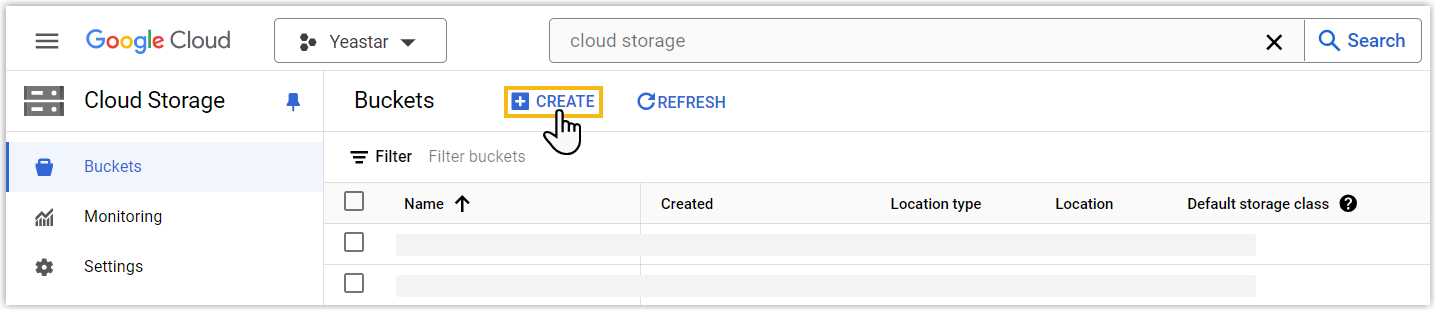
- In the top search bar, search for and select Cloud
Storage.

You are redirected to buckets configuration page.
- In the top pane, click CREATE.
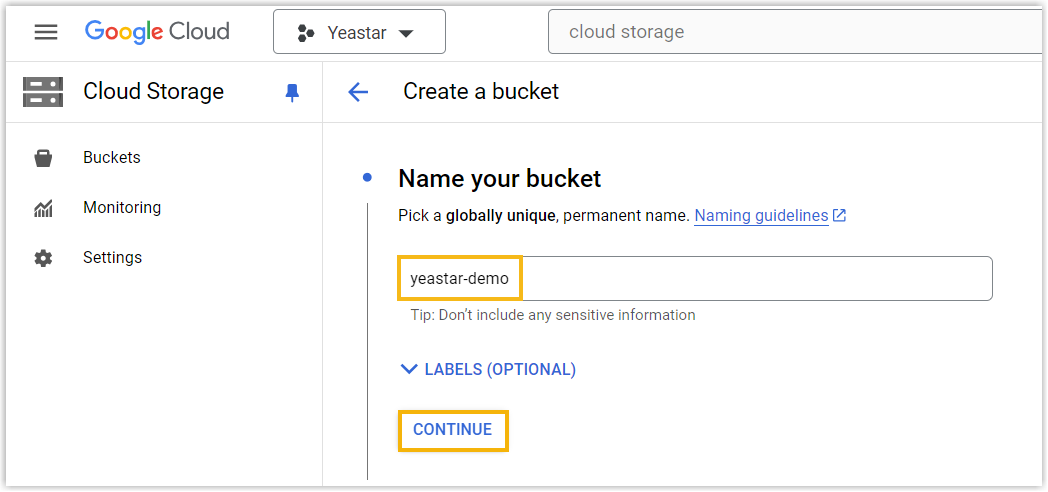
- In the Name your bucket field, enter a name to help
you identify the bucket, then click
CONTINUE.
- In the Choose where to store your data section,
select the region in which you want to create a bucket, then click
CREATE.
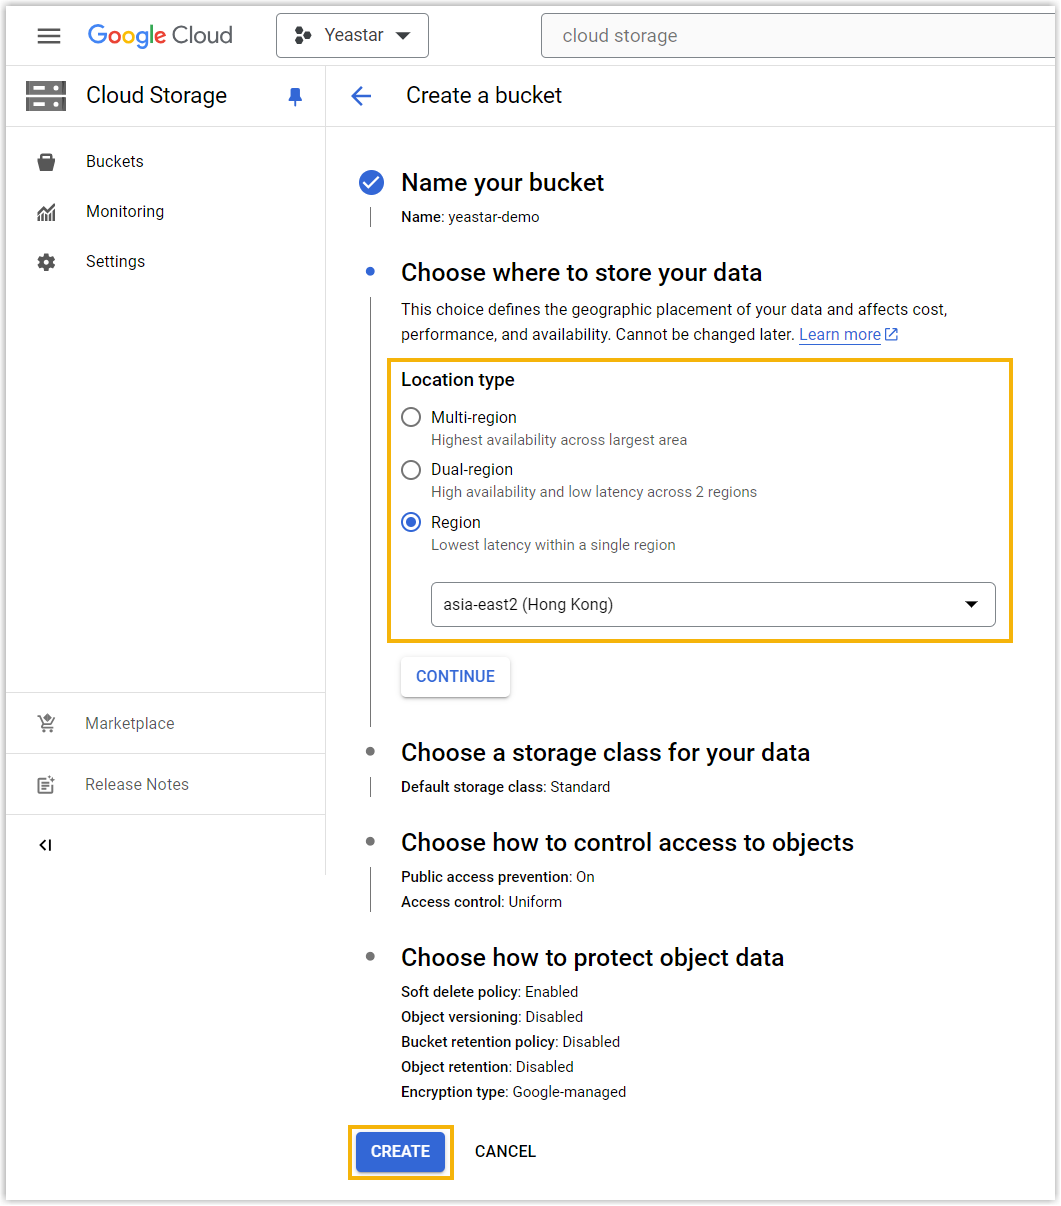
The bucket is created.
Note: If you want to group the archived files in Google Cloud Storage, you can create folders in the bucket. In this way, you can specify files to be archived to the designated folder in the follow-up settings.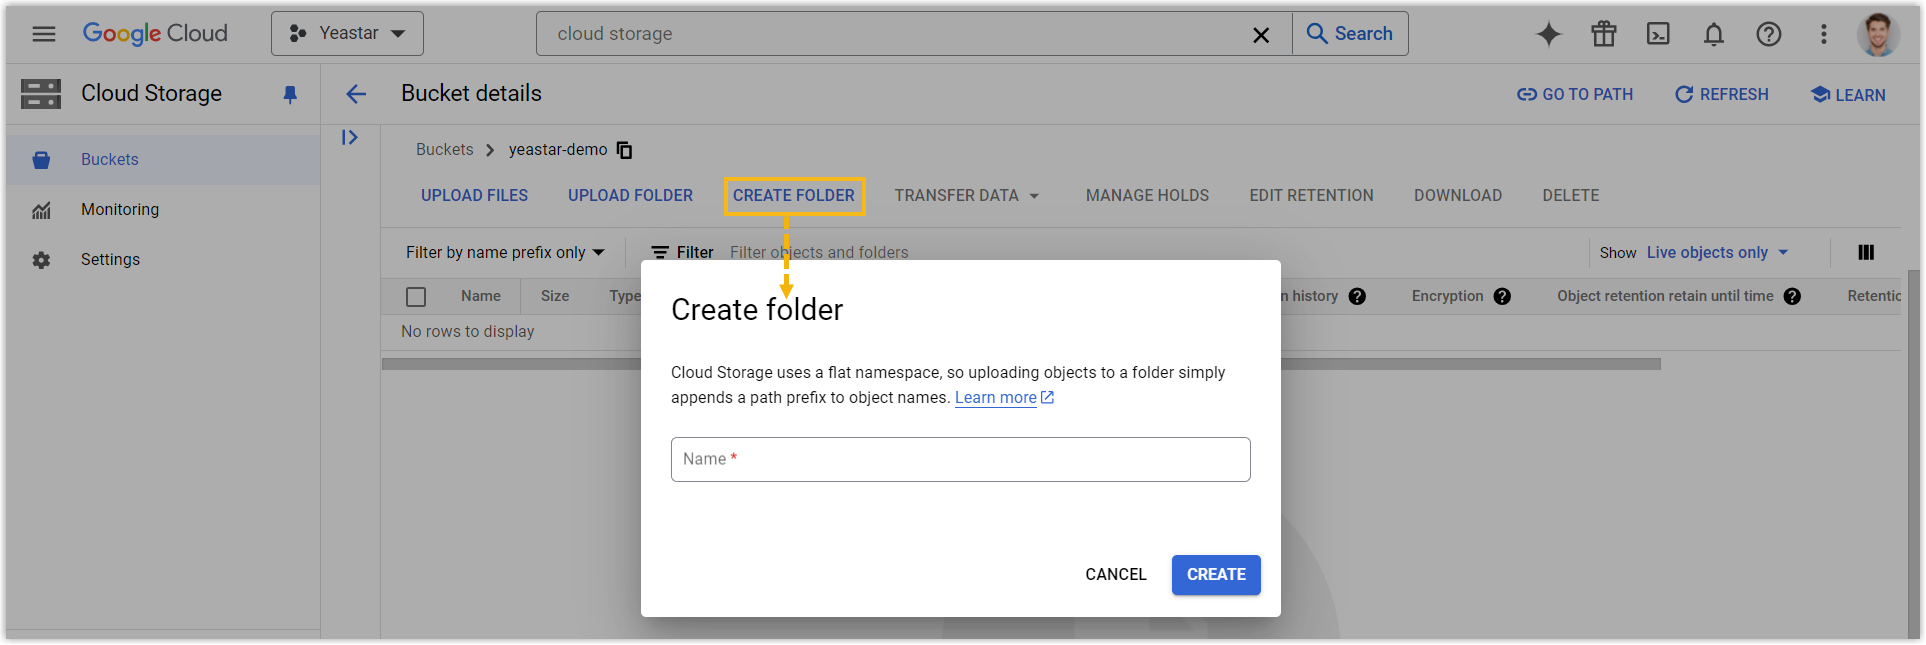
Step 3. Add Google Cloud Storage bucket as archive server on Yeastar Central Management
- On Yeastar Central Management, go to , then click Add.
- At the top of the page, click Archive
Server.

- Set up Google Cloud Storage bucket as an archive server.
- Click Add.
- In the pop-up window, complete the following settings.
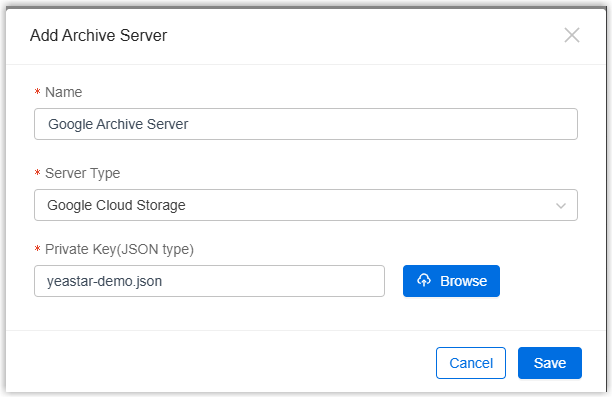
Setting Description Name Enter a name to help you identify the server. Server Type Select Google Cloud Storage. Private Key(JSON type) Click Browse to browse and upload the JSON file that you have downloaded in Google Cloud. - Click Save.
The Google Cloud Storage bucket is added as an archive server and displayed on the archive server list.
- Click
 to close the window.
Step 4. Create a task to archive files to Google Cloud Storage on Yeastar Central Management
- On Yeastar Central Management, go to , then click Add.
- Create a one-time or recurring archive task.
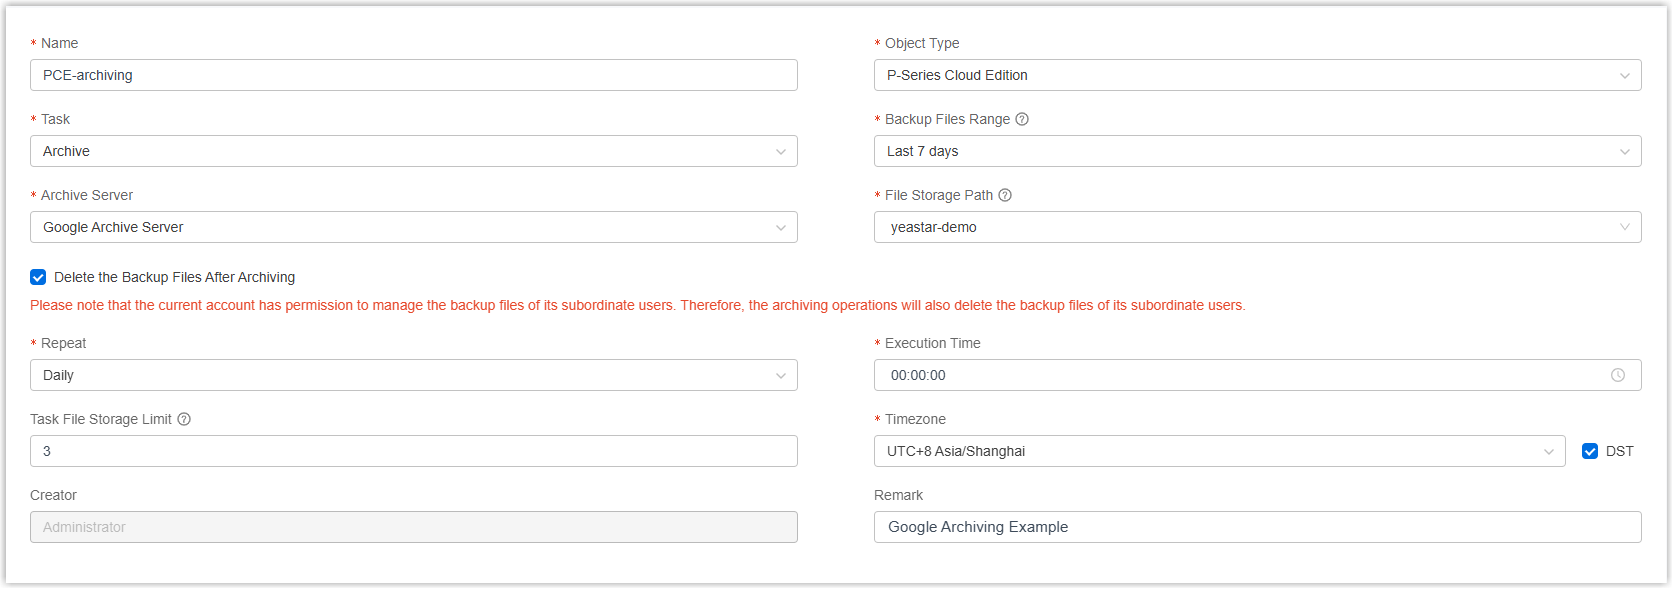
Setting Description Name Enter a name to help you identify the task. Object Type Select P-Series Cloud Edition. Task Select Archive. Backup File Range Specify a time range of the backup files to be archived. Note: You can archive files for up to 31 days at a time.Archive Server Select the Google Cloud Storage bucket that you have added. File Storage Path Select the bucket or the folder in which you want to store archived files. Delete the Backup Files After Archiving Optional. If enabled, the backup files will be automatically deleted from Yeastar Central Management after being successfully archived. Note:- If a backup file is failed to be archived, it will not be deleted.
- If you have permission to manage backup files of subordinate users, archiving operations will also delete the backup files of these subordinate users.
Repeat Set how often to archive files to Google Cloud Storage. - One-time: If you choose the option, the system will archive files immediately after you save the task.
- Daily: If you choose the option, select a time from the Execution Time drop-down list. The system will archive files at this time of the day.
- Weekly: If you choose the option, choose a day of week and select a time from the Execution Time drop-down list. The system will archive files at this time of the week.
-
Monthly: If you choose the option, choose a day and select a time from the Execution Time drop-down list. The system will archive files on this day and time of the month.
Task File Storage Limit Optional. Set the maximum number of files generated by this archive task to be retained in the Google Cloud Storage. When it reaches the limit, the system will retain the latest files and delete the earlier ones.
For example, an archive task is set to execute daily at 11:00 PM with a storage limit of 3 files, which generates one archive file per day. On the 4th day, the system will delete the archived file from the 1st day and archive the new backup files from the 4th day.
Note:-
Each archiving task will generate one file, which may contains multiple backup files.
-
This option is available only when you schedule to archive backup files on a recurring basis. If left blank, there will be no limit on the number of files, and therefore files will not be automatically deleted.
Timezone Select a time zone of the task execution time. Tip: You can enable or disable Daylight Saving Time (DST) as needed.Creator Your name is automatically filled in, and the field can not be edited. Remark Optional. Add a note to the task. - Click Save.
Result
The specified files will be archived to the designated bucket or folder in your Google Cloud Storage immediately or at the scheduled time.
You can check the archive result in the following ways.
- Check the archive result on Yeastar Central Management
- On Yeastar Central Management, go to . If the Result column of the task
shows Succeeded, it indicates that the specified
files have been successfully archived to Google Cloud Storage.
 Note: If the task is not successful, you can check the details and retry it.
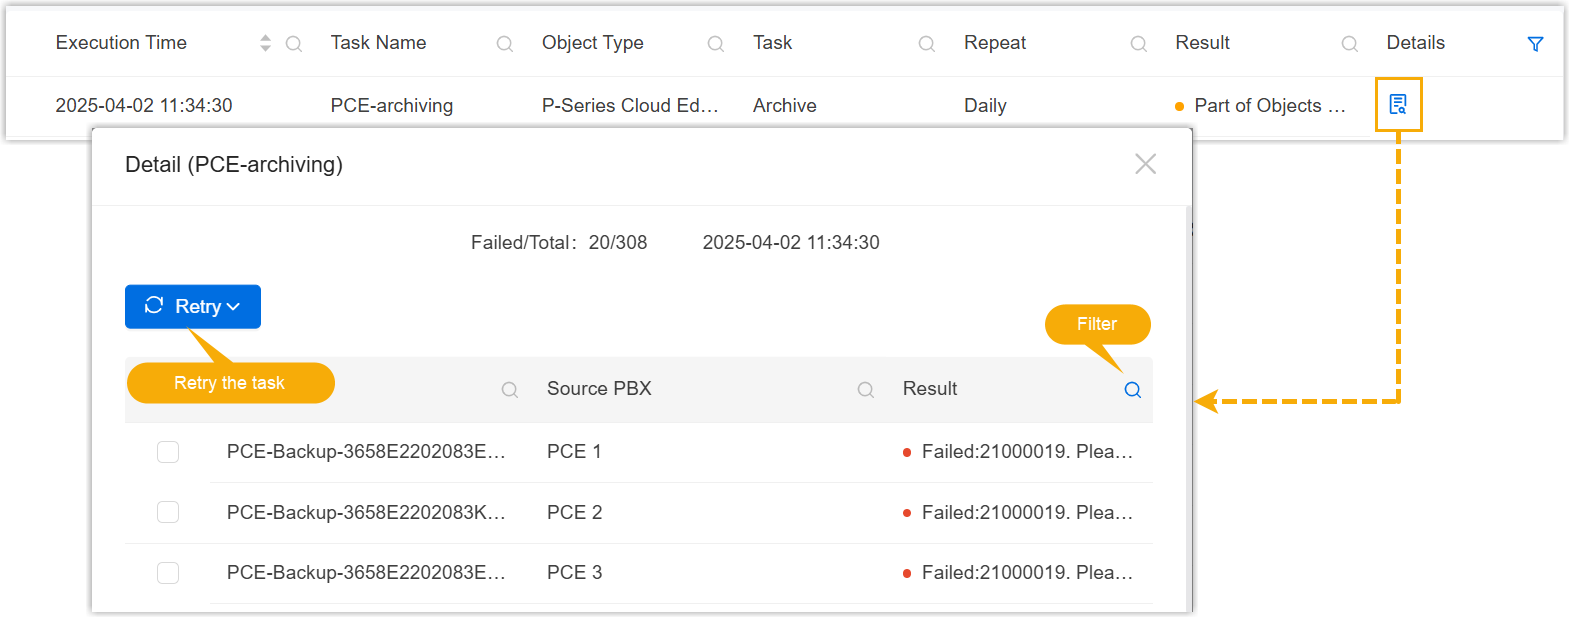
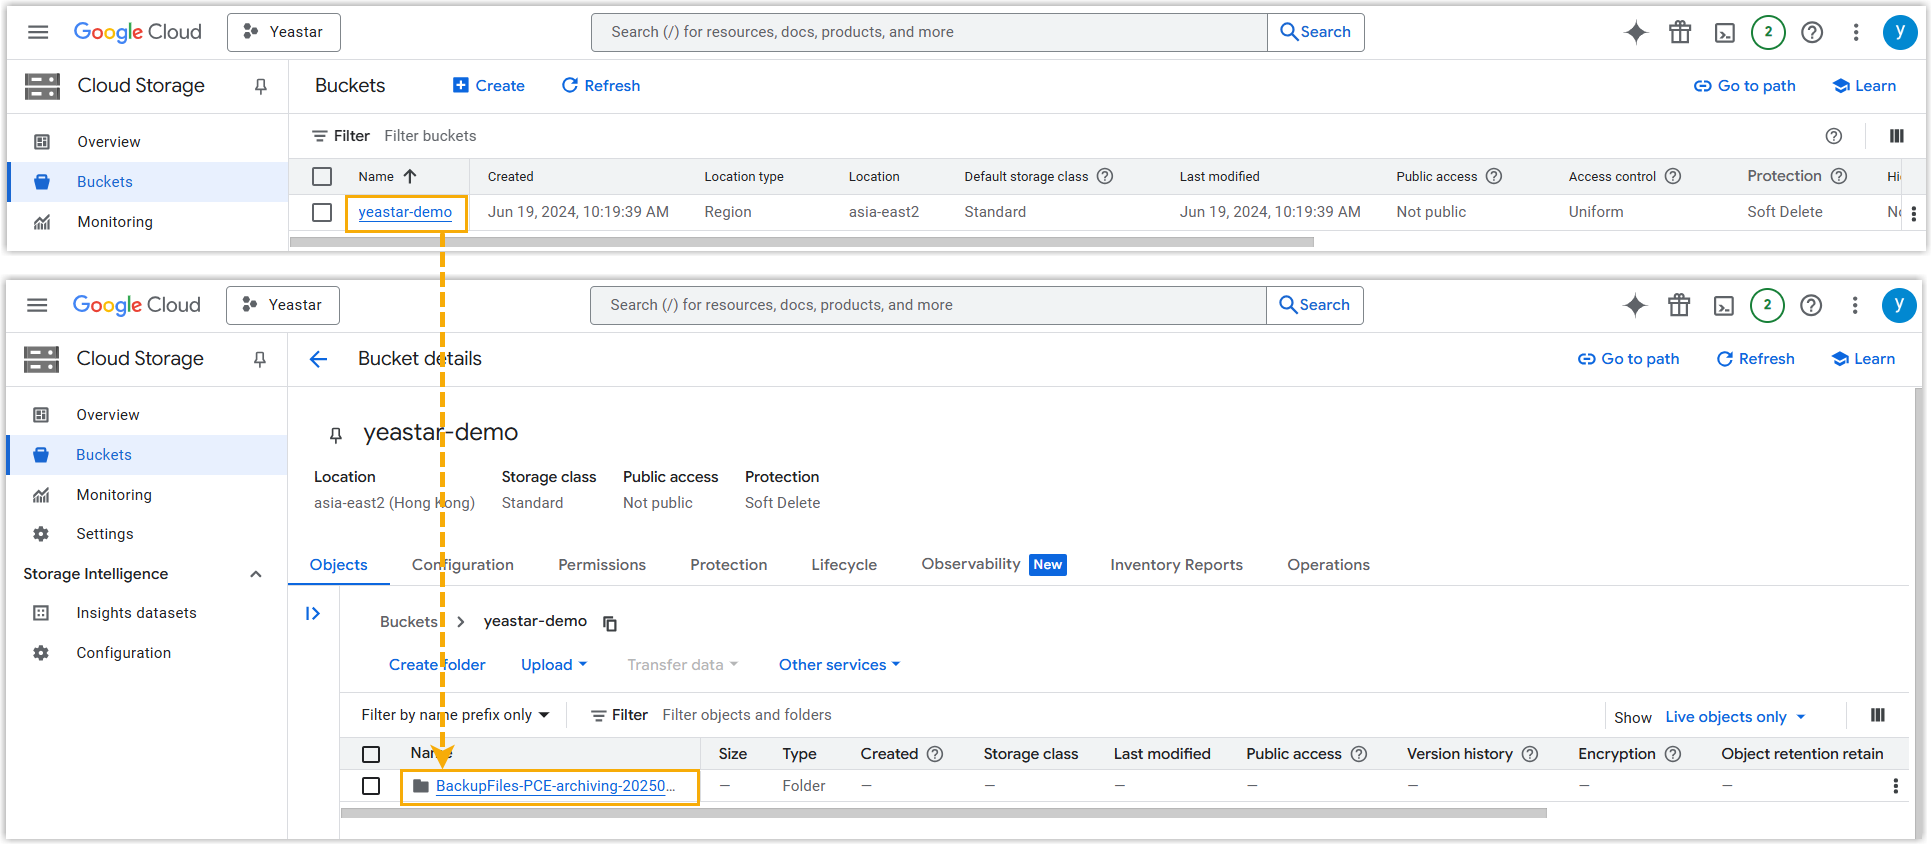
- Check the archive result on Google Cloud Storage
- On Google Cloud Console, go to the created bucket. If the specified
files appear in the list, it indicates that the archive is
successful.