Dedicated SIP Trunking on Yeastar S-Series VoIP PBX
If you have bought a dedicated SIP trunk from the ITSP, you need to set the network mode to Dual, add a static route, configure NAT setting and firewall on Yeastar S-Series VoIP PBX to ensure that the SIP trunk works properly.
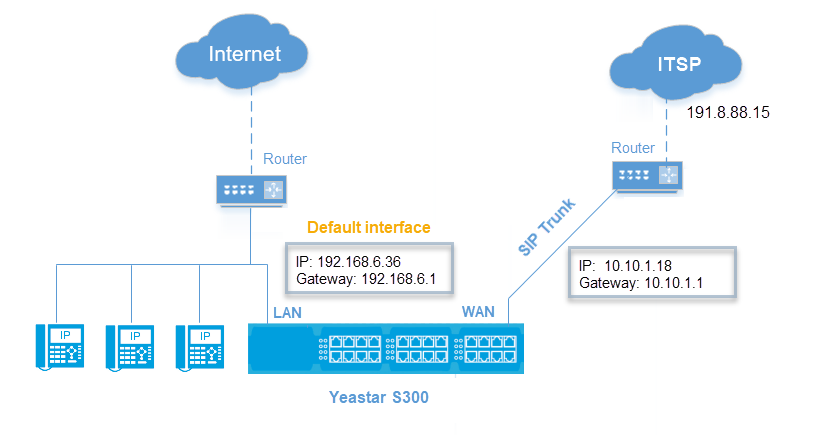
The ITSP provides a dedicated network cable for the SIP trunk. The ITSP router is used for the SIP trunk only, but cannot access the Internet.
Network settings
- Connect your local router or switch to the PBX LAN interface; Connect the ITSP router to the PBX WAN interface.
- Go to to configure the PBX network.
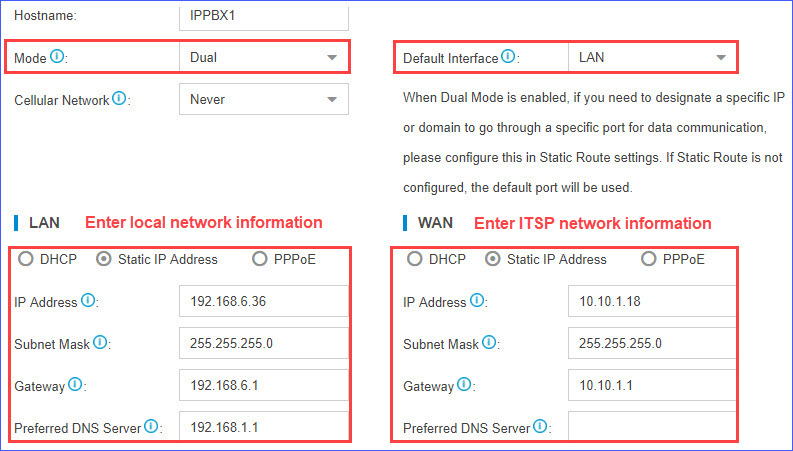
- In the drop-down menu of Mode, select Dual.
- In the drop-down menu of Default Interface, select LAN.
- In the LAN section, enter your local network information.
- In the WAN section, enter the network information that is provided by the ITSP.
- Click Save and reboot the PBX.
Static route settings
- Go to , click Add.
- Set a route rule for the SIP trunk, routing the SIP trunk traffic through
the ITSP router.
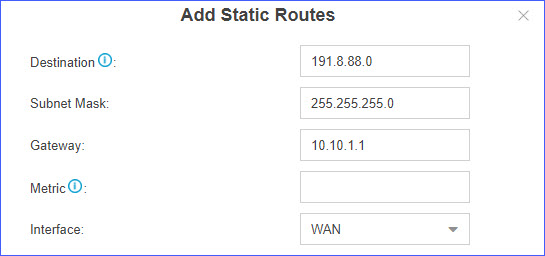
- Destination: Enter the IP address of SIP
trunk.
To ensure that both SIP registration packets and SIP media packets can be routed to the desired destination, set the IP range of the SIP trunk. In this scenario, set Destination to 191.8.88.0, and set Subnet Mask to
255.255.255.0. - Subnet Mask: Enter the subnet mask. In this scenario, enter 255.255.255.0.
- Gateway: Enter the gateway IP address of the WAN interface. In this scenario, enter 10.10.1.1.
- Metric: Leave it blank.
- Interface: Select WAN.
- Destination: Enter the IP address of SIP
trunk.
SIP trunk settings
Register the SIP trunk on Yeastar S-Series VoIP PBX.
- Go to , click Add.
- Enter the SIP trunk information that is provided by the ITSP.
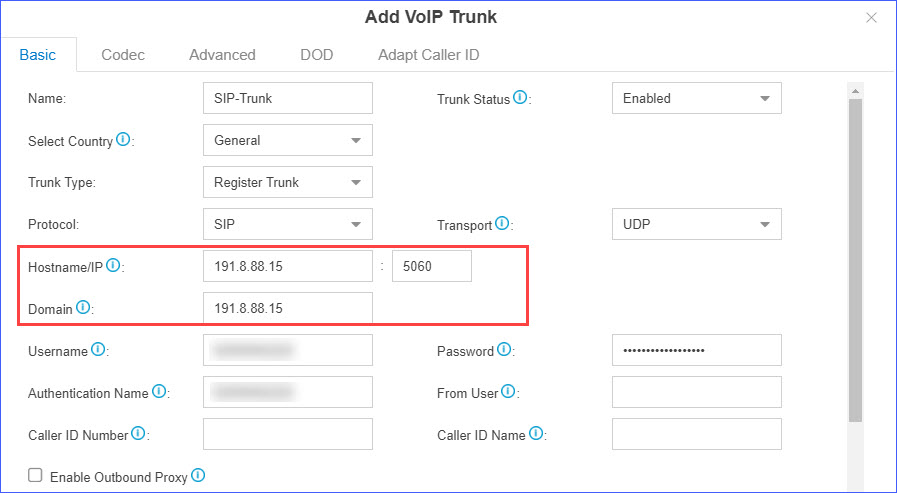
- Click Save and Apply.
NAT settings
If you have configured NAT settings on the PBX, you need to add a Local Network Identification for the SIP trunk to ensure successful communication through the SIP trunk.
- Go to .
- Click
 to add a Local Network
Identification.
to add a Local Network
Identification. - Enter the IP range of the SIP trunk.
In this scenario, set Local Network Identification to 191.8.88.0/255.255.255.0.
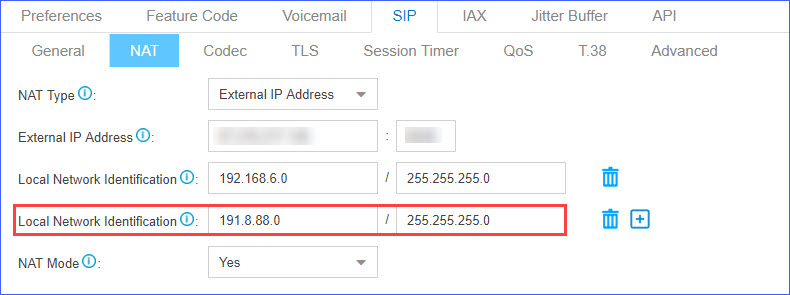
- Click Save and reboot the PBX.
Firewall settings
To avoid that the PBX may accidentally block the IP address of the SIP trunk, add a firewall rule to accept packets from the SIP trunk IP address.
- Go to , click Add.
- Configure a firewall rule to accept packets from the IP address of SIP
trunk.
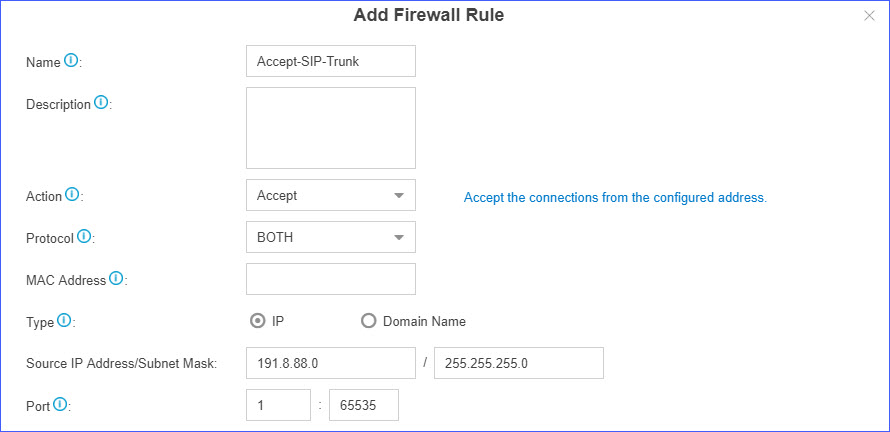
- Name: Set a name to help you identify it.
- Action: Select Accept.
- Protocol: Select BOTH.
- Type: Select IP.
- Source IP Address/Subnet Mask: Enter 191.8.88.0/255.255.255.0.
- Port: Enter 1:65535.
- Click Save and Apply.