Create an AI Receptionist
Create an AI receptionist and complete the basic configuration.
Requirements
- Firmware
- The firmware of Yeastar P-Series Software Edition is 83.23.0.123 or later.
- Subscription
- The AI Receptionist feature includes 60 one-time free minutes
with your plan subscription. To expand AI receptionist minutes, subscribe to
the following add-on service(s) (Path: ).
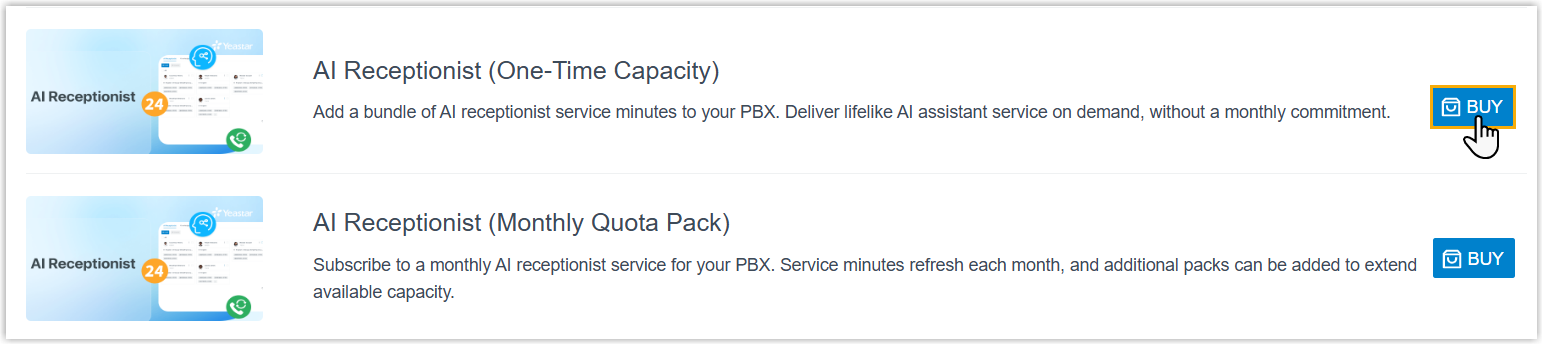
- AI Receptionist (One-Time Capacity): One-time receptionist minutes. When used up, you need to purchase additional capacity.
- AI Receptionist (Monthly Quota Pack): Monthly subscription pack with a fixed quota of 200 minutes that resets each month; unused minutes do not roll over to the next month.
Note: If both services are subscribed, minutes are deducted from the monthly quota pack first. - Network
-
- The PBX is able to access the Internet.
- The PBX is accessible via a domain name, either through
Yeastar
FQDN or a NAT-mapped domain (Yeastar
Domain or External
Host). The requirements vary by domain type,
as listed below.
Domain Type Requirement Yeastar FQDN The SIP access feature should be enabled (Path: ). 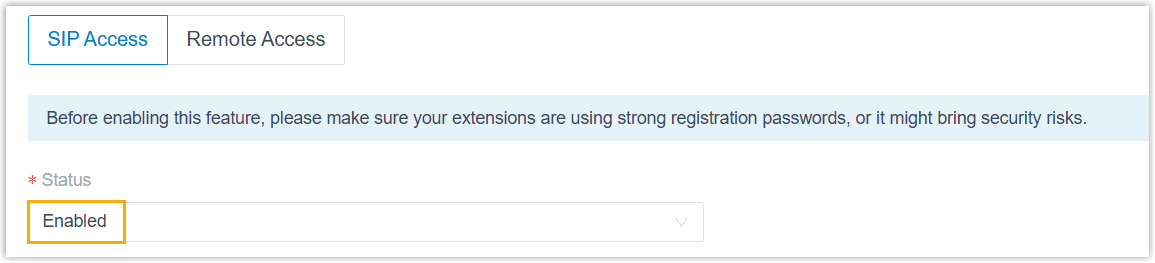
NAT-mapped domain - The PBX has installed a valid domain
certificate issued by a trusted CA (uploaded on ).

- If the Allowed
Country/Region IP Access
Protection feature is enabled
on the PBX (Path: ), allow the access of the following
countries based on the PBX's location:
- Germany (DE) - for PBX in Europe
- United States of America (US) - for PBX in other regions
- If your company has multiple public IP addresses, ensure the PBX domain name is resolved to the specific public IP address that the PBX uses for outbound SIP and RTP traffic to prevent one-way audio call issue.
- The PBX has installed a valid domain
certificate issued by a trusted CA (uploaded on ).
- SIP Settings
- The SIP TCP port is enabled to ensure AI receptionist call connectivity
(Path: ).Note: A system reboot is required after enabling this setting for the change to take effect.

Limitations
- The PBX does not limit the number of AI receptionists.
- Each AI receptionist can handle up to 10 concurrent calls.
Procedure
- Log in to PBX web portal, go to .
- Click Add.
- Complete the following configurations to set up an AI receptionist.
- Personalization
- In the Personalization page, configure
the basic information, language, and voice profile for
receptionist.
- Set the basic information of the AI
receptionist.

Setting Description Name Specify a name to help you identify the AI receptionist. Number Set a number for the AI receptionist. Incoming calls to this number will be answered by the receptionist. Tip: You can check the available number range on .LLM Select the Large Language Model (LLM) that powers the AI receptionist's comprehension and response generation.
You can choose the appropriate model based on specific business requirements and model characteristics, such as task complexity, latency requirements, context window size, and legal compliance. For example, choose Claude Sonnet 4 for complex reasoning tasks, or Gemini Flash for fast responses.
Note: You can change the LLM and customize system prompts later in the AI Receptionist settings if necessary. - Set the primary language and voice profile for the AI
receptionist.
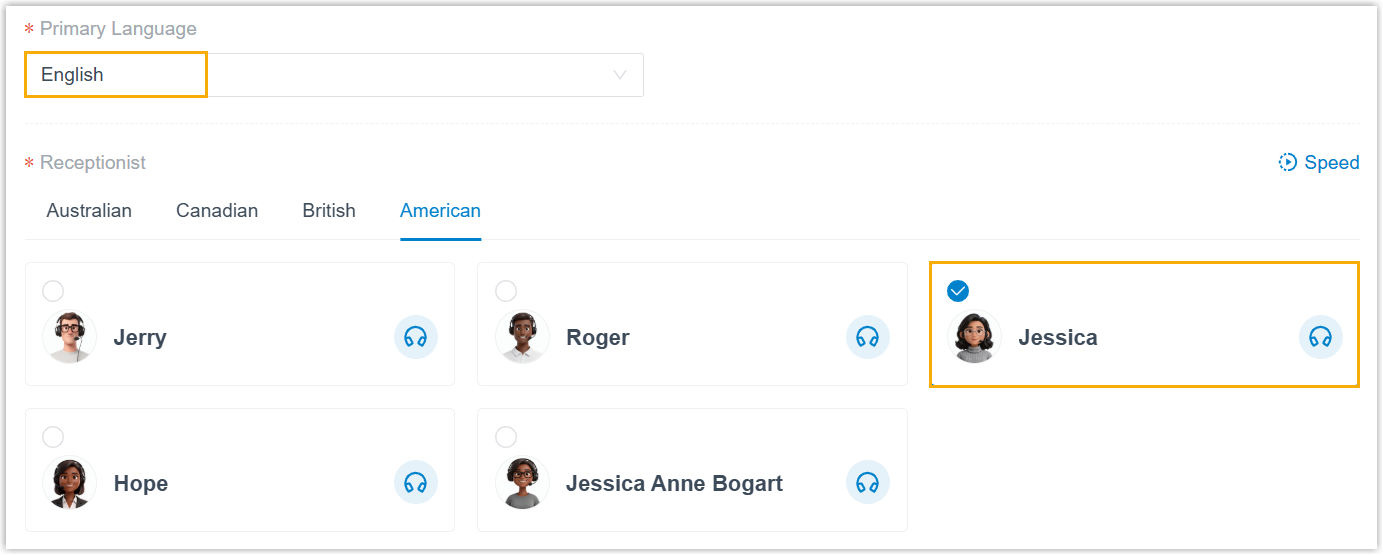
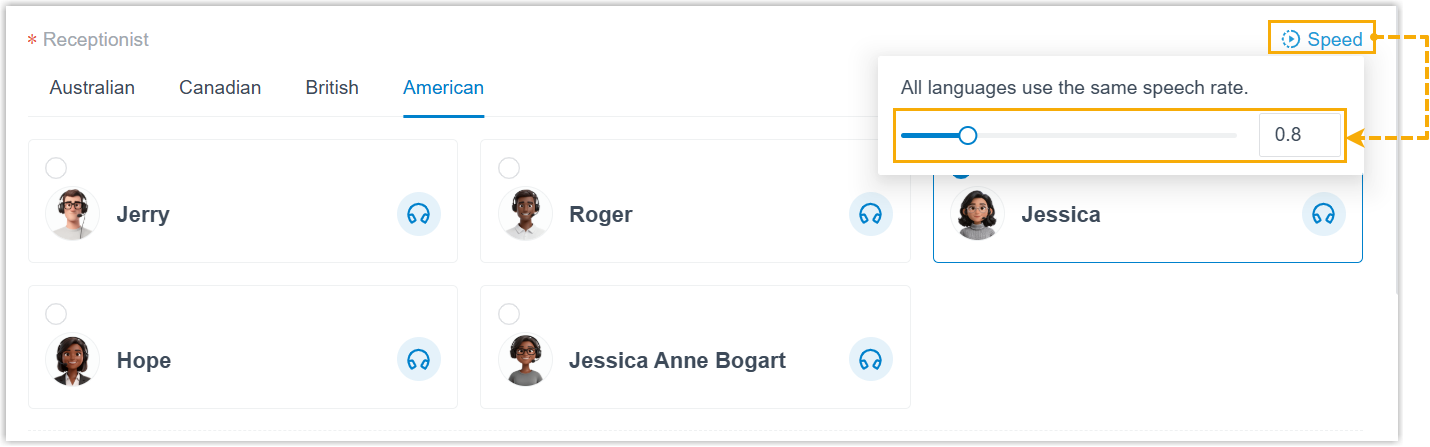
Setting Description Primary Language Select the primary language the AI receptionist will use to communicate with callers. Receptionist Select a desired voice profile for the selected language. Tip:- To preview the voice, click
 beside a voice
profile.
beside a voice
profile.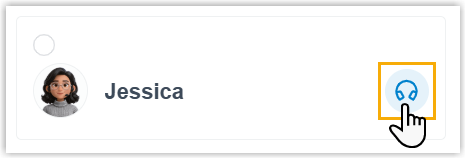
- To adjust how fast the AI speaks, click
Speed at the top-right
corner of the Receptionist
section. The specified speech rate applies to all
languages used by the receptionist.
- To preview the voice, click
- Optional: In the Additional
Languages section, click
Add to add one or more
additional
languages for the receptionist as needed.
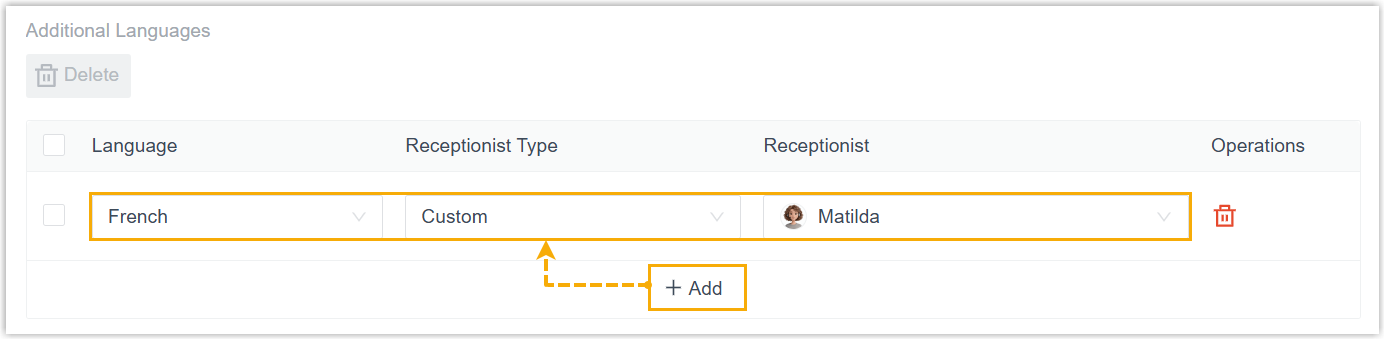
Setting Description Language Select an additional language the AI receptionist can use to communicate with callers. Receptionist Type Select the voice option for the additional language. - Follow Primary Language: Use the same voice profile as the primary language.
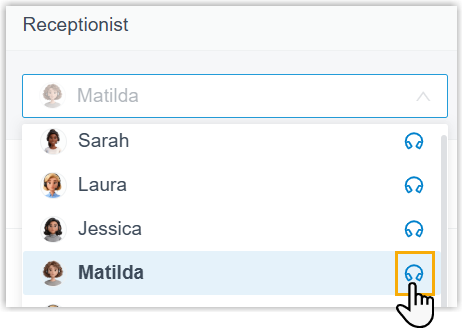
- Custom: Use a different
voice profile for the additional language.If selected, choose a desired profile in the Receptionist drop-down list.Tip: To preview the voice, click beside a voice profile in
the list.
- Click Next.
- Set the basic information of the AI
receptionist.
- Company Information
- In the Company Information page, enter
the following company information so the AI receptionist can use
this information to answer business-related questions.
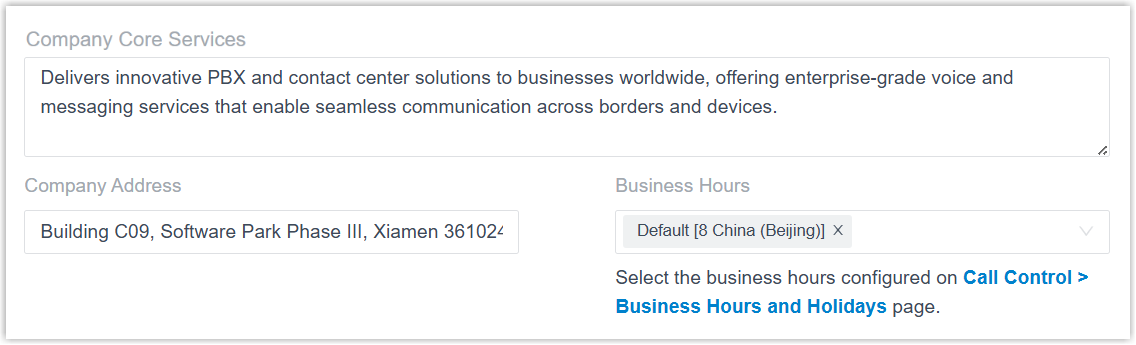
- In the Company Core Services
field, enter a description of your company's core
services.Note: The description can contain up to 5000 characters.
- In the Company Address field,
enter your company address.Note: The address can contain up to 255 characters.
- In the Business Hours drop-down
list, select the time zone(s) where your company has
business operations.
The AI receptionist will use the business hours configured for the selected time zones to answer caller questions about the company's operating hours.
- Click Next.
- In the Company Core Services
field, enter a description of your company's core
services.
- Greeting
- In the Greeting page, set the greeting
for the receptionist, which will be played to the caller when
the call is answered.Note: If no greeting is needed, disable this feature by turning off the switch. After answering a call, the AI receptionist will wait for the caller to speak first.
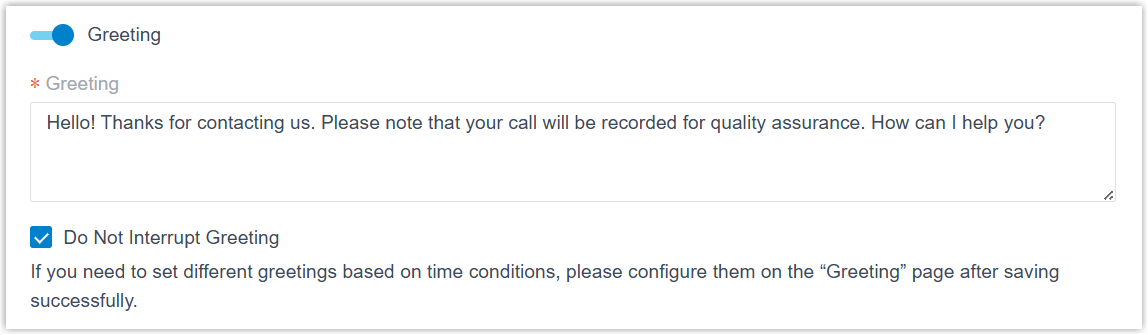
- Turn on the switch of Greeting.
- In the Greeting field, enter a
welcome message in the receptionist's primary
language.Note:
- As recording prompts do not work during AI receptionist calls, you can use the greeting instead.
- If you need to set different greetings based on time conditions, you can configure them later after the AI receptionist is created. For more information, see Configure Time-Based Greetings.
- Optional: Select the checkbox of Do Not Interrupt Greeting to prevent callers from interrupting the greeting.
- Click Next.
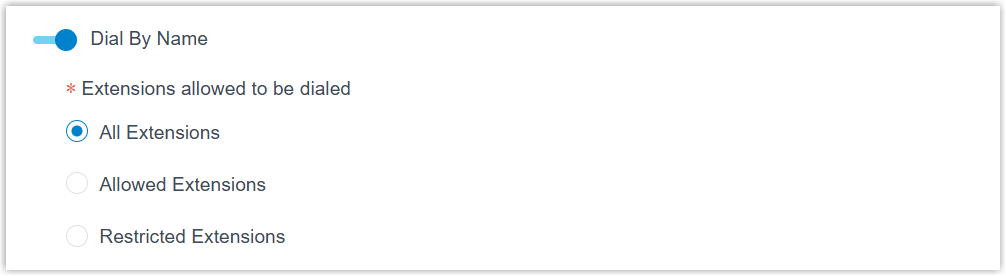
- Dial By Name
- In the Dial By Name page, enable the
feature as needed to allow receptionist to transfer calls to a
designated extension when a caller says the extension user's
name.Note: If this feature is not needed, disable this feature by turning off the switch.
- Failover Destination
- In the Failover Destination page, set
where to transfer the call if the AI receptionist cannot resolve
caller's issue or match a pre-defined transfer rule.

-
- In the Failover Destination
drop-down list, select one of the following destination type.
- Extension
- Inbound Queue
- Ring Group
- Conference
- Call Flow
- IVR
- Group VoicemailNote: For transfers to Group Voicemail, ensure that the Leave a Voicemail for an Extension/Group Voicemail feature is enabled (Path: ).

- In the follow-up field, select the specific destination.
- In the Failover Destination
drop-down list, select one of the following destination type.
- Click Save and Apply.
Result
- The AI receptionist is created successfully.
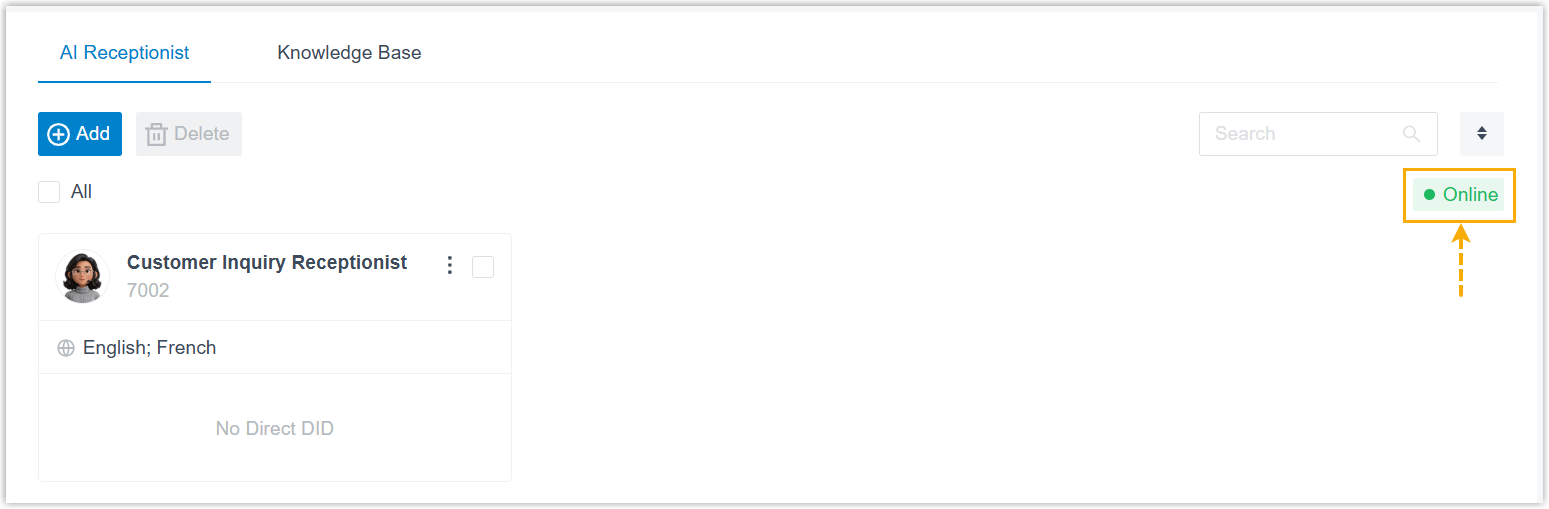
- When go back to the AI receptionist list, you can see the global status of
the AI receptionist feature is displayed as Online,
indicating that the feature is connected successfully and ready to answer
calls.
 Note:
Note:- If the online status is Abnormal, an AI Receptionist Call Line Abnormal event notification will be triggered to notify relevant contacts.
- You can hover the mouse over the status to view the
reason.
