Provision Akuvox Intercom Device with Yeastar P-Series Cloud Edition
This topic describes how to provision Akuvox IP intercom device (door phone and indoor monitor) with Yeastar P-Series Cloud Edition. After registering extensions with a door phone and an indoor monitor respectively, calls from the door phone can be routed directly to the indoor monitor by the PBX, enabling extension users to answer the calls and unlock the door remotely.
Requirements
The firmwares of Akuvox Door Phone, Akuvox Indoor Monitor and Yeastar PBX meet the following requirements.
| Model | Device Requirement | PBX Requirement |
|---|---|---|
| Door Phone | ||
| E16C V2.0 | 216.30.10.85 or later | 84.21.0.66 or later |
| R20A | 320.30.11.112 or later |
84.21.0.66 or later |
| Indoor Monitor | ||
| S562W | 562.30.14.48 or later | 84.21.0.66 or later |
| S563W | 563.30.13.202 or later |
84.21.0.66 or later |
Prerequisites
- RESET the Akuvox intercom device if it is previously used.
- Make sure that there is only one DHCP server running in the subnet where the intercom device is deployed, or the intercom device would fail to obtain an IP address.
- Gather information of the intercom device, including Vendor, Model, and MAC address.
- Make sure that you have downloaded the template for the desired device model on the PBX (Path: ).
- You have created a SIP extension on the PBX to be assigned to the intercom device.
Procedure
Step 1. Add the Akuvox intercom device on PBX
Add the intercom device on PBX. The PBX will generate a configuration file based on the device's MAC address.- On PBX web portal, go to .
- Click .
- In the IP Phone section, enter the following device
information.

- Vendor: Select Akuvox.
- Model: Select the device model. In this example, select E16C V2.0.
- MAC Address: Enter the MAC address of the intercom device.
- In the Options section, select a desired template
from the Template drop-down list.Note: You can select the default template corresponding to the intercom device, or customize your own template. For more information, see Create a Custom Auto Provisioning Template.

A provisioning link is automatically generated in the Provisioning Link filed, which points to the location where the device's configuration file is stored.
- In the Assign Extension section, assign an extension
to the intercom device.
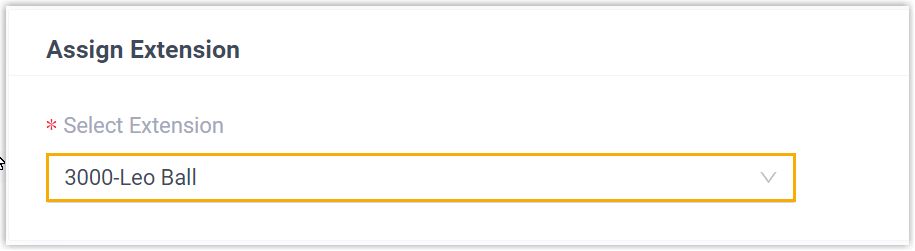 Note: If your desired extension is not listed in the drop-down list, it indicates that the extension has been associated with a device and it is only allowed to be registered on one SIP endpoint.
- To release the extension from the associated IP phone, see Release an Extension from a Provisioned IP Phone.
- To register the extension to the phone without releasing it from the previously associated one, you need to configure the concurrent registration setting for the extension.
- Click Save.
Step 2. Configure DHCP option 66 on DHCP server
- On PBX web portal, copy the provisioning link from the device's detail
page.

- On the DHCP server, set up option 66 with the provisioning link.
In this example, the configuration on a router's DHCP server is shown below.

- Reboot the intercom device.
Result
- The intercom device obtains its IP address from the DHCP server, automatically downloads the configurations from the PBX using the provisioning link acquired from Option 66, and applies the settings.
- The extension has been successfully registered on the intercom device. You
can check the registration status on on the PBX web portal.
