Download CDR from PBX Web Portal
Yeastar P-Series PBX System supports downloading CDR locally for call analysis or billing. This topic describes how to download CDR from PBX web portal.
Prerequisites
(Optional) Customize CDR download settings.
Step 1. Filter CDR
- Log in to PBX web portal, go to .
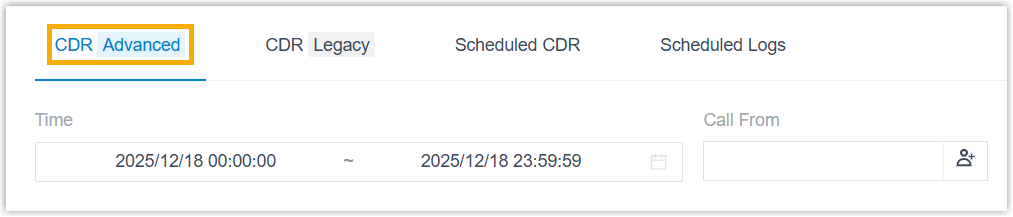
- Click CDR (Advanced) tab.
 Note: To enhance system performance, Yeastar has upgraded the CDR module in version 37.21.0.117 with a new data structure for clearer display and more comprehensive call details. The system gradually deletes old CDRs according to the CDR Auto Cleanup setting. Before old CDRs are cleaned up, new and historical data are managed separately - the CDR(Advanced) tab for new data and the CDR (Legacy) tab for historical data.
This topic describes how to download CDR data generated after upgrading to version 37.21.0.117 or later. To download historical data, please proceed from the CDR (Legacy) tab.
- Set basic filter criteria to filter CDR list
data.

- Filter CDRs by time or call participants.
Filter Description Time Set the start date and the end date. Note: To specify an exact time period, click Select Time to set the start time and the end time.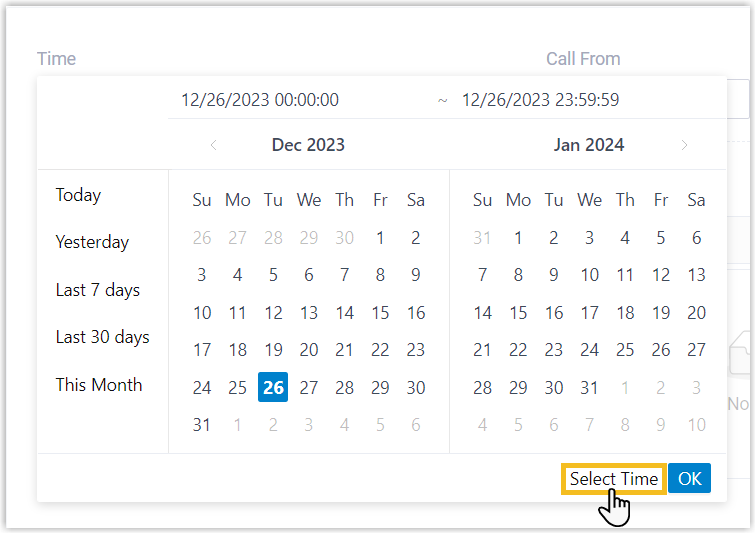
Call From Enter the caller's number or name, or click  to select
extension(s), extension group(s),
organization(s).
to select
extension(s), extension group(s),
organization(s).Call To Enter the callee's number or name, or click to select
extension(s), extension group(s),
organization(s).Tip: To swap the callee for the caller, click .
. - Optional: To perform a fuzzy search for call participants by
name or number, click
 to enable fuzzy search.
- Filter CDRs by time or call participants.
- Set advanced filter criteria for CDR to filter call leg
data.
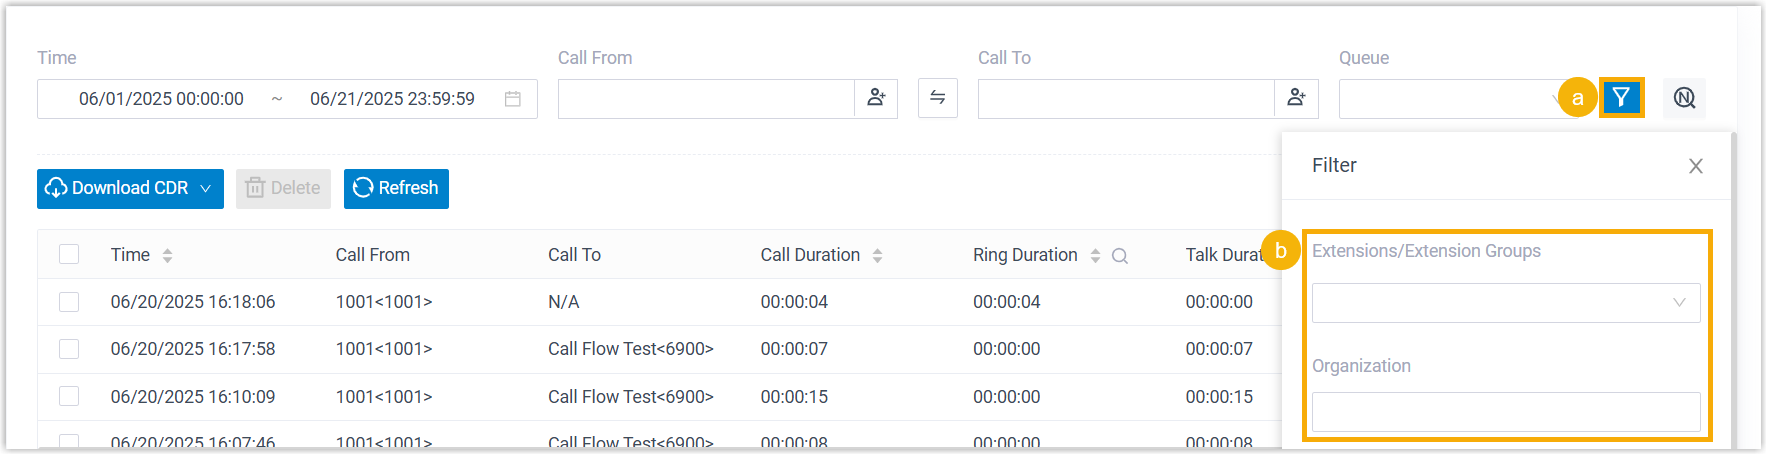
- On the right pane, click
 .
. - Configure the advanced filters as needed.
Filter Description Second Participant Enter the callee's number or name for the second call leg, or click to select extension(s),
extension group(s), organization(s).Last Participant Enter the callee's number or name for the last call leg, or click to select extension(s),
extension group(s), organization(s).Extensions/Extension Groups Select extension(s) or extension group(s). Organization Select department(s). Queue Select queue(s). Call Notes Select disposition codes. Remark Enter the remark added in the last call leg. Trunk Select a trunk. DID/DDI Select DID number(s). Caller IP Address Enter the caller's IP address. Recording Files Select an option to display all CDRs, CDRs with recordings, or CDRs without recordings.
- At the top-right corner, click
 to save the
filter and close the window.
to save the
filter and close the window.
- On the right pane, click
- Optional: Set column filter criteria for CDR to
narrow down the results.
- Optional: Click
 to select the columns to
display.
to select the columns to
display.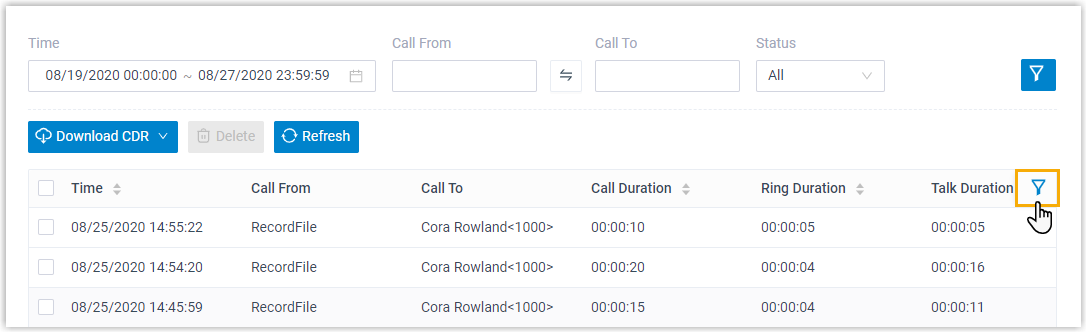 Tip: You can rearrange fields in the list as follows:
- To pin fields, click
 beside the
desired field, and drag it to the Left
(Freeze Column) or Right
(Freeze Column).
beside the
desired field, and drag it to the Left
(Freeze Column) or Right
(Freeze Column).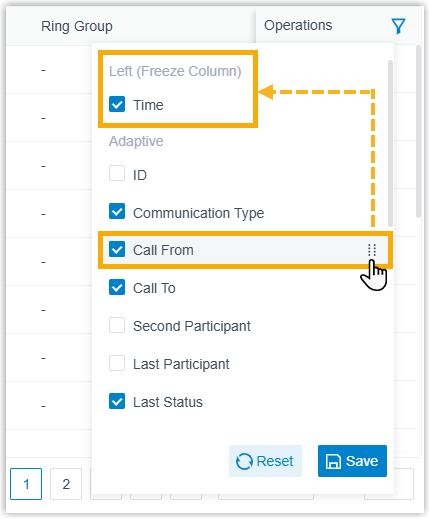
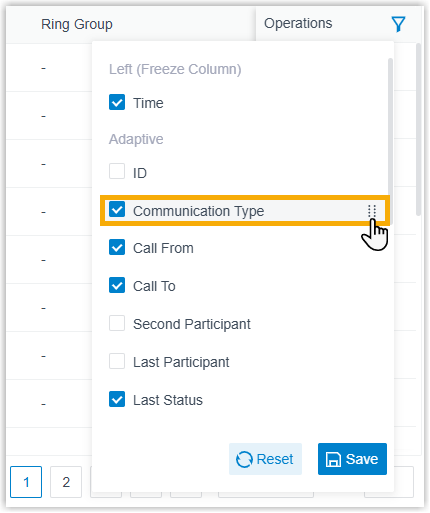
- To change the field order, click beside the desired field,
and drag it to the desired position.
- To pin fields, click
- For columns with a
 icon, click the icon to
filter the desired field.
icon, click the icon to
filter the desired field.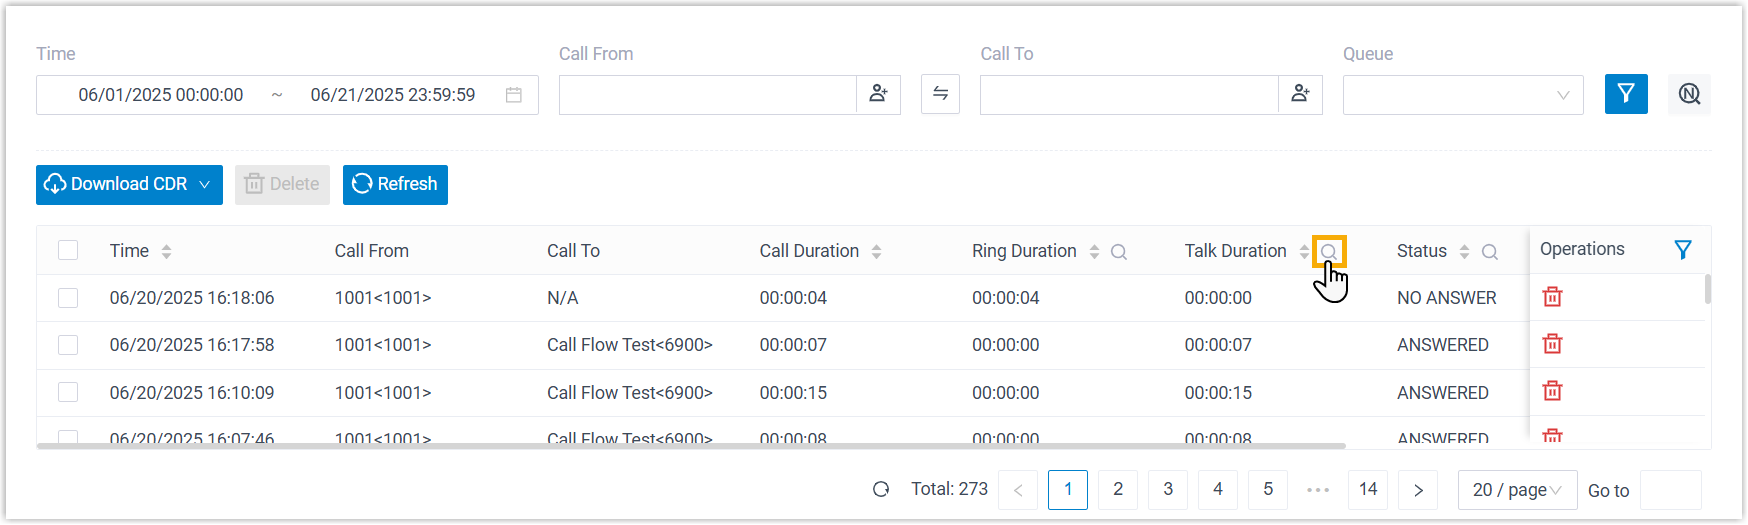
- Optional: Click
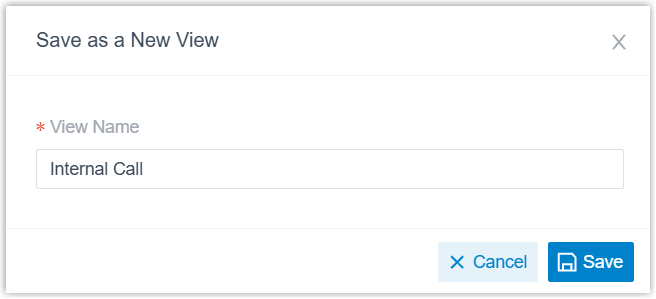
- Optional: Save the current CDR filter as a view.Note: Up to 10 custom views are supported.
- On the right pane, click
 , then select Save
as a New View.
, then select Save
as a New View.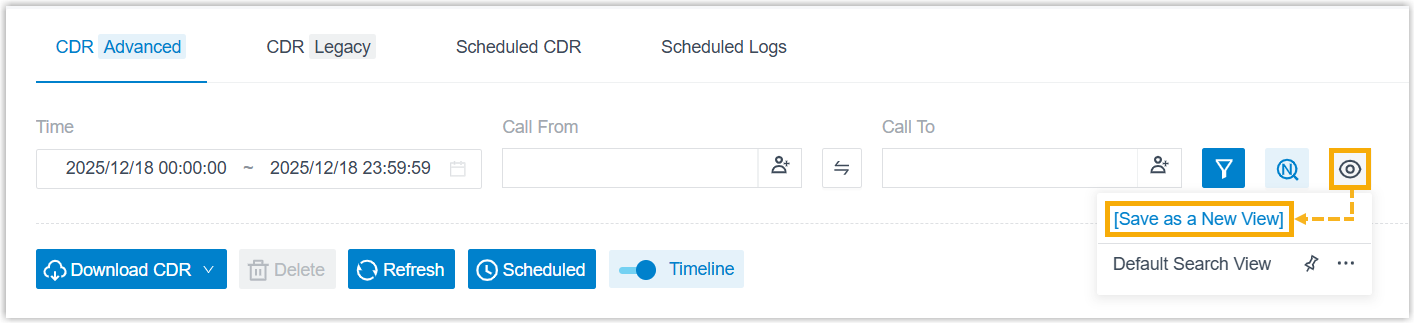
- In the pop-up window, enter a name for the view, then click
Save.
Tip: You can set the view as default if needed.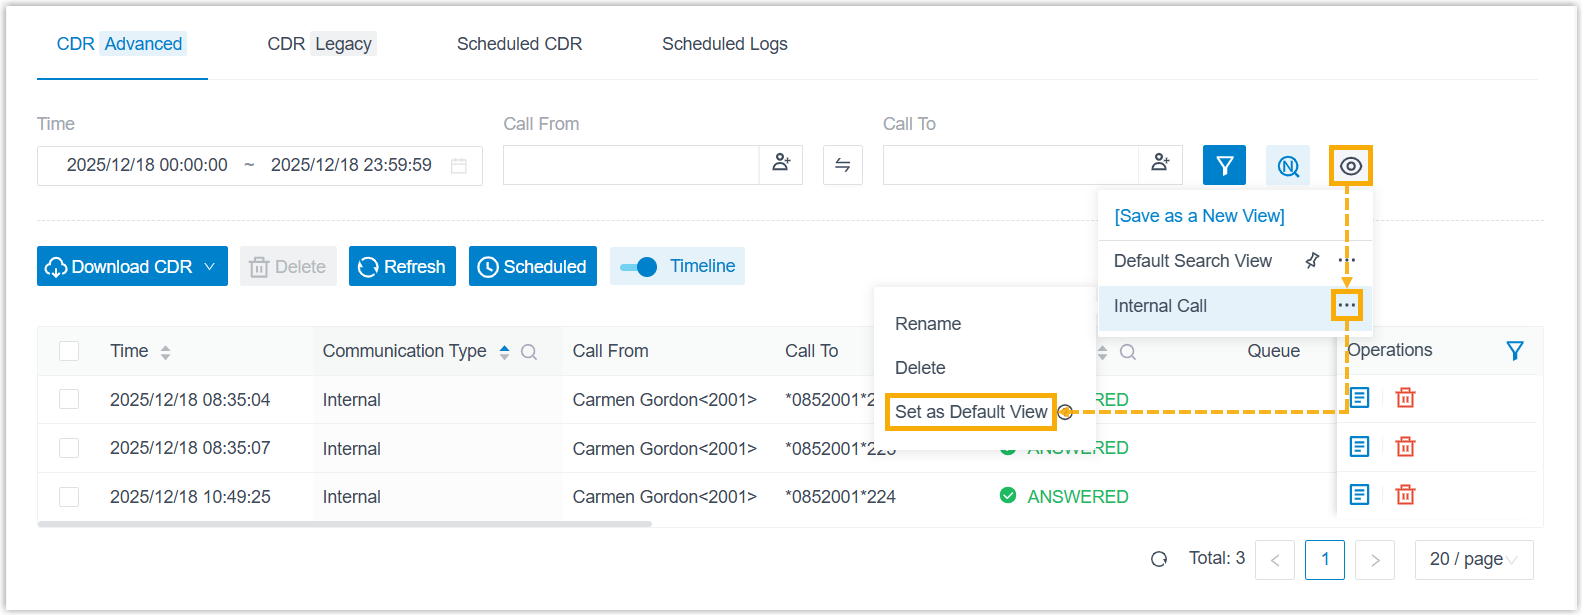
- On the right pane, click
Step 2. Download CDR
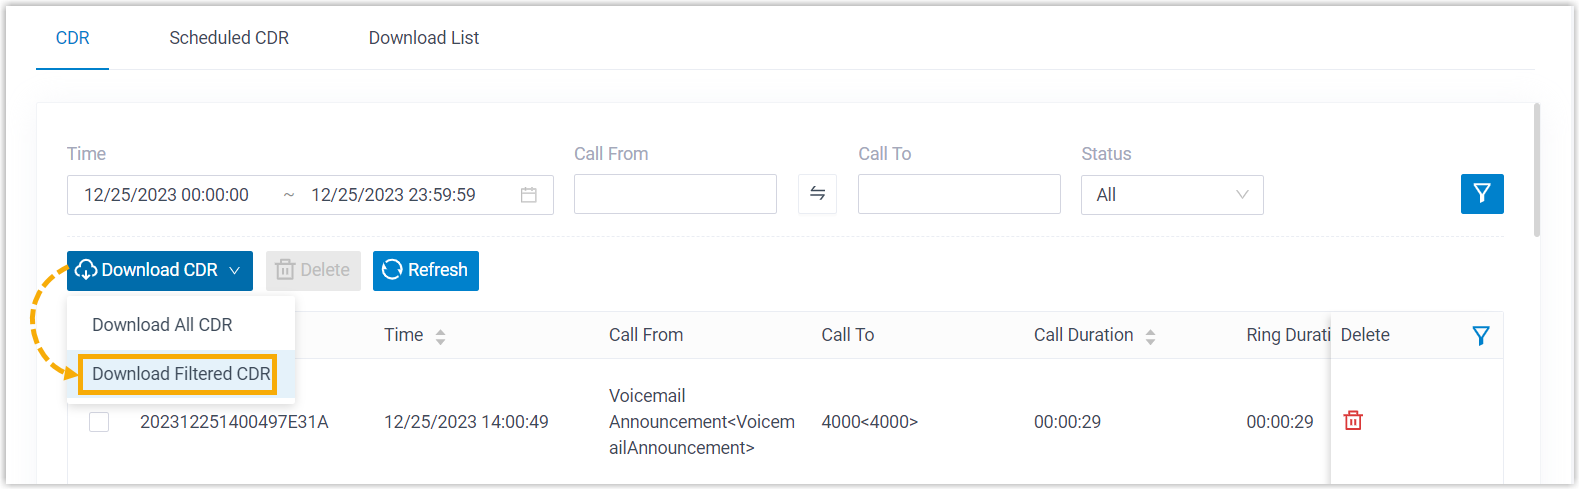
- To download all the CDRs, click Download CDR, then
select Download All CDR.

- To download the filtered CDRs, click Download CDR,
then select Download Filtered CDR.
Result
CDRs matching the filter criteria are downloaded in the selected format to your local computer.