Auto Provision an IP Phone
This topic takes Fanvil X4U (firmware: 2.4.13) to describe how to auto provision an IP phone via RPS method, which can greatly save time and cost in mass deployment.
Supported IP phones
This topic can be applied to the following IP phones:
- Phones listed in Auto Provisioning - Supported Devices and that support RPS provisioning
- Custom models added by your service provider.
Prerequisites
- Gather information of IP phone, including Vendor, Model, and MAC address.
- RESET the phone if it is previously used and connect it to the network.
Procedure
Step 1. Add an IP phone on NovoOne Tenant
You need to add an desired IP phone on NovoOne Tenant first, the system will generate a configuration file for the IP phone.
- Log in to NovoOne Tenant portal, go to .
- Click Add to add an IP phone.
- In the IP Phones section,
fill in the phone information.
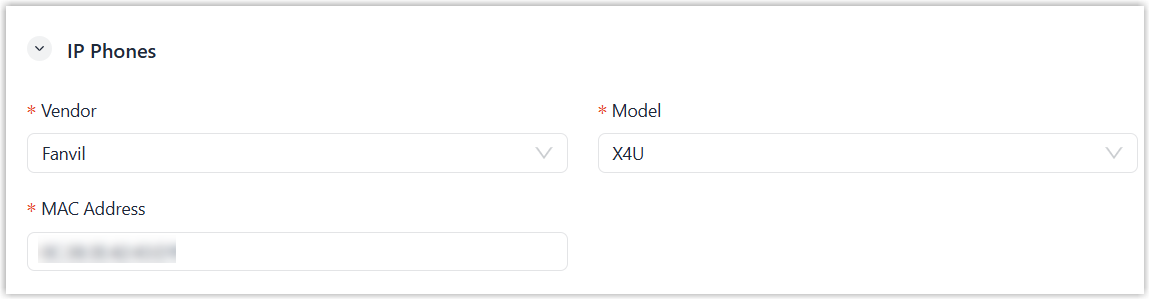
- Vendor: Select a phone vendor. In this example, select Fanvil.
- Model: Select a phone model. In this example, select X4U.
- MAC Address: Enter MAC address of the phone.
- In the Options section, configure the following
settings.
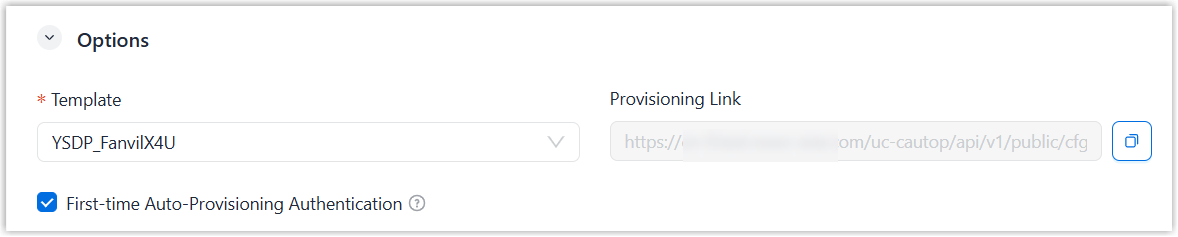
- Template: Select a desired template from the drop-down list. The template provides configurations to be applied to the phone.
- Provisioning Link: Display the auto-generated provisioning server URL.
- First-time
Auto-Provisioning Authentication: If enabled, users
are requested to fill in authentication information on the IP phone
before triggering the first-time provisioning.Note: We recommend that you keep this option selected for security purpose if the option is available.
-
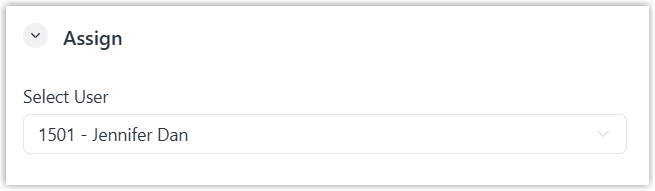
In the Assign section, select a user in the Select User drop-down list.Note: If the desired user exists but is not listed in the drop-down list, it indicates that the phones registered to the user has reached the limit. You can use either of the following methods to proceed.
- To release the user form the previous phone, see Release a User from a Provisioned IP Phone.
- To associate the user with multiple IP phones, see Allow Multiple Registrations for One User.
- Click Save.
A configuration file for the phone is generated in NovoOne Tenant.
Note: For Yealink phones that no longer receive RPS support from Yealink, you must upgrade them to the specified firmware version and use them together with the RPS PIN to continue using the RPS service. In this case, you can obtain the RPS PIN from NovoOne Tenant (Path: Inventory > IP Phones > Phones > > Options > RPS PIN), and enter it on the phone to complete the RPS
provisioning process if required.
> Options > RPS PIN), and enter it on the phone to complete the RPS
provisioning process if required. 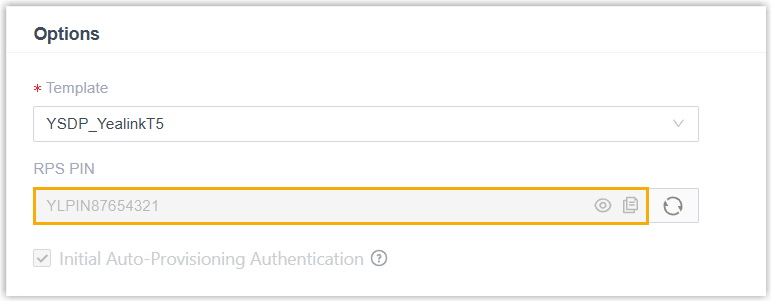
Step 2. Trigger the IP phone to complete provisioning
Reboot the IP phone to obtain the configuration file and automatically apply the settings in the file.
- Reboot the IP phone.
- If you have enabled First-time Auto-Provisioning
Authentication for the IP phone on NovoOne Tenant, enter the authentication credential on
the IP phone to finish phone provisioning.
- Username: Enter the extension number of the user that is assigned to the phone.
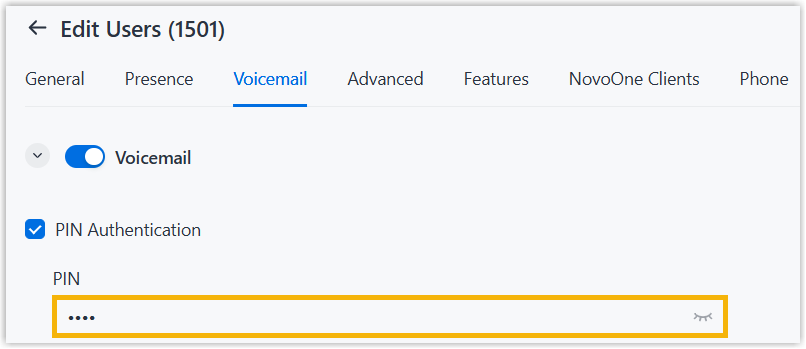
- Password: Enter the user's Voicemail
Access PIN. Note: You can check the Voicemail Access PIN on NovoOne Tenant portal (Path: Users > Users > > Voicemail > Voicemail > PIN Authentication > PIN).
Result
- The IP phone automatically downloads the configurations from NovoOne Tenant and applies the settings.
You can check the registration status of provisioned phone on NovoOne Tenant (Path: ).
 : The assigned user is registered on the IP phone.
 : The assigned user fails to register to the
IP phone.
: The assigned user fails to register to the
IP phone.
