Create an Account Trunk
A SIP Account Trunk allows external devices to register to the NovoOne platform. This establishes a connection between the platform and the remote device. This topic describes how to create a SIP Account Trunk on the platform.
Limitations
You can create up to 50 SIP
trunks.
Note: The number
of trunks created by your colleagues is also included.
Prerequisites
Ensure that you have the permission to add SIP
trunks.
Note: If the
Add button is not
available,
contact your service provider to grant the permission to your
account.
Procedure
- Log in to NovoOne Platform portal, go to .
- Click Add.
- In the Basic section, enter the
general information of the trunk.

Setting Description Name Enter a name to identify the trunk. Trunk Status Select Enabled. Select ITSP Template Select General. - In the Detailed Configuration section, configure the
following settings.
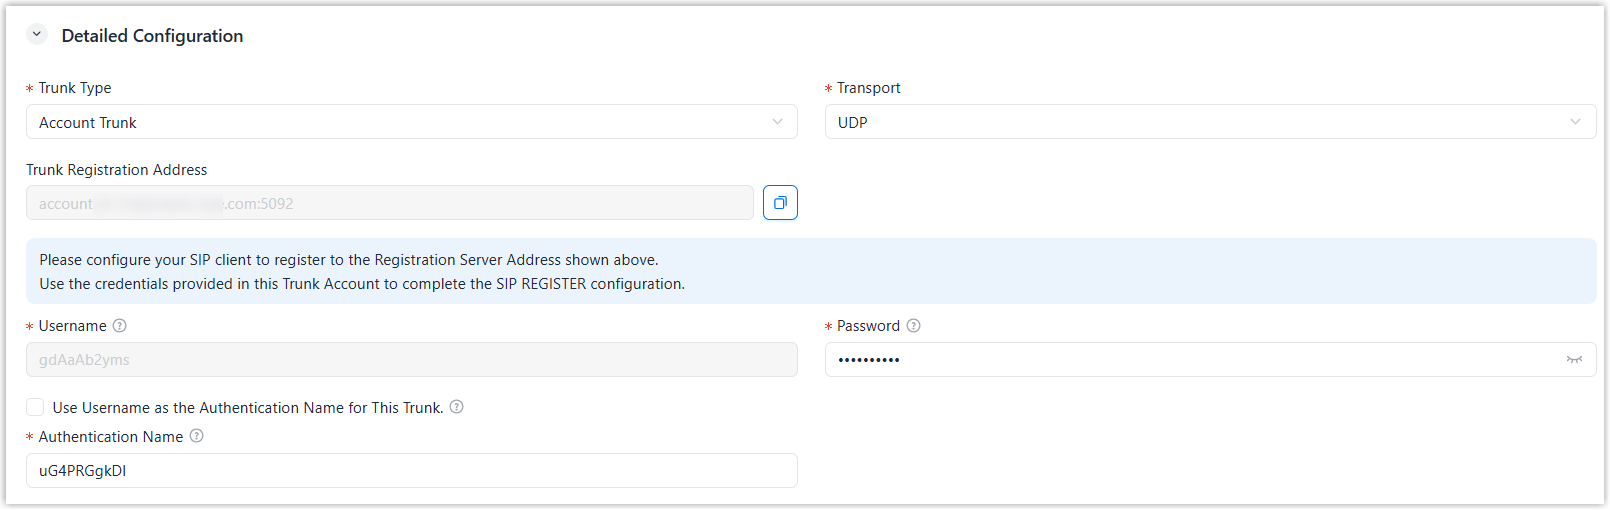
Setting Description Trunk Type Select Account Trunk. Transport Select the transport protocol to be used. - UDP
- TCP
- TLS
Trunk Registration Address Automatically populated with the platform's registration server address and port. This field is read-only. Username Automatically populated with the SIP account username. This field is read-only. Password Set a password for the SIP account. Use Username as the Authentication Name for This Trunk Set whether to use the Username as the Authentication Name.- If enabled, the trunk's username is used as
the authentication name for SIP authentication.Note: If the connecting device does not support the Authentication Name field, enable this option to use the Username as the Authentication Name for this trunk.
- If disabled, set a value in the Authentication Name field, which will be used for SIP authentication.
- Optional: Go to the Advanced, Inbound Caller ID Reformatting, and SIP Headers tab to configure advanced trunk settings according to your needs.
- Click Save.
Result
The trunk is created and displayed in the trunk list.
What to do next
- On the third-party device, enter the following registration details to complete
the connection:
- Transport
- Trunk Registration Address
- SIP Account Trunk connection details (Username, Password, and Authentication Name)
- Assign the trunk to your tenants and/or resellers.
- Add DID numbers to the trunk and grant access to your tenants or a reseller.
- Assign the associated DID numbers to a specific tenant.