Assign a SIP Trunk
This topic describes how to assign your SIP trunk to all your tenants and/or specific resellers, granting them access to the trunk for further resource assignment.
Prerequisites
You have created a SIP trunk.
Procedure
- Log in to NovoOne Platform portal, go to .
- In the trunk list, click
 beside the desired trunk.
A Assignment Management panel appears at the right side, where you can assign the trunk as needed.
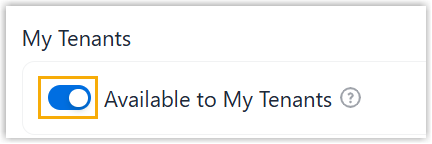
- In the My Tenants section,
turn on the switch of Available to My Tenants to
assign the trunk to your
tenants.
- In the Reseller Assignments section, assign the trunk
to your resellers.

- Click Add to add an assignment rule for a reseller.
- In the Reseller drop-down list, select the desired reseller.
- Configure the concurrent call limit for the reseller on this
trunk.Note: If set to Inherit Trunk, the reseller can use the trunk's maximum concurrent capacity.
Setting Description Inbound Limit Set the maximum number of concurrent inbound calls. Outbound Limit Set the maximum number of concurrent outbound calls. Total Limit Set the maximum number of total concurrent calls (inbound and outbound calls combined). - Optional: Click Add to assign the trunk to other resellers.
- Click Save.
Result
The trunk is assigned successfully. You can check the assignment in the Assigned to column of the trunk.
- If assigned to your tenant, the trunk is available when you assign trunk and DID resources to the tenants under your account.
- If assigned to your reseller, the trunk is available when the specified
reseller assign trunk and DID resources to their own
tenants.Note: The assigned trunk does not appear in the reseller's trunk list. It is only visible when they assign resources to their tenants.