Create a Peer Trunk
This topic provides a configuration example for creating a generic SIP Peer Trunk that can be adapted to various peering scenarios.
Limitations
You can create up to 50 SIP
trunks.
Note: The number
of trunks created by your colleagues is also included.
Prerequisites
Obtain the following information from your
ITSP or the peer system for trunk setup. The example information are shown below:
-
Provider domain:
abc.provider.com -
Port: 5060
-
Transport protocol: UDP
Procedure
- Log in to NovoOne Platform portal, go to .
- Click Add.
- In the Basic section, enter the
general information of the trunk.

Setting Description Name Enter a name to identify the trunk. Trunk Status Select Enabled. Select ITSP Template Select General. - In the Detailed Configuration section, enter the
trunk information provided by the ITSP or the peer system.
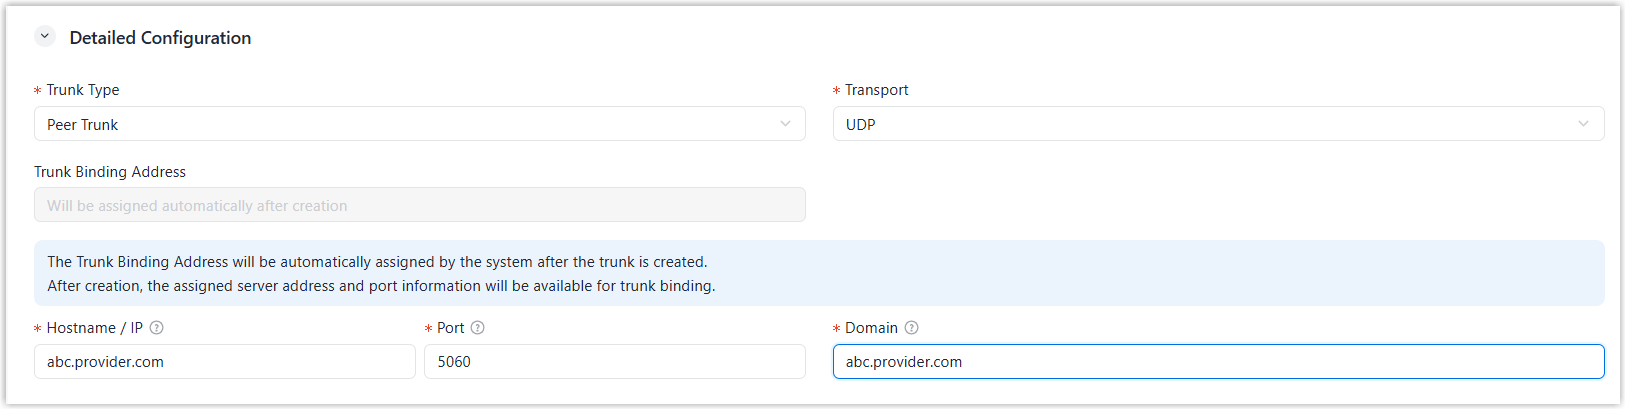
Setting Description Trunk Type Select Peer Trunk. Transport Select the provided transport. In this example, select UDP. Trunk Binding Address This address is automatically assigned by the system after the trunk is created and can be used for trunk binding. Hostname / IP Enter the provided domain name or IP address. In this example, enter abc.provider.com. Port Enter the provided port. In this example, enter 5060. Domain Enter the provided domain name, which will be used in the SIP URI (e.g., in the FromorToheader).Note: If there is no domain name provided, enter the same value as Hostname/IP. - In the Inbound SIP Security
section, specify source IP addresses or domain names that are allowed to
send inbound calls to this trunk, and configure the ports they use.Note:
- The IP address / domain configured in Hostname / IP is trusted by default.
- You can add up to 30 allowed source addresses.
- CIDR notation (e.g.
192.168.1.0/24) is not supported.

- Optional: Go to the Advanced, Inbound Caller ID Reformatting, and SIP Headers tab to configure advanced trunk settings according to your needs.
- Click Save.
Result
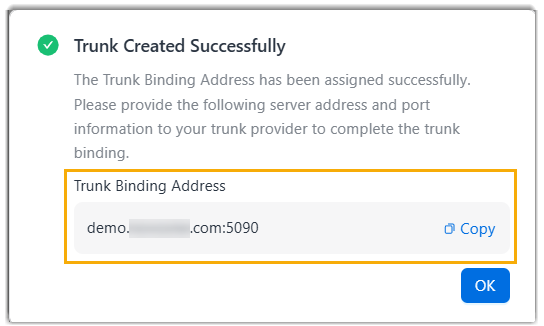
- The trunk is created and displayed in the trunk list.
-
The system assigns a trunk binding address that is required for the peer side to establish a connection with your trunk.
What to do next
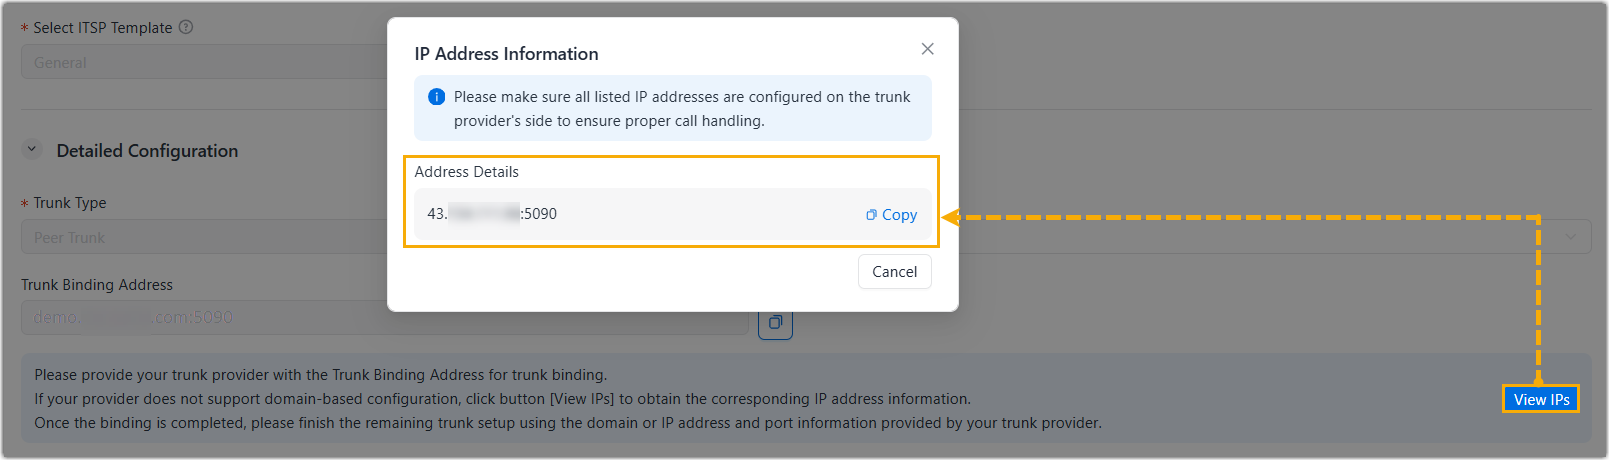
- Provide the trunk binding address to your ITSP or the peer system to
complete the binding.Note: If the peer side does not support domain-based configuration, go to the trunk's details page and click View IPs to obtain the IP address information.
- Assign the trunk to your tenants and/or resellers.
- Add DID numbers to the trunk and grant access to your tenants or a reseller.
- Assign the associated DID numbers to a specific tenant.