Update Certificate for Yeastar Central Management Domain Name
To ensure normal access and secure usage of Yeastar Central Management, it is essential to periodically renew the domain certificates to prevent it from expiring. This topic describes how to update certificate for Yeastar Central Management domain name on the web portal.
Introduction
-
DNS API Mode: The system automatically interacts with your DNS provider's native API to complete certificate issuance and renewal. It dynamically adds and removes DNS TXT records required for ACME challenge, handling issuance and renewal without manual intervention. This method requires you to provide API credentials for your DNS provider.
-
DNS Alias Mode: The system uses ACME delegation via CNAME record to complete certificate issuance and renewal without requiring any API credentials. You manually add a one-time, static DNS CNAME record during initial setup to delegate SSL verification authority. After that, the system handles certificate renewal automatically.
Prerequisites
Complete the following preparations based on your chosen method for domain certificate management.
| Mode | Prerequisite |
|---|---|
| DNS API Mode |
|
| DNS Alias Mode |
|
Configure CNAME record (for DNS Alias Mode)
- Obtain the CNAME target for Yeastar Central Management domain.
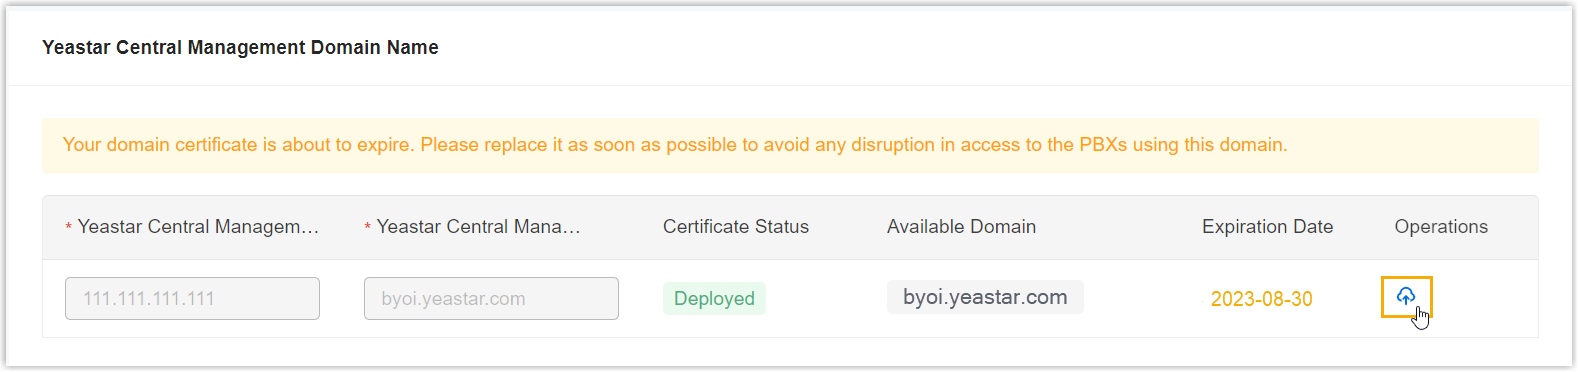
- Log in to Yeastar Central Management, go to .
- In the Operations column, click
 .
.
- In the pop-up window, select Apply for a certificate.
- In the DNS Provider drop-down list, select the DNS provider you added for DNS Alias Mode.
- Note down the Certificate CNAME Record Name
and Certificate CNAME Record Target
Domain.
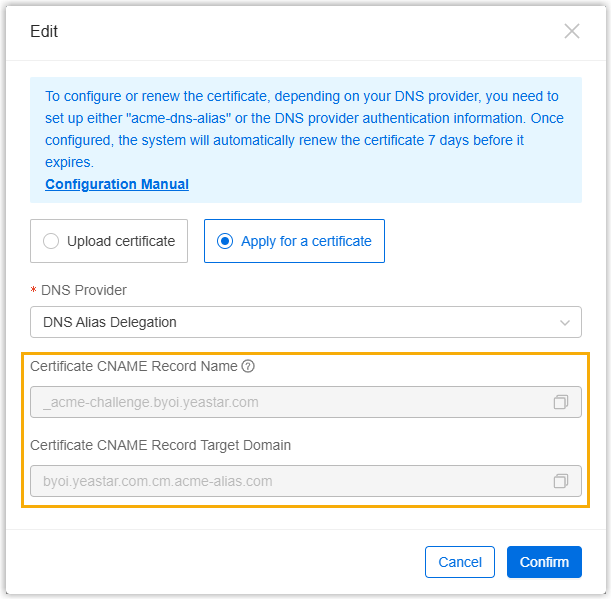
- Configure CNAME record on your DNS provider.
- Log in to your DNS provider's management console.
- Add a CNAME record for your domain name to point the validation
domain names to the CNAME target domains generated by Yeastar
Central Management.
Domain Name Record Type Target Domain YCM Server's certificate CNAME record name _acme-challenge.byoi.yeastar.comCNAME YCM Server's certificate CNAME record target domain byoi.yeastar.com.cm.acme-alias.com
Update certificateProcedure
- Log in to Yeastar Central Management, go to .
- In the Operations column, click .
- In the pop-up window, update the certificate via either of the following
methods according to your needs.
- Automatic certificate update
- You can directly apply for a new certificate on Yeastar
Central Management, the system will automatically request
domain certificates from Let's Encrypt via your DNS
provider.
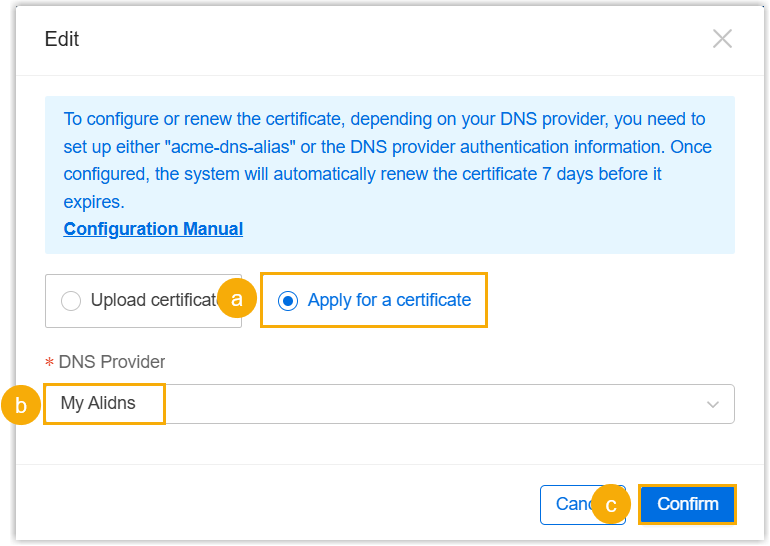
- Select Apply for a certificate.
- Select your DNS provider in the DNS Provider drop-down list.
- Click Confirm.
- Manual certificate update
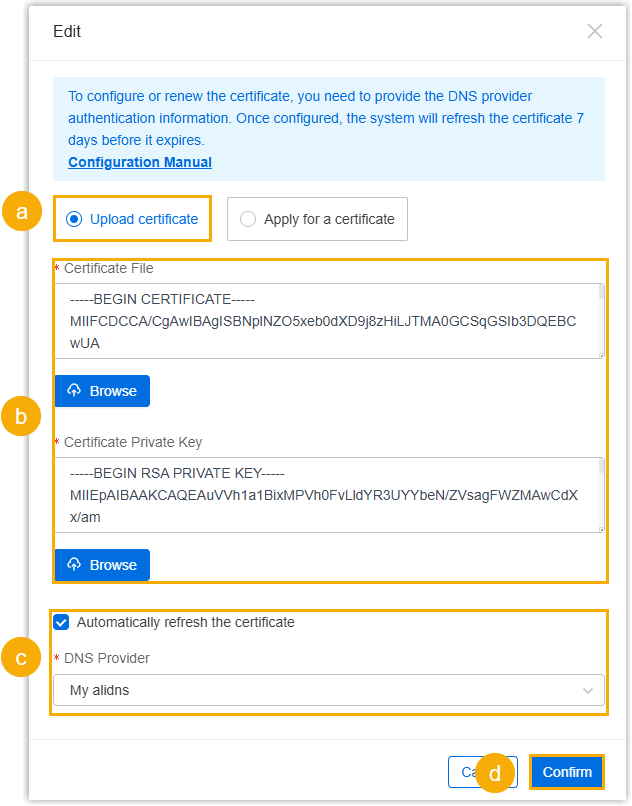
- Click Save.
Result
The certificate expiration date is updated to the latest one, indicating that the domain name certificate is renewed successfully.
