Install Room Comfort Sensor AM307
This topic describes the hardware overview of Milesight Room Comfort Sensor AM307 and gives instructions on how to power up , and install a Room Comfort Sensor AM307.
Package contents
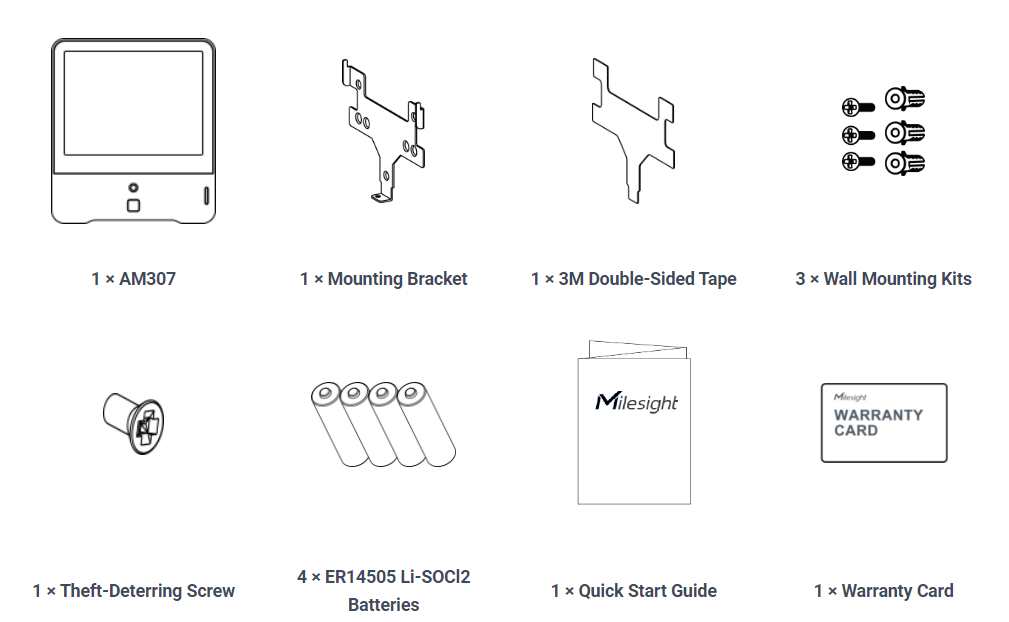
Before you begin to install the room comfort sensor AM307, you need to check the package contents to verify that you have received the items below.
Hardware overview
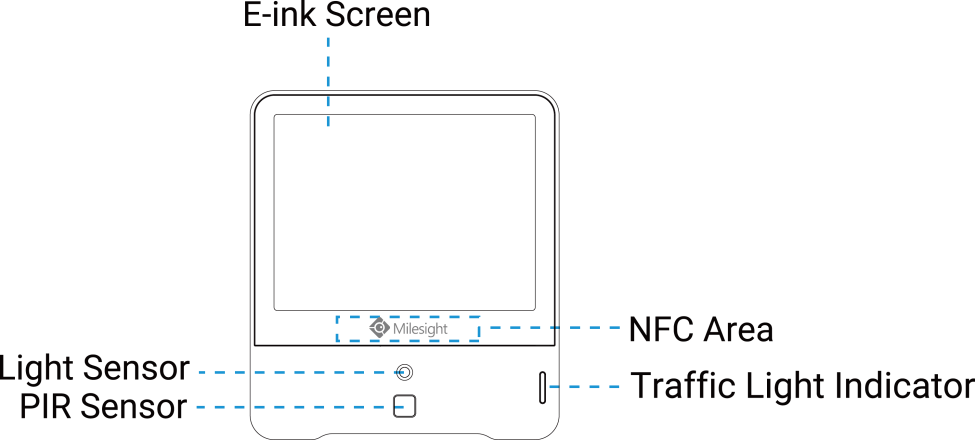
- Front panel
- Back panel (with the back cover removed)
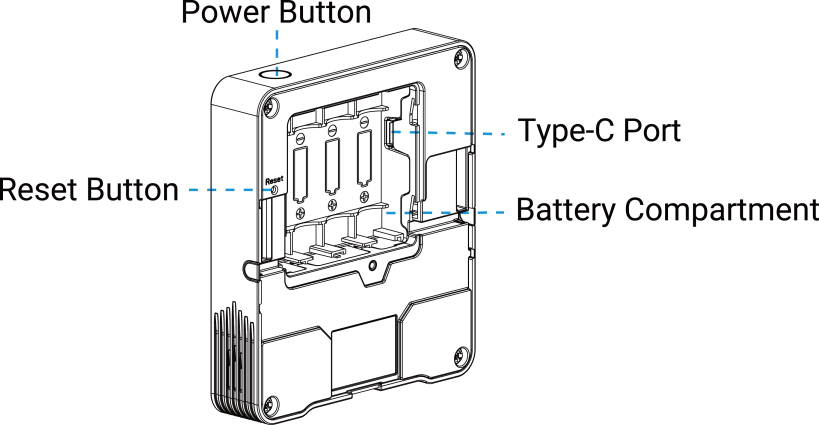
- Buttons and functions
-
Button Function Action Power Turn on/off the sensor Press and hold the power button for more than 3 seconds Switch screen display mode Press the power button once. Reset Reset to factory settings Press and hold the reset button for more than 10 seconds.
Power on a room comfort sensor
- Powered by ER14505 Li-SOCl2 batteries
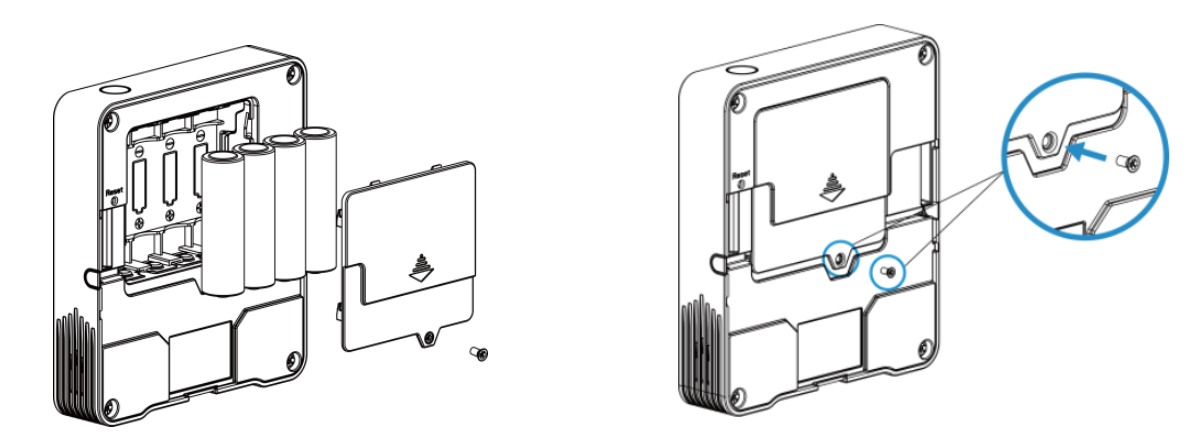
- Release the screw on the back of the sensor and remove the rear cover.
- Install the batteries.
- Fix the rear cover back to the sensor with the fixing screw.
- Press the power button for three seconds, the device will start up.
- Powered via USB Type-C port
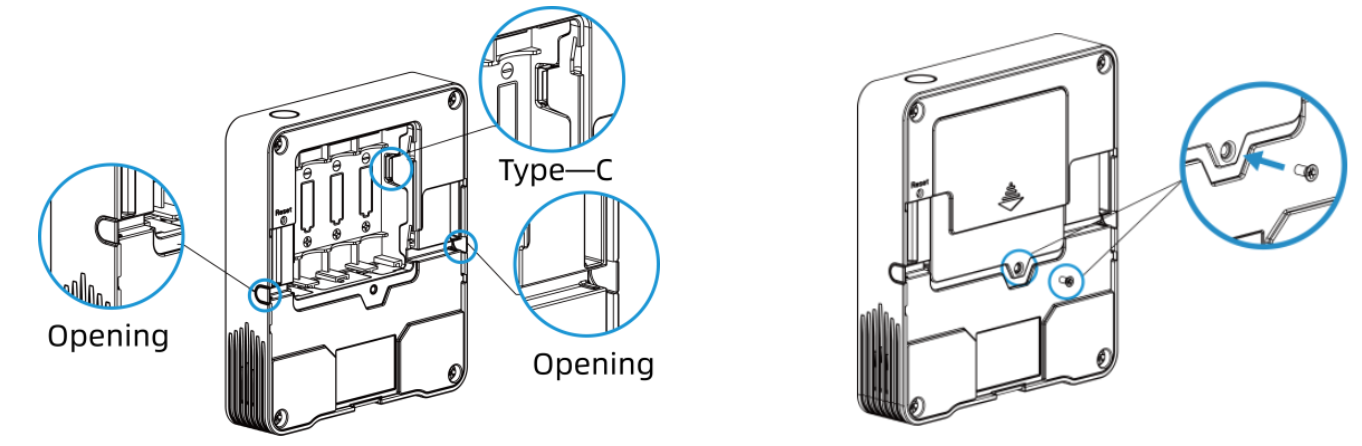
- Release the screw on the back of the sensor and remove the rear cover.
- Connect the Type-C cable to the Type-C port of the sensor.
- Pass the type-C cable through the openings on both sides of the sensor.
- Fix the rear cover back to the sensor with the fixing screw.
- Connect the Type-C cable to the USB Type-C power adapter.
- Plug the power adapter into a power outlet.
- Press the power button for three seconds, the device will start up.
Mount the Room Comfort Sensor AM307
- Mounting positions
-
- Mount the sensor away from any heat source or cold sources like an oven, or refrigerator.
- Mount the sensor away from where airflow varies greatly like windows, vents, fans, and air conditioners.
- Mount the sensor at least 1.5m high from the floor.
- Mounting by 3M tape
-
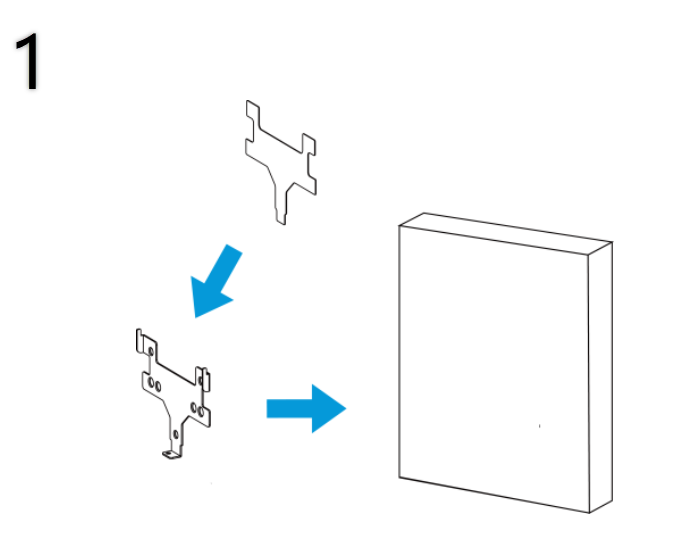
1.Paste 3M tape to the back of the mounting bracket and attach the bracket to a flat surface.
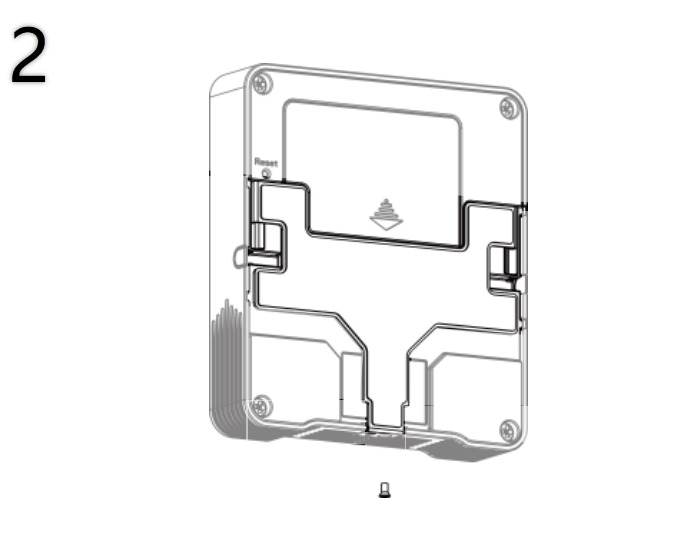
2. Place the sensor on the mounting bracket and secure it to the bracket by screwing the Theft-Deterring screw into the hole on the bottom of the sensor.
- Mounting by wall-mounting kits
-
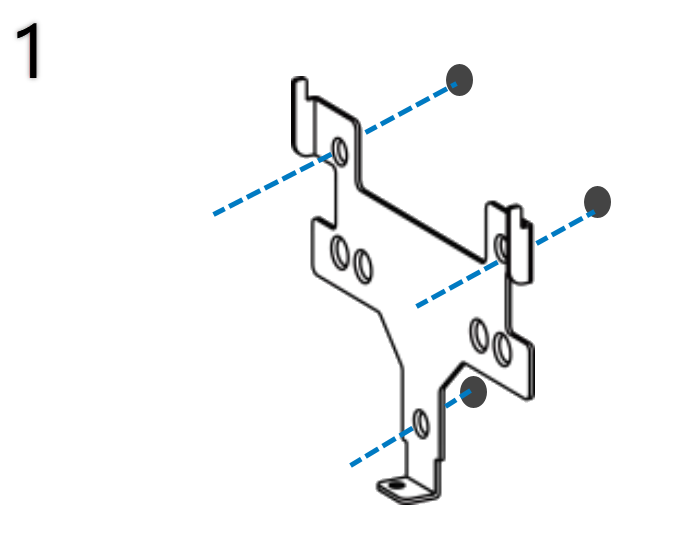
1.Press the mounting bracket horizontally at the desired height on the wall and mark three hole locations.
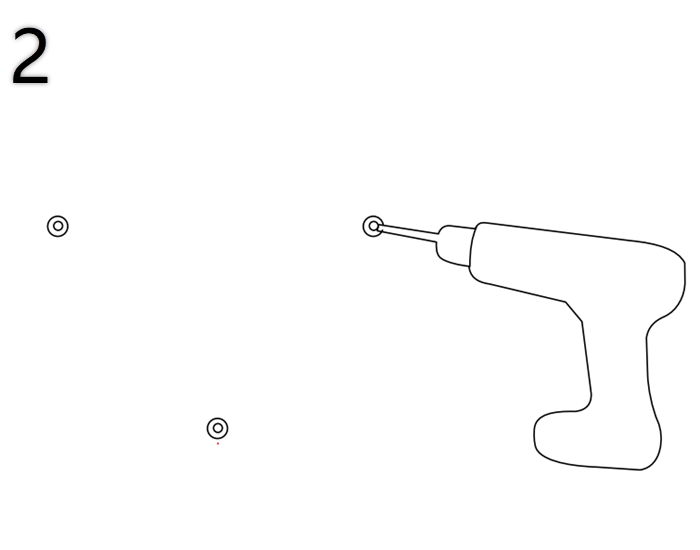
2. Remove the bracket and drill three holes on the marked position.
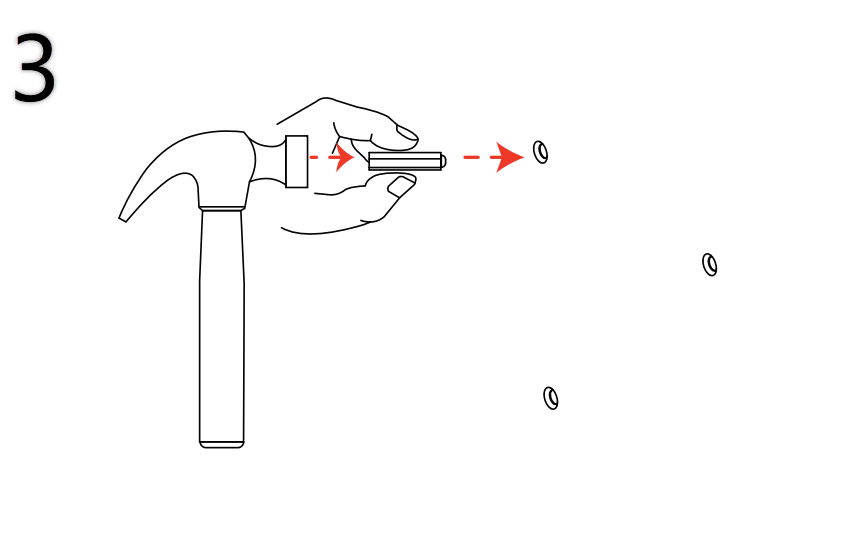
3. Hammer the wall plugs into the holes respectively.
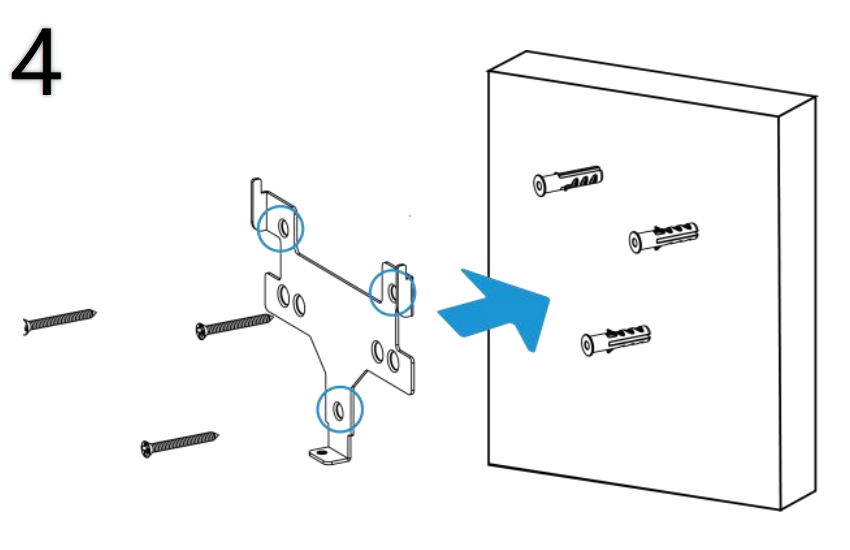
4. Press the mounting bracket on the wall and align its holes with the wall plugs, then fix the screws into the wall plugs.
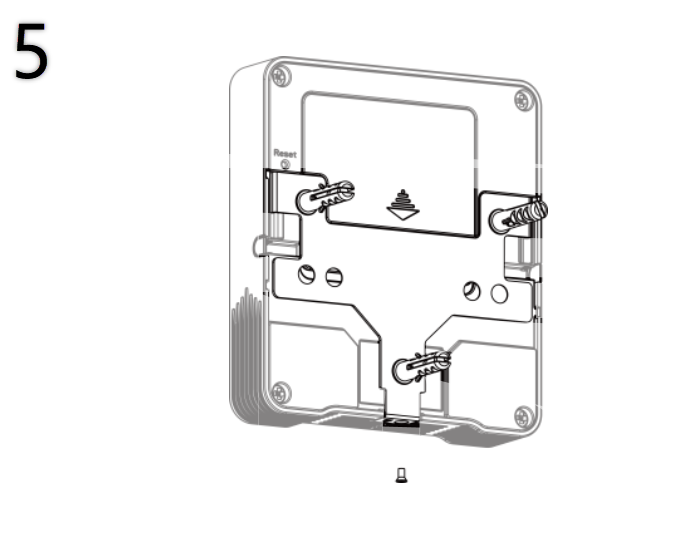
5. Place the sensor on the mounting bracket and secure it to the bracket by screwing the Theft-Deterring screw into the hole on the bottom of the sensor.
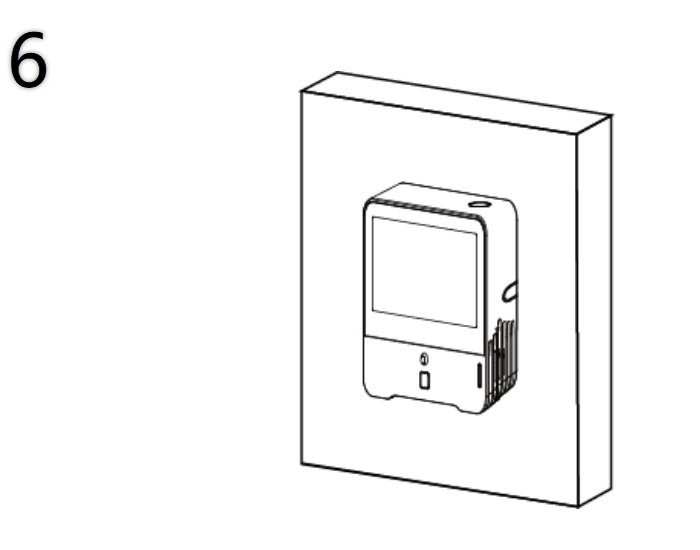
6. Room Comfort Sensor is securely mounted on the wall.
What to do next
After the People Counting Sensors are installed and powered on, you can check the device status to see if they are connected to Yeastar Workplace, and learn the features that People Counting Sensors can achieve.
For more information, see Check the Status of Room Comfort Sensor.