Set up Smart Wall Switch
This topic provides step-by-step instructions on setting up Smart Wall Switch for Yeastar desk booking system.
Requirements
- Yeastar Workplace plan: Pro Plan
- Device Model: Milesight Wall Switch WS50x
Prerequisites
- You have added room resources in Yeastar Workplace.
-
You have set up one of the following devices:
- Yeastar Room
Display DS7510 with the hardware version
x.x.x.x-r3 or later Note: To view the hardware version, go to Device List and click
 of the desired Room Display,
then go to .
of the desired Room Display,
then go to .
- Yeastar Room
Display DS7510 with the hardware version
x.x.x.x-r3 or later
Step 1. Register Smart Wall Switches
- Log in to Yeastar Workplace management portal, go to Device List.
- Click Add, and configure the following information in
the pop-up window.
Item Description Registration Code/ SN Enter the Serial Number (SN) of this device.
If the SN is correct, the system automatically detects the device type.Note: You can collect the SN on the back panel of the device.Device Name Specify a name to help you identify this device. Associated Gateway Select a gateway or Room Display DS7510 for transmitting data between Yeastar Workplace and the device. Tip: Refer to the following suggestions for optimal data transmission quality:- If you want to associate the device with a gateway, select a gateway that is installed on the same floor as the device.
- If you want to associate the device with a Room Display DS7510, select the one that is located within 288 m3 (12*8*3 m) range of the device, and do NOT associate more than 10 devices with the same Room Display DS7510.
Bind to Select a room resource to associate with this device. -
Click OK.
-
Mark the device to remind you where it will be installed.
For example, attach a label of its associated meeting room on the back of the device.
-
Repeat Step 2 ~ Step 4 for all the devices that need to be set up.
You have registered Smart Wall Switches to Yeastar Workplace. After the devices are installed, they will be activated and connected to Yeastar Workplace automatically.
Step 2. Install Smart Wall Switch
- Package contents
- Before you begin to install the Smart Wall Switch, you need to check the
package contents to verify that you have received the items
below.

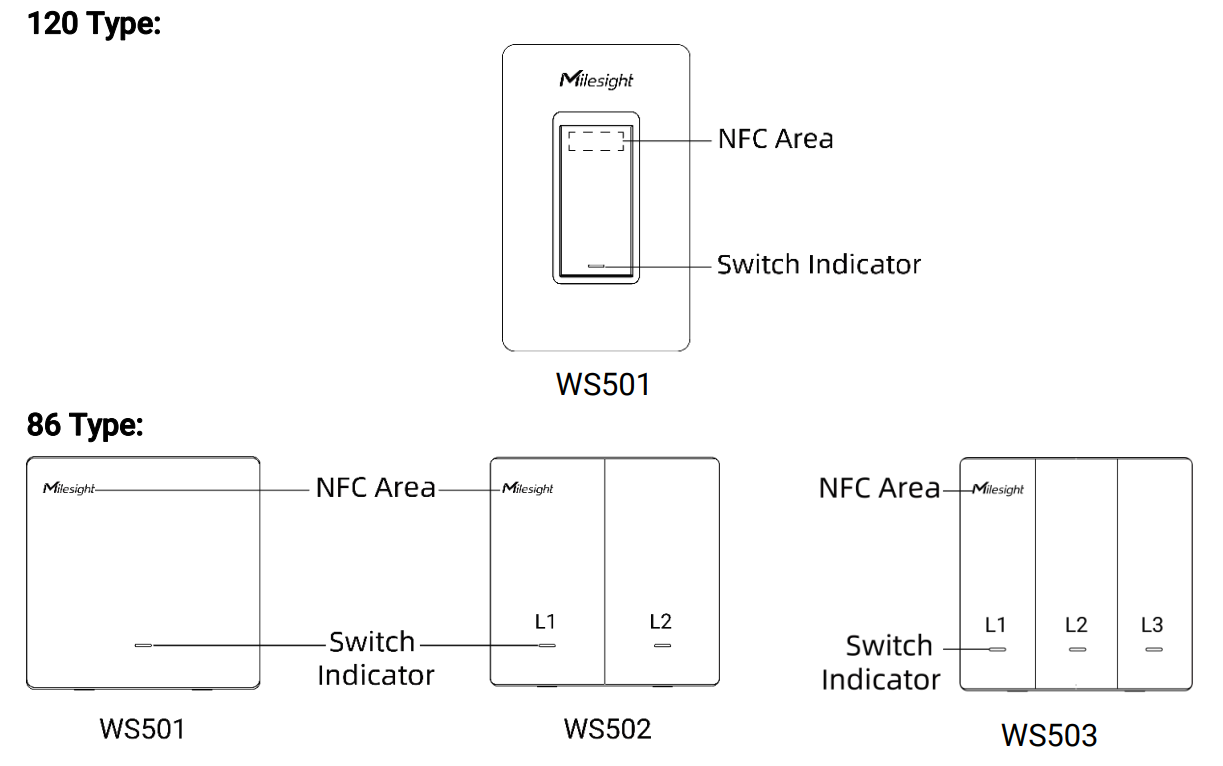
- Hardware overview
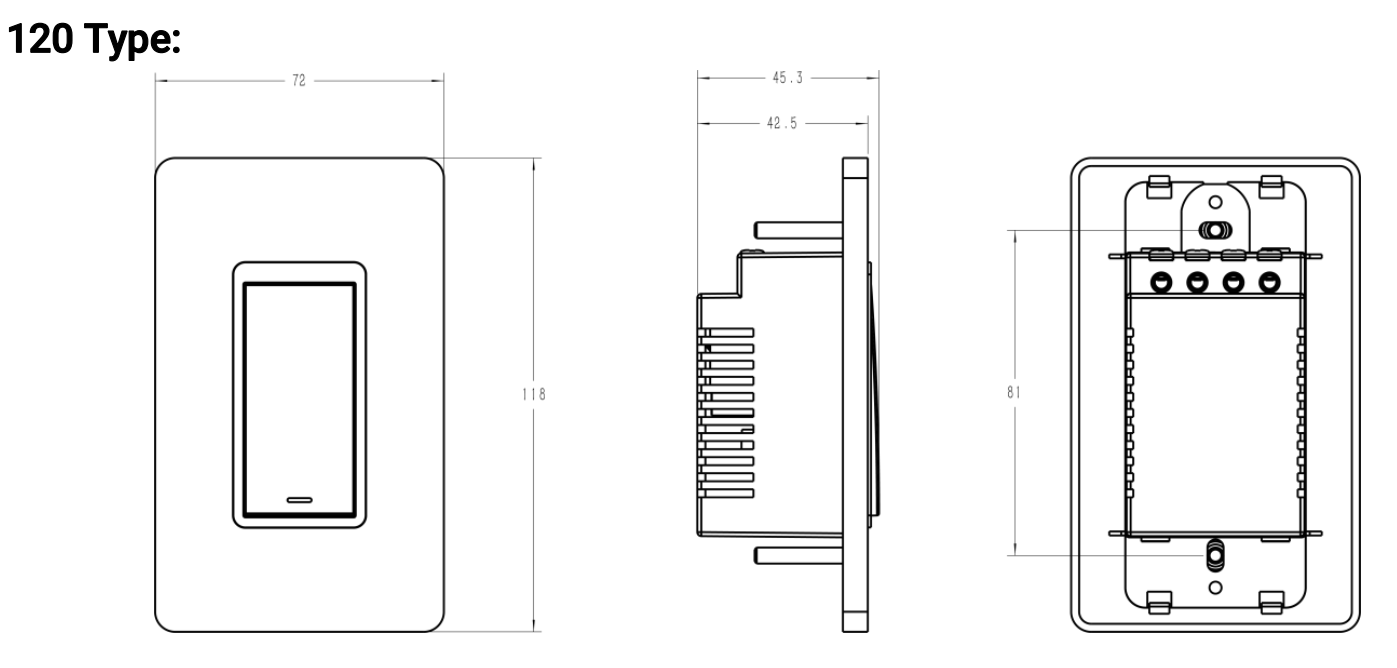
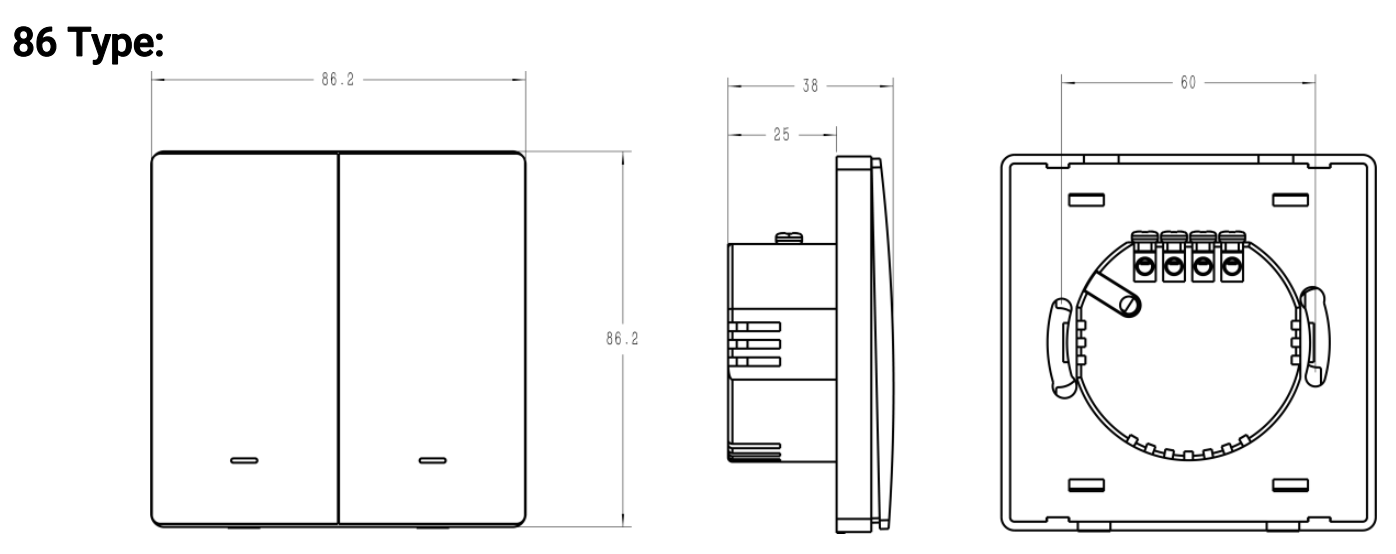
- Dimensions
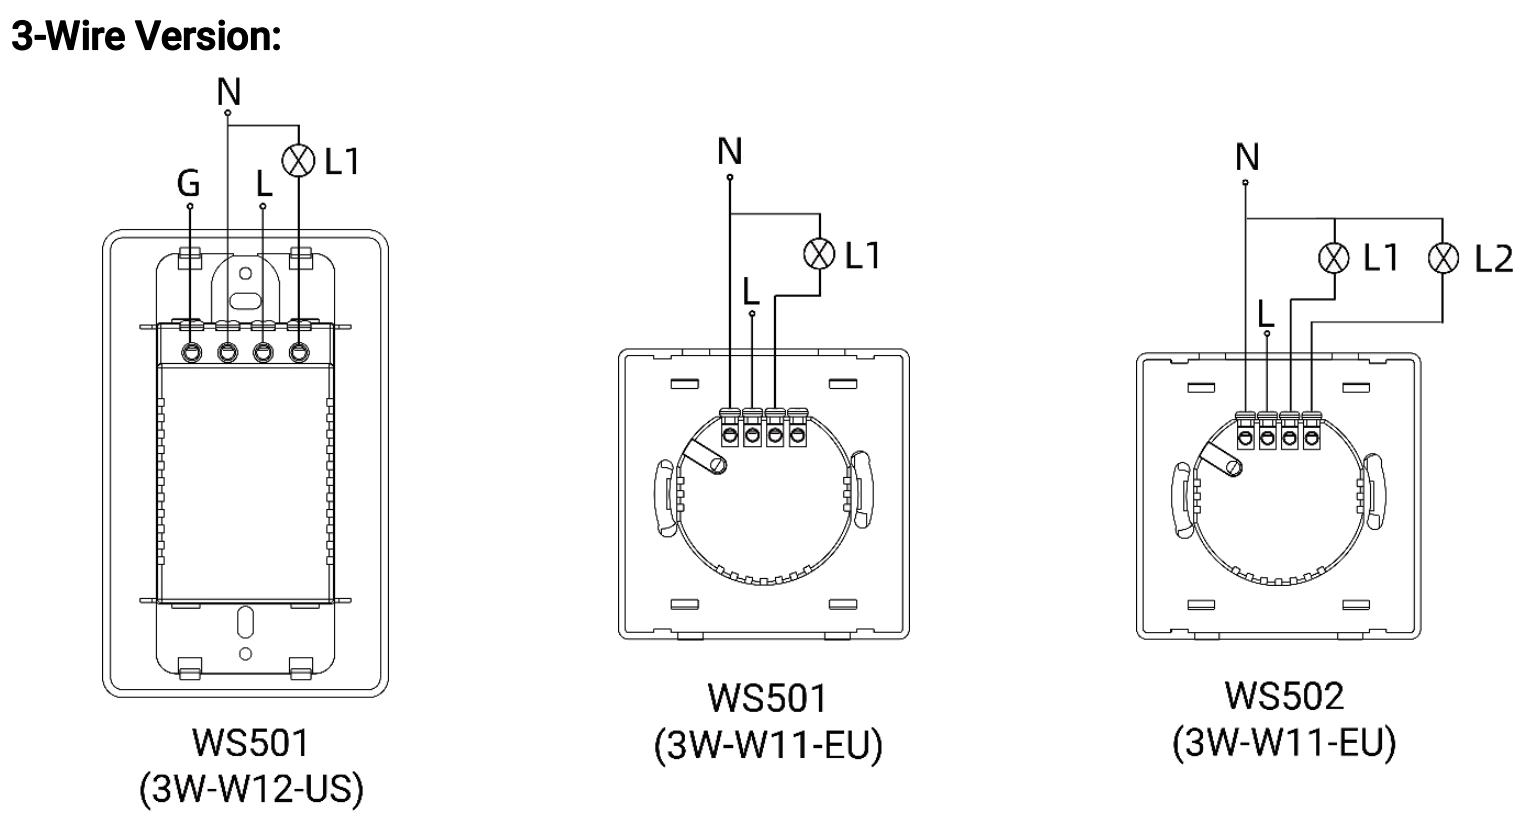
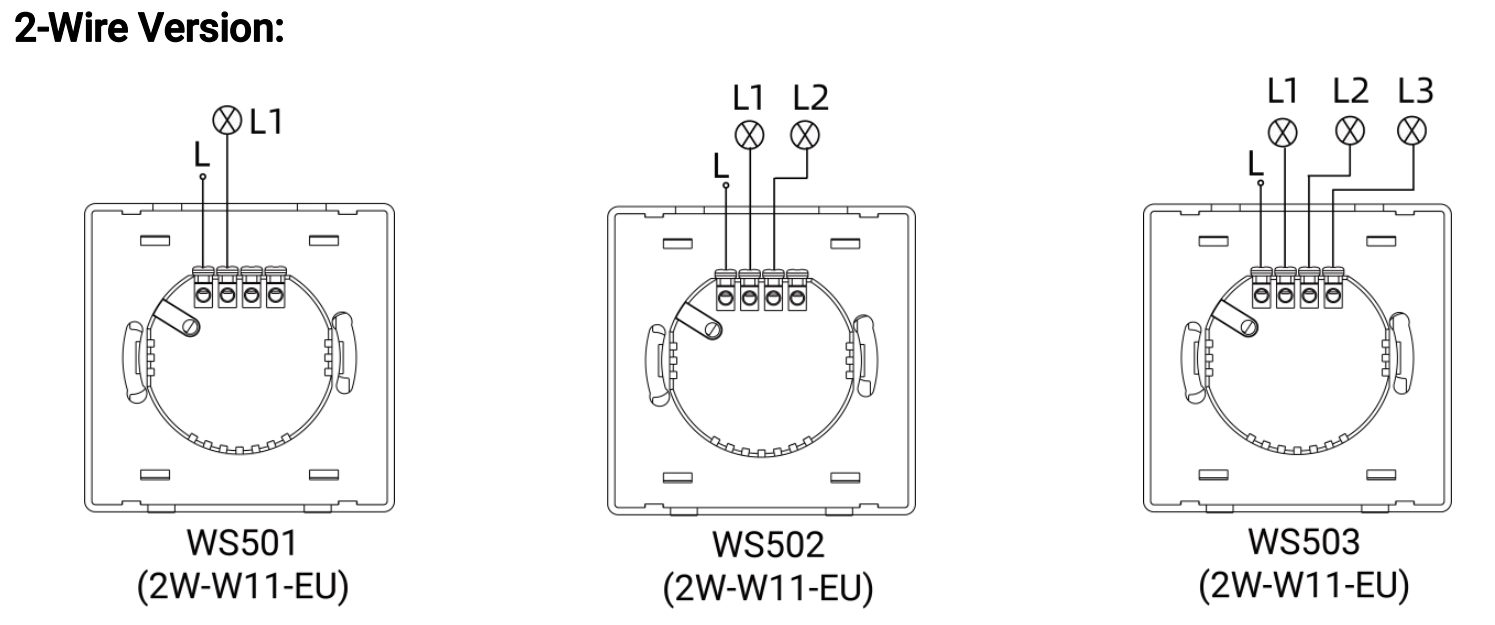
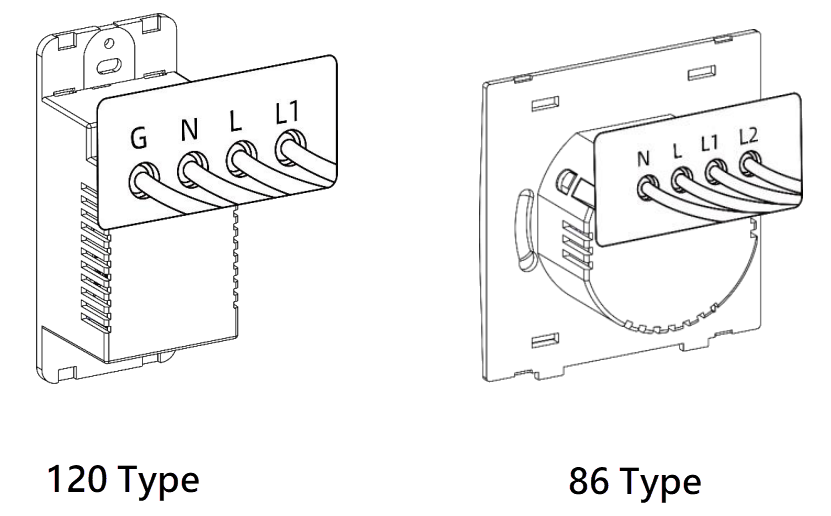
- Wiring Diagram
- Install Smart Wall Switch WS50x
-
Warning: Before installation, ensure that the circuit has been shut off.
-
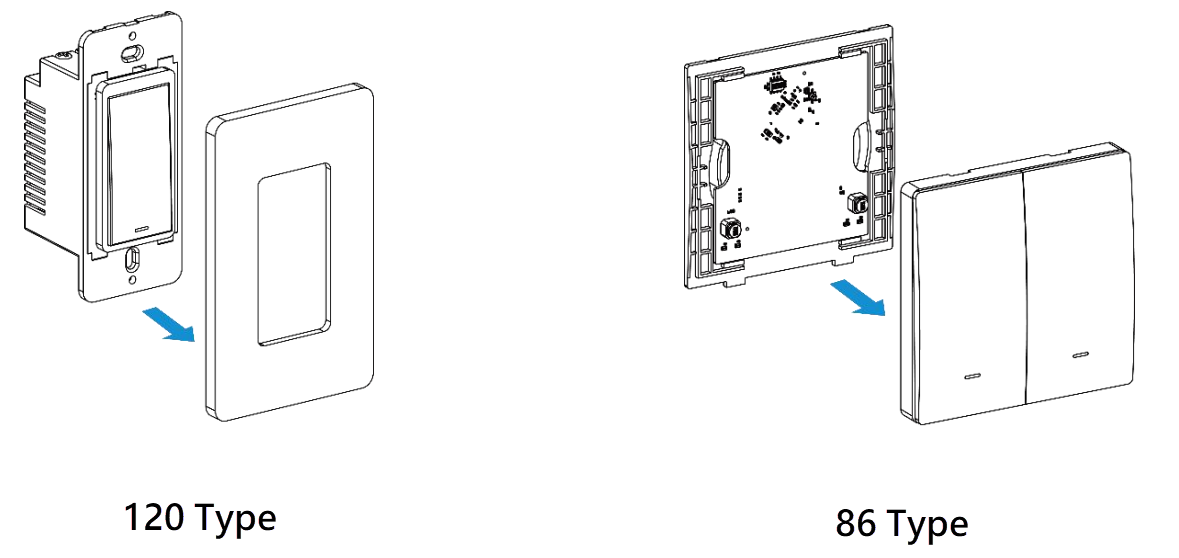
- Remove the front panel of the Smart Wall Switch.
-
Connect corresponding wires to the Smart Wall Switch.
-
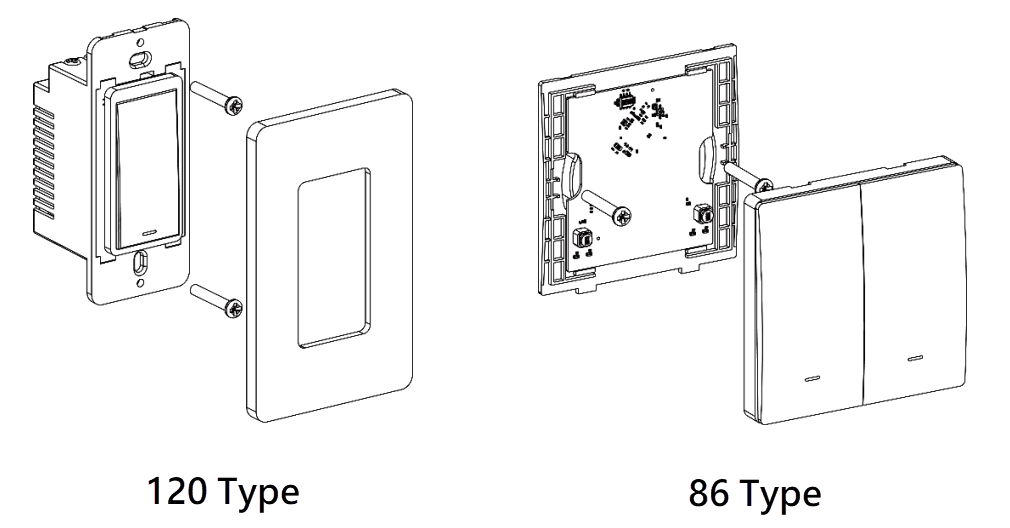
Fix the Smart Wall Switch to the switch box with mounting screws, then fix the front panel back to the device.
- Remove the front panel of the Smart Wall Switch.
Step 3. Check the device status
- Log in to Yeastar Workplace admin portal, go to Device List.
- Under the Status column, view the device status.
If the device status shows
 , indicating that the Room
Comfort Sensor is connected to Yeastar Workplace.
, indicating that the Room
Comfort Sensor is connected to Yeastar Workplace. Tip: Use the status filter to check for abnormal device connections and fix the abnormal connections accordingly.
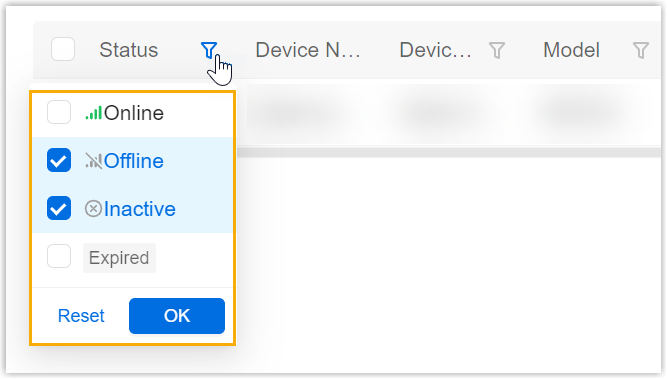
Step 4. Configure auto light-on/light-off strategies for Smart Wall Switch
-
Log in to Yeastar Workplace admin portal, go to .
-
Select meeting rooms that are associated with a Smart Wall Switch, and click Edit.
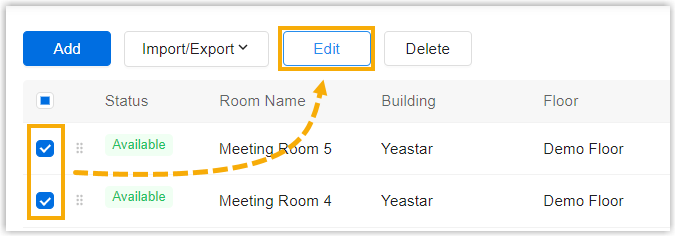
-
Click the Smart Device Settings tab, and configure the auto light-on/light-off strategies as needed.
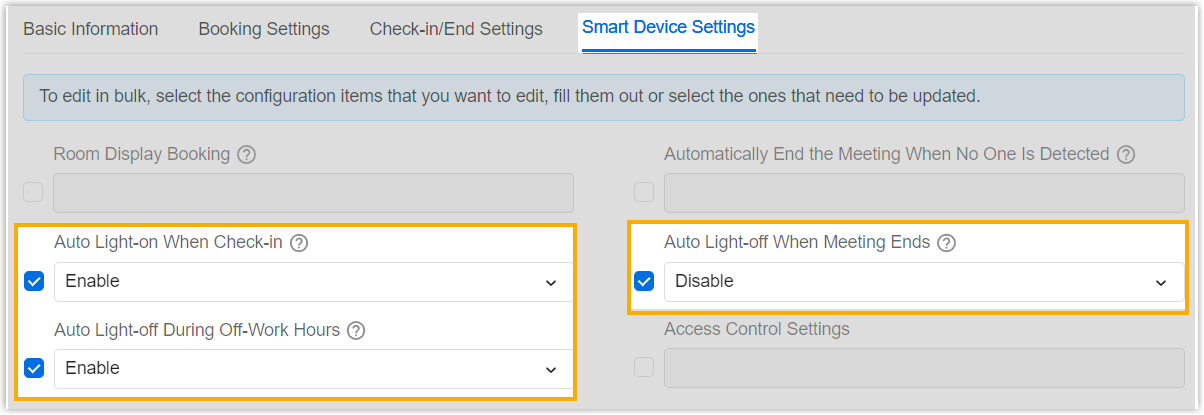
Setting Description Auto Light-on When Check-in Decide whether to automatically turn on the light in the meeting room when users check in to the room reservation. Auto Light-off When Meeting Ends Decide whether to automatically turn off the light in the meeting room when the meeting ends and when users release the room. Auto Light-off During Off-Work Hours Decide whether to automatically turn off the light in the meeting room during non-working hours. Note: To view or set the working hours, go to Location and click of the
desired building, then go to .
of the
desired building, then go to . - Click Save.
Result
You have set up Smart Wall Switch, when the corresponding event occurs, the Smart Wall Switch will automatically turn on or turn off the light in the meeting room.
FAQ & Troubleshooting
- Q: What to do when the status shows
 ?
? - The status indicates the device is NOT activated.
Refer to the following corrective actions to fix this issue:
- Ensure the device is powered on.
- Ensure the sensor's associated gateway can access the Internet.
- Q: What to do when the status shows
 ?
? -
The status
indicates the device failed to connect
to the LoraWAN network. Refer to the following corrective actions to
fix this issue:-
Ensure the sensor's associated gateway can access the Internet.
-
Reboot the device to rejoin the LoraWAN network.
- Download and install
Milesight
                                                  ToolBox
App from Google Play or App Store. - Enable NFC on your mobile phone and open Milesight ToolBox.
- Attach your phone with NFC area to the device.
- Go to , tap Reboot.
- Download and install
-