Manage Visit Schedules
This topic describes how to edit, delete visit schedules, and how to print visitor badges.
Visit schedule status
There are 4 different statuses of visit schedules.
-
Invited: The schedule has not yet reached the start time, and no one has checked in for this visit schedule.
-
Arrived: The visitor or the internal users (inviter/host/receptionist) have checked in for the visit schedule.
-
Late: The schedule has reached the start time, and no one has checked in for this visit schedule.
-
No-show: The schedule has passed the end time and no one has checked in for this visit schedule.
Edit a visit schedule
- Restrictions
-
- Visit schedule status: Invited or Late
-
For regular users: You can only edit the visit schedules you created or you host.
-
For receptionists: You can edit all the visit schedules within your authority that admin assigned.
- Procedure
-
- Log in to Yeastar Workplace, click the Visit tab in the top bar.
- In the top filter bar, click
 beside Status, select
Invited or/and
Late, then click
Search.
beside Status, select
Invited or/and
Late, then click
Search.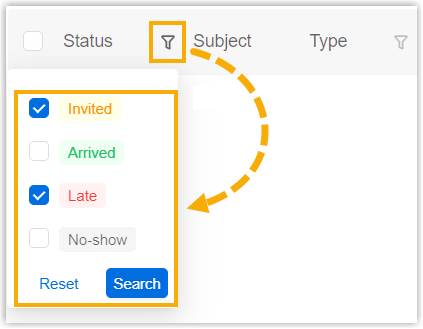
All visit schedules that haven't been checked in are displayed on the page.
- Click
 beside the desired visit
schedule.
beside the desired visit
schedule. - In the pop-up window, edit the visit schedule as needed.Note: If you have booked a meeting room for this visit, when the meeting room is checked in, the visit schedule can no longer be edited.
- Click OK.
- Result
- You have edited the visit schedule successfully. A notification with the latest visit details is sent to the host and the visitor.
Delete visit schedules
- Restrictions
-
-
For regular users: You can only delete/cancel the visit schedules you created or you host.
-
For receptionists: You can delete/cancel all the visit schedules within your authority that admin assigned.
-
- Procedure
-
- Log in to Yeastar Workplace, click the Visit tab in the top bar.
- Select the desired visit schedule(s) and click
Delete.
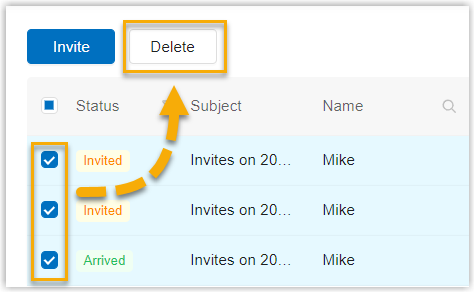
- In the pop-up window, click Delete.
- Result
- You have deleted the visit schedule(s) successfully.
Print visitor badges
- Prerequisites
- Your administrator has set up manual visitor badge printing.
- Restrictions
-
- Visit schedule status: Invited, Late, or Arrived
-
For regular users: You can only print visitor badges for visit schedules you created or you host.
-
For receptionists: You can print visitor badges for all the visit schedules within your authority that admin assigned.
- Procedure
-
- Log in to Yeastar Workplace, click the Visit tab in the top bar.
- Click
 beside the desired visit schedule
and select Print Badge.
beside the desired visit schedule
and select Print Badge.
- For individual visit, click Print
in the pop-up window.Note: Make sure the Destination is selected as the badge printer.
- For group visits, do as follows:
- Select the user(s) that need to print visitor badges, then click Print.
- In the pop-up window, click Print.
Note: Make sure the Destination is selected as the badge printer.
- For individual visit, click Print
in the pop-up window.
- Result
- The connected badge printers is triggered to print the visitor badge(s).