Handle Visit Requests
Yeastar Workplace supports visitor self-registration, which allows visitors to submit visit requests themselves. After the visit request is submitted, the approver should decide whether to approve the visit request. Only when the visit request is approved will the visit be scheduled. This topic describes how approvers handle visit requests submitted by visitors themselves.
About approvers
- Host
- Visitors must fill in the host information when submitting a visit request. If you are the host that visitors filled in, you are allowed to handle this visit request.
- Receptionist
- If you are a receptionist and the administrator has granted you permission to approve visit requests, you are allowed to handle all the visit requests submitted to your company.
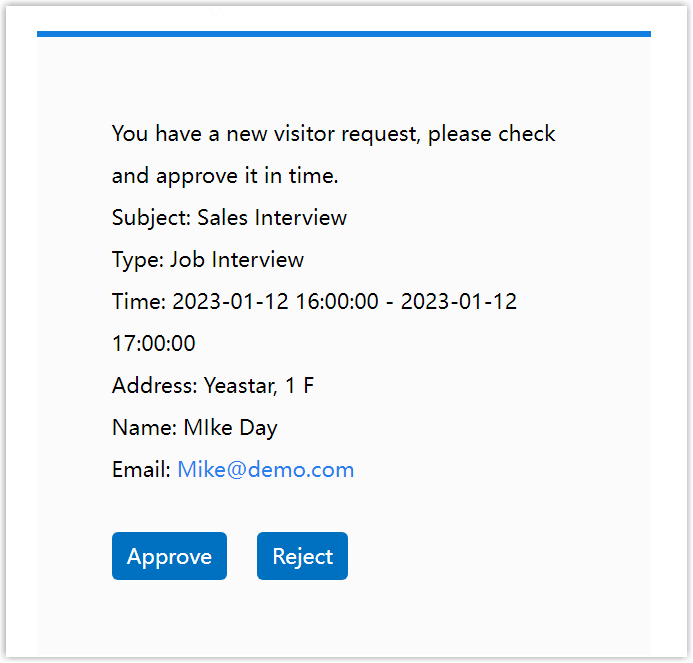
Handle visit requests via notification email
When visitors submit a visit request, the approvers will receive a notification email, through which approvers can approve or reject the visit request.
Handle visit requests via approval queue
- Procedure
-
- Log in to Yeastar Workplace web portal, click
 beside the account button. Note: The number on indicates the number of
pending requests.
beside the account button. Note: The number on indicates the number of
pending requests.
- In the top left corner, click the Visit
Approval tab to view all the approvals you are
involved.
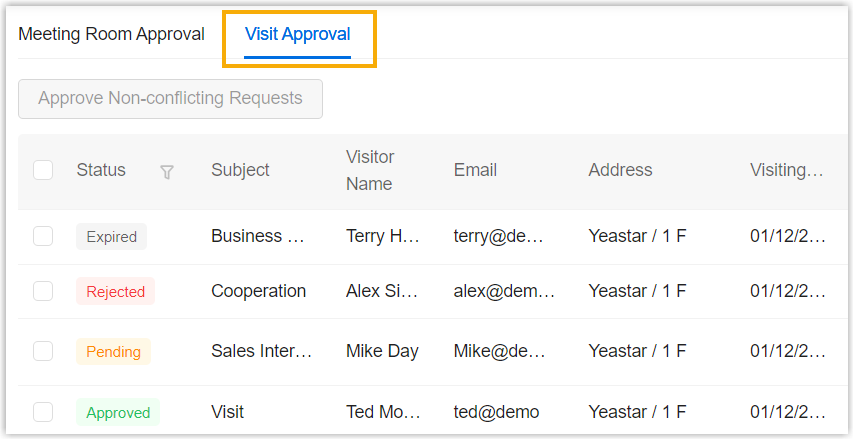
- In the list header, click
 beside Status, select
Pending, then click
Search to display all the pending
visit requests.
beside Status, select
Pending, then click
Search to display all the pending
visit requests.
- Manage the visit requests as needed.
-
To reject visit requests individually, click Reject beside a desired visit request.
-
To approve visit requests individually, do as follows:
-
Click Approve beside a desired visit request.
-
In the pop-up window, view and edit the visit details as needed, and click Approve.
-
-
To approve visit requests in bulk, do as follows:
-
Select the desired visit requests and click Approve Non-conflicting Requests.
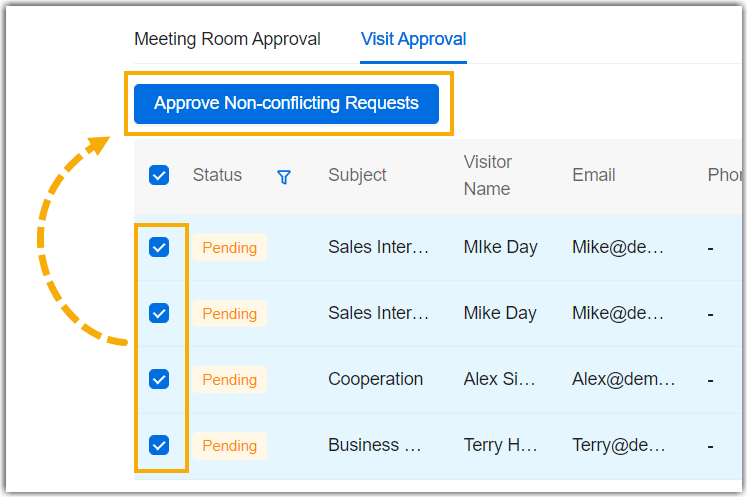
-
In the pop-up window, click OK.
-
-
- Log in to Yeastar Workplace web portal, click
- Result
-
-
For rejected visit requests: A notification email about the visit rejection is sent to the visitor.
-
For approved visit requests:
-
A visit schedule is created, and a notification about this visit schedule is sent to the host(s).
-
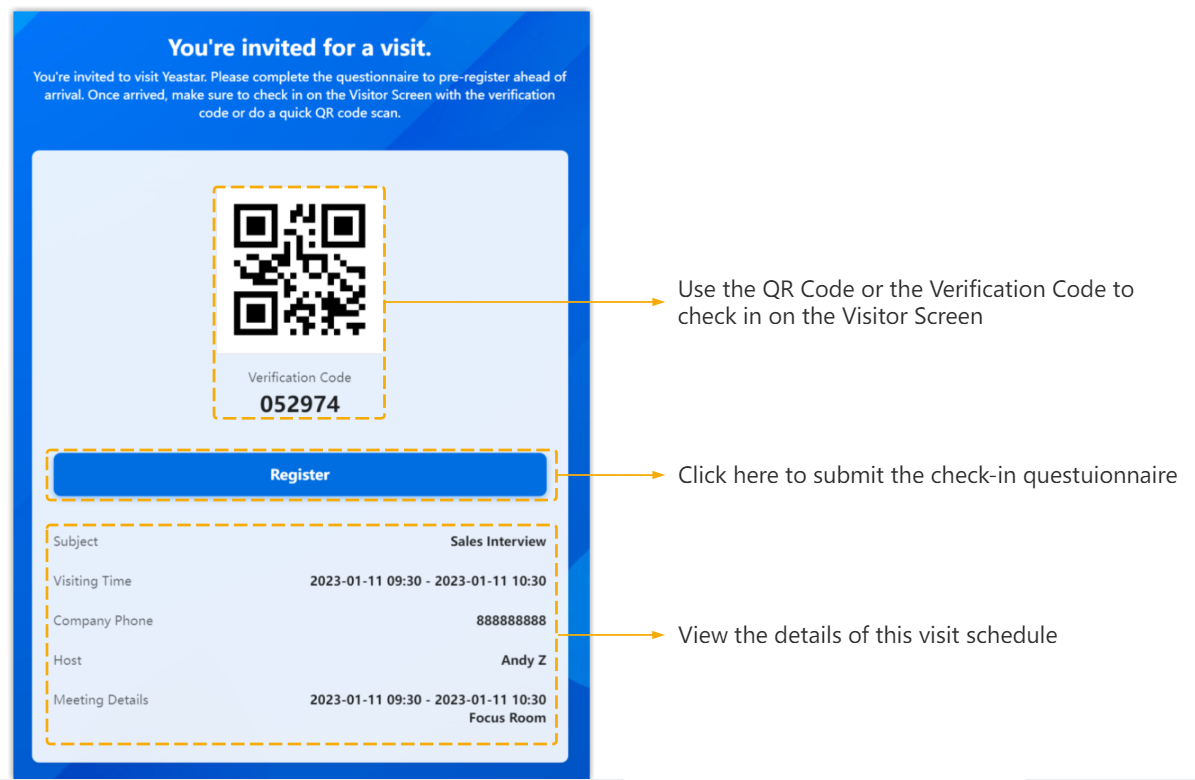
An invitation email is sent to the visitor, through which visitors can submit the check-in questionnaire and check in when they arrive.
-
-