Configure Static IP Address
This topic describes how to assign a static IP address to the LAN network interface when the PBX is in Single network mode.
- Go to .
- In the Hostname field, enter a host name.
The host name is used to help you identify the PBX, usually carried in SIP packets or displayed in notification emails and web browser's tab title.
- In the Mode field, select Single mode.
- Select Static IP Address and enter the network
information as follows.Note: Consult your network administrator to get the network information.
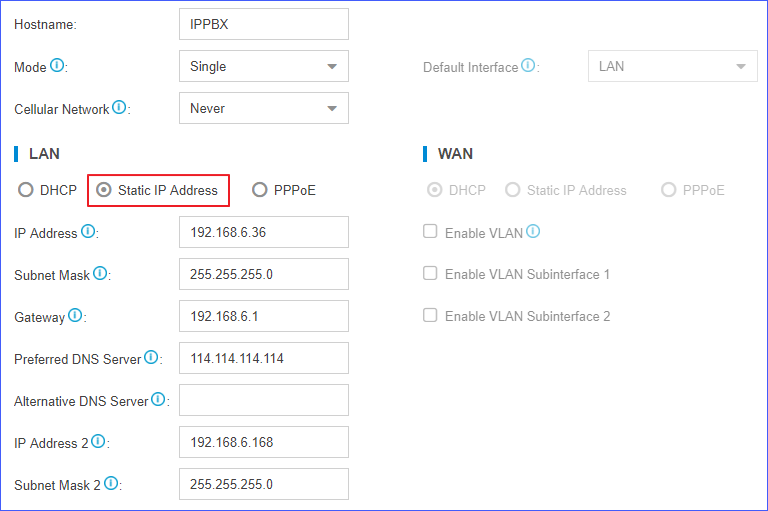
- IP Address: Enter the IP address that is assigned to the PBX.
- Subnet Mask: Enter the subnet mask.
- Gateway: Enter the gateway address.
- Preferred DNS Server: Enter the IP address of preferred DNS server.
- Alternative DNS Server: Optional. Enter the IP address of alternative DNS server.
- IP Address 2: Optional. Enter a second IP
address for the PBX.Note: According to your network environment, you may need to set another IP address to allow users in different IP segment to access the PBX.
- Subnet Mask 2: Optional. Enter another subnet mask for the second IP address.
- Click Save and reboot the PBX to take effect.