2N IP Intercom Integration Preparation
Before the integration, you need to create and configure extensions on PBX for the 2N IP intercom device (door station) and the indoor receiver, then set up the network connectivity for the intercom device.
Create extensions on Yeastar PBX
Prepare the necessary extensions before integration, one will be registered to the 2N IP intercom, while the others will be assigned to users to receive calls from the intercom device and trigger door release.
- Create an extension for 2N IP intercom (door station)
-
- Log in to PBX web portal, go to , click .
- In the User tab, do as follows:
- Configure the user and extension information or retain the default settings.
- Note down the following details, which are required for
subsequent extension registration on the 2N IP
intercom.

- Extension Number
- Registration Name
- Registration Password
- If you want the receivers to preview video before answering
the intercom call, set up video preview for the extension.Note:
- To use this feature, make sure that the PBX has subscribed to Ultimate Plan.
- The supported video preview methods vary depending
on the indoor receiver's Linkus UC clients, as
listed in the table below:
Video Preview Auto Preview Linkus Mobile Client (iOS) × × Linkus Mobile Client (Android) √ √ Linkus Desktop Client (Windows) √ × Linkus Desktop Client (Mac) √ × Linkus Web Client √ √
- Click the Features tab.
- Scroll down to the Door Phone
Application section, enable the preview mode
as needed.

- Video Preview: If enabled, when receiving a
call from the door station, the callee can click
 on his or her Linkus
client to preview the video while ringing.
on his or her Linkus
client to preview the video while ringing.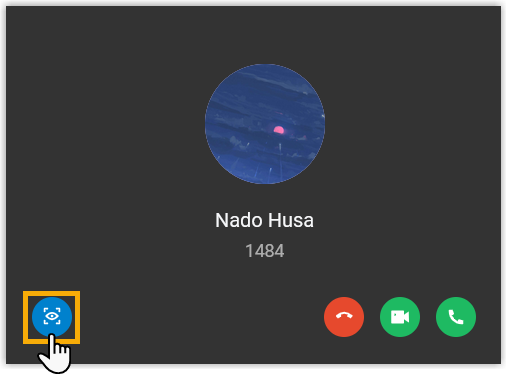
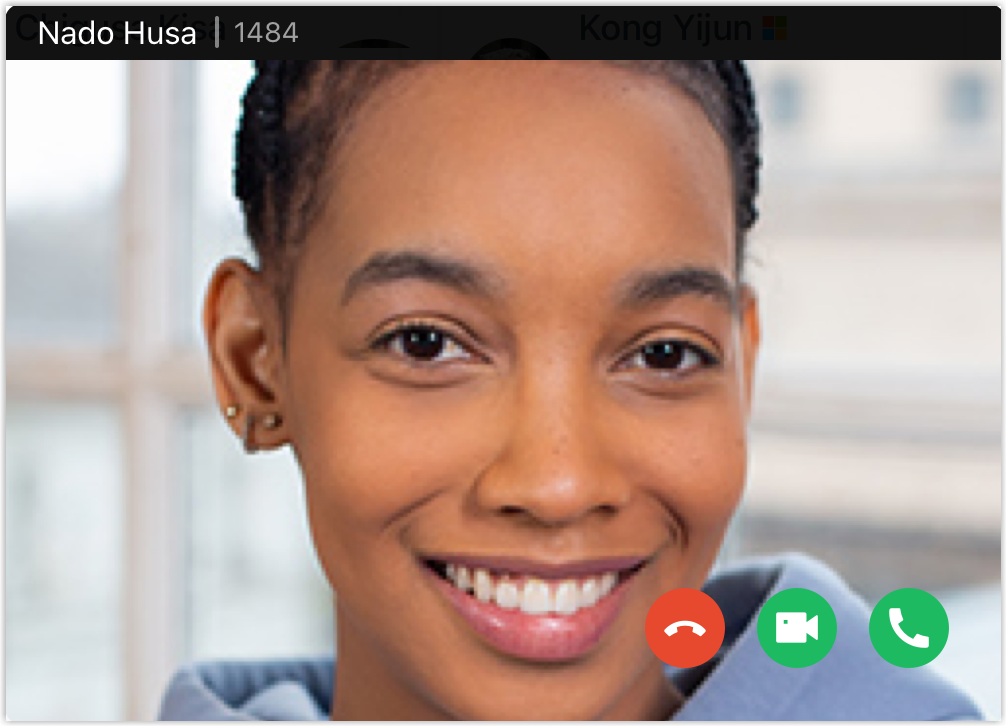
- Auto Preview: If enabled, when receiving a
call from the door station, the callee's Linkus
client will automatically show the video while
ringing.
- Video Preview: If enabled, when receiving a
call from the door station, the callee can click
- If the intercom device and PBX
are located in different subnets, enable the remote registration
feature for the extension.
- Click the Security tab.
- In the SIP Security section, select
the checkbox of Allow Remote
Registration.

- Click Save and Apply.
- Create extensions for indoor receivers
-
- Log in to PBX web portal, go to , click .
- In the User tab, configure the user and extension information or retain the default settings.
- In the Presence tab, configure call handling
rules for the extension as needed to prevent from missing calls from visitors.
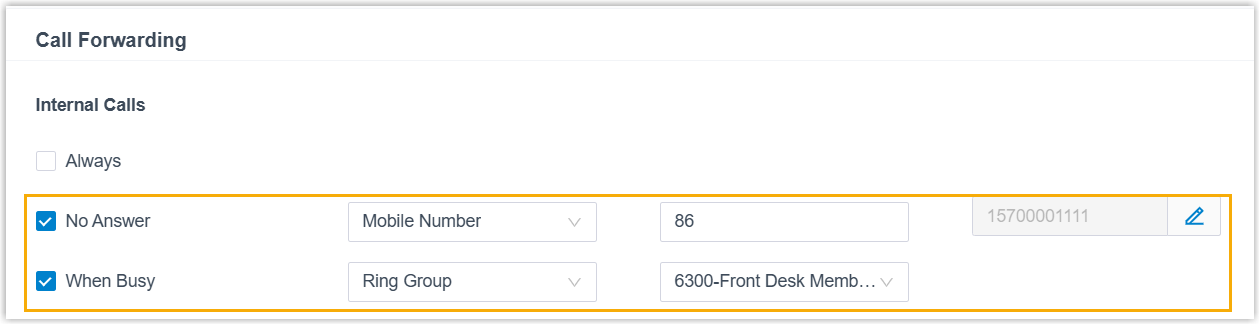
Configuration Instruction Call forwarding To ensure calls are automatically routed to a backup number (e.g. user's mobile number) when the extension user is not available, complete the following settings: - In the Call Forwarding section, select the checkbox of the unavailable conditions (No Answer or When Busy) for internal calls.
- Specify a destination for the specific
condition.Note: If you set the destination to an external number or mobile number, ensure that the extension has the permission to use the desired outbound route, and enter the prefix of the outbound route that will be used according to its outbound dial pattern.
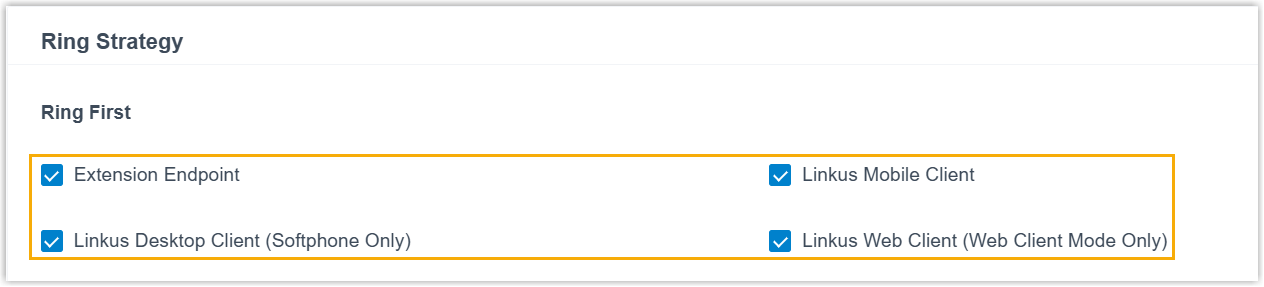
Simultaneous ring To ensure prompt response to visitors, configure the extension to ring on multiple registered devices at the same time. This allows the user to answer the call immediately from any available device. - Scroll down to the Ring Strategy section.
- Select the registered devices that will ring
when receiving a call.
- Click Save and Apply.
Configure Network for 2N IP Intercom
Locate the 2N IP intercom device in your network, and configure its IP address to enable access to the device's web interface for subsequent configuration.
- Prerequisites
-
- Download and install the 2N Network Scanner on your local computer.
- Connect the 2N IP intercom to same local network (LAN) as your computer, then perform a factory reset.
- Obtain the login credentials for the intercom's web
interface.Note: In this example, the default username is
adminwith the password2n.
- Procedure
-
- On your computer, run the 2N Network Scanner.
The application automatically discovers all 2N IP intercoms within the same local network, displaying the device type, firmware version, and current IP address.
- Modify the IP address of the 2N IP intercom.
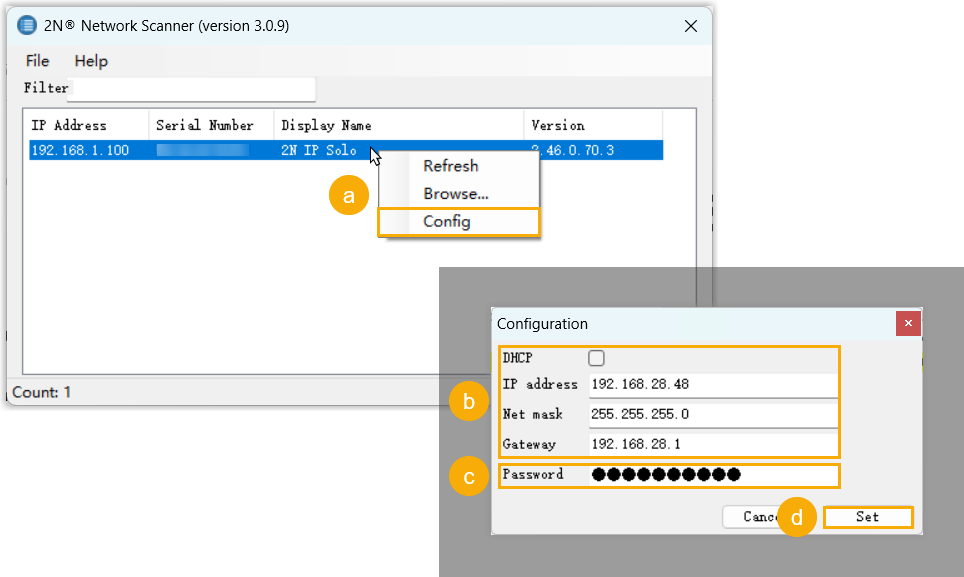
- Right click the desired device, then select Config.
- Configure the IP address assignment.
- For dynamic IP, select the checkbox of DHCP.
- For static IP, enter the network details (IP address, net mask, and gateway).
- In the Password field, enter
the password of the device.
In this example, enter the default password
2n. - Click Set.
- On your computer, run the 2N Network Scanner.
- Result
-
- The device list now displays the newly assigned IP address for the intercom, indicating successful configuration of the network settings.
- You can use the IP address to log in to the web interface of
the 2N IP intercom.Note:
- In this example, the default username and
password of the 2N IP solo is
adminand2n. - For security purposes, you will be prompted to change the default password upon initial login. Follow the on-screen instructions to complete this process.

- In this example, the default username and
password of the 2N IP solo is
- What to do next