Integrate Yeastar P-Series Cloud Edition with Zendesk
This topic describes how to integrate Yeastar P-Series Cloud Edition with Zendesk.
Requirements
- Zendesk
-
- Zendesk Suite: Suite Team, Suite Growth, Suite Professional, Suite Enterprise
- Zendesk Support only: Support Team, Support Professional, Support Enterprise
- PBX server
-
- Plan: Enterprise Plan (EP) or Ultimate Plan (UP)
- Firmware: Version 84.9.0.18 or later
Prerequisites
You Zendesk account has administrator privileges in Zendesk support.
Procedure
Step 1. Get authentication information from PBX
- Log in to PBX web portal, go to .
- Click Zendesk.

- In the Network section,
click
 to note down the redirect URI, as you will use it when registering an
application with Zendesk.
Step 2. Register an application with Zendesk
- Log in to your Zendesk account.
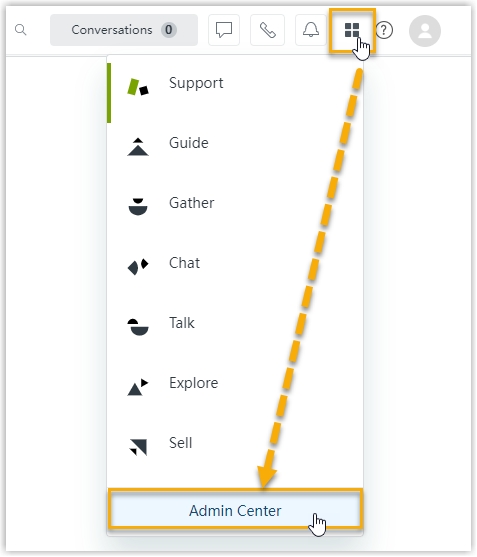
- On the top-right corner, click
 , then click Admin
Center.
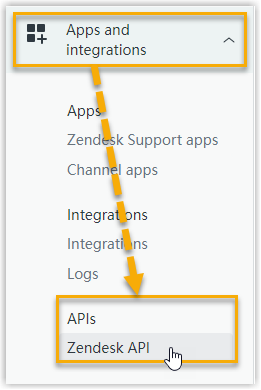
- On the left navigation bar, go to .
- On the OAuth clients page, create an application.
- At the top-right corner of the page, click Add OAuth
client.

- On the configuration page, complete the following
settings.
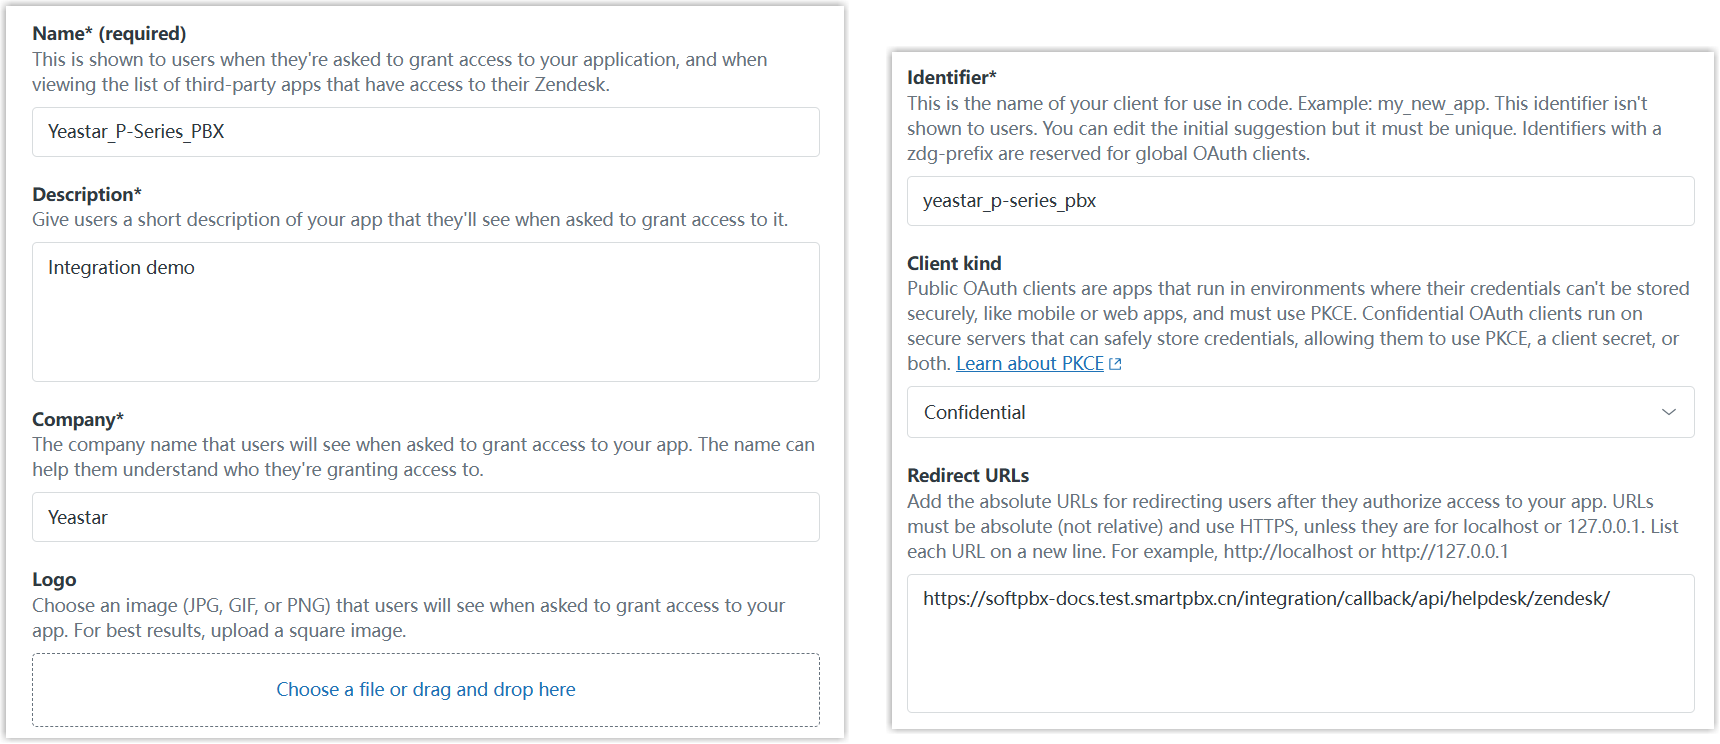
- Name: Specify a name for the application to help you identify it.
- Description: Set a short description for the application.
- Company: Set the company name for the application. This field is auto-populated with your organization's name.
- Logo: Optional. Set a logo for the application.
- Identifier: The field
is auto-populated with a reformatted version of the
application name.Note: Note down the unique identifier as you will need it later.
- Client kind: Select Confidential.
- Redirect URLs: Paste the redirect URI obtained from the PBX.
- Click Save.
The Secret field at the bottom of the page displays the secret of the application.

- Click Copy and note down the
secret.Important: Make sure that you copy and properly store the secret before you leave the current web page, as the secret only displays once. Otherwise you will have to re-generate a new one.
- At the top-right corner of the page, click Add OAuth
client.
Step 3. Make authorization request to Zendesk
- Log in to PBX web portal, go to .
- On the right side of Zendesk, click Integrate.
- In the Authorization section, fill in the following
information.

- Unique Identifier: Paste the unique identifier of the Zendesk application.
- Secret: Paste the secret of the Zendesk application.
- Your Zendesk Address Subdomain: Enter your
Zendesk subdomain. Tip: You can get the subdomain from your Zendesk account's URL
https://{subdomain}.zendesk.com.
- Click Save.
A new browser web page will be launched, indicating that the Zendesk application requests to access data in your Zendesk account.
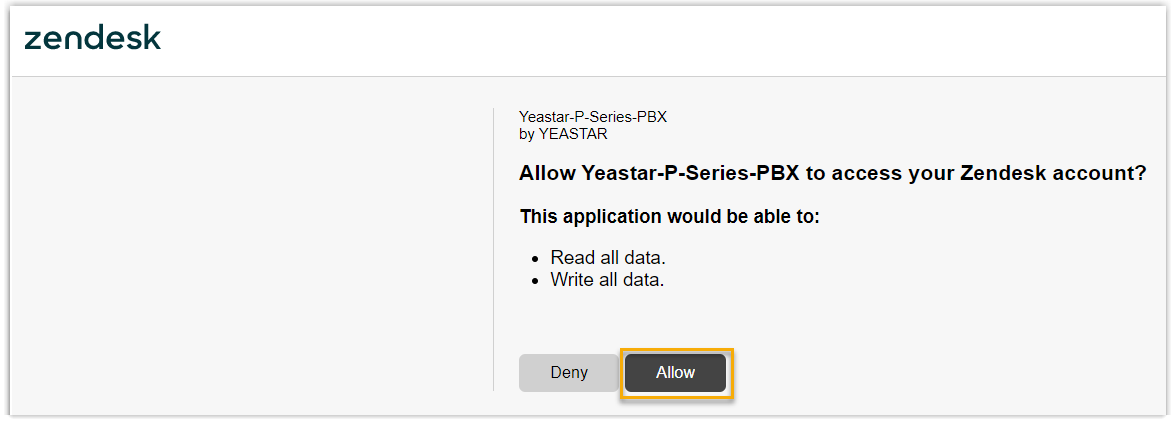
- Click Allow to proceed.
You are redirected to the PBX configuration page, a pop-up window displays the integration authentication result.
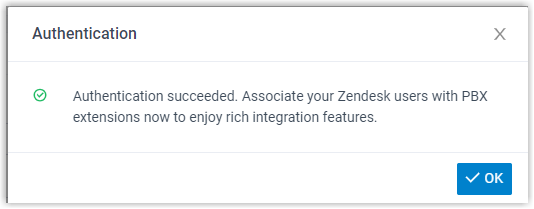
- Click OK to confirm.
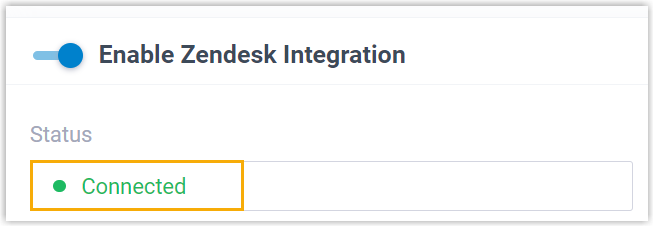
The Status field displays Connected, indicating that Yeastar P-Series Cloud Edition is connected to Zendesk successfully.
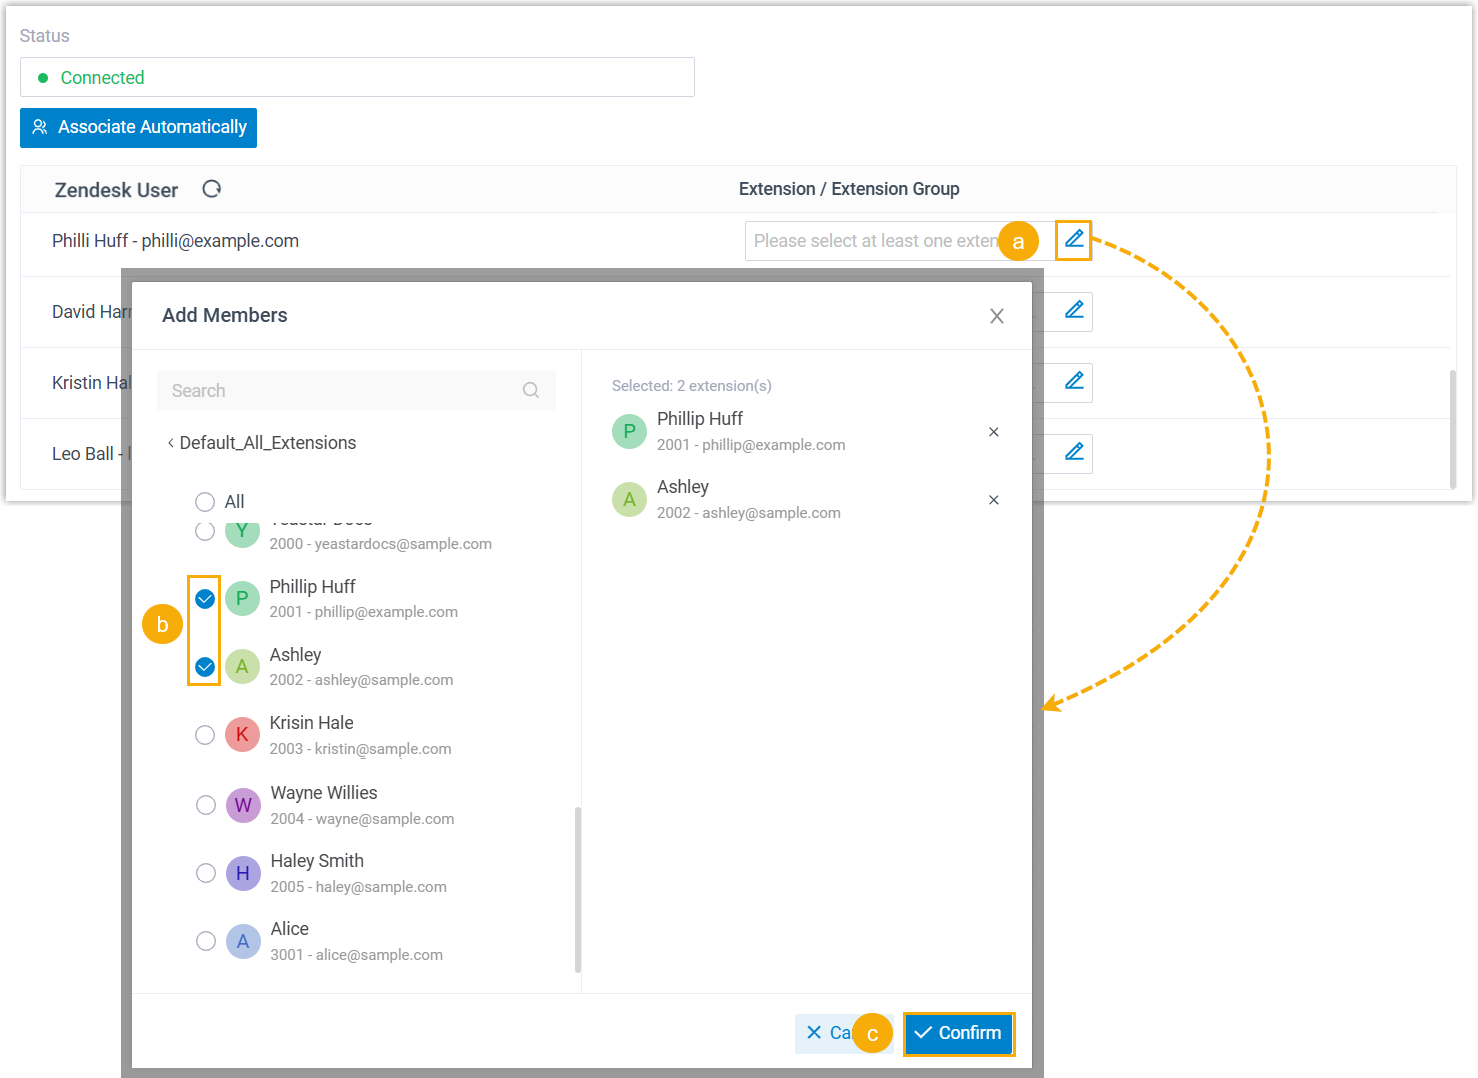
Step 4. Associate Zendesk users with PBX extensions
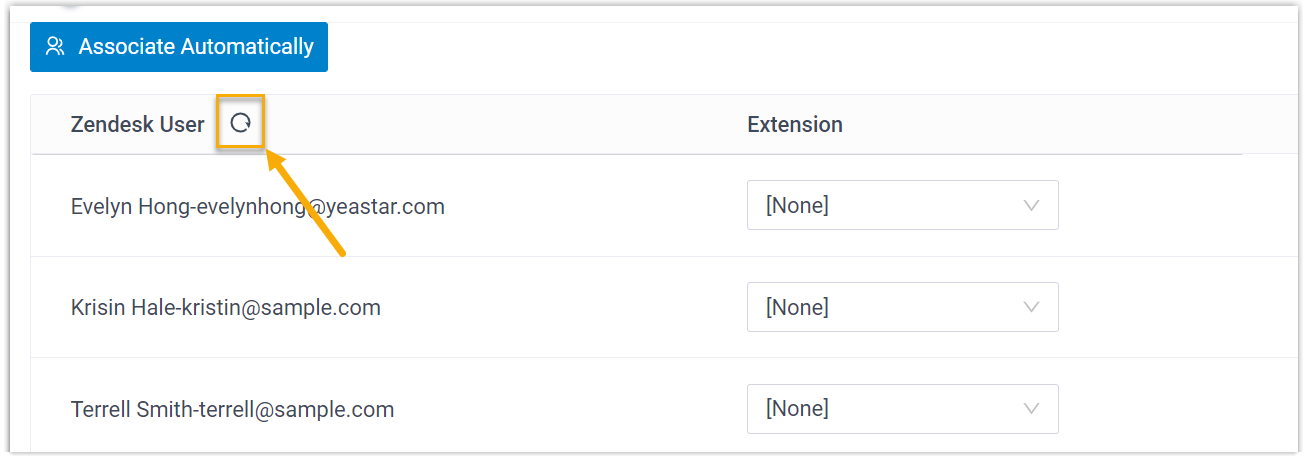
- On the Zendesk integration page of the PBX, click
 beside Zendesk
User to obtain the latest list of Zendesk users.
- Associate the Zendesk users with PBX extensions.
- Associate automatically
- If users bind the same email address to their Zendesk
accounts and PBX extensions, you can implement automatic
association of their Zendesk accounts and PBX extensions.
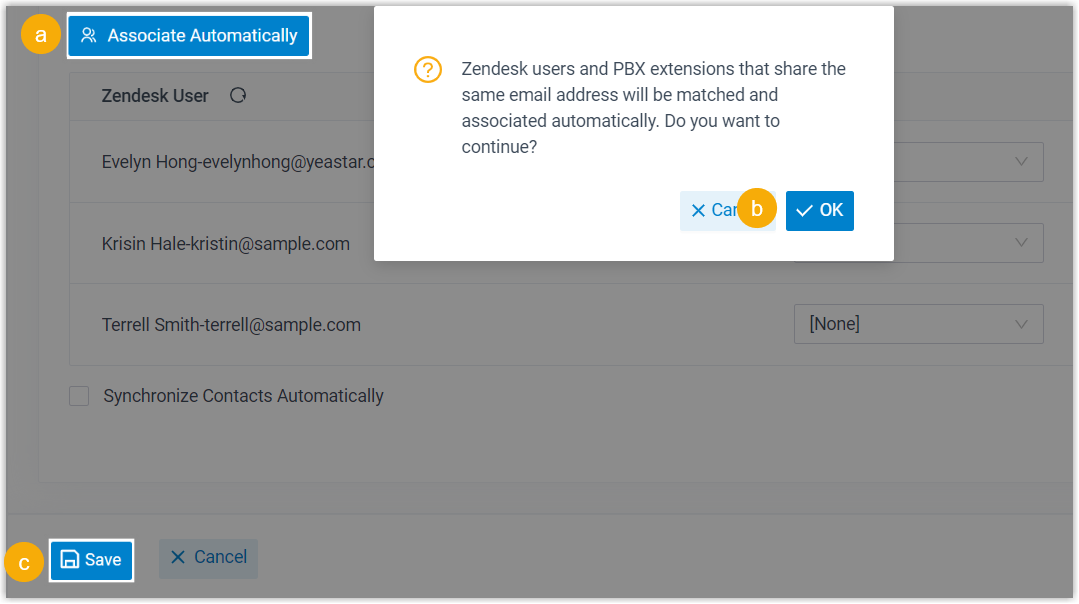
- Click Associate Automatically.
- On the pop-up window, click OK.
- Click Save.
- Associate manually
- If a user binds different email addresses to his or her Zendesk
account and PBX extension, you need to manually associate the
user's Zendesk account and PBX extension.
Result
- The integration of Yeastar P-Series Cloud Edition and Zendesk is set up.
- Associated Zendesk users can make or receive calls with their PBX extensions.