Create a WhatsApp Campaign
WhatsApp campaigns allows you to send marketing, utility, and authentication messages directly to your contacts' mobile devices via WhatsApp using message templates, making it easy to reach customers quickly and effectively. This topic describes how to create a message campaign for a WhatsApp channel.
Requirements
- Firmware: Version 84.20.0.21 or later
Prerequisites
Before you begin, make sure that the following resources are ready for a message campaign:
| Item | Description |
|---|---|
| Message Channel | Set up a WhatsApp Channel with your
WhatsApp Business Account. Note: Ensure
your account’s messaging limit can support your planned bulk
messaging volume.
|
| Message Template |
|
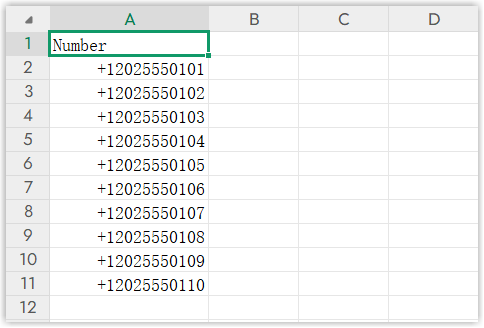
| Contact List | Prepare a list of contacts with phone numbers for the
campaign. Note: Each campaign supports
up to 1,000 contacts. You can associate a contact
list with a campaign using one of the following methods:
|
| Message Routing Target | Optional. If you want the message campaign to automatically create sessions, configure the desired routing target (either an extension or a message queue) in advance. |


Procedure
- Log in to PBX web portal, go to , then click Add.
- In the Basic section, complete the following
settings.
- Name: Enter a name for the campaign to help you identify it.
- Message Channel: Select the desired WhatsApp channel.
- Sender: Select the associated WhatsApp phone number for message sending.
- Recipient: Specify recipients
using one of the following methods.
Method Instruction Manual entry Manually add contact numbers in E.164 format (e.g.,
+1xxxxxxxxxx).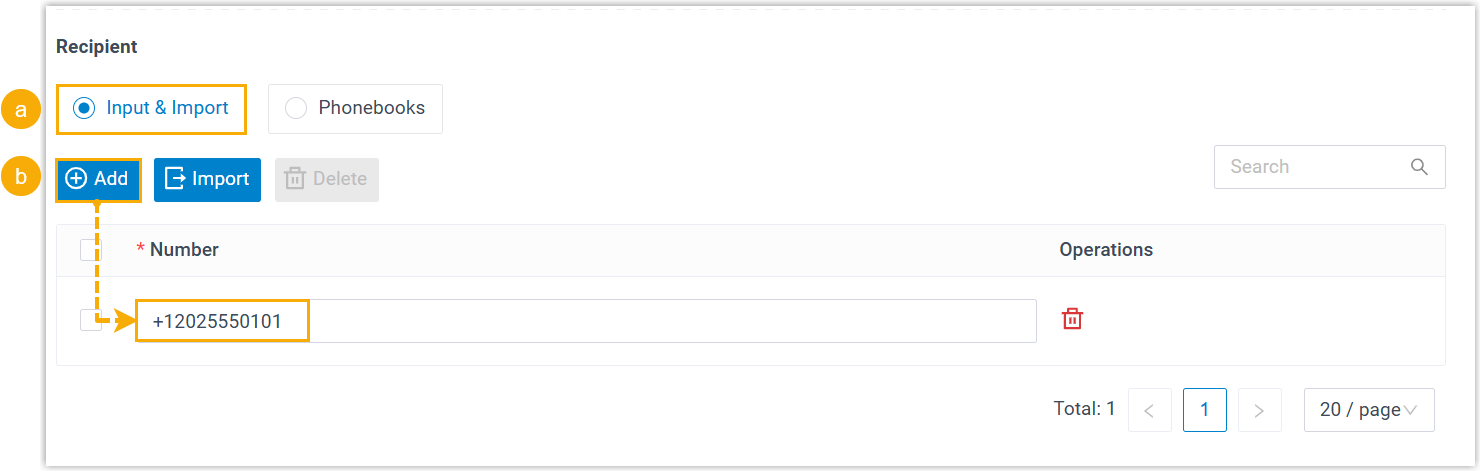
- Select Input & Import.
- Click Add to manually add phone numbers.
Import from CSV file Import a CSV file containing the contacts’ phone numbers.
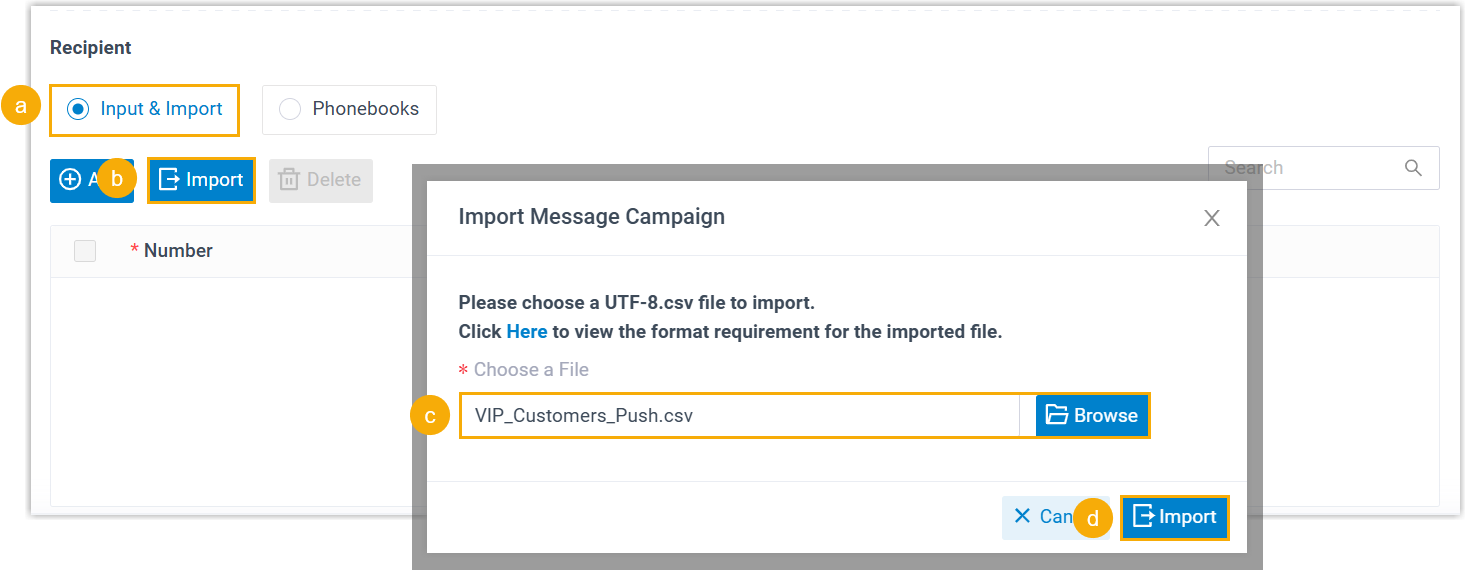
- Select Input & Import.
- Click Import.
- In the pop-up window, click Browse to select the desired file.
- Click Import.
Use existing PBX phonebook Directly use existing contacts stored in your PBX phonebook.
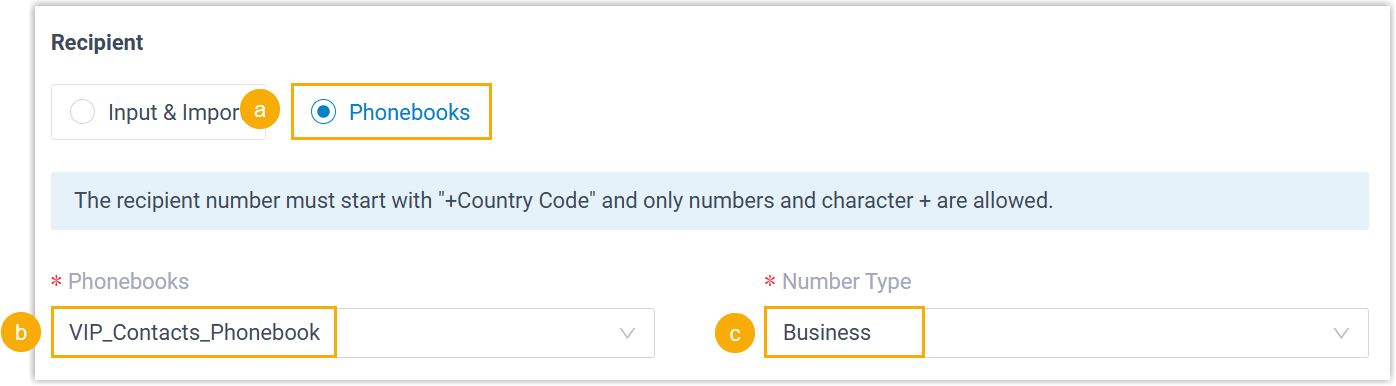
- Select Phonebooks.
- In the Phonebooks drop-down list, select the existing phonebook.
- In the Number Type
drop-down list, select the number type.
The system will retrieve phone numbers from the specified number types.
- In the Message Content section, configure the message
template to be sent.
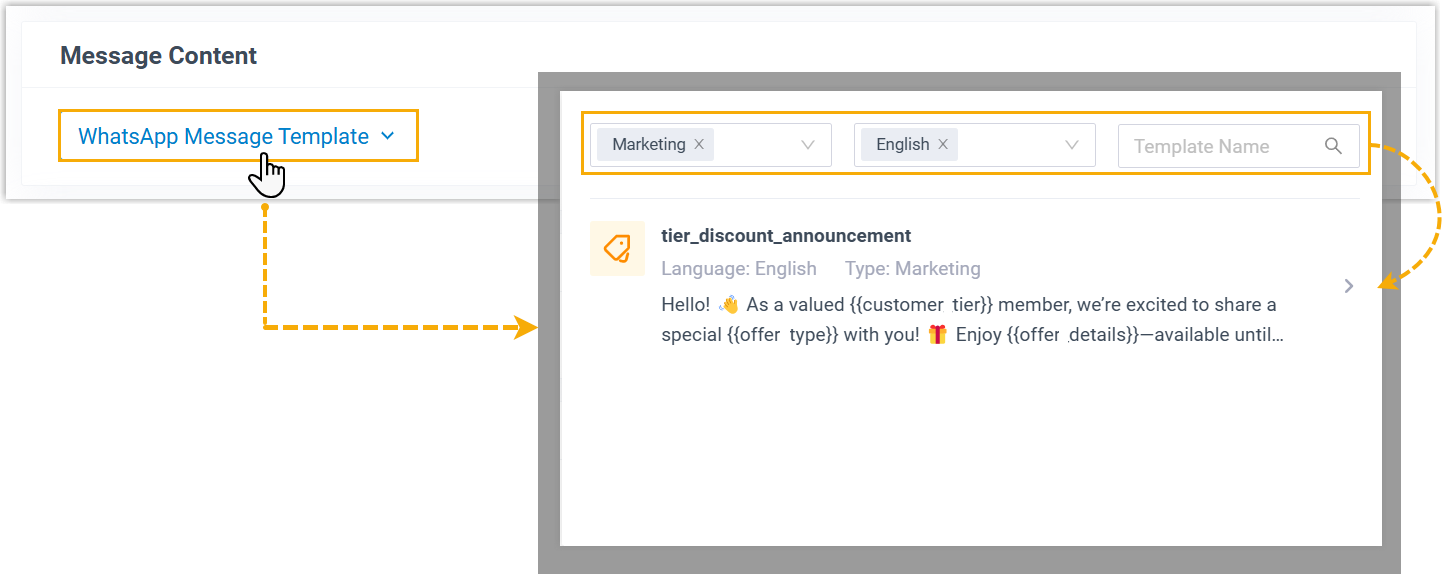
- Click WhatsApp Message Template, then
search and select the desired message template.
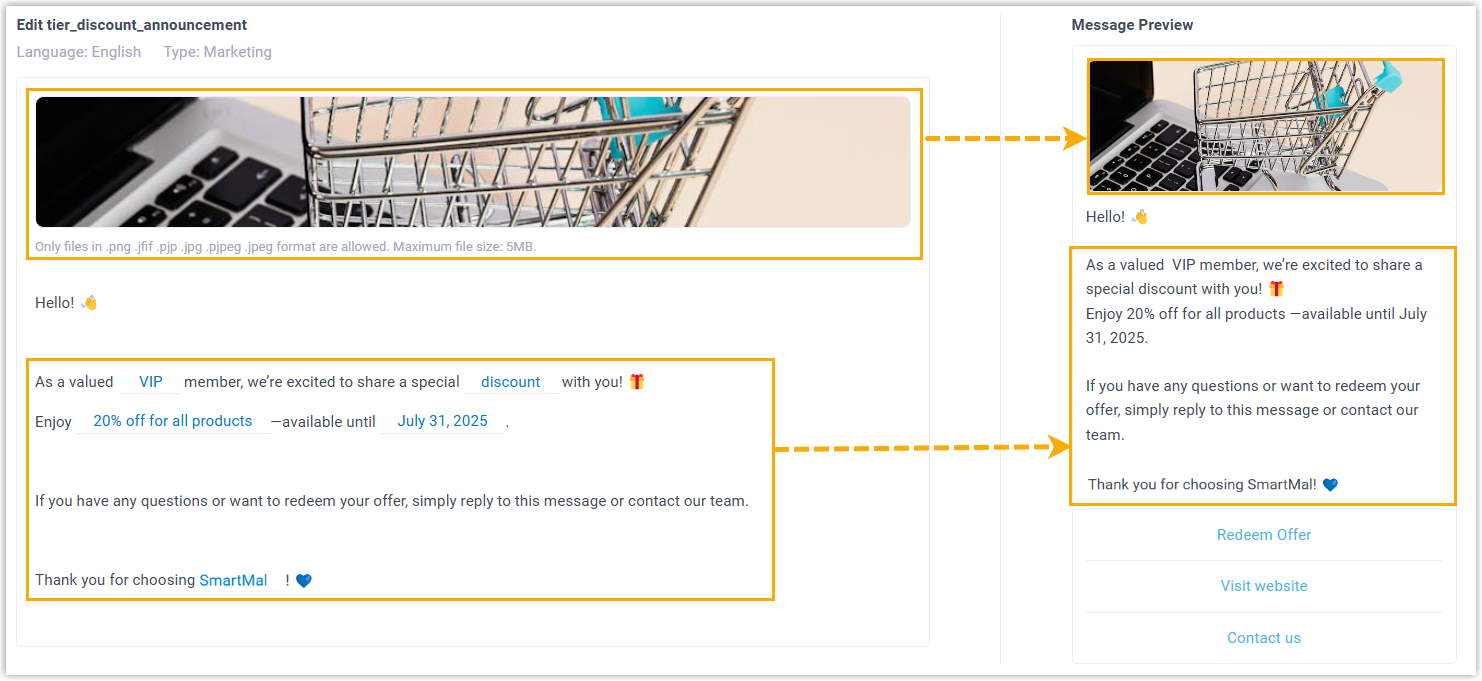
- If the template includes media or variable placeholders, upload
the required media files and fill in specific values for all
variables.
 Note:
Note:- You can preview the final message contents on the right panel.
- For location information, you can simply paste
the Google Maps
URL, the system will auto-fill the name and
coordinates based on the URL. However, you need to
manually enter the detailed address for the
{{Address}}variable.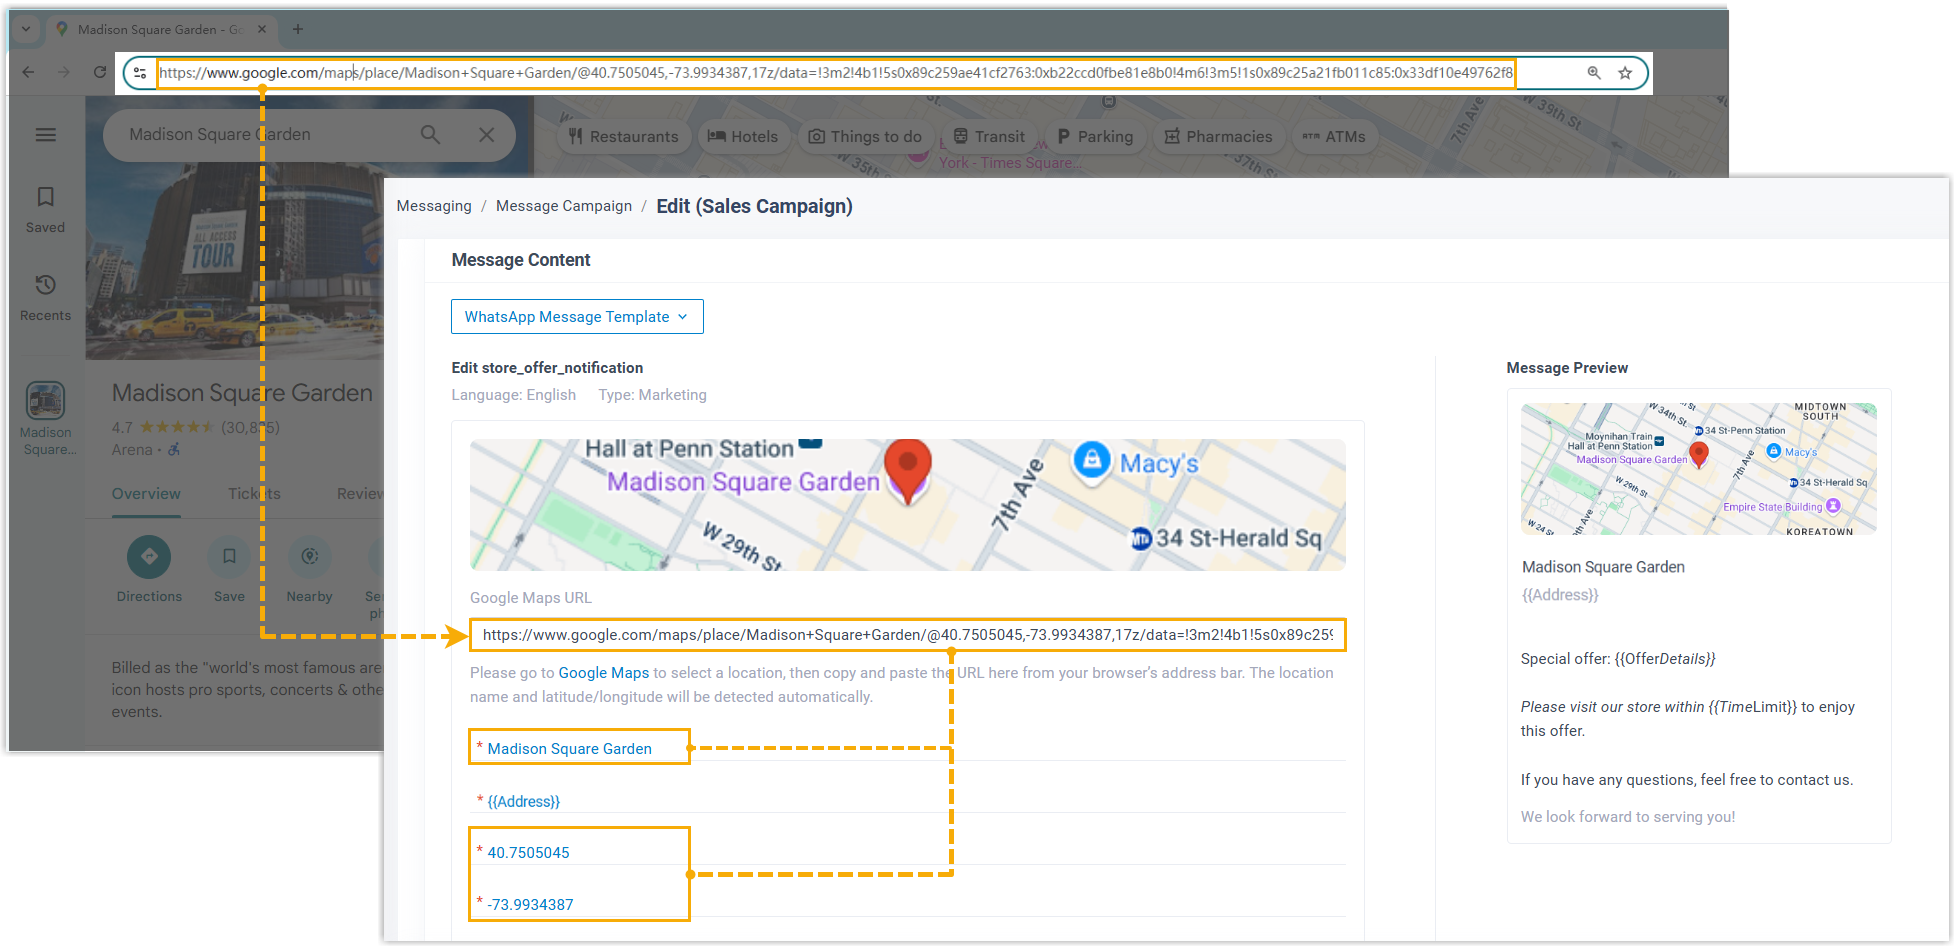
- Click WhatsApp Message Template, then
search and select the desired message template.
- In the Sending Rules section,
configure the message send time and the mode.
- In the Send Time section, specify when to
send the message.
Option Description Send Now The campaign will be sent immediately after saving. Schedule Sending The campaign will be sent at a specified date and time. 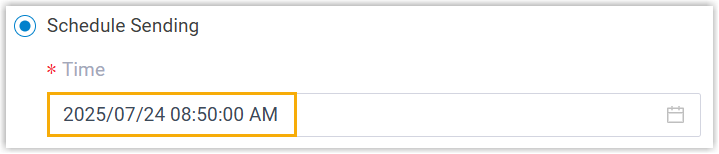
Do NOT Send, Save as Draft The campaign will be saved as a draft. You can edit or send it later. - In the Send Mode section, set whether to
create sessions accordingly.
Option Description Create session and send message The system automatically create a session for each contact number when sending the campaign messages, and the sessions will be assigned to a selected target. Note: If an active session already exists for a contact number, the campaign message will be sent to the existing session instead of creating and assigning a new session to the specified target.You can specify one of the following destinations as the target.- An extension: The selected extension handles the message sessions.
- A message queue: The agent in the selected message queue picks up and handles the message sessions.
- A message flow: The message sessions are
automatically routed to the selected message
flow.Note: Make sure that you have set up a message flow applicable to the specified Message Channel
- Third-Party Message Analytics Platform
(Transmitted via API): The message sessions are
automatically forwarded to a third-party message
analytics platform via API for advanced
processing.Note: To enable automatic forwarding of inbound messages to a third-party message analytics platform, ensure that your PBX server has been integrated with the third-party message analytics platform via API. Once this option is selected, the PBX system will automatically transmit inbound messages to the designated platform. You can get notified by monitoring the API event (30031) New Message Notification. Additionally, the PBX provides a comprehensive Message API suite for advanced message interaction with the integrated third-party message analytics platforms.
Send messages directly without creating session No session will be created when sending a message.
The message sent log will be displayed in SMS/WhatsApp Sent Logs (Path: ).
- In the Send Time section, specify when to
send the message.
- Click Save.
Result
-
A campaign is created successfully and displayed in the campaign list.
- If you choose to send messages immediately, the campaign status
will display as Executing, and messages
will be sent to the specified phone numbers right away.

- If you scheduled the campaign, the campaign status will display
as Scheduled, and messages will be sent
automatically at the specified time.

- If you choose to send messages immediately, the campaign status
will display as Executing, and messages
will be sent to the specified phone numbers right away.
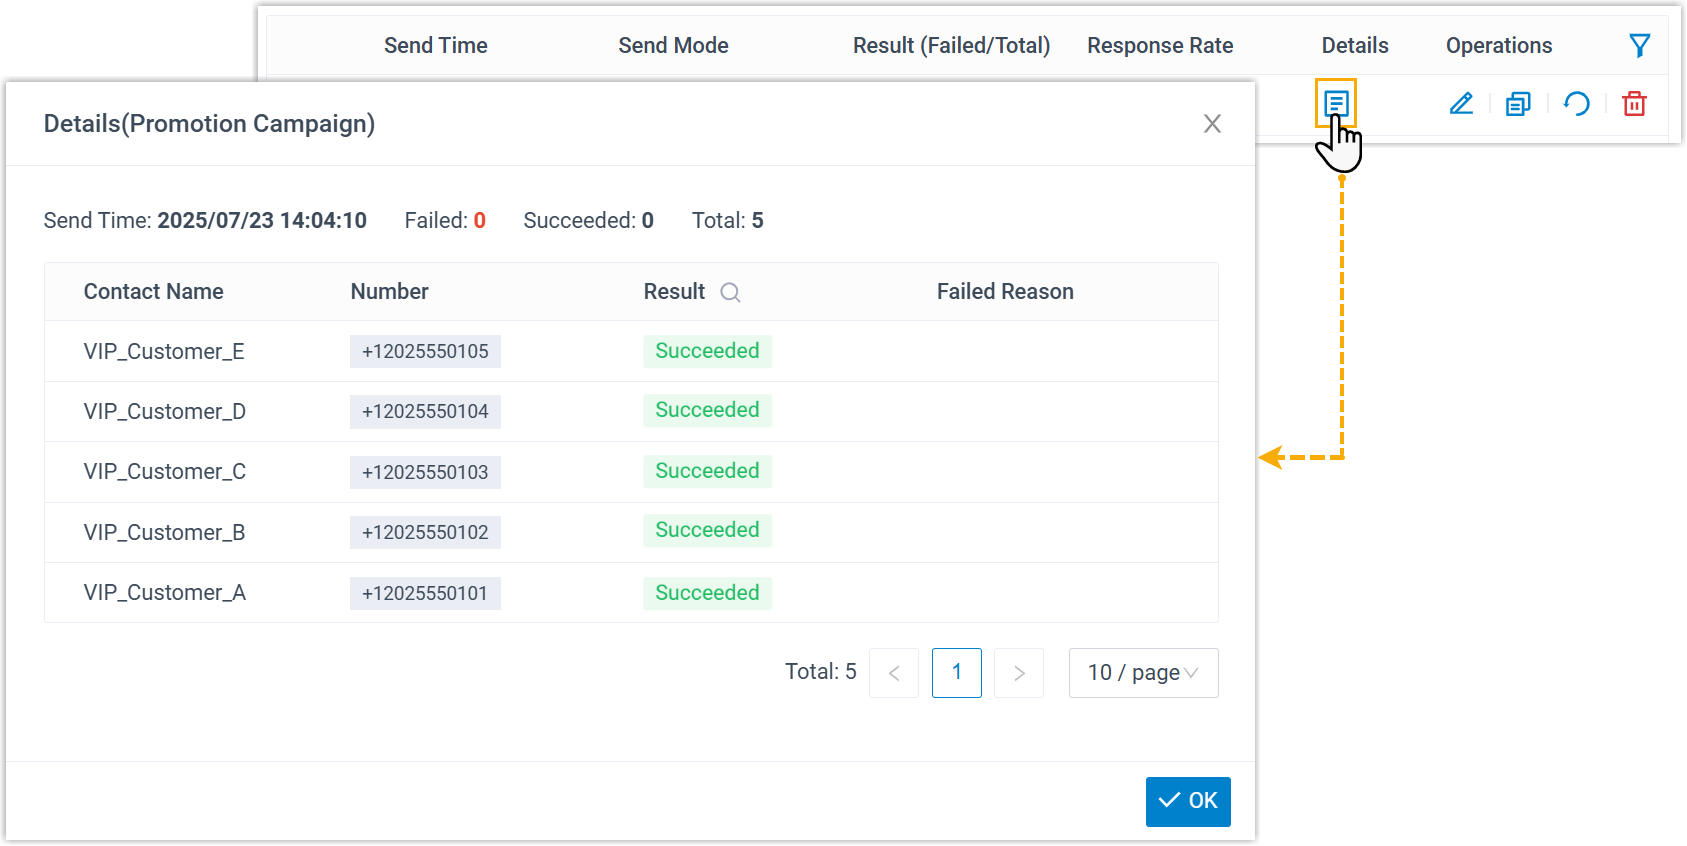
- When a campaign is marked as
Completed, you can check its results from the
campaign list.Note:
- If there are any failed messages, you can click
 to retry sending.
 - To create a similar campaign, click
 to duplicate the campaign.
- For a quick overview, check the Result and
Response Rate columns.

- To see detailed sending information, click
 .
.
- If there are any failed messages, you can click