Manage Yeastar for Teams Desktop Plugin
This topic describes supported management operations for Yeastar for Teams Desktop Plugin and how to perform these operations.
Supported operations
Set up hotkeys for Yeastar for Teams Desktop Plugin
This section describes how to set up hotkeys for Yeastar for Teams Desktop Plugin. After setting up hotkeys, you can quickly perform specific operations without using the mouse.
- Supported shortcut operations and default hotkeys
The following table lists the supported shortcut operations and their default hotkeys. The hotkeys vary depending on your operating system.
Shortcut Operation Windows Hotkey macOS Hotkey Dial Selected Number Ctrl+Shift+E⌘+Shift+EAnswer Ctrl+Shift+A⌘+Shift+AHold/Resume Ctrl+Shift+H⌘+Shift+HHang Up Ctrl+Shift+F⌘+Shift+F- Procedure
- Access the Settings menu of
Yeastar for Teams Desktop Plugin based on your operating system.
Operating System Instruction Windows On the system tray, right click  and select
Settings.
and select
Settings.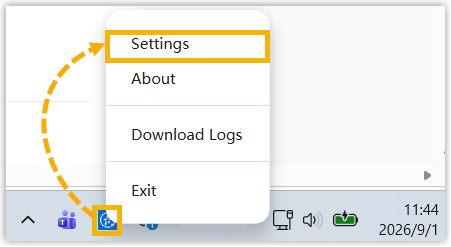
macOS On the App menu, click and select
Settings.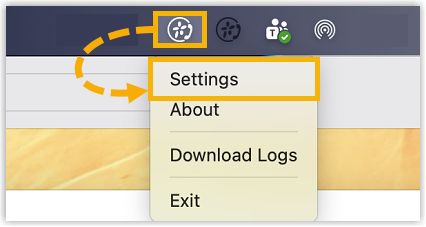
- In the pop-up window, configure hotkeys as needed.Note: To reset hotkey configurations to the default value, click Reset.
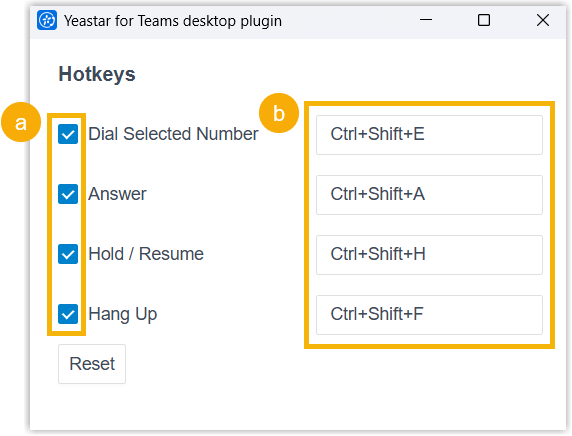
- Select the checkbox of the desired shortcut operation.
- If you want to modify the default hotkey, click the hotkey
field on the right, then press the desired key(s) on your
keyboard.Note: The hotkeys must not conflict with those defined in Linkus Desktop Client. If a conflict occurs but you require the hotkeys of Yeastar for Teams Desktop Plugin to take effect, modify or disable the corresponding hotkeys in Linkus Desktop Client.
- Press a single function key (
F1~F12): The key itself becomes the hotkey. - Press a key combinations: The key combinations must
begin with
Ctrl,⌘,Shift, orAlt, and end with one alphabetic character, a number or a function key (F1~F12).
- Press a single function key (
- Access the Settings menu of
Yeastar for Teams Desktop Plugin based on your operating system.
Update Yeastar for Teams Desktop Plugin
This section describes how to manually check and update Yeastar for Teams Desktop Plugin, and enable automatic updates to reduce manual maintenance efforts.
- Access the About menu of Yeastar
for Teams Desktop Plugin based on your operating system.
Operating System Instruction Windows On the system tray, right click and select
About.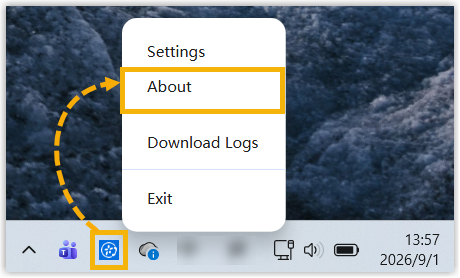
macOS On the App menu, click and select
About.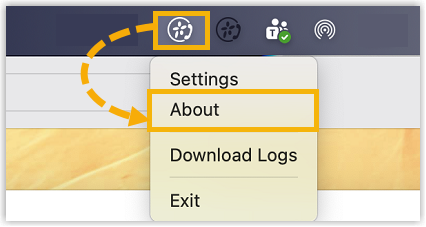
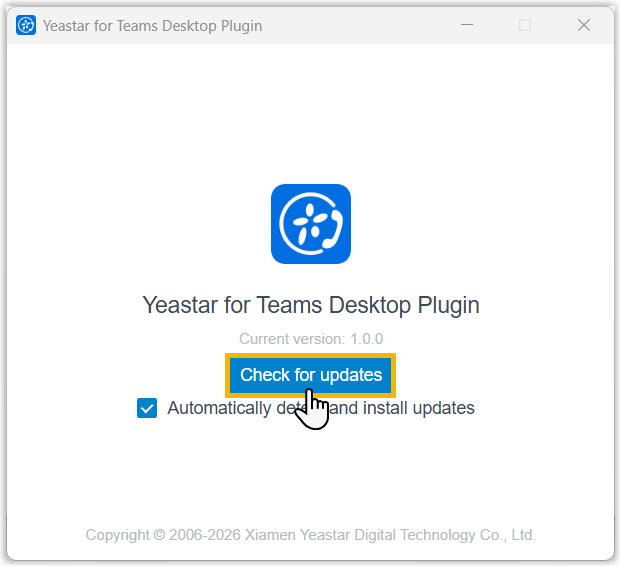
- In the pop-up window, click Check for
updates.
- If a new version is detected, click Update now.
The update progress bar pops up; wait for one minute until the update completes successfully.
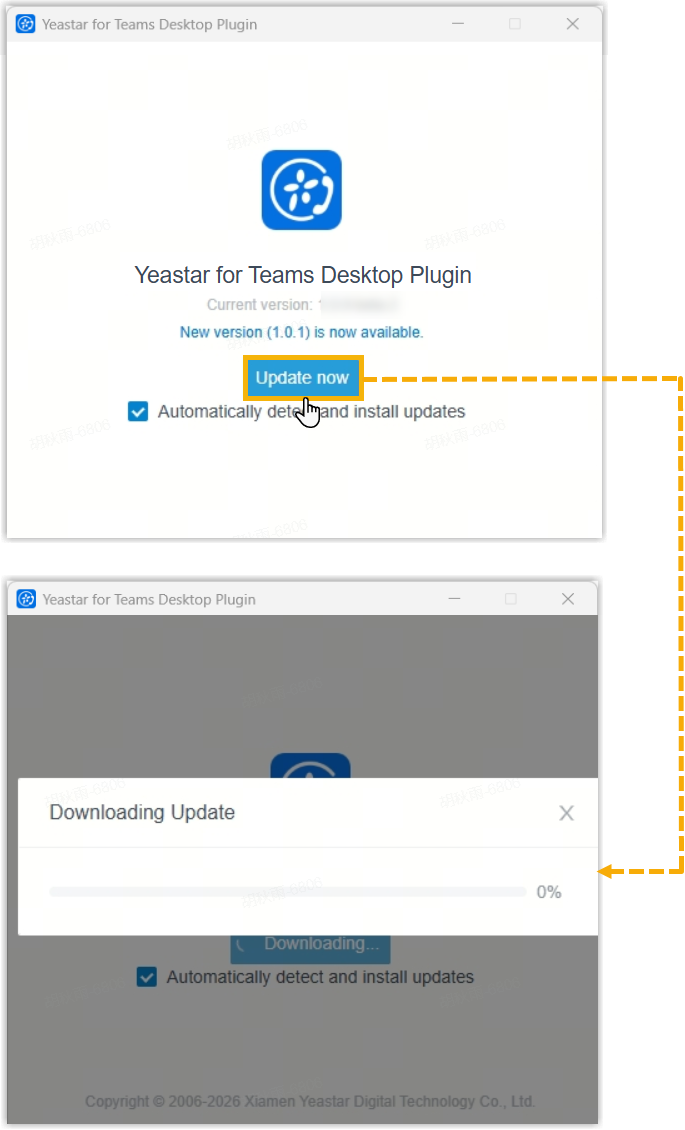
- If you want the plugin to automatically check for latest version and install updates, keep the Automatically detect and install updates option enabled. Otherwise, disable the option.
Download logs of Yeastar for Teams Desktop Plugin
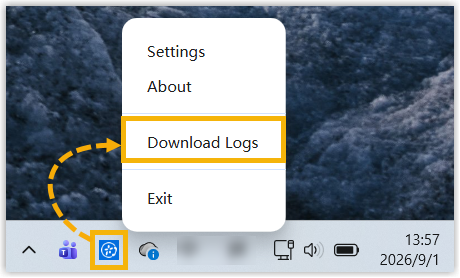
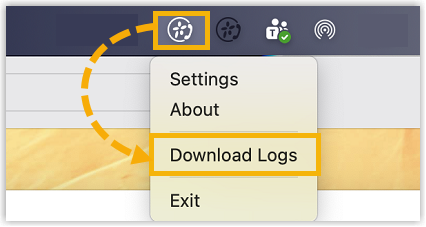
This section describes how to download logs of Yeastar for Teams Desktop Plugin for troubleshooting and diagnosis.Download logs based on your operating system.
| Operating System | Instruction |
|---|---|
| Windows | On the system tray, right click and select Download
Logs.
|
| macOS | On the App menu, click and select Download
Logs.
|
Exit Yeastar for Teams Desktop Plugin
This section describes how to exit Yeastar for Teams Desktop Plugin.
-
Exit the desktop plugin based on your operating system.
Operating System Instruction Windows On the system tray, right click and select
Exit.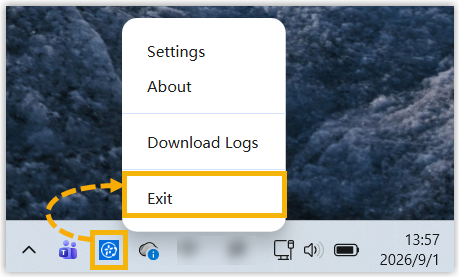
macOS On the App menu, click and select
Exit.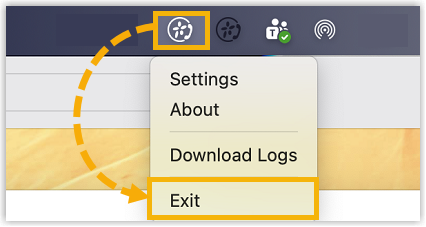
- In the pop-up window, click Quit.