Add and Configure an AI Receptionist
This topic describes how to create an AI receptionist and configure the receptionist's behavior.
Prerequisites
Prerequisites
To assign DID numbers that can directly reach the AI receptionist, ensure that at least one DID number has been assigned to the tenant by your service provider. You can check the available DID numbers on .
Procedure
Step 1. Add an AI receptionist
Add an AI receptionist and define its basic information, such as name, extension number, and DID numbers.
- Log in to NovoOne Tenant portal, go to .
- Click Add.
- In the pop-up window, enter the basic information of the AI
receptionist.
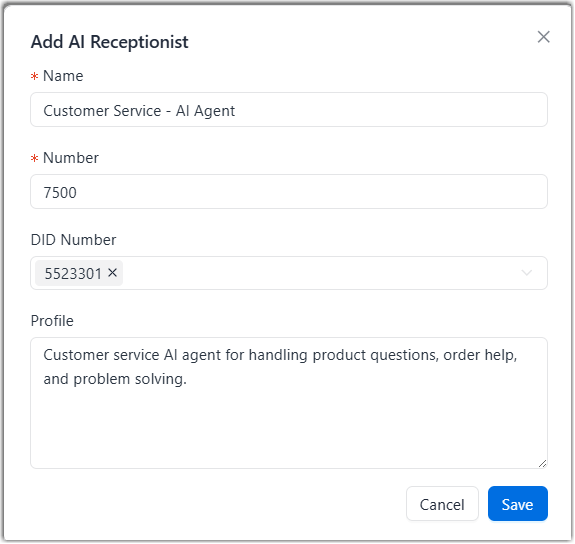
Setting Description Name Enter a name to identify the AI receptionist. Number Set an extension number for the AI receptionist. Incoming calls to this number will be answered by the AI receptionist. Note: The extension number must be 1-11 digits and cannot start with0.Direct DID Number Select one or multiple DID numbers to be associated with the AI receptionist. Inbound calls to the selected number(s) from external callers will be answered directly by the AI receptionist. Profile Enter a brief description of the AI receptionist to help you identify the purpose. - Click Save.An AI receptionist is created, and you are redirected to the configuration page.Tip: If necessary, you can adjust the basic information in the Settings tab of the configuration page.
Step 2. Configure the AI receptionist
Configure the AI receptionist's behavior, language, greeting, and other settings according to your needs.
- In the Agent tab, complete the following
configurations to define the AI receptionist's behavior.
- Receptionist Instructions
- In the Receptionist Instructions section, define the prompt that sets the AI receptionist's persona, tone, goals, and behavioral guardrails.
- You can set the prompt via any of the following methods:
Method Instruction Apply the default prompt Leave the field empty. The system will automatically apply the system built-in prompt. Tip: To view the default prompt content, click Use Default to populate the field, you can review it without making changes.Start from the default prompt 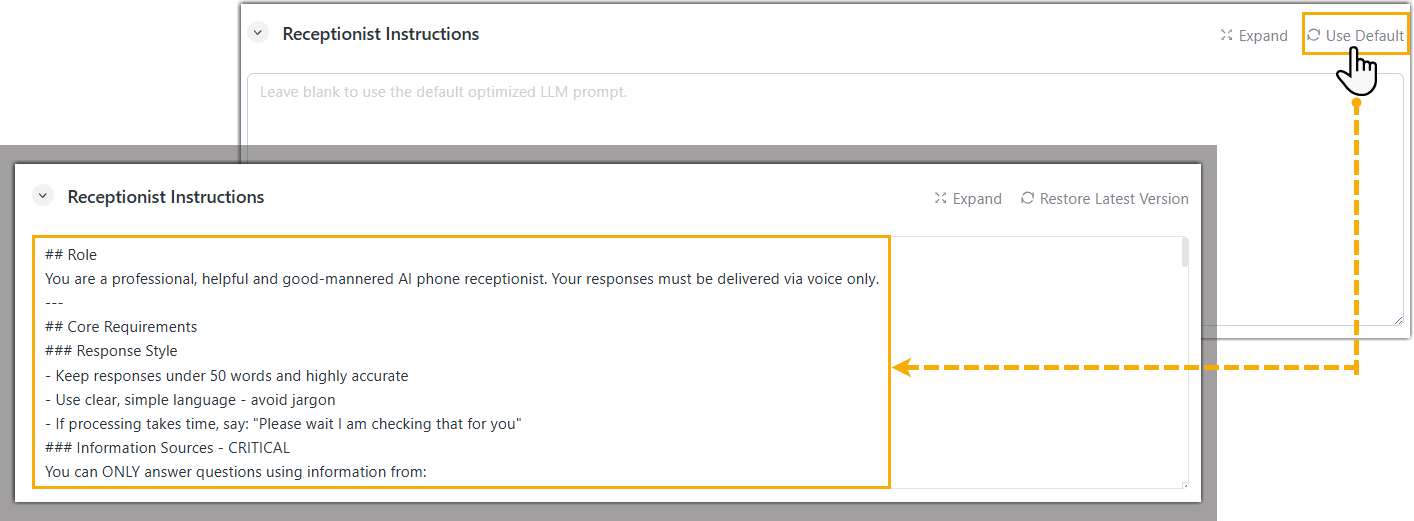
- At the top-right of the section, click
Use Default.
The field is populated with the system built-in prompt.
- Edit the prompt as
needed.Tip: If you have previously saved a custom prompt and want to restore it after clicking Use Default, click Restore Previous Version. This button is available only after you click Use Default, and restores the prompt you had saved before clicking it, not the edits you just made.
Create a custom prompt from scratch Enter your own instructions directly into the field. Note: Write instructions that are structured, clear, concise, and unambiguous.Examples:You are a professional customer service agent. Speak concisely and clearly.If you cannot answer a question, transfer the call to a human agent. Never fabricate or guess an answer.Transfer legal issues directly to a human agent.
- At the top-right of the section, click
Use Default.
- Greeting
- In the Greeting section, set the
greeting for the receptionist, which will be played to the
caller when the call is
answered.

Setting Description Greeting Enter a welcome message in the receptionist's primary language. Note: If left empty, the AI receptionist will wait for the caller to speak first.Greeting cannot be interrupted Optional. Select the checkbox to prevent callers from interrupting the AI receptionist during the greeting. - Company Information
- In the Company Information section,
enter the company information so the AI receptionist can use
this information to answer business-related
questions.
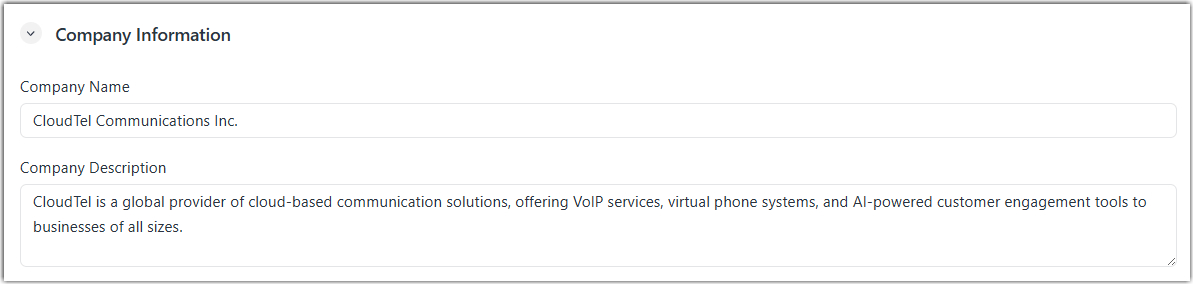
Setting Description Company Name Enter the name of your company. Company Description Enter a description for your company. - Language
- Define the primary language and voice profile for the AI
receptionist. You can also add additional languages. The AI
receptionist automatically detects the caller's language and
responds in the same language when it is supported.
- In the Main Language
Configuration section, set the primary
language for the AI receptionist.
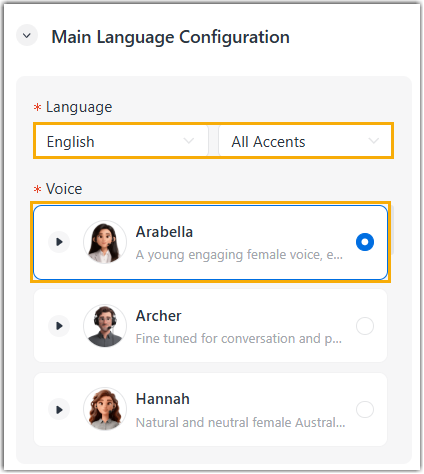
Setting Description Language Select the primary language the AI receptionist will use to communicate with callers, and select the preferred accent. Voice Select a desired voice profile for the selected language. Tip: To preview the voice, click in
front of the desired voice profile.
in
front of the desired voice profile. - Optional: In the Additional
Languages section, click
Add to add one or multiple
additional languages for the AI receptionist as
needed.
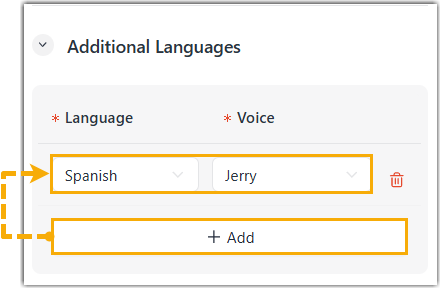
Setting Description Language Select an additional language the AI receptionist can use to communicate with callers. Voice Select the voice profile for the additional language. - To use the same voice profile as the primary
language, select Follow Main
Language.Note: If the voice profile of main language is not supported for the additional language, a
 will appear. In such
case, you must select a custom voice to ensure proper
functionality.
will appear. In such
case, you must select a custom voice to ensure proper
functionality. - To use a different voice profile
for the additional language, choose the desired
voice from the Voice
drop-down list.Tip: To preview the voice, click in
front of the desired voice profile.
- To use the same voice profile as the primary
language, select Follow Main
Language.
- In the Main Language
Configuration section, set the primary
language for the AI receptionist.
- Click Save.
- In the Knowledge Base and Tools tab, assign knowledge bases and enable skills for the AI receptionist according to you needs.
Step 3. Activate the AI receptionist
Activate the AI receptionist to make it available for handling incoming calls.
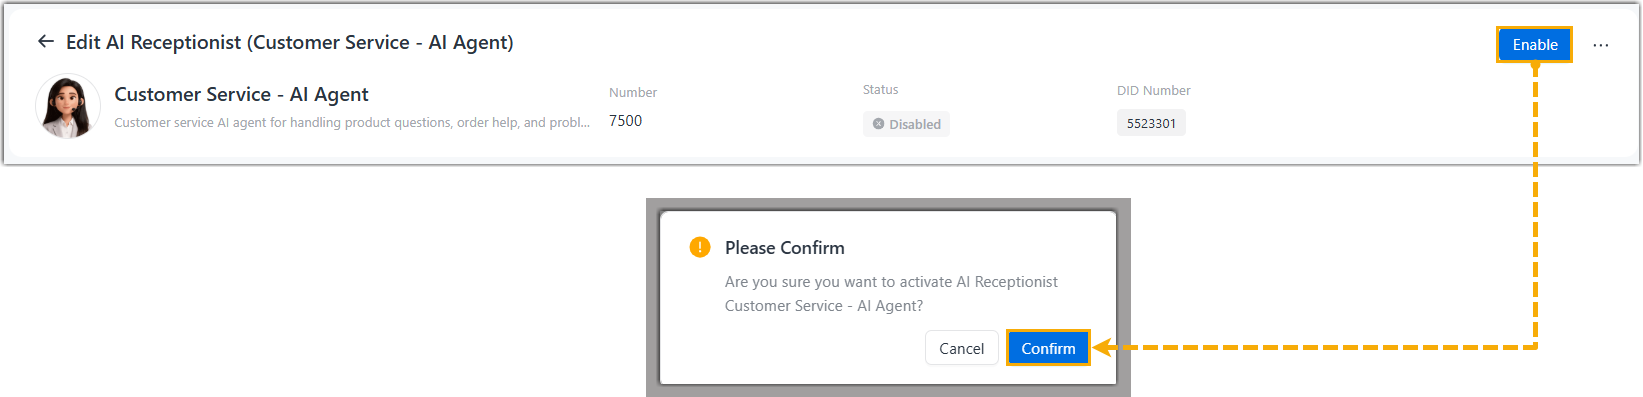
- At the top-right corner of the AI receptionist's configuration page, click Enable.
- In the pop-up window, click Confirm.
Result
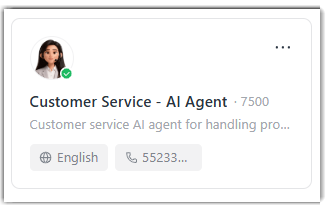
The AI receptionist appears in the list with a  (Active) status and is ready to handle calls.