Set up Outlook as an Email Server
This topic describes how to set up Microsoft Outlook as the email server for NovoOne Platform using modern authentication. This allows the system to send emails through your Microsoft account.
Requirements
- Prepare an account that belongs to a user in a Microsoft Entra ID tenant and
that meets the following requirements:
- Assigned with the Global Administrator role.
- Assigned with Microsoft 365 Business Standard license.
- The modern authentication is enabled in Microsoft 365 admin center.
Procedure
Step 1. Obtain redirect URI from NovoOne Platform
Obtain the redirect URI from NovoOne Platform, which will be required when registering a Microsoft Entra application later.
- Log in to NovoOne Platform portal, go to .
- In the Email Server
Provider section, select
Microsoft.

- In the Redirect URI field,
click
 to
copy the URI for later use.
to
copy the URI for later use.
Step 2. Create and obtain credentials on Microsoft Entra admin center
Register an application on Microsoft Entra admin center with the redirected URI provided by NovoOne Platform, then obtain the application authentication information for later use.
- Log in to Microsoft Entra admin center with the Microsoft Administrator account, go to .
- Register an application.
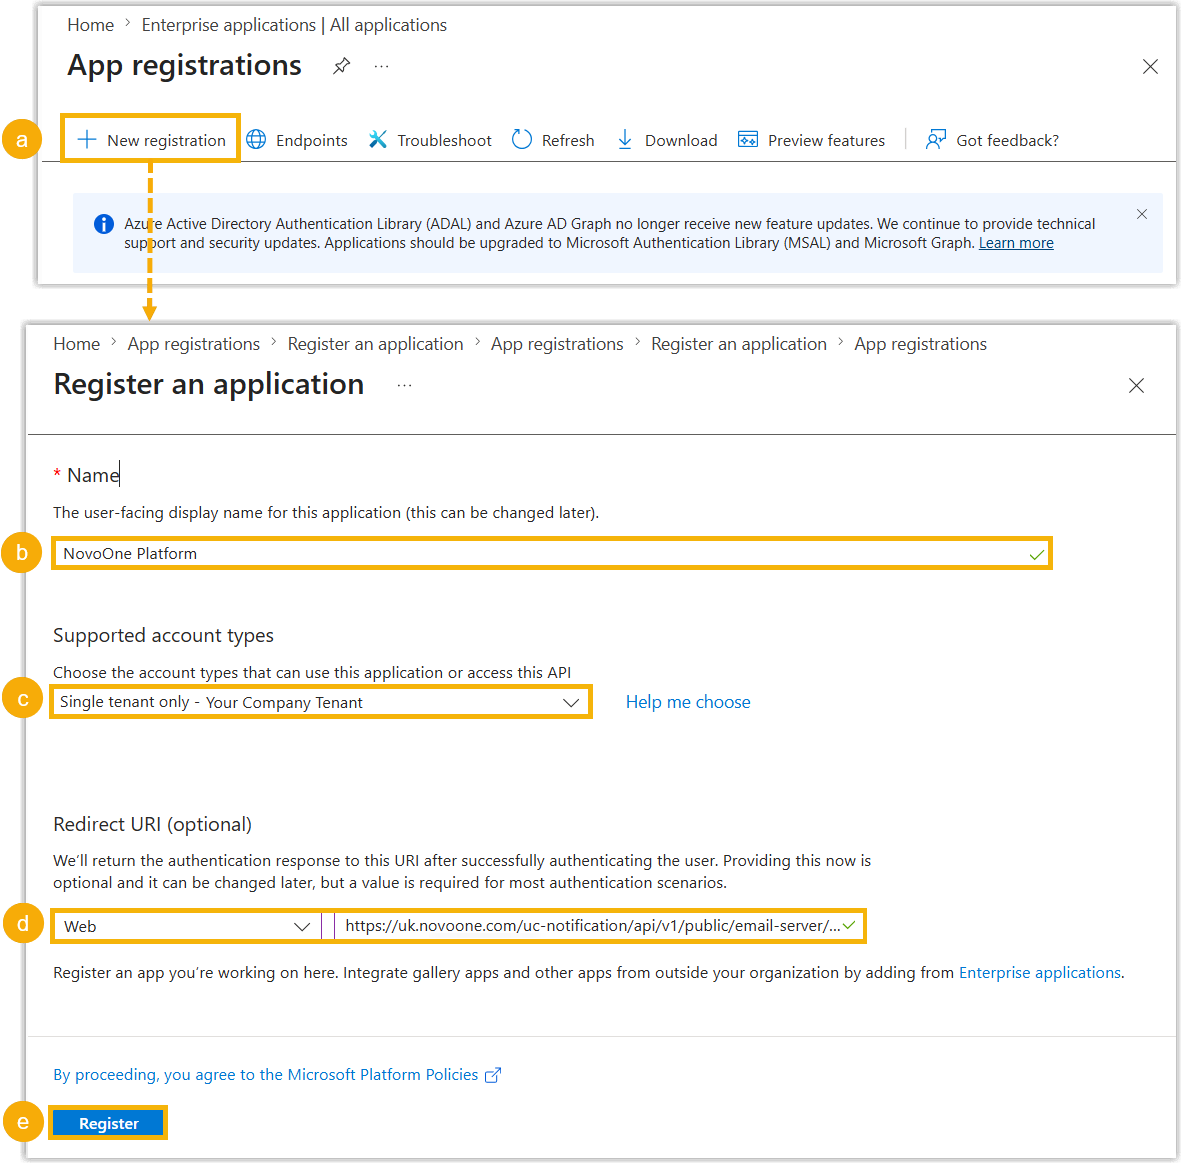
- Click New registration.
- In the Name field, enter a name to identify the application.
- In the Supported account types drop-down list, select Single tenant only - Your Company Tenant.
- In the Redirect URI section, select Web in the platform drop-down list, and then enter the redirect URI obtained from NovoOne Platform in the field beside the drop-down list.
- Click Register.
The application is successfully registered and you are automatically redirected to its management page.
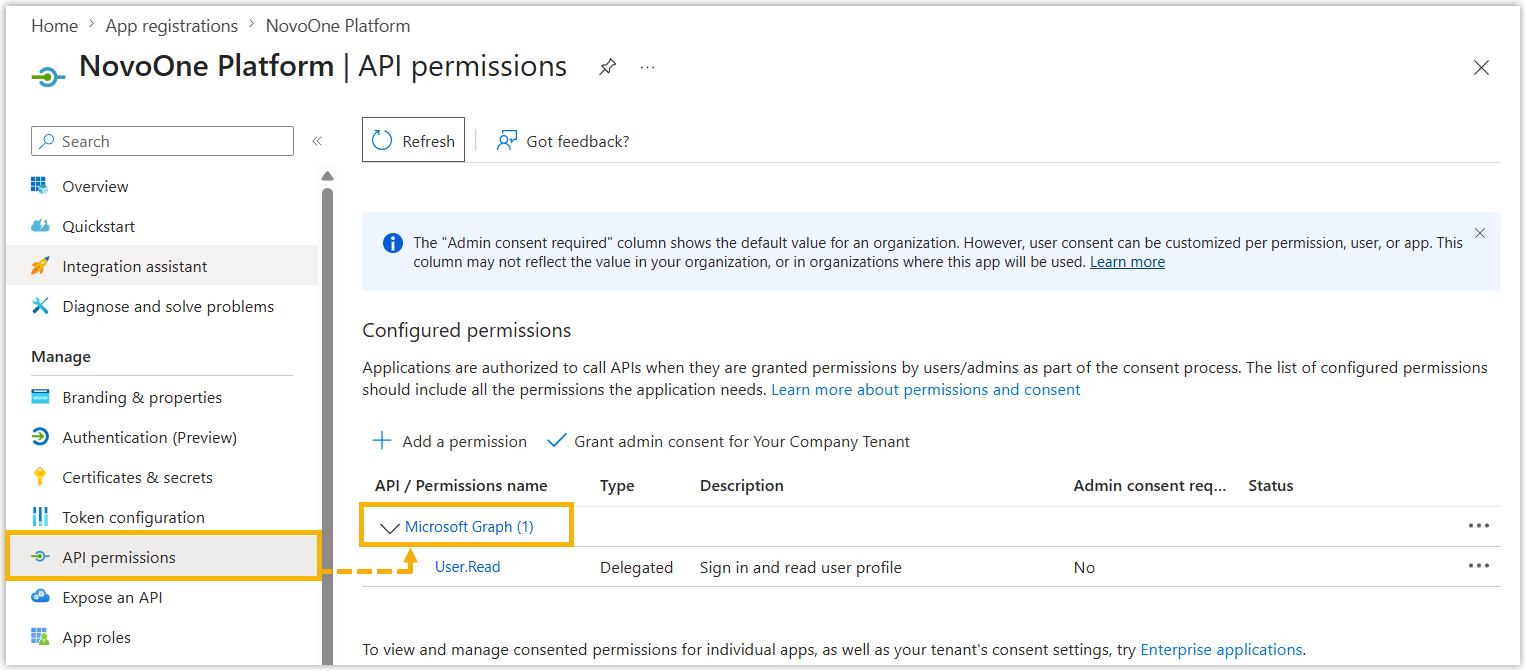
- Grant the application permission to send emails.
- Go to API permission, click Microsoft
Graph.
-
In the pop-up right panel, complete the following settings.
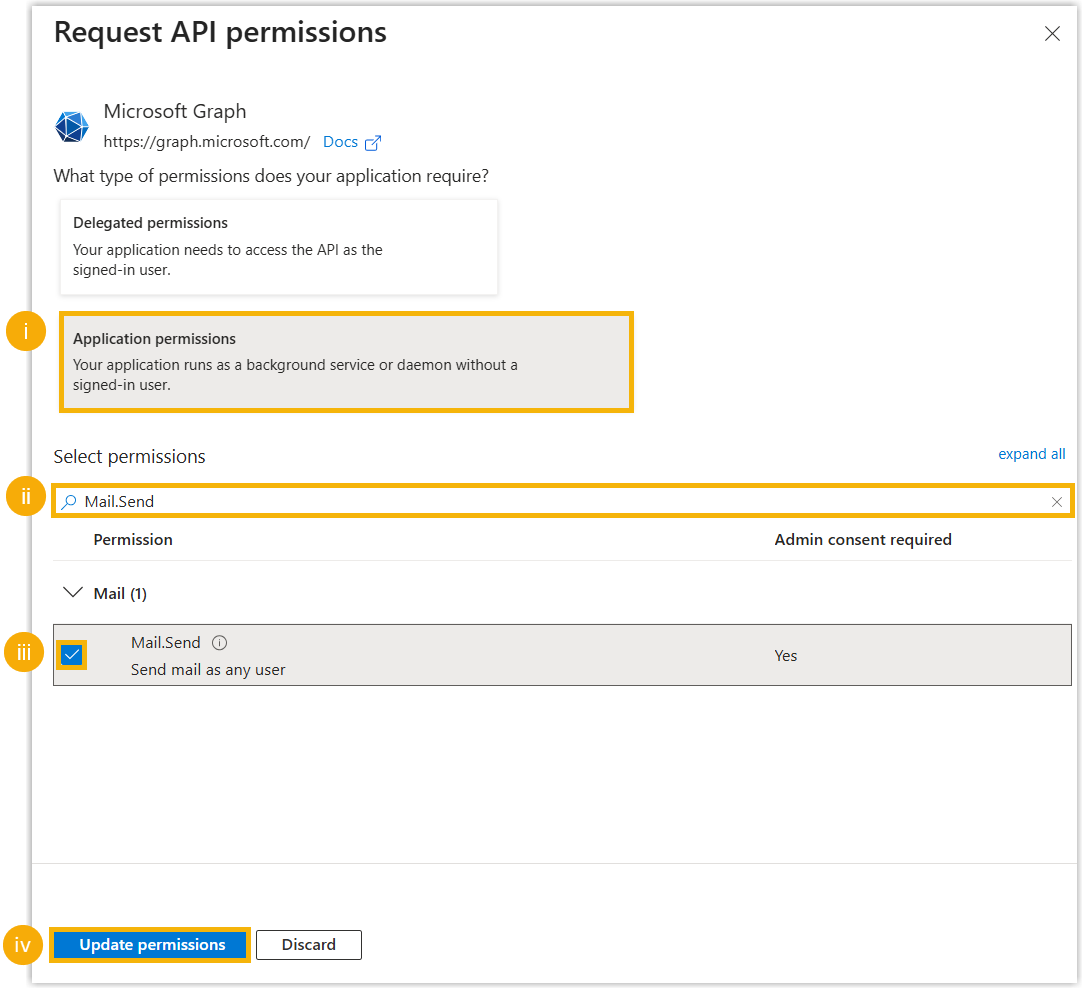
- Click Application permissions.
- In the search box, enter "Mail.Send".
- In the search results, select the checkbox of Mail.Send .
- Click Update permission.
The Mail.Send permission appears in the permission list.
- At the top of the permission list, click Grant admin consent
for Your Company Tenant, and then click
Yes in the pop-up prompt.
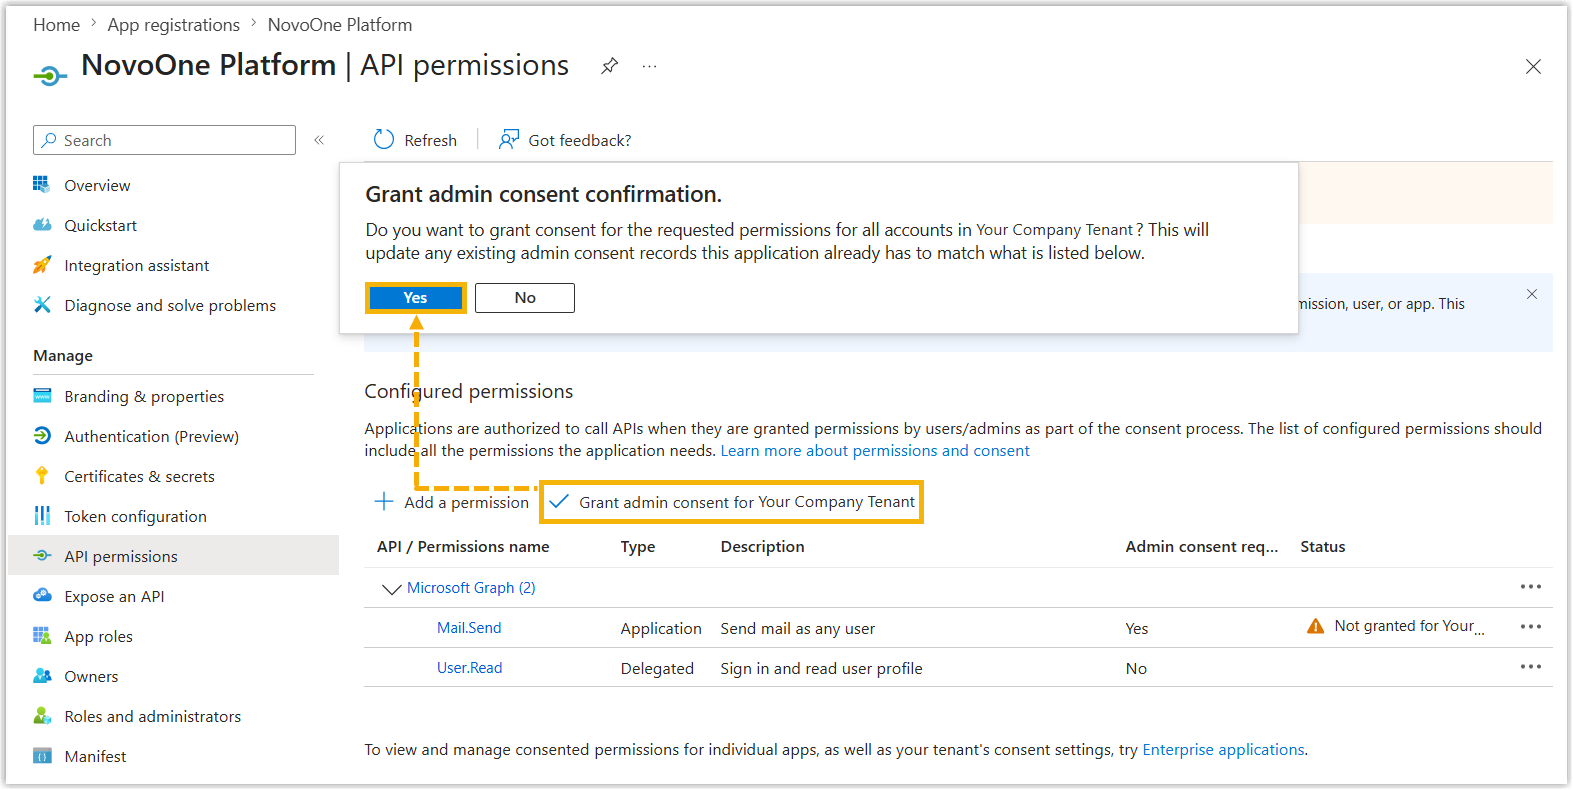
The permission status displays within
 .
.
- Go to API permission, click Microsoft
Graph.
- In the application, create and obtain credentials.
- Create a client secret.
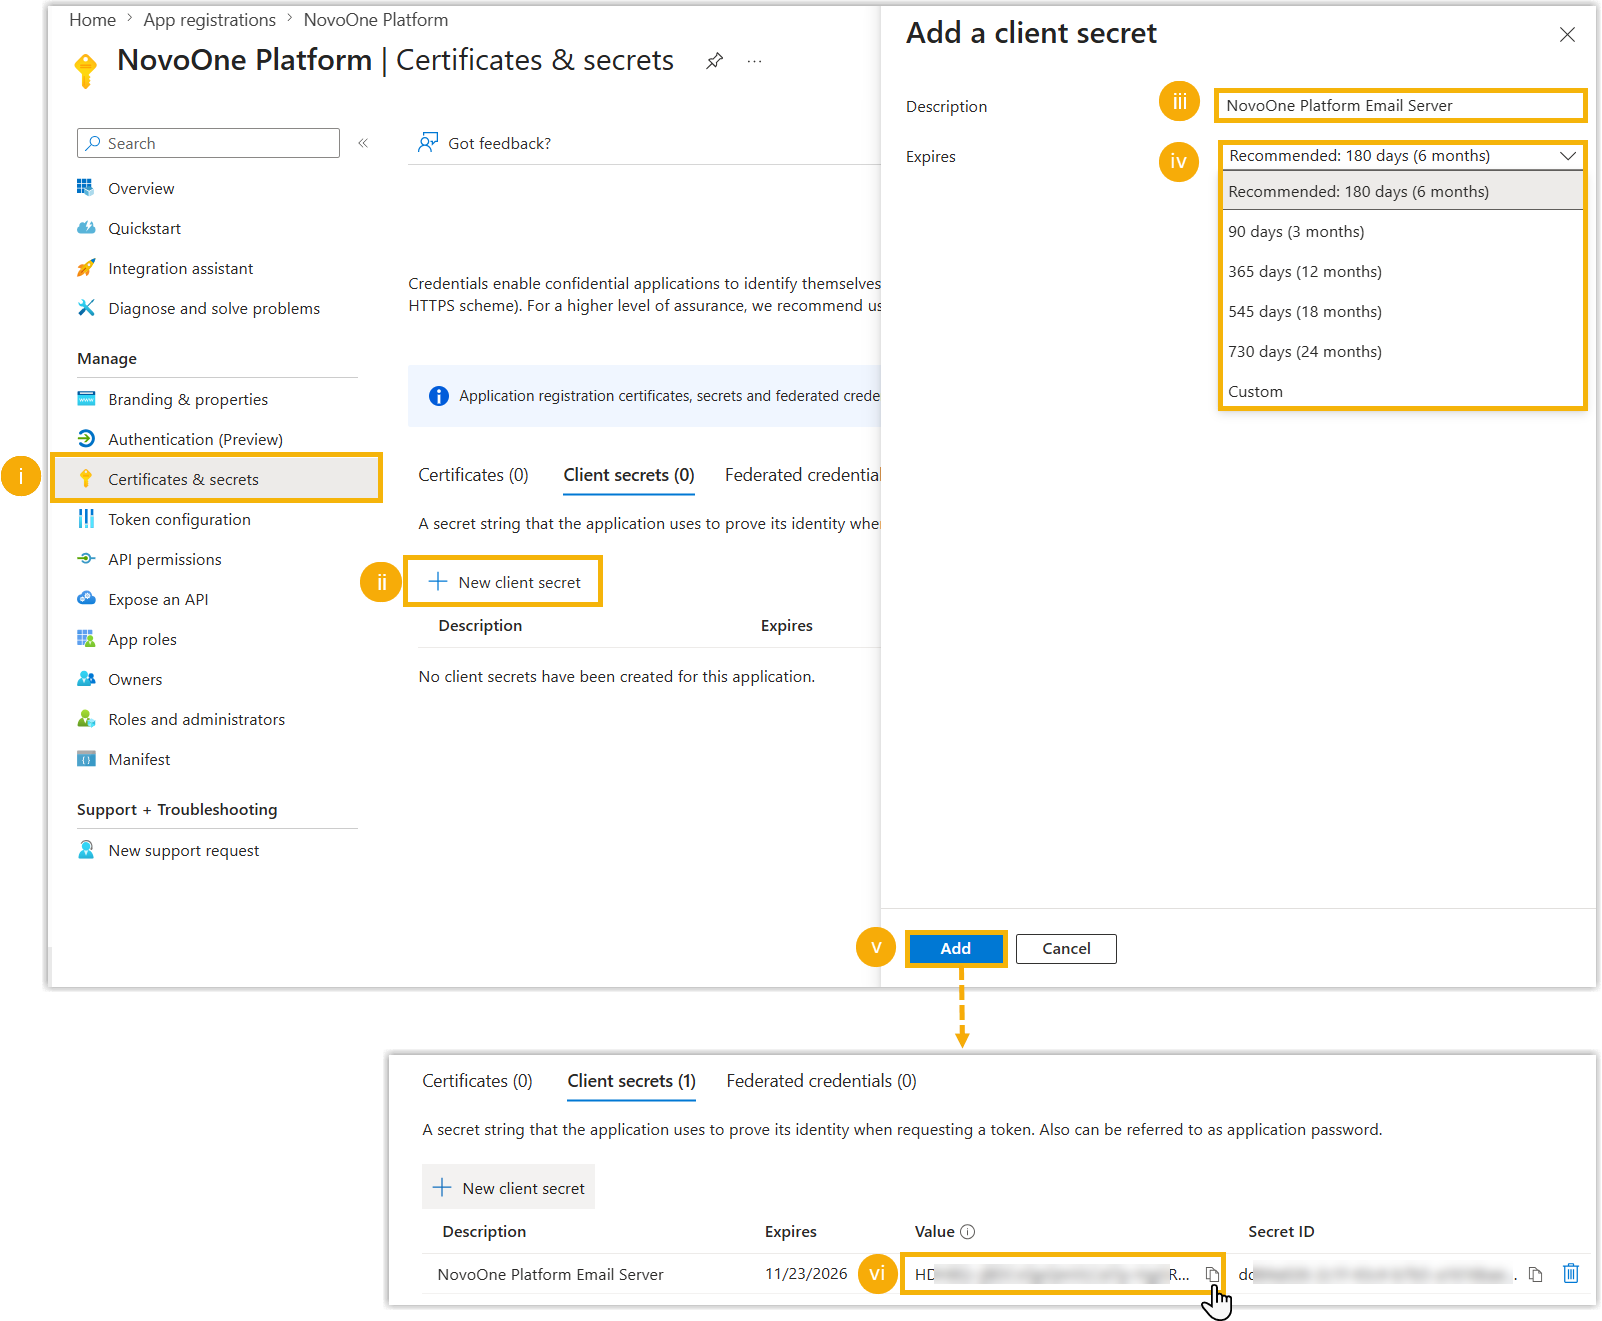
- Go to Certificates & secrets.
- Under the Client secrets tab, click
New client secret.
A right panel pops up.
- In the Description field, enter a description to identify the client secret.
- In the Expires drop-down list, select the validity period for the client secret.
- Click Add.
The client secret appears in the Client secrets list.
-
Click
 to copy the value of the client
secret for later use.Note: Be sure to save the value of the client secret before leaving the page. This value can only be viewed immediately after generation.
to copy the value of the client
secret for later use.Note: Be sure to save the value of the client secret before leaving the page. This value can only be viewed immediately after generation.
- Obtain client ID and tenant ID.
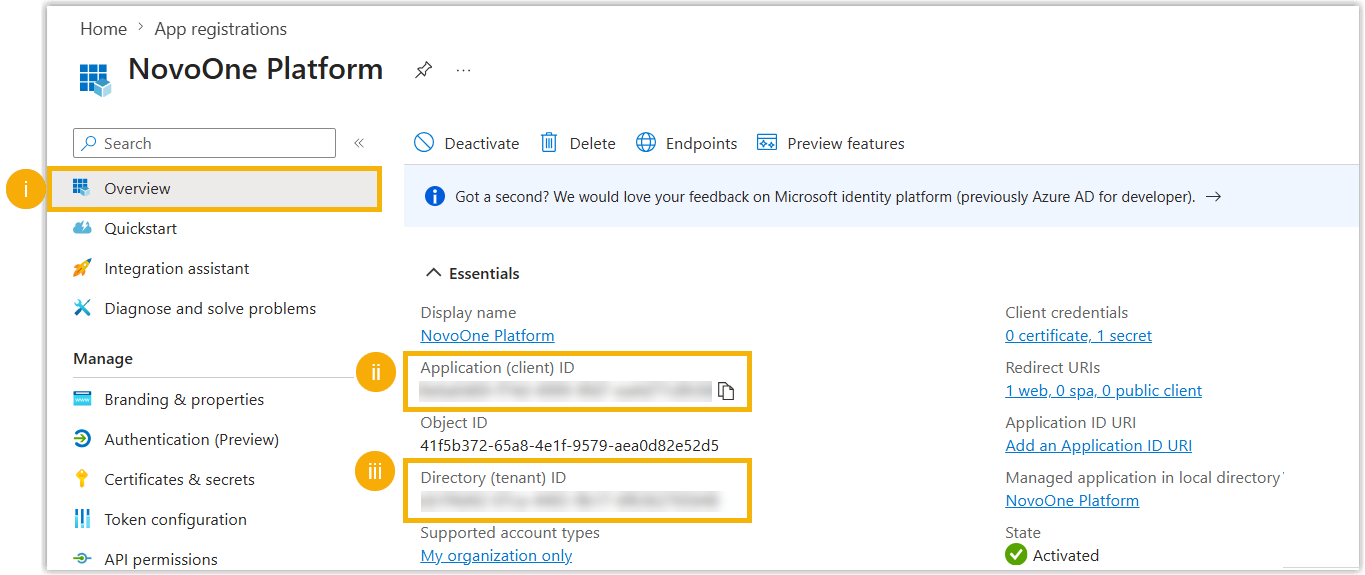
- Go to Overview.
- Hover your mouse over the
Application (client) ID and click
to copy the client ID for later
use.
- Hover your mouse over the
Directory (tenant) ID and click
to copy the tenant ID for later
use.
- Create a client secret.
Step 3. Configure SMTP settings on NovoOne Platform
Configure the SMTP settings on NovoOne Platform with the authentication information obtained from the Microsoft Entra admin center, so as to set Microsoft Outlook as the system's email server.
- Log in to NovoOne Platform portal, go to .
- In the Email Server
Provider section, select
Microsoft.
- Enter the following authentication information.
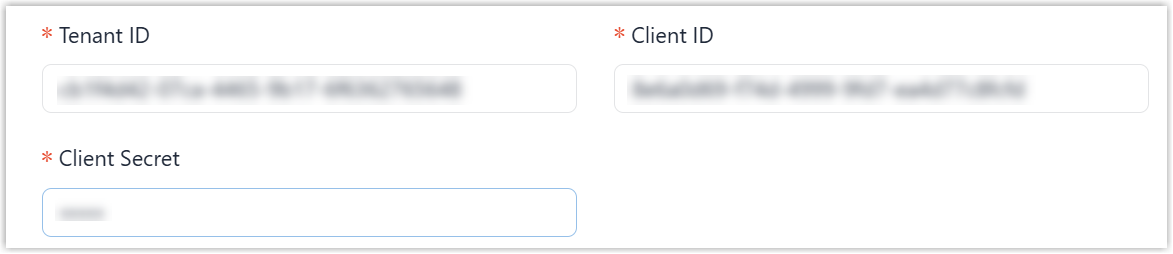
- Tenant ID: Paste the Tenant ID of the Microsoft Entra application.
- Application (Client) ID: Paste the Application ID of the Microsoft Entra application.
- Client Secret: Paste the client secret of the Microsoft Entra application.
- Click Save.
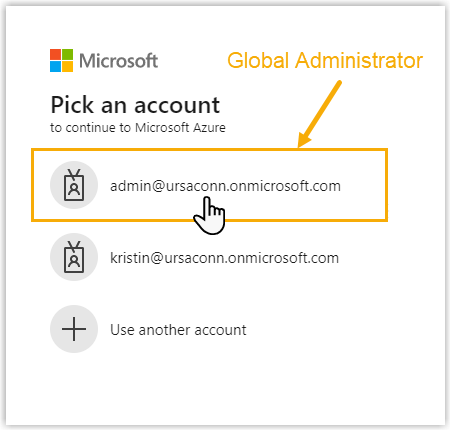
You are redirect to the Microsoft Sign-in page.
- Sign in with the Microsoft account that has Global
Administrator privilege.
-
In the pop-up window, do as follows to confirm.
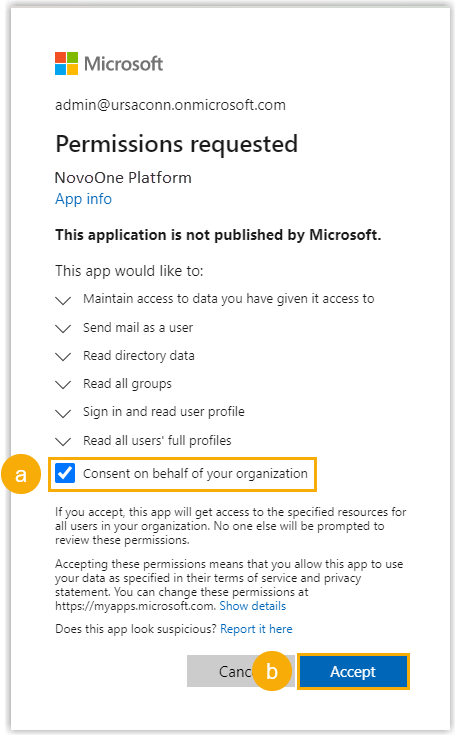
- Select the checkbox of Consent on behalf of your organization.
- Click Accept.

- Optional: Test if the mail server can successfully send
emails.
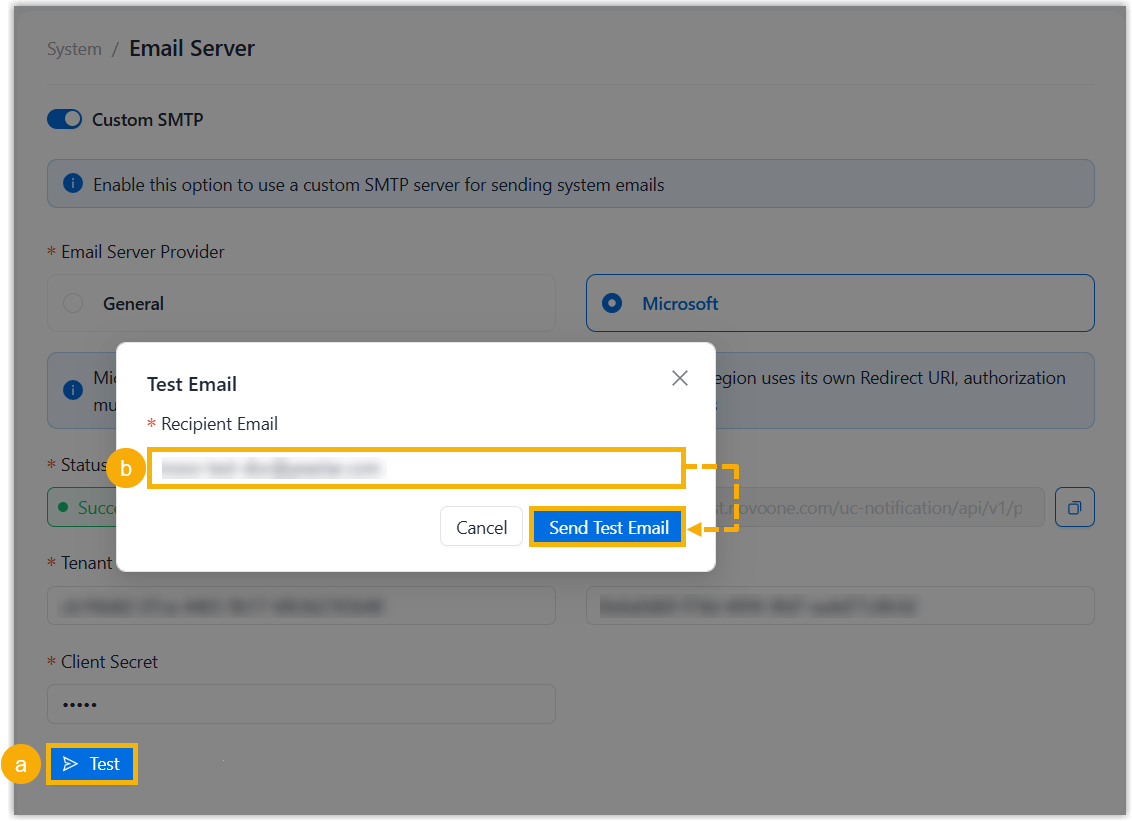
- Click Test.
- In the pop-up window, enter a recipient's email address in the Recipient Email field, then click Send Test Email.
Result
A test email is successfully sent to the recipient's mailbox via the Microsoft account, and the page prompts "Email sent successfully".
admin<admin@ursaconn.onmicrosoft.com>.